Blog

  • Best Email Deliverability Tools 2026

    Best Email Deliverability Tools 2026

    Last updated: 15 November 2026. A ranked shortlist of the best email deliverability tools, with the reasons behind each pick.

    Deliverability is the quiet part of cold email. Nobody celebrates it when it works, and everybody notices when it stops. One week your emails land in the inbox and replies flow in. The next week they slide into spam, and the same emails to the same kind of people get silence. The good news is that this is a fixable problem, and the tools below exist to fix it. Some warm up your mailboxes so providers learn to trust you. Others test your emails before you send them, so you see where they land. A third group watches your reputation day after day and warns you before a small problem becomes a big one. This guide ranks eight of the best email deliverability tools for 2026, explains what each one actually does, and helps you pick the one that matches your situation.

    We have not scored these tools yet. Scores only mean something after hands-on testing, and that testing is still to come. Each tool below carries a Best-for label instead. Each label sums up what the tool is designed for and what its own website says it does best. Skim the comparison table to cut the list to two or three, try the free option on each, and let a real placement test settle it. Within a week, a good deliverability tool should feel reassuring: you connect a mailbox, watch the warmup climb, and send your next campaign knowing where it will land.

    Our pick in one line: Instantly for warmup built in, MailReach for warmup plus testing

    If you already send cold email, start with Instantly — warmup is built into the sending tool you already use. If you want a specialist that warms up and tests in one place, start with MailReach. If you only need to find out where your emails land before you send, GlockApps is the test-first pick. Compare all eight in the table below — then run one placement test before your next campaign.

    Compare the best tools Jump to the comparison table

    Quick Answer

    The best email deliverability tools, in one paragraph: Instantly is the best email deliverability tool for warmup built into high-volume sending, MailReach is the best email deliverability tool for warmup and spam testing in one subscription, Lemwarm is the best email deliverability tool for Lemlist users because it is included with every Lemlist plan, Warmbox is the best email deliverability tool for standalone warmup on a budget, Warmup Inbox is the best email deliverability tool for simple per-inbox warmup with sending built in, Smartlead is the best email deliverability tool for agencies that need warmup at scale, Folderly is the best email deliverability tool for ongoing monitoring and spam-trigger detection, and GlockApps is the best email deliverability tool for inbox placement testing before you send. Most offer a free trial or a free test.

    The right choice depends on whether you need warming, testing, monitoring — or all three. Read the table first, then try the free option on your shortlist.

    Table of Contents

    How we ranked the best email deliverability tools

    A ranking only helps when you can see the thinking behind it, so here it is. First, we sorted the tools by the job they do. Some warm up mailboxes, some test placement, and some watch reputation. A few do more than one of those jobs, and those earn their place higher when they do both well. Then we checked which features each provider’s own website confirms, how it charges, and whether you can try it before you pay. The heaviest weight went to the things that decide whether your emails reach real people. A warmup network with real inboxes matters most. So do placement tests across Gmail and Outlook, clear authentication checks, and alerts that arrive before a campaign goes out.

    Then we looked at the extras that save time day to day. A simple dashboard, a free test to start with, and honest plan limits all help.

    We did not rank on price alone. The cheapest warmup tool is not one of the best email deliverability tools for everyone, and the most expensive monitoring suite is not either. A solo founder warming up one mailbox needs something different from an agency watching fifty domains. Both need something different again from a sender who only wants to know why one campaign landed in spam. So every tool below carries a Best-for label instead of a number. The label names who it suits. The table shows what it includes. The trial shows whether it feels right in your hands.

    No scores yet — and why

    Before the list, one honest note. We have not run hands-on tests on these tools yet, so this article has no scores. Scores will only come after we have connected real mailboxes, run real warmups, and sent real placement tests through each tool. Until then, everything here comes from the providers’ own official websites, checked on 15 November 2026. The source note under each table links to the exact pages we checked, so if a feature matters to you, confirm it on the provider’s site before you buy. Features and plans change, and the provider’s page is always the final word.

    Best email deliverability tools at a glance

    The whole shortlist fits on one screen. Start with the Best-for label, then the strengths, then the starting point. In that order, eight tools become two or three in under a minute. The reviews further down go into detail on each pick, and the feature matrix after the table shows which tools warm up, test placement, or monitor — and which do all three.

    #ToolKey strengthsStarting point
    1Instantly
    ★ Best for: Warmup built into sending
    Warmup built into high-volume sending.
    ✓ Warmup and inbox rotation built in
    ✓ Unlimited mailboxes on a flat price
    14-day free trial Visit Site →Check the site for current pricing & trial
    2MailReach
    ★ Best for: Warmup + spam testing
    Warmup and spam testing in one subscription.
    ✓ 30,000+ inbox warmup network
    ✓ Spam test credits included in the plan
    Free spam test; no warmup trial Visit Site →Check the site for current pricing & trial
    3Lemwarm
    ★ Best for: Lemlist users
    Warmup included with every Lemlist plan.
    ✓ 20,000+ domain warmup network
    ✓ Deliverability score and DNS checks
    Free with Lemlist; no standalone trial listed Visit Site →Check the site for current pricing & trial
    4Warmbox
    ★ Best for: Standalone warmup on a budget
    Dedicated warmup, nothing else to pay for.
    ✓ 35,000+ private inbox network
    ✓ GPT-4 warmup emails and spam-score monitor
    Free DNS & blacklist checker Visit Site →Check the site for current pricing & trial
    5Warmup Inbox
    ★ Best for: Simple warmup + sending
    Warmup with a sequencer built in.
    ✓ 30,000+ real inbox network
    ✓ Outreach sequences included in the plan
    7-day free trial Visit Site →Check the site for current pricing & trial
    6Smartlead
    ★ Best for: Agencies at scale
    Warmup and deliverability for many clients.
    ✓ Warmup, rotation and placement checks
    ✓ Multi-client workspaces, unlimited mailboxes
    14-day free trial Visit Site →Check the site for current pricing & trial
    7Folderly
    ★ Best for: Monitoring & spam triggers
    Ongoing monitoring with fixes, not just scores.
    ✓ Folderly Score and spam-trigger detection
    ✓ Real-time alerts with recommended fixes
    Free Pulse alerts; core plan paid Visit Site →Check the site for current pricing & trial
    8GlockApps
    ★ Best for: Placement testing
    Test before you send, then fix what it finds.
    ✓ Seed-list tests across major providers
    ✓ DMARC reports and 50+ blocklist monitoring
    Free plan (2 test credits) Visit Site →Check the site for current pricing & trial

    Last checked: 15 November 2026. The trial and starting-point details above come from each provider’s official website — see the linked source note under the feature matrix below. Features and pricing can change, so please check the provider’s site before you buy.

    The best email deliverability tools compared at a glance

    Same eight tools, one view. You can see at a glance which ones warm up mailboxes, which test placement, and which keep watch afterwards. A tick means the feature is stated on the provider’s own site; a dash means we could not confirm it there.

    FeatureInstantlyMailReachLemwarmWarmboxWarmup InboxSmartleadFolderlyGlockApps
    Warmup network✓✓✓✓✓✓✓—
    Inbox placement testing—✓———✓✓✓
    Spam / content testing—✓✓✓✓—✓✓
    Authentication & blacklist checks—✓✓✓✓—✓✓
    Ongoing monitoring & alerts✓✓✓✓✓✓✓✓
    Free trial or free plan✓✓—✓✓✓✓✓

    Last checked: 15 November 2026. The features and trial information in this table are based on what we found on each provider’s official website on that date — Instantly, MailReach, Lemwarm, Warmbox, Warmup Inbox, Smartlead, Folderly, GlockApps. Features and pricing can change, so please check the provider’s site before you buy. ✓ = the feature is stated on the provider’s site (some features only on certain plans — see the notes below). — = not confirmed for this tool. We do not guess at features, prices or trials.

    Reading the table: plan notes

    Plan notes, so the ticks above are not overstated: Instantly’s warmup is built into its sending plans, and its monitoring covers deliverability inside the campaign workflow; we could not confirm a standalone placement-test product on its site. MailReach includes at least 20 spam test credits in its All-in-One plan, and its warmup has no free trial — the free option is a spam test, up to three a day. Lemwarm is free with any paid Lemlist plan and has no standalone trial listed on its pricing page; it tracks spam per template but does not run seed-list placement tests.

    Plan notes, continued: Warmbox is warmup only — there is no placement testing, and its free option is a DNS and blacklist checker. Warmup Inbox includes spam and category monitoring and a built-in sequencer, with a 7-day free trial and no card required. Folderly’s placement testing, Inbox Insights, is a separate product with a free tier of two tests a month, and its Pulse monitoring alerts are free; Folderly’s warmup runs as an automated Daily Upkeep process. GlockApps has no warmup at all — it tests and monitors — and its free plan includes two spam-test credits.

    The 8 best email deliverability tools for 2026

    Below is the full shortlist, one tool at a time, with what each one is good at, who it suits, and what to watch out for. Read the two or three that match your situation, skip the rest, and then use the free trials and free tests to settle it. If cold email is entirely new to you, read our Cold Email for Beginners guide first. It covers the whole system, from your offer to your first replies, and this ranking will make much more sense afterwards.

    1. Instantly — Best for warmup built into sending

    Instantly earns the top spot here for a simple reason: it removes a decision. If you already send cold email through Instantly, you do not need to buy, connect, and learn a separate warmup tool. Warmup is built into the same product, running on the same mailboxes you send from, and sending rotates across unlimited mailboxes on a flat monthly price. That matters because deliverability problems usually come from one mailbox doing too much. Rotation spreads the load, warmup builds the reputation, and the unified inbox gathers every reply in one place. For senders who already know cold email works for them and simply want more of it landing safely, that combination is hard to beat.

    The trade-off is that Instantly is a sending tool first and a deliverability specialist second. We could not confirm a standalone placement-test product on its site, so if you want to test a specific email against seed inboxes before a big send, you will still want a tester like GlockApps or MailReach alongside it. That is a fair pairing, not a flaw: Instantly keeps your mailboxes warm day after day, and a tester checks the occasional campaign that matters most. The 14-day free trial is long enough to warm a mailbox properly and run a genuine test campaign. If you want the full sending comparison, read our Best Cold Email Software 2026 ranking, where Instantly leads the list for the same reasons.

    2. MailReach — Best for warmup and spam testing in one

    MailReach is the specialist that does two jobs at once. It warms your mailboxes through a network of more than 30,000 real inboxes, mostly Google Workspace and Microsoft 365 accounts, and it runs seed-list spam tests that show where your real emails land at Google, Microsoft, and Yahoo. Every All-in-One plan includes at least 20 spam test credits a month, so warming and testing come in one subscription instead of two. It also checks your SPF, DKIM, and DMARC records, watches more than 50 blacklists, and shows your reputation per provider. For a sender who wants one deliverability subscription that covers both the slow work of warming and the quick check before a campaign, MailReach is the most complete single purchase on this list.

    There are two things to know before you commit. MailReach charges per mailbox, so the cost grows with every inbox you add, and there is no free trial for the warmup itself — you pay from day one, and the free option is a spam test, up to three a day without an account. That makes it a weaker pick if your sequencer already includes warmup for unlimited mailboxes, because you would be paying twice for the same job. But if you send from a tool without warmup, or you manage mailboxes across several senders, MailReach is the tidiest answer. Warmup takes at least fourteen days before campaigns should start, so plan for that wait, and use the free spam test first to see the tool’s reporting style.

    3. Lemwarm — Best for Lemlist users

    Lemwarm is the warmup tool from the team behind Lemlist, and its best feature is its price for the right person: free. Every paid Lemlist plan includes Lemwarm Essential at no extra cost, so if you already send through Lemlist, you already own a warmup tool. It works by exchanging emails across a network of more than 20,000 real domains in over 150 countries, generating opens, replies, and spam removals that build your sender reputation. A deliverability score out of 100, updated daily, shows how each inbox is doing, and built-in DNS checks cover your SPF, DKIM, and DMARC setup. The Smart plan goes further and warms up your mailboxes using your actual email templates, with per-template spam tracking that pauses risky templates automatically.

    The honest caveat is about who it suits. Bought on its own, Lemwarm costs $29 a month per inbox on Essential, or $49 on Smart, and there is no standalone free trial listed on its pricing page. That makes it a poor standalone purchase when cheaper dedicated tools exist, and a superb bundled one when you already pay for Lemlist. It also does not run real seed-list placement tests, so it tells you your reputation score rather than showing you exactly which folder an email lands in. If you are a Lemlist user, turn it on today — it costs you nothing extra. If you are not, read the Lemlist review in our Best Cold Email Software 2026 guide first, and compare it with the standalone warmup tools below before you decide.

    4. Warmbox — Best for standalone warmup on a budget

    Warmbox does one job and does it with unusual focus: it warms up mailboxes. You connect an inbox in about two minutes, pick a warmup recipe — Grow, Flat, Randomize, or Fully Custom — and its network of more than 35,000 private inboxes starts trading GPT-4-written emails with yours, opening them, replying, and pulling anything that lands in spam back out. A live spam-score monitor tracks the trend over time, and a free DNS deliverability checker audits your SPF, DKIM, and DMARC records plus blacklists across more than 120 data points. Because it has no sending platform attached, it works with any provider that supports SMTP, from Gmail and Outlook to Amazon SES. For a solo sender or a small team that wants a dedicated warmup tool without paying for features they will never use, Warmbox is the simplest buy on this list.

    Two limits are worth knowing. Warmbox runs no inbox-placement tests, so it cannot show you a seed-list report before a campaign, and it does not check your email content for spam trigger words — a separate content check is still wise before a big send. Its per-mailbox pricing also climbs as you add inboxes, so agencies warming twenty mailboxes will pay far more than a solo sender warming one. None of that matters much at small scale: connect one inbox, let the recipes run, and watch the spam score fall over two to three weeks. Start with the free DNS checker on Warmbox’s site to see whether your domain has any obvious problems before you pay for anything.

    5. Warmup Inbox — Best for simple warmup with sending built in

    Warmup Inbox is the friendly option on this list. It warms your mailboxes across a network of more than 30,000 real inboxes, with spam and category monitoring, a reputation check, and human-like AI-generated warmup content — and it also includes a built-in cold email sequencer, so you can warm up and send from the same login. Setup takes under a minute, the pricing is a flat per-inbox monthly rate, and the 7-day free trial needs no credit card, which makes it the easiest tool here to try properly before spending anything. For a founder warming one or two mailboxes who also needs a simple way to send, that combination of warmup plus sequences in one cheap subscription is genuinely appealing.

    The trade-off is depth. Warmup Inbox covers warmup and basic monitoring well, but it does not offer the deep placement testing of GlockApps or the managed diagnostics of Folderly, and its per-inbox pricing climbs steeply once you pass a handful of mailboxes — ten inboxes cost roughly ten times one. It suits senders who want warmup to be simple and cheap, not senders who need forensic answers about a damaged domain. If that is you, start the free trial with one mailbox, let it run for the full seven days, and judge it on whether the reputation check moves. Our Best Warmup Tools hub puts it alongside the other warmup-first tools if you want to compare them side by side.

    6. Smartlead — Best for agencies that need warmup at scale

    Smartlead is the agency pick in this ranking. It is built for teams that send on behalf of several clients or products and need every client’s sending kept apart. Warmup, inbox rotation, and placement checks are tuned for the volumes where a small deliverability slip costs real meetings, and multi-client workspaces with unlimited mailboxes keep reputations separate. SmartProspect lead data is bundled in, so agencies can find verified prospect emails without a second database subscription on every plan. For an agency warming dozens of mailboxes across several clients, having warmup inside the sending platform — rather than bolted on per mailbox — saves money and admin time.

    Two details deserve a check before you commit. LinkedIn steps do not run natively — they come through HeyReach or Aimfox — and calls need the SmartDialer add-on, so building a fully multichannel setup takes more assembly than it does in Lemlist. Verified prospect emails are also free only on Unlimited plans; on Base and Pro they are a paid add-on. Neither detail is a deal-breaker. Agencies pick Smartlead because it handles scale and client separation so well. But both details change the real monthly cost, so confirm them on the pricing page before you budget. The 14-day free trial leaves room to set up one client workspace properly and judge whether the workflow fits your team. The full review sits in our Best Cold Email Software 2026 ranking.

    7. Folderly — Best for ongoing monitoring and spam-trigger detection

    Folderly works differently from the warmup tools above. Instead of testing one email, it runs continuously: analysing DNS records, sending behaviour, content, and domain reputation every day, and flagging problems before your next campaign goes out. Its Folderly Score gives you a high-level view of sender health, its spam-trigger detection points at the exact words and content patterns that push you out of the inbox, and its real-time alerts arrive with recommended next steps rather than just a raw diagnosis. Around the core sit separate products: Inbox Insights for on-demand placement tests, Pulse for free real-time spam-placement alerts, and EmailGen AI for cold email copy. For a team with a valuable domain that cannot afford a surprise spam problem, that always-on watch is the point.

    The honest caveat is cost and structure. Folderly’s core product is priced per mailbox with a minimum commitment, starting at around $96 per mailbox per month on annual billing, and placement testing is a separate Inbox Insights product on top of that — although its free tier includes two tests a month. That puts it out of reach for a solo sender warming one inbox, and squarely in reach for a funded team or agency protecting a domain that earns real revenue. Start free with Pulse, the free monitoring alerts, and run the two free Inbox Insights tests before you talk to sales. If the alerts catch something real, the paid plan will have already earned its keep. Pair it with verification: our Best Email Verification Tools hub covers checking every address before you send, so bounces never put your domain at risk.

    8. GlockApps — Best for inbox placement testing before you send

    GlockApps is the test-first tool on this list. Its best-known feature, Inbox Insight, sends your email to a seed list across Gmail, Outlook, Yahoo, and many more providers, then reports exactly where it lands — primary inbox, promotions tab, or spam — and runs it through five spam filters including SpamAssassin, Barracuda, and Google’s own filter. Around that sit a DMARC Analyzer, an Uptime Monitor that watches blocklists and DNS records, and a free spam checker that needs no account at all. For a sender about to launch a campaign that matters, that before-you-send answer is worth more than any warmup schedule.

    The trade-off is that GlockApps diagnoses, it does not repair. It has no warmup network, so once a test reveals a reputation problem, you still need a warmup tool to fix it — pair it with Warmbox, MailReach, or the warmup built into your sender. Its free plan includes two spam-test credits and DMARC processing for up to 10,000 messages a month, which is enough to test the product properly, and paid plans start from a modest monthly price. Run the free spam checker first, read the action steps it gives you, and fix one thing before your next send. If you want the full picture of what a placement test can and cannot tell you, the video below explains it with real test results.

    Watch: what 1,000 placement tests actually show

    Prefer to watch? This video runs over 1,000 inbox placement tests and shows what actually moves an email out of promotions and spam — including small fixes, like dropping the www from a link, that changed placement overnight.

    Video credit: “I Ran 1,000 Email Deliverability Tests. Here’s What Works in 2026” by Lead Gen Jay on YouTube. This video is the property of its creator and is embedded here via YouTube for educational purposes. OutreachCompare is not affiliated with Lead Gen Jay and does not claim ownership of this content.

    How to choose the best email deliverability tools for you

    Three questions that narrow the list of the best email deliverability tools

    Eight good tools is still seven too many to test properly. Five honest minutes with three questions will cut the list down, and the answer usually picks itself. First, what is actually wrong? If your mailboxes are new or your reputation has slipped, you need warmup — Instantly, MailReach, Lemwarm, Warmbox, or Warmup Inbox. If your reputation is fine but one campaign landed badly, you need testing — GlockApps or MailReach. When everything works today and you want warning before it breaks, you need monitoring — Folderly or GlockApps.

    Second, how many mailboxes are you protecting? One or two points to a per-inbox tool like Warmbox or Warmup Inbox. Ten or more points to a flat-price sender like Instantly or an agency platform like Smartlead, because per-mailbox pricing climbs fast. Third, do you already send through a tool with warmup built in? If yes, do not pay twice — add a tester instead. The best email deliverability tools all do one of these jobs well, so matching the job to the tool is the whole trick.

    Run the trial like a real check

    Then give the trial a real job to do. A trial is not a tour of the settings page; it is a small live check. Connect one mailbox, start the warmup, and run a placement test on a real email you plan to send. The tool has earned its place when that loop feels easy.

    Connecting takes minutes. The dashboard shows a clear score or placement result, and nothing about the interface makes you sigh. If the tool fights you in week one, it will still be fighting you in month six, so trust that first impression. Keep everything else the same while you test: same mailbox, same sending domain, same email. That way you are comparing tools, not campaigns. Our sending domain guide pairs well with any of these tools. SPF, DKIM, and DMARC have to be right before warmup or testing can tell you anything useful.

    Choosing an email deliverability tool: three paths for warmup, placement testing and monitoring
    Choosing comes down to three questions: what is actually wrong, how many mailboxes are you protecting, and does your sender already include warmup? Answer those and the shortlist usually narrows to two or three tools.

    Watch the other side of the problem: this short video follows a real domain that lands in spam even though it is verified, and shows the missing DMARC record, the warmup plan, and the test that proves delivered does not mean inbox.

    Video credit: “Resend Emails Going to Spam? How to Fix It (DMARC, Warm-Up)” by Unspam on YouTube. This video is the property of its creator and is embedded here via YouTube for educational purposes. OutreachCompare is not affiliated with Unspam and does not claim ownership of this content.

    Warmup, testing and monitoring: three different jobs

    Warmup builds reputation slowly

    Warmup is the slow job. A brand-new mailbox that suddenly sends hundreds of emails looks exactly like spam to Gmail and Outlook, so a warmup tool trades small, realistic emails with a network of real inboxes over two to four weeks. Those inboxes open the emails, reply to some, and pull any that land in spam back out. Over time, providers learn that mail from your domain is wanted. That is why every warmup tool on this list quotes a network size: the bigger and more realistic the network, the more convincing the signals. Warmup is not a one-off fix, either. Mailboxes that stop warming slowly lose reputation again, so most tools keep a low level of warmup running for as long as you send.

    Testing answers one question before you send

    Testing is the fast job. A placement test sends your actual email to seed inboxes across Gmail, Outlook, Yahoo, and other providers, then reports where each copy landed — inbox, promotions, or spam — and what the spam filters thought of it. That answer takes minutes, and it is the only way to know whether a specific subject line, link, or image is hurting you before a real campaign goes out. Testing cannot fix a bad reputation, though. It can only tell you the truth about it, which is why the best setups pair a tester with a warmup tool: test, find the problem, warm up to fix it, test again to confirm. If you only buy one of the two, buy warmup first — a good reputation makes most tests pass on their own.
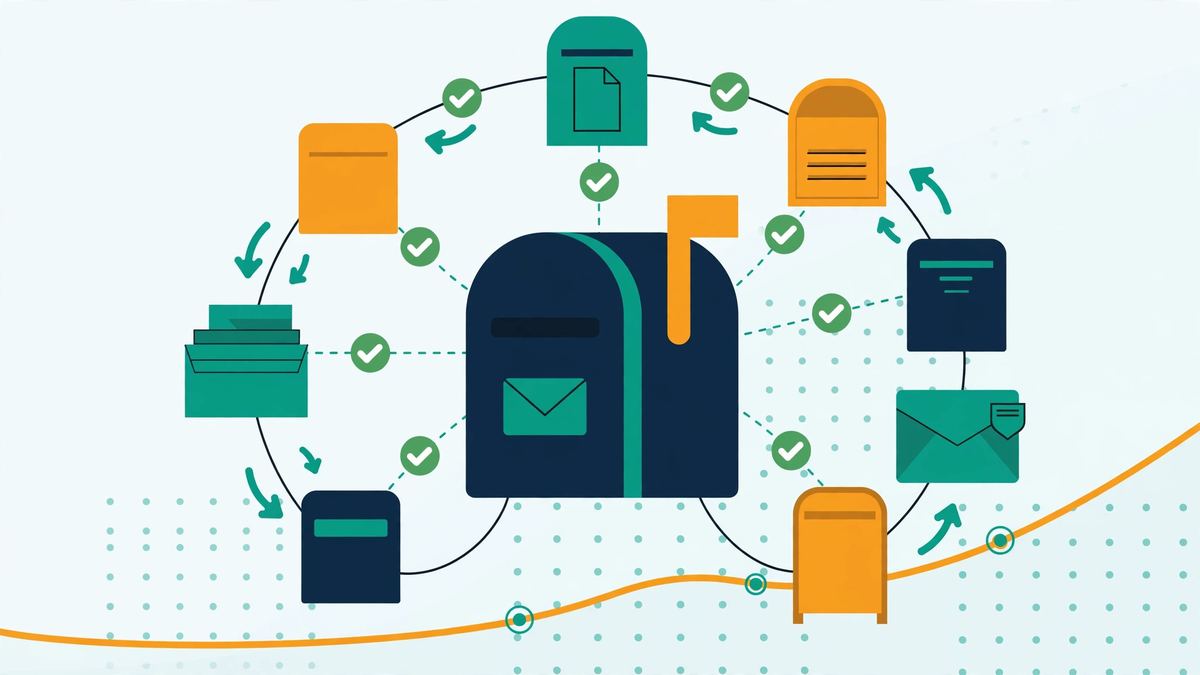
    An email warmup network: one central mailbox exchanging emails with many inboxes, building reputation week by week
    Warmup, at a glance: your mailbox trades realistic emails with a network of real inboxes, which open, reply and rescue messages from spam. Give a new mailbox two to four weeks of warmup before your first real campaign.

    Monitoring watches while you sleep

    Monitoring is the quiet job. It watches your authentication records, your blacklist status, and your placement day after day, and it tells you when something changes. A domain can be fine on Monday and listed on a blacklist on Tuesday because a shared IP misbehaved, and without monitoring you only find out when replies dry up. The best email deliverability tools for monitoring do more than alert you: they explain what changed and what to fix first. That is Folderly’s strength, and it is why GlockApps pairs its tests with DMARC and blocklist monitors. If your domain earns real revenue, monitoring is cheap insurance. If you are just starting out, warmup plus an occasional free test will carry you until the volume justifies it.

    Your first month with one of the best email deliverability tools

    A four-week plan: warmup first, then test

    Once you have picked a tool, the first month is about patience, not volume. Start in week one by fixing the basics. Set up a separate sending domain with SPF, DKIM, and DMARC. Connect your mailbox to the warmup tool, and run a free spam test to get a baseline. Week two is for watching the warmup climb while you write your first real campaign. Keep it under 120 words, with a single clear ask, and verify every address before you send.

    In week three, send your first twenty-five emails and run a placement test on the exact email you sent. Read every reply, notice what people ask, and change one thing at a time. By week four, the warmup should be finishing and your placement should be improving. Raise the volume gradually instead of all at once.

    By the end of that month, you will understand your deliverability better than any review could explain it. You will see whether the warmup is progressing, whether your emails land in the inbox, and whether the tool’s alerts are useful or just noise. Most senders who follow this order book their first meeting in week three or four, once the warmup has finished and the follow-ups have had time to work. For the full week-by-week plan, our beginner’s guide walks through it in detail, and the How Cold Email Works page explains the system behind it. If placement is still poor after a full month of warmup, read our Best Email Verification Tools hub — dirty data, not the warmup tool, is the usual culprit.

    Email deliverability monitoring dashboard with a shield checkmark, blacklist alert bell and authentication checklist
    Monitoring, at a glance: a shield for authentication, a bell for blacklist alerts, and a checklist for SPF, DKIM and DMARC. The best tools explain what changed and what to fix first — not just that something is wrong.

    What the best email deliverability tools cost

    Three pricing models to know

    The best email deliverability tools are priced in three different ways, and understanding the model matters more than comparing any single number. Per-mailbox tools charge for every inbox you connect. That suits a solo sender with one mailbox, and punishes an agency with fifty. Flat-fee tools charge one monthly price for the workspace, however many mailboxes you connect, which suits volume because adding a mailbox costs nothing extra. Per-test tools charge for the tests you run, which suits senders who only need an occasional check before a big campaign and punishes senders who test every day. Before you compare prices, work out which model fits your setup. A solo founder and a five-person agency can look at the same two tools and walk away with opposite answers.

    Watch for the extras

    Watch for the extras, too. Placement testing is often a separate product from warmup, even inside the same company. Folderly’s Inbox Insights is the clearest example. Spam test credits are frequently capped per month, so check how many tests your plan actually includes.

    Warmup on the best network can be a paid add-on inside a sending tool. Multichannel steps frequently sit on a higher tier than the plan you first looked at. None of that is hidden — it is all on the pricing pages we link to under the tables. It just means the headline price is rarely the whole story. Add up the plan, the test credits, and any add-ons you need, then compare that total across your shortlist. Use the free trials and free tests, too. Six of the eight tools on this list offer one, and a week of real warming tells you more about value than any pricing page can. Check the provider’s site for current pricing before you buy. Prices and plans change.

    Mistakes to avoid when you pick the best email deliverability tools

    • Buying warmup when you need testing. Warmup builds reputation over weeks. If one campaign landed badly and you need to know why today, you need a placement test, not a warmup subscription.
    • Skipping the free test. Most tools on this list offer a free spam test or a free trial. Run it before you pay, or you have not really tried the tool.
    • Sending from your main domain. Keep cold email on a separate sending domain, whatever tool you choose. Your main domain is too valuable to gamble with.
    • Paying per mailbox at agency scale. Per-inbox pricing is cheap for one mailbox and painful for fifty. Count your mailboxes before you count the monthly price.
    • Judging warmup by its first day. Warmup takes two to four weeks, and placement improves gradually. Wait a full month before you decide a new tool is not working.
    • Ignoring the authentication basics. No warmup tool can save a domain with broken SPF, DKIM, or DMARC. Fix the records first, then warm up.
    • Buying a huge list to fill a big plan. Begin with fifty to two hundred verified contacts. Small and accurate beats large and stale every time, and it keeps your deliverability safe.

    Frequently asked questions about the best email deliverability tools

    What are the best email deliverability tools for beginners?

    For a complete beginner, Warmup Inbox is the gentlest start on this list: it is simple to set up in under a minute, it includes a sequencer, and its 7-day free trial needs no credit card. If you already send through Instantly or Lemlist, start with the warmup built into the tool you already use instead. Read our Best Cold Email Tools for Beginners 2026 guide for the beginner-focused version of our rankings.

    Do I need a separate warmup tool if my sender has warmup built in?

    No — if your sending tool already warms up your mailboxes, do not pay twice for the same job. Instantly, Smartlead, and Lemlist all include warmup, so their users should spend the extra budget on a placement tester like GlockApps or MailReach instead. A separate warmup tool earns its keep when you send from a tool without warmup, or when you manage mailboxes across several different senders.

    What is the difference between warmup and inbox placement testing?

    Warmup builds your sender reputation slowly, over two to four weeks, by trading realistic emails with a network of real inboxes. Placement testing answers one fast question: where does this specific email land right now — inbox, promotions, or spam? Warmup fixes reputation; testing diagnoses it. The best setups use both, and the best email deliverability tools for most senders combine the two in one subscription, like MailReach does.

    How long does email warmup take?

    Plan for two to four weeks before your first real campaign, and at least fourteen days as an absolute minimum. Warmup works by building a history of positive signals with mailbox providers, and that history cannot be rushed without looking suspicious. Keep a low level of warmup running after that, for as long as you send, because reputation fades when the positive signals stop.

    Can I test the best email deliverability tools for free?

    Yes. GlockApps has a free plan with two spam-test credits and a free spam checker that needs no account, MailReach offers a free spam test up to three times a day, Warmbox has a free DNS and blacklist checker, and Folderly’s Pulse monitoring alerts are free. Start with one of those free tests to get a baseline before you pay for anything.

    Why are my emails going to spam even though my domain is verified?

    Verification only sets up SPF and DKIM. The usual missing pieces are a DMARC record, a mailbox that was never warmed up, or a sending volume that jumped too fast. Run a placement test to see where your emails actually land, check your DMARC record, and start warmup before your next campaign. Our sending domain guide walks through SPF, DKIM, and DMARC step by step.

    Our verdict on the best email deliverability tools

    Our verdict — Best email deliverability tools 2026: Instantly for warmup built into high-volume sending, MailReach for warmup and spam testing in one, Lemwarm for Lemlist users, Warmbox for standalone warmup on a budget, Warmup Inbox for simple warmup with sending built in, Smartlead for agencies at scale, Folderly for ongoing monitoring and spam-trigger detection, and GlockApps for placement testing before you send. Start with one tool, warm up for two to four weeks, and test before every big campaign — see Best Warmup Tools, Best Email Verification Tools and Comparisons. We have not scored these tools yet — scores come only after hands-on testing. “Best for” labels reflect each tool’s stated focus.

    Your next step

    That is the whole shortlist: eight tools, a comparison table, a feature matrix, and a Best-for label on each one, all checkable against the providers’ own sites. The next step is a small one. Pick the tool that matches the job you actually have — warmup, testing, or monitoring — and run one free test or trial this week. Compare the placement result, not the homepage — the tool that makes your first month feel easy is the right one. Then work through the rest of the system: our Start Here hub, Cold Email for Beginners, and the hub page for this ranking, where it sits alongside the rest of our comparisons. You are in the right place, and your first campaign is closer than it feels.

    Keep reading — next in this series

    You have the ranking now. These guides go deeper on the pieces around it:

    Best for deliverability: InstantlyWarmup built into your sending Visit Site →
  • Best Cold Email Software 2026

    Best Cold Email Software 2026

    Last updated: 15 November 2026. A ranked shortlist of the best cold email software, with the reasons behind each pick.

    Picking the best cold email software feels harder than it should. Every tool promises the same things — better deliverability, more replies, less manual work — and every homepage looks convincing. The good news is that the choice is simpler than the marketing makes it sound. Most senders only need a tool that sends reliably and warms up their mailboxes. It should handle follow-ups without fuss and fit the way they already work. This guide ranks eight tools that do exactly that. It explains who each one suits best, and shows you how to test one properly before you pay for it.

    We have not scored these tools yet. Scores only mean something after hands-on testing, and that testing is still to come. Instead, each tool below carries a Best-for label. The label reflects what the tool is built for and what its own website says it does well. Use the comparison table to narrow the list to two or three. Try the free trial on each, and let a real campaign decide. A good tool should feel invisible within a week. You set up a sequence, press send, and spend your time on replies instead of settings.

    Our pick in one line: Instantly for volume, Woodpecker for simplicity

    If you want to send at scale, start with Instantly. If you want the gentlest first campaign, start with Woodpecker. If you also need to find contacts, Apollo covers data and sending in one login. Compare all eight in the table below — then pick one and send your first 25 emails.

    Compare the best tools Jump to the comparison table

    Quick Answer

    The best cold email software, in one paragraph: Instantly is the best cold email software for high-volume sending, Smartlead is the best cold email software for agencies and teams sending at scale, Lemlist is the best cold email software for personalised multichannel outreach, Woodpecker is the best cold email software for a simple and reliable first campaign, Saleshandy is the best cold email software for all-in-one value, Apollo is the best cold email software if you also need to find contacts, Mailshake is the best cold email software for simple sequences and A/B testing, and QuickMail is the best cold email software for deliverability-first teams. Every tool on this list includes warmup and follow-up sequences. Most offer a free trial, and the right choice depends on your volume, your team size, and whether you need lead data built in.

    Table of Contents

    How we ranked these tools

    A ranking is only useful if you know what it is based on, so here is the honest version. We looked at what each tool is designed for. Next, we checked which features its own website confirms, how it charges, and whether you can try it before you pay. We gave the most weight to the things that decide whether your emails reach real people. Built-in warmup, inbox rotation, sensible sending limits, and reply handling that does not make you dig through five inboxes matter most. After that, we looked at the extras that save time day to day. Follow-up automation, A/B testing, LinkedIn steps, and a contact database all help senders who do not already have a list.

    We did not rank on price alone. The cheapest tool is not the best cold email software for everyone, and the most expensive is not either. A solo founder sending 500 emails a month needs something different from an agency sending 50,000. Both need something different again from a sales team that lives on LinkedIn as well as email. That is why every tool below has a Best-for label instead of a number. The labels tell you who the tool is built for; the table tells you what it includes; the trial tells you whether it feels right in your hands.

    No scores yet — and why

    One more thing to know before you read the list. We have not run hands-on tests on these tools yet, so there are no scores in this article. Scores will come only after we have connected real inboxes, built real sequences, and sent real campaigns through each tool. Until then, everything here comes from the providers’ own official websites, checked on 15 November 2026. The source note under each table links to the exact pages we checked. If a feature matters to you, confirm it on the provider’s site before you buy. Features and plans change, and the provider’s page is always the final word.

    Best cold email software at a glance

    Here is the whole shortlist on one screen. Read the Best-for label first, then the strengths, then the starting point. That order will narrow eight tools down to two or three in under a minute. The detailed reviews further down explain each pick. The feature matrix after the table shows which tools bundle warmup, multichannel steps, or a contact database.

    #ToolKey strengthsStarting point
    1Instantly
    ★ Best for: High-volume sending
    High-volume sending from unlimited mailboxes.
    ✓ Deliverability and inbox rotation
    ✓ Unlimited mailboxes and warmup built in
    14-day free trial Visit Site →Check the site for current pricing & trial
    2Smartlead
    ★ Best for: Agencies & scale
    Agencies and teams sending at scale.
    ✓ Deliverability-first sending
    ✓ Multi-client workspaces, SmartProspect lead data
    14-day free trial Visit Site →Check the site for current pricing & trial
    3Lemlist
    ★ Best for: Personalised outreach
    Personalised, multichannel outreach.
    ✓ Images, video and LinkedIn steps
    ✓ lemwarm warmup and 650M+ contact database
    14-day free trial Visit Site →Check the site for current pricing & trial
    4Woodpecker
    ★ Best for: Simple & reliable
    A simple, reliable first campaign.
    ✓ Low learning curve
    ✓ Deliverability checks and smart follow-ups
    14-day free trial Visit Site →Check the site for current pricing & trial
    5Saleshandy
    ★ Best for: All-in-one value
    Lead finding, sending and deliverability in one subscription.
    ✓ 852M+ B2B database and unlimited email accounts
    ✓ Multichannel sequences with AI Copilot
    7-day free trial Visit Site →Check the site for current pricing & trial
    6Apollo
    ★ Best for: Data + sending
    Best if you also need to find contacts.
    ✓ Built-in B2B database
    ✓ Data and sending in one tool
    Free plan available Visit Site →Check the site for current pricing & trial
    7Mailshake
    ★ Best for: Simple sequences
    Best for simple sequences and A/B testing.
    ✓ Easy sequences
    ✓ A/B testing and reply handling
    No free trial Visit Site →Check the site for current pricing & trial
    8QuickMail
    ★ Best for: Deliverability-first teams
    Teams that put inbox placement above everything else.
    ✓ Inbox rotation and reply management
    ✓ Free AutoWarmer via MailFlow on all plans
    14-day free trial Visit Site →Check the site for current pricing & trial

    Last checked: 15 November 2026. The trial and starting-point details above come from each provider’s official pricing page — see the linked source note under the feature matrix below. Features and pricing can change, so please check the provider’s site before you buy.

    The best cold email software compared at a glance

    Same eight tools, one view. You can see at a glance which ones bundle warmup, multichannel steps or a contact database, and which keep it simple. A tick means the feature is stated on the provider’s own site; a dash means we could not confirm it there.

    FeatureInstantlySmartleadLemlistWoodpeckerSaleshandyApolloMailshakeQuickMail
    Cold email sending✓✓✓✓✓✓✓✓
    Built-in warmup✓✓✓✓✓✓✓✓
    Multichannel (email + LinkedIn / calls)—✓✓✓✓✓—✓
    Built-in B2B data / lead finder✓✓✓✓✓✓✓—
    Free trial or free plan✓✓✓✓✓✓—✓

    Last checked: 15 November 2026. The features and trial information in this table are based on what we found on each provider’s official website on that date — Instantly, Smartlead, Lemlist, Woodpecker, Saleshandy, Apollo, Mailshake, QuickMail. Features and pricing can change, so please check the provider’s site before you buy. ✓ = the feature is stated on the provider’s site (some features only on certain plans — see the notes below). — = not confirmed for this tool. We do not guess at features, prices or trials.

    Reading the table: plan notes

    Plan notes, so the ticks above are not overstated: Instantly’s 450M+ lead database is a separate Credits/bundle plan, not the base Outreach plan, and Instantly is email-only (no LinkedIn or call steps). Smartlead’s LinkedIn steps run via HeyReach/Aimfox integrations and calls via the SmartDialer add-on; its verified prospect emails are free on Unlimited plans and a $59/month add-on on Base/Pro. Lemlist’s LinkedIn, SMS and calling need the Multichannel plan. Woodpecker’s LinkedIn steps need the Multichannel or LinkedIn plan, and it includes 100 Lead Finder credits.

    Plan notes, continued: Saleshandy’s warm-up is included on its plans, with simultaneous warm-up slots varying by plan, and its multichannel steps cover email, LinkedIn, calls and WhatsApp. Apollo’s warmup is on paid plans (1 mailbox included); its LinkedIn steps are manual tasks and its dialer is on Professional. Mailshake has no free trial — payment is collected upfront; its LinkedIn tasks are manual, and Data Finder credits are plan-limited. QuickMail’s warmup runs through its free MailFlow AutoWarmer integration on all plans, and it has no built-in B2B database of its own.

    The 8 best cold email software tools for 2026

    Below is the full shortlist, one tool at a time, with what each one is good at, who it suits, and what to watch out for. Read the two or three that match your situation, skip the rest, and then use the free trials to settle it. If you are new to cold email entirely, start with our Cold Email for Beginners guide first — it covers the whole system, from your offer to your first replies, and this ranking will make much more sense afterwards.

    1. Instantly — Best for high-volume sending

    Instantly is built around one idea: sending a lot of email, safely, from many mailboxes at once. You can connect unlimited mailboxes on a flat monthly price. Sending rotates across them, so no single inbox carries the whole load, and the built-in warmup network warms every mailbox up. That combination makes it the natural first pick for founders and teams who already know cold email works for them. They simply want more of it now. The campaign builder stays simple even at that scale. Its unified inbox, Unibox, gathers replies from every mailbox into one place, so nothing gets missed when volume climbs.

    One trade-off is that Instantly is email-only. There are no LinkedIn steps and no call steps inside a sequence, so if your outreach lives on two channels, you will need a second tool or a different pick from this list. Its lead database, with more than 450 million contacts, is also a separate Credits plan rather than part of the base sending plan, which is worth knowing before you budget. Even so, for pure sending volume with strong deliverability tooling, Instantly is the most focused tool here — and the 14-day free trial is long enough to run a genuine test campaign. If you are comparing it head to head with the agency favourite, read our Best hub and the Smartlead review below.

    2. Smartlead — Best for agencies and scale

    Smartlead is the agency pick on this list. It is designed for teams that send for more than one client or product. They need to keep all of it separate and organised. Multi-client workspaces, white-label options, and unlimited mailboxes are the core of the product. Its deliverability tooling — warmup, inbox rotation, and placement checks — is built for the kind of volume where a small deliverability slip costs real meetings. It also bundles SmartProspect lead data, so agencies can find verified prospect emails without buying a separate database subscription on every plan.

    There are two details to check before you commit. LinkedIn steps run through HeyReach or Aimfox integrations rather than natively, and calls need the SmartDialer add-on, so a fully multichannel setup takes a little more assembly than it does in Lemlist. Verified prospect emails are free on Unlimited plans but a paid add-on on Base and Pro. Neither point is a deal-breaker — agencies choose Smartlead precisely because it handles scale and client separation so well — but both affect the real monthly cost, so confirm them on the pricing page. The 14-day free trial gives you room to set up a client workspace properly and see whether the workflow fits your team.

    3. Lemlist — Best for personalised multichannel outreach

    Lemlist is the tool to reach for when your emails need to feel personal at scale. Its signature features are visual. Personalised images and videos carry each prospect’s name, logo, or website inside the email itself, and LinkedIn steps, calls, and SMS can sit in the same sequence as your emails. That makes it a strong fit for sales teams selling to a smaller, higher-value list, where one thoughtful touch is worth more than a hundred generic sends. The lemwarm warmup tool and the contact database of more than 650 million people round out a product that wants to cover the whole outreach workflow, from finding a prospect to booking the meeting.

    The main thing to understand is the plan structure. LinkedIn, SMS, and calling steps need the Multichannel plan, so the cheapest plan is email-only in practice, and the per-user pricing means a growing team pays more as it adds seats. If your list is large and your emails are mostly the same for everyone, a volume tool like Instantly will cost less. But if your reply rate depends on standing out in a crowded inbox — and for most high-value B2B sales, it does — Lemlist’s personalisation is the most developed on this list. Try the 14-day free trial with twenty of your best prospects and judge it on the replies, not the feature list.

    4. Woodpecker — Best for simple and reliable sending

    Woodpecker is the calmest tool on this list, and that is a compliment. It does the essentials with a minimum of fuss: sequences, smart follow-ups, deliverability checks, and reply detection. It has been doing them since 2015, longer than most of its rivals. New senders tend to find it the easiest to learn: you can build your first campaign in an afternoon without watching hours of tutorials, and the conservative sending limits protect your domain while you learn the ropes. For a founder or a small team sending its first few hundred emails, that gentleness is worth more than any advanced feature.

    Woodpecker is also the most compliance-conscious tool here, with GDPR-friendly features built into the product rather than added on afterwards — a real advantage if you send to European prospects. LinkedIn steps need the Multichannel or LinkedIn plan, and the built-in lead finding is modest at 100 Lead Finder credits, so it is not the pick for senders who need a large database or heavy automation. But as a first tool, it is hard to beat: reliable, honest about its limits, and kind to beginners. The 14-day free trial is the easiest way to find out whether its pace suits you, and our sending domain guide pairs well with it — Woodpecker walks you through SPF, DKIM, and DMARC during setup.

    5. Saleshandy — Best for all-in-one value

    Saleshandy is the newest face in the top five of this ranking, and it earns its place by putting the most under one roof for the money. One subscription covers AI-powered sequences, a B2B database of more than 852 million contacts, unlimited connected email accounts, warmup, sender rotation, and a built-in outbound CRM. It charges without per-seat pricing, so adding a teammate does not add a bill. Multichannel sequences can include email, LinkedIn, calls, and WhatsApp steps, and the AI Copilot can draft a whole multi-step campaign from your website in minutes. For a small team that wants one tool instead of three subscriptions, that breadth is genuinely appealing.

    The honest caveats are about the trial and the fine print. The free trial lasts seven days, not fourteen, so you need to plan your test campaign before you start the clock — a weekend of setup followed by a live send is the right shape. Simultaneous warm-up slots also vary by plan, so check how many warm-ups your plan includes if you run many mailboxes. With those understood, Saleshandy is the strongest value pick on this list for senders who want data, sending, and deliverability tooling in a single login. Compare it with the other all-in-one on this list, Apollo, in the review below, and check the current plan details on Saleshandy’s pricing page.

    6. Apollo — Best for data and sending in one place

    Apollo is different from every other tool on this list because it starts with data, not sending. Its database of hundreds of millions of B2B contacts is the product’s heart. You search for the exact job titles, industries, and company sizes you want, then build sequences and send to them without exporting a spreadsheet or buying a second tool. For teams that spend half their week hunting for contacts, that single-login workflow is a genuine time saver, and the free plan — the only free plan on this list — makes it the easiest tool here to try properly before spending anything.

    As a sending tool alone, Apollo is solid rather than spectacular. Warmup is included on paid plans, with one mailbox covered, LinkedIn steps are manual tasks rather than automated ones, and the dialer sits on the Professional plan. Teams that send very high volumes often pair Apollo’s data with a dedicated sender like Instantly, using Apollo to find people and the other tool to reach them. That is a perfectly sensible setup. But if you want one login that finds your prospects and emails them, and you value a free plan that actually lets you test the product, Apollo is the obvious pick. See our Best B2B Data Providers hub for how its database compares with standalone data tools.

    7. Mailshake — Best for simple sequences and A/B testing

    Mailshake has been around since the early days of cold email, and it shows in the best way: the product is simple, the campaign builder is quick to learn, and the A/B testing is easy to run without a manual. You write your sequence, add your follow-ups, test two subject lines against each other, and watch the replies come into one inbox. For senders who know what they want to say and just need a reliable tool to say it at scale, that simplicity is the whole appeal. Reply handling is straightforward, and the interface stays out of your way.

    Two things to know before you choose it. Mailshake has no free trial, and payment is collected upfront. You are committing money before you have sent a single test email, which makes it the hardest tool on this list to try risk-free. And LinkedIn steps are manual tasks, not automated ones, so multichannel senders should look at Lemlist or Saleshandy instead. If neither point bothers you, and you value a tool that has been refined over many years rather than rebuilt every quarter, Mailshake remains a dependable choice. Just go in with a clear sequence already written, so your first paid month is spent sending, not learning.

    8. QuickMail — Best for deliverability-first teams

    QuickMail is the specialist on this list. Where other tools compete on features, QuickMail competes on one thing: getting your emails into the inbox. It pioneered inbox rotation: spreading sends across several mailboxes so no single inbox looks like a bulk sender. That deliverability thinking runs through the whole product, from the free AutoWarmer integration with MailFlow on every plan to its status as one of the few outreach platforms allowed to send through Gmail’s approved sending API. Reply management is equally thoughtful: replies from every inbox land in one view, AI categorisation sorts them, and out-of-office replies and unsubscribe requests are handled automatically.

    The trade-off is breadth. QuickMail has no built-in B2B database, so you bring your own list — from Apollo, a data provider, or your own research — and its plans include unlimited senders, LinkedIn accounts, and users, which suits teams rather than solo senders who only need one mailbox. If your list is already good and your problem is deliverability, that focus is exactly right: a specialist tool for a specialist problem. The 14-day free trial is enough to run a real campaign and watch where your emails land. Pair it with our Best Warmup Tools hub to complete your deliverability setup.

    Prefer to watch? This short video ranks the three biggest tools — Instantly, Lemlist, and Smartlead — using real G2 reviews, and it reaches the same conclusion as our table: the pricing model matters more than the feature list.

    Video credit: “3 Cold Email Tools by Real G2 Reviews – The Winner Is Surprising #instantly #Lemlist #smartlead” by Niche AI Tool on YouTube. This video is the property of its creator and is embedded here via YouTube for educational purposes. OutreachCompare is not affiliated with Niche AI Tool and does not claim ownership of this content.

    How to choose the best cold email software for you

    Three questions that narrow the list

    Eight good tools is still seven too many to test properly, so here is how to cut the list down in five minutes. Answer three questions honestly, and the answer usually picks itself. First, how many emails will you send each month? Under a thousand, any tool on this list will cope, so pick the simplest — Woodpecker or Mailshake. Over ten thousand, you need unlimited mailboxes and rotation, which points to Instantly, Smartlead, or Saleshandy. Second, do you already have a list? If you do, a pure sender is fine. If you do not, you need a database built in, which means Apollo, Lemlist, Saleshandy, or Smartlead. Third, do you sell on LinkedIn as well as email? If yes, you need real multichannel steps — Lemlist, Saleshandy, or Smartlead — rather than manual tasks.

    Run the trial like a real campaign

    Then run the trial properly. A trial is not a tour of the settings page; it is a small live campaign. Connect one mailbox, warm it up, load fifty real prospects, write your best email, send it, and read every reply. A tool earns its place when that loop feels easy. Building the sequence takes minutes, the replies land in one place, and nothing about the interface makes you sigh. If you find yourself fighting the tool in week one, you will still be fighting it in month six. Trust that first impression. Keep the rest of your setup the same while you test. Same list, same email, same sending domain — so you are comparing tools, not campaigns. Our guide to getting your first email addresses will help you build that test list safely.

    Choosing the right cold email software: three paths for high volume, agencies and personalisation
    Choosing comes down to three questions: how much will you send, do you already have a list, and do you sell on LinkedIn as well as email? Answer those and the shortlist usually narrows itself to two or three tools.

    Watch the wider comparison: Scrap.io tested twelve cold email platforms for 2026 and ranked them by use case — deliverability, personalisation, high volume, and value — which is a useful second opinion alongside our table above.

    Video credit: “Best 11+1 Cold Email Platforms for 2026” by Scrap.io on YouTube. This video is the property of its creator and is embedded here via YouTube for educational purposes. OutreachCompare is not affiliated with Scrap.io and does not claim ownership of this content.

    Deliverability: the feature that matters most

    Four ways the best tools protect you

    Every tool on this list will send your emails. The question that decides your results is whether those emails land in the inbox or the spam folder — and that is mostly about deliverability, not about which logo is on your dashboard. The strongest tools protect you in four ways. They warm up new mailboxes gradually, rotate sending across several mailboxes, check your domain’s authentication, and pause sending automatically when bounces spike. Warmup matters most at the start. A brand-new domain that suddenly sends hundreds of emails looks exactly like spam to Gmail and Outlook. Rotation matters most at scale, because it spreads the load so no single mailbox ever looks like a bulk sender.

    Start with warmup

    Here is the reassuring part: you do not need to understand all of this on day one. Pick a tool with warmup built in; every tool in our table has it. Then set up a separate sending domain with SPF, DKIM, and DMARC, and let the warmup run for two to four weeks before you send to real prospects. That single habit does more for your results than any other feature on any pricing page. If deliverability is your biggest worry, QuickMail and Instantly are the two names to look at first. Our Best Email Verification Tools hub covers the other half of the job: verifying every address before you send, so bounces never put your domain at risk.

    Email deliverability dashboard with an inbox placement gauge and a four-week warmup chart
    Deliverability, at a glance: warmup builds your domain’s reputation week by week, and the gauge only turns green when your emails are landing in the inbox. Give a new domain two to four weeks of warmup before your first real campaign.

    Your first week with your new cold email software

    A five-day plan

    Once you have picked a tool, the first week is about learning, not volume. Start on day one by connecting your sending mailbox and starting the warmup. This is the longest pole in the tent, so begin it before anything else. Day two is for your list: fifty to two hundred real prospects, every address verified. By day three, write your first email and two follow-ups, keeping each one under 120 words with a single clear ask. Next, build the sequence inside the tool. Send the first email on day zero, a short bump on day three, a new angle on day seven, and a polite close around day fourteen. Finish the week by sending your first twenty-five emails, then stop. Read every reply, note what people ask, and adjust one thing at a time.

    By the end of that week, you will know more about your tool than any review could tell you. You will know whether building a sequence feels quick or clumsy, whether replies are easy to find, and whether the warmup is progressing. Most senders who follow this order book their first meeting in week three or four. By then the warmup has finished and the follow-ups have had time to work. If you want the full week-by-week plan, our beginner’s guide walks through it in detail, and the How Cold Email Works page explains the system behind it.

    A first cold email campaign: a laptop inbox full of friendly replies and a meeting circled on a calendar
    Your first campaign, working: replies landing in one inbox, a meeting circled on the calendar, and a paper plane on its way to the next prospect. Send twenty-five emails, read every reply, and let the replies teach you what to change.

    What the best cold email software costs

    Three pricing models to know

    Cold email software is priced in three different ways, and understanding the model matters more than comparing any single number. Flat-fee tools charge one monthly price for the workspace, however many mailboxes you connect. That suits volume, because adding a mailbox costs nothing extra. Per-user tools charge for every seat. A team of five pays five times as much as a solo sender for the same features. Per-prospect tools charge for the people you contact, which suits senders with small, valuable lists and punishes senders with large ones. Before you compare prices, work out which model fits your team. A solo founder and a five-person agency can look at the same two tools and reach opposite conclusions.

    Watch for the extras

    Watch for the extras, too. A lead database is often a separate Credits plan. Warmup on the best network can be a paid add-on, and multichannel steps frequently sit on a higher tier than the plan you first looked at. None of that is hidden. It is all on the pricing pages we link to under the tables, but it does mean the headline price is rarely the whole story. Add up the plan, the database credits, and any add-ons you need, then compare that total across your shortlist. Use the free trials, too. Seven of the eight tools on this list offer one, and a week of real sending tells you more about value than any pricing page can. Check the provider’s site for current pricing before you buy, because prices and plans change.

    Mistakes to avoid when you pick cold email software

    • Choosing on price alone. The cheapest tool that cannot warm up your mailboxes properly will cost you far more in lost replies than a better tool ever would in subscription fees.
    • Skipping the trial. A tool can look perfect on paper and feel wrong in your hands. Send a real campaign during the trial, or you have not really tried it.
    • Paying for features you will not use. If you never send on LinkedIn, do not pay for a Multichannel plan. Start with the plan that matches what you do today, and upgrade when your sending changes.
    • Sending from your main domain. Always use a separate sending domain for cold email, whatever tool you choose. Your main domain is too valuable to risk.
    • Buying a huge list to fill a big plan. Start with fifty to two hundred verified contacts. A small, accurate list beats a large, stale one every time — and it keeps your deliverability safe.
    • Judging a tool by its first day. Warmup takes two to four weeks, and follow-ups take two weeks to play out. Give a new tool a full month before you decide it is not working.
    • Ignoring the replies. The tool that makes replies easiest to find and answer is the tool that books the most meetings. Check reply handling during your trial, not after you pay.

    Frequently asked questions

    What is the best cold email software for beginners?

    For a complete beginner, Woodpecker is the gentlest start on this list: it is simple to learn, it protects your domain with conservative limits, and its 14-day free trial is long enough to send a real first campaign. If you already know you will send at high volume, start with Instantly instead. Read our Best Cold Email Tools for Beginners 2026 guide for the beginner-focused version of this ranking.

    Which is the best cold email software for high-volume sending?

    Instantly is the best cold email software for high-volume sending, because it connects unlimited mailboxes on a flat monthly price, rotates sending across them, and warms them all up with its built-in network. Smartlead and Saleshandy are the closest alternatives for volume, and both add agency features that Instantly does not have.

    Can I try the best cold email software for free?

    Yes — Apollo is the only tool on this list with a permanent free plan, and it includes its contact database, so you can find prospects and send to them without paying. The other tools offer free trials instead: fourteen days for most of them, and seven days for Saleshandy. Mailshake is the exception, with no free trial at all.

    Do I need a separate tool for warmup?

    No — every tool in this ranking includes warmup, either built in or through a free integration, so you do not need a separate warmup subscription to start. A dedicated warmup tool can still help if you manage many domains or want deeper placement testing, and our Best Warmup Tools hub covers those.

    Can one tool find contacts and send emails?

    Yes. Apollo, Lemlist, Saleshandy, and Smartlead all combine a contact database with sending, so you can find prospects and email them from one login. Instantly’s database is a separate Credits plan, Woodpecker’s lead finding is limited to a small credit allowance, and QuickMail has no database of its own — those three suit senders who already have a list.

    How long should I try a tool before I pay for it?

    Use the full free trial, and send a real campaign inside it: connect a mailbox, warm it up, load fifty real prospects, and read every reply. Then give the tool a full month after you pay, because warmup takes two to four weeks and follow-ups take two weeks to play out. A tool deserves at least that long before you judge it.

    Our verdict on the best cold email software

    Our verdict — Best cold email software 2026: Instantly for high-volume sending, Smartlead for agencies, Lemlist for personalised multichannel outreach, Woodpecker for the simplest start, Saleshandy for all-in-one value, Apollo if you also need contacts, Mailshake for simple sequences and A/B testing, and QuickMail for deliverability-first teams. Start with one tool, run a real trial campaign, and add verification and warmup around it — see Best Email Verification Tools, Best Warmup Tools and Comparisons. We have not scored these tools yet — scores come only after hands-on testing. “Best for” labels reflect each tool’s stated focus.

    Your next step

    You now have the whole shortlist. Eight tools, each with a clear Best-for label, a comparison table, and a feature matrix you can check against the providers’ own sites. The next step is a small one. Pick the two tools that match your situation. Start both free trials, and send one real campaign of twenty-five emails from each. Compare the replies, not the homepages — the tool that makes your first week feel easy is the right one. Then work through the rest of the system: our Start Here hub, Cold Email for Beginners, and the hub page for this ranking, where it lives alongside the rest of our comparisons. You are in the right place, and your first campaign is closer than it feels.

    Keep reading — next in this series

    You have the ranking now. Go deeper with the guides that go with it:

    Best for high volume: InstantlyStart your first cold email campaign Visit Site →
  • Best Cold Email Tools for Beginners 2026

    Best Cold Email Tools for Beginners 2026

    Last updated: 15 November 2026. Written for complete beginners — no prior cold email experience needed.

    Choosing your first cold email tool feels harder than it should. After all, every tool promises the same thing: more replies, better deliverability, and faster growth. In practice, the differences are smaller than the sales pages suggest — and the best cold email tools for beginners share the same few strengths. They are easy to set up, they protect your sender reputation, and they let you send a small first campaign without a week of training. This guide compares six of them side by side, with verified prices, trials and features, so you can pick one today and send your first emails this week. The good news is simple: there is no wrong choice here, only a better fit for your situation.

    Our shortlist for beginners: six tools, one clear pick each

    Instantly for high-volume sending, Woodpecker for the simplest first campaign, Smartlead for agencies and scale, Lemlist for personalised outreach, Apollo if you also need contacts, and Mailshake for simple sequences. Compare all six below, then pick one and send your first 25 emails this week.

    Compare the best tools Jump to the comparison table

    Quick Answer

    The best cold email tools for beginners in 2026 are Instantly, Woodpecker, Smartlead, Lemlist, Apollo and Mailshake. For most beginners, Woodpecker is the easiest first step, Instantly is the best choice once you want more volume, and Apollo is the best pick if you still need to find contacts. Five of the six offer a 14-day free trial, Apollo has a free plan, and Mailshake is the only one with no trial at all. Prices start from $29 a month, and every tool on this list includes built-in warmup. Pick the tool that matches your situation, start its trial, and send your first small campaign — the tool matters far less than the offer, the list and the follow-ups.

    Table of Contents

    The best cold email tools for beginners at a glance

    Here is the whole comparison in one place. First, scan the Best-for label on each row and find the one that matches your situation. Then check the trial column — five tools let you try before you pay, and Apollo even has a free plan. After that, read the short notes under the table. They explain the one catch on each tool, so nothing surprises you later.

    Six tools, six different strengths

    #ToolBest for & why beginners like itTry it first
    1Instantly
    ★ Best for: High-volume sending
    Unlimited mailboxes and warmup on every plan, simple to set up, and a 450M+ lead database as a bundle.
    14-day free trial, no card
    From $47/mo
    Visit Site →Check the site for current pricing & trial
    2Woodpecker
    ★ Best for: Simple & reliable
    A gentle learning curve, 3 warm-ups included, unlimited verification, and LinkedIn steps on the Multichannel plan.
    14-day free trial, no card, all features
    Check site for pricing
    Visit Site →Check the site for current pricing & trial
    3Smartlead
    ★ Best for: Agencies & scale
    Unlimited mailboxes and warmup, a master inbox for all replies, and SmartProspect lead data built in.
    14-day free trial, no card
    From $39/mo
    Visit Site →Check the site for current pricing & trial
    4Lemlist
    ★ Best for: Personalised outreach
    Images, video and LinkedIn steps in one sequence, lemwarm warmup, and a 650M+ contact database.
    14-day free trial
    From $69/mo
    Visit Site →Check the site for current pricing & trial
    5Apollo
    ★ Best for: Data + sending
    A huge B2B database and sending in one place, with a free plan you can learn on before paying anything.
    Free plan ($0)
    Paid from $49/user/mo
    Visit Site →Check the site for current pricing & trial
    6Mailshake
    ★ Best for: Simple sequences
    Easy sequences, A/B testing, and unlimited warmup and verification on every plan — but no free trial.
    No free trial, payment upfront
    From $29/mo
    Visit Site →Check the site for current pricing & trial

    A note on prices and trials

    Last checked: 15 November 2026. Prices and trials checked on the providers’ official pricing pages: Instantly, Smartlead, Lemlist, Woodpecker, Apollo, Mailshake. Features and pricing can change, so please check the provider’s site before you buy. We do not guess at features, prices or trials.

    Prefer video? Watch the best cold email tools ranked

    If you would rather watch than read, this ranking walks through the same tools — Instantly, Smartlead, Apollo and the rest — and explains which one fits which sender. It is a useful second opinion before you start a trial.

    Video credit: “Best Cold Email Tools In 2026 – S Tier Ranking” by Revenue Boost (AJ Cassata) on YouTube. This video is the creator’s property, embedded via YouTube for education. OutreachCompare is not affiliated with Revenue Boost and does not claim ownership of the video.

    How to choose the best cold email tools for beginners

    Start with your situation, not the feature list. For example, a solo founder sending 500 emails a month needs something very different from an agency sending 50,000. The best cold email tools for beginners all make the same promise, so judge them on fit, not on features. In fact, most beginners overthink this choice. The tool is only about 10% of your result — your offer, your list and your follow-ups do the rest. So pick the tool that fits today, and change later if you outgrow it. Switching tools is normal, and your list and your domain move with you.

    Three questions that narrow the shortlist

    First, ask how many emails you will send. If the answer is under 2,000 a month, almost any tool on this list will do. In that case, choose the simplest one and spend your energy on the offer instead. However, if you plan to send tens of thousands a month, unlimited mailboxes and inbox rotation matter much more. That is where Instantly and Smartlead earn their place.

    Second, ask whether you already have a list. If you do, a pure sending tool is enough. If you do not, a tool with a built-in database saves you a second subscription. Apollo, Lemlist and Instantly all bundle lead data, while Woodpecker and Mailshake include a smaller credit allowance. As a result, the cheapest sending plan is not always the cheapest setup.

    Third, ask how much hand-holding you want. Some beginners love a tool that does everything in one place. Others prefer a simple sender and a separate warmup tool. Neither approach is wrong. Above all, choose the tool you will actually open every day — the best tool is the one you use.

    A beginner at a laptop choosing between three paths to different cold email tools, with a checklist on the desk
    Choosing your first tool is a three-way decision: how much you will send, whether you already have a list, and how much hand-holding you want. Answer those three questions and the shortlist narrows itself to one or two names.

    A five-minute checklist for choosing cold email tools

    • Volume: under 2,000 emails a month? Pick the simplest tool. Over 10,000? Pick unlimited mailboxes.
    • List: no list yet? Pick a tool with a built-in database, such as Apollo or Lemlist.
    • Channels: want LinkedIn steps too? Pick Lemlist, Woodpecker or Apollo — not Instantly.
    • Budget: want to try before paying? Five tools offer a 14-day trial, and Apollo has a free plan.
    • Team: working alone? A flat monthly price beats per-seat pricing. Working in a team? Check the per-user cost first.

    Work through that list in order, and the answer usually picks itself. In short, match the tool to your volume, your list and your patience — then stop comparing and start sending.

    Deliverability and warmup: the feature that matters most in cold email tools

    Deliverability decides whether anyone ever sees your emails. In fact, a beautiful email in the spam folder is worth nothing. That is why warmup is the first feature to check on any tool. Warmup slowly builds your new domain’s reputation by exchanging emails with real inboxes, so Gmail and Outlook learn to trust you. The best cold email tools for beginners include warmup as standard — but the details differ, so read the notes in the matrix below.

    Warmup first, then send

    A new domain needs two to four weeks of warmup before real sending. During that time, send a few emails a day and build up slowly. Meanwhile, set up SPF, DKIM and DMARC on your sending domain. Our guide to setting up a sending domain walks through all three records step by step, and it is the best companion to this article.

    An email envelope rising along a warmup gauge towards an open inbox, with a shield and checkmark protecting it from spam
    Warmup is a slow ramp, not a switch: your new domain starts with a few emails a day and climbs steadily towards its normal volume over two to four weeks, while the shield — SPF, DKIM and DMARC — keeps spam filters on your side.

    Warmup alone is not enough, however. You also need a clean list, verified addresses, and sensible daily limits. For example, keep each mailbox under 30 to 40 emails a day at first, and add more mailboxes instead of pushing one harder. In addition, watch your bounce rate — under 2% is healthy — and pause any campaign that bounces. Google’s bulk sender guidelines explain what inbox providers expect, and they are worth a read before you scale.

    What to check before you pay for a cold email tool

    • Warmup included? Yes on all six tools here — but Lemlist’s lemwarm is not active during its trial, and Apollo’s warmup is on select paid plans.
    • How many warm-ups? Woodpecker includes 3 warm-ups; Instantly and Smartlead include unlimited warmup.
    • Verification included? Woodpecker and Mailshake include unlimited verification; the others verify through credits or add-ons.
    • Inbox rotation? Instantly and Smartlead rotate sending across your mailboxes, which spreads the load and protects each one.

    The six best cold email tools, up close

    Below is each tool in turn, with the honest trade-off. First, the Best-for label tells you who it suits. Then the short notes explain what beginners like, and what to watch out for. There are no scores here — we have not hands-on tested every plan, and a made-up score would not help you choose. That is how the best cold email tools for beginners should be compared: on fit, not on invented numbers.

    1. Instantly — Best for: high-volume sending

    Instantly is the volume pick. You connect unlimited email accounts for one flat monthly price, and warmup is unlimited on every plan. That combination is why so many beginners who plan to scale choose it first. The Growth plan starts from $47 a month and covers 5,000 emails and 1,000 uploaded contacts, with a 14-day free trial and no card required. Setting up a campaign takes minutes, and the built-in A/Z testing helps you learn what works.

    The catch is that lead data costs extra. Instantly’s 450M+ B2B database lives in a separate Credits plan, so budget for it if you have no list yet. Instantly is also email-only — there are no LinkedIn or call steps. If you only send email, that is a strength, not a weakness: fewer moving parts, fewer things to learn.

    Our verdict: pick Instantly if you plan to send real volume and want unlimited mailboxes for one flat price. Visit Instantly →

    2. Woodpecker — Best for: simple & reliable

    Woodpecker is the calmest first step on this list. The interface is plain, the learning curve is gentle, and the 14-day free trial includes every feature with no card required. Three warm-ups are included, verification is unlimited, and contacts storage is unlimited too. For a beginner sending a first campaign, that simplicity is worth more than a long feature list.

    The catch is the price page: Woodpecker does not show a simple monthly figure up front, so check the site for current pricing before you decide. LinkedIn steps need the Multichannel plan, and lead finding is a 100-credit allowance rather than a full database. If you already have a list, none of that matters — Woodpecker just sends, reliably.

    Our verdict: pick Woodpecker if you want the easiest possible first campaign and you already have a list. Visit Woodpecker →

    3. Smartlead — Best for: agencies & scale

    Smartlead is built for senders who manage many mailboxes, or many clients. Every plan includes unlimited email accounts and unlimited warmup, and the master inbox pulls all replies into one place. The Base plan starts from $39 a month, the lowest entry price on this list, with a 14-day free trial and no card required. The trial allows 2,500 sends and 1,250 contacts, which is enough to run a real first campaign.

    The catch is that some features are add-ons. Verified prospect emails are free on the Unlimited plans but a $59 a month add-on on Base and Pro. LinkedIn steps run through integrations, and calling needs the SmartDialer add-on. If you are a solo beginner, Smartlead can feel like more tool than you need — but it grows with you further than any other tool here.

    Our verdict: pick Smartlead if you send at scale, run campaigns for clients, or want the lowest starting price with unlimited mailboxes. Visit Smartlead →

    4. Lemlist — Best for: personalised outreach

    Lemlist is the personalisation pick. You can add custom images, video and LinkedIn steps to a sequence, so each prospect gets something that feels made for them. The 650M+ contact database is included, and the Email plan starts from $69 a month, with a 14-day free trial that includes Multichannel features and 200 credits. For founders selling a high-value offer to a small list, that personal touch is often the difference between a reply and silence.

    The catch is the price structure. LinkedIn, SMS and calling need the Multichannel plan at $109 per user a month, and pricing is per user, so a team pays more than a solo sender. Also note that lemwarm warmup is included in paid plans but switched off during the trial. If you send to a small, valuable list and personalisation matters, Lemlist earns its price.

    Our verdict: pick Lemlist if you sell to a small list of valuable prospects and want every email to feel personal. Visit Lemlist →

    5. Apollo — Best for: data + sending

    Apollo is the only tool here that finds contacts and sends emails in one place. The database holds 275M+ contacts, and the free plan costs $0, with 900 credits a year and two sequences — enough to learn the tool properly before paying. Paid plans start from $49 per user a month on annual billing, with unlimited sequences, CRM integrations and multichannel steps that mix email, LinkedIn tasks and calls.

    The catch is that sending is not Apollo’s strongest side. The free plan allows only two sequences, warmup is on select paid plans, and the dialer needs the Professional plan. Apollo suits a beginner who needs contacts first and sending second. If you already have a list, a dedicated sender will feel simpler.

    Our verdict: pick Apollo if you still need to find contacts and want one tool for data and sending, starting free. Visit Apollo →

    6. Mailshake — Best for: simple sequences

    Mailshake is the straightforward pick: build a sequence, add contacts, and let follow-ups run themselves. A/B testing is included, replies land in one inbox, and warmup and verification are unlimited on every plan. The Starter plan starts from $29 a month, the cheapest paid start on this list, with 1,500 sends a month and 50 Data Finder credits.

    The catch is the big one: Mailshake has no free trial. Payment is collected upfront, so you pay before sending a single test campaign. Pricing is also per user, and Starter allows only one mailbox — you need the $49 plan for two. If you are happy to pay for a short pilot to test it, Mailshake is simple and reliable. If you want to try before you pay, pick any of the other five first.

    Our verdict: pick Mailshake if you want simple sequences with unlimited warmup and you are happy to pay upfront for a pilot. Visit Mailshake →

    Quick comparison of the best cold email tools at a glance

    Features are only half the story — the plan they sit on matters just as much. This matrix shows the five features beginners ask about most, checked against each provider’s own site. Read the plan notes underneath before you decide, because a tick can hide a plan limit.

    FeatureInstantlySmartleadLemlistWoodpeckerApolloMailshake
    Cold email sending✓✓✓✓✓✓
    Built-in warmup✓✓✓✓✓✓
    Multichannel (email + LinkedIn / calls)—✓✓✓✓—
    Built-in B2B data / lead finder✓✓✓✓✓✓
    Free trial or free plan✓✓✓✓✓—

    Last checked: 15 November 2026. Sources: Instantly, Smartlead, Lemlist, Woodpecker, Apollo, Mailshake. Features and pricing can change, so please check the provider’s site before you buy. ✓ = the feature is stated on the provider’s site (some features only on certain plans — see the notes below). — = not confirmed for this tool. We do not guess at features, prices or trials.

    Plan notes: read these before you decide

    Plan notes, so the ticks above are not overstated: Instantly’s 450M+ lead database is a separate Credits/bundle plan, not the base Outreach plan, and Instantly is email-only (no LinkedIn or call steps). Smartlead’s LinkedIn steps run via integrations and calls via the SmartDialer add-on; its verified prospect emails are free on Unlimited plans and a $59/month add-on on Base/Pro. For Lemlist, LinkedIn, SMS and calling sit on the Multichannel plan, and lemwarm warmup stays off until you pay for a plan. Woodpecker’s LinkedIn steps need the Multichannel or LinkedIn plan, with 100 Lead Finder credits included. Apollo’s warmup is on select paid plans; its LinkedIn steps are manual tasks and its dialer is on Professional. Mailshake takes payment upfront and offers no free trial; its LinkedIn automation sits on the Sales Engagement plan, and Data Finder credits depend on the plan.

    What the best cold email tools for beginners actually cost

    The headline price is rarely the whole story. First, check whether lead data costs extra. Instantly’s 450M+ database, for example, is a separate Credits plan, not part of the base sending plan. Smartlead’s verified prospect emails are free on its Unlimited plans and a $59 a month add-on on Base and Pro. Lemlist’s lead data is included, while Woodpecker and Mailshake give you a limited credit allowance. As a result, two tools with the same monthly price can cost very different amounts in practice. The best cold email tools for beginners are the ones whose total cost — tool, data and add-ons — still fits your budget.

    Second, check the billing. Most tools charge less on annual billing — Instantly drops from $47 to $37.60 a month, Smartlead from $39 to $32, and Lemlist from $69 to $55. However, annual billing locks you in for a year. For your first tool, monthly billing is the safer choice, even if it costs a little more. You can switch to annual once you know the tool fits.

    Third, remember the sending domain itself. A new domain and a mailbox cost a few dollars a month on top of the tool. That is a small cost, and it protects your main domain. In total, most beginners can start properly for under $60 a month, including the tool, the domain and the mailbox.

    Your first week with your new cold email tool

    Day one is setup, not sending. Connect your sending domain, turn on warmup, and import a small list of 50 to 100 verified contacts. The best cold email tools for beginners make this setup quick: connect, warm up, import, send. Then write one short sequence: a first email and two follow-ups. Keep each email under 120 words, with one clear ask. Our beginner’s guide to cold email shows the whole system, from offer to first meeting, if you want the full picture.

    A cold email campaign dashboard showing three follow-up steps, a rising reply-rate chart and a first-week calendar
    Your first week in one picture: three follow-up steps in a row, a reply-rate chart that climbs as the sequence runs, and a calendar marking the first seven days. Setup on day one, first sends on day two, then watch replies — not opens.

    On day two, send your first 25 emails. Then wait, and answer every reply fast. In fact, replies are the whole point — a reply, even a no, tells you the email landed and was read. After a week, look at the numbers: replies, not opens. A reply rate around 3% is healthy for a first campaign, with 1 to 3% positive. If you are below that, change the offer or the list before you blame the tool.

    Prefer video? See five cold email tools tested side by side

    This walkthrough tests five cold email tools on the same campaigns and scores them on deliverability, channels, lead data and real cost. It is a handy reality check after reading the tables above — features on a pricing page and results in a live inbox are two different things.

    Video credit: “Best Cold Email Tools 2026” walkthrough by SmartReach.io (Lancelot Dsouza) on YouTube. This video is the creator’s property, embedded via YouTube for education. OutreachCompare is not affiliated with SmartReach.io and does not claim ownership of the video.

    Mistakes to avoid when picking a cold email tool

    The best cold email tools for beginners will not save you from these mistakes — they are about how you choose and use the tool, not which name you pick. Avoid these six, and your first campaign starts on solid ground.

    • Choosing on price alone. The cheapest plan can cost more once lead data and add-ons are counted.
    • Skipping the trial. Five tools offer 14 days free — use them. A trial tells you more in a week than a month of reading reviews.
    • Paying for features you will not use. LinkedIn steps and dialers are wasted if you only send email.
    • Ignoring the per-user trap. Lemlist, Apollo and Mailshake charge per user, so a team of five pays five times the headline price.
    • Forgetting warmup. A tool without warmup on your plan means buying a separate warmup tool — check before you pay.
    • Switching every month. Give your first tool at least one full campaign before judging it. Constant switching burns your warmup and your time.

    Frequently asked questions

    Which are the best cold email tools for beginners?

    For most beginners, Woodpecker is the simplest start, Instantly is the best choice once you want more volume, and Apollo is the best pick if you still need to find contacts. Our Best Cold Email Software hub compares them side by side — then start a free trial and send a small first campaign.

    Do I need a free trial before I choose a cold email tool?

    It helps a lot. Instantly, Smartlead, Lemlist and Woodpecker all offer a 14-day free trial, and Apollo has a free plan, so you can test five of the six tools without paying. Mailshake is the exception — it collects payment upfront and offers no trial.

    How much should a beginner pay for a cold email tool?

    The best cold email tools for beginners start from $29 a month (Mailshake) and run to $69 a month (Lemlist), with Smartlead from $39 and Instantly from $47. In total, most beginners can start properly for under $60 a month, including the tool, a sending domain and a mailbox. Start monthly, not annual, until you know the tool fits.

    Is warmup included in the best cold email tools for beginners?

    Yes. Every tool on this shortlist includes built-in warmup, which is one reason they made the list. The details differ: Instantly and Smartlead include unlimited warmup, Woodpecker includes 3 warm-ups, Lemlist’s lemwarm is not active during its trial, and Apollo’s warmup is on select paid plans. Our sending domain guide explains how warmup works alongside SPF, DKIM and DMARC.

    Can I switch cold email tools later?

    Yes. Your contact list and your sending domain move with you, and switching tools is normal as you grow. Expect a short re-warm period in the new tool, and export your lists and templates before you cancel the old one. That is another reason to start with a trial rather than an annual plan.

    Do I still need a separate sending domain?

    Yes. Every tool on this list works best with a separate sending domain, warmed up for two to four weeks, with SPF, DKIM and DMARC set up. Never send cold email from your main domain. See our sending domain guide and the cold email legal checklist before your first send, and read the FTC’s CAN-SPAM compliance guide for the US rules in plain language.

    Your next step

    You have the shortlist now. The best cold email tools for beginners only help if you use them, so pick one tool, start its trial, and send your first 25 emails this week. Then work through the rest of the beginner series: our complete beginner’s guide for the whole system, how to get your first email addresses for safe list building, the legal checklist for staying compliant, and the sending domain guide for SPF, DKIM, DMARC and warmup. Start on our Start Here hub, browse Best for more comparisons, and read individual tool write-ups in Reviews. You have everything you need to start.

    Keep reading — next in this series

    You have the shortlist now. Go deeper with the guides that go with it:

    Best for beginners: InstantlyStart your first cold email campaign Visit Site →
  • How to Set Up a Sending Domain: SPF, DKIM, DMARC and Warmup

    How to Set Up a Sending Domain: SPF, DKIM, DMARC and Warmup

    If you are about to send your first cold emails, here is the single most important technical step. It is also one of the easiest to get right: set up a sending domain with SPF, DKIM and DMARC, and warm it up before you send to real people. It sounds technical, and the three-letter acronyms do not help, but in practice it is about twenty minutes of copying and pasting, followed by two to four weeks of patience while your new domain earns a good reputation. This guide walks through every step in plain English, with no jargon left unexplained, so you can set up sending domain SPF DKIM DMARC records and start sending with confidence.

    Last updated: 15 November 2026. Written for complete beginners — no prior technical experience needed.

    Set up your sending domain once, send safely for years

    A separate sending domain, three small DNS records and a two-to-four-week warmup are all that stands between you and the inbox. Follow the steps below in order, and your cold emails will reach real people instead of spam folders.

    Compare the best warmup tools Jump to the warmup ramp

    Quick Answer

    How to set up sending domain SPF DKIM DMARC, in one paragraph: first, buy a separate sending domain that looks like your main domain — for example, yourcompany.co if your website is yourcompany.com — and create a mailbox on it. Next, add three DNS records. SPF lists the servers allowed to send for your domain. DKIM signs every email to prove it really came from you. And DMARC tells Gmail and Outlook what to do with mail that fails those checks. Then, set up a custom tracking domain, warm the domain up for two to four weeks with a slow daily ramp, and check your reputation in Google Postmaster Tools.

    Finally, start sending to real prospects at 25 to 30 emails per mailbox per day, never more than 40, and add more mailboxes when you want more volume. Keep bounces under 2% and spam complaints under 0.1%, and your domain will stay healthy.

    Table of Contents

    Why you need a separate sending domain

    Above all, never send cold email from your main business domain. Your main domain is where your website lives, where your customers email you, and where your invoices and password resets come from. If that domain ever gets flagged for spam, every email you send — including the important ones — starts landing in spam folders. In contrast, a separate sending domain keeps that risk in a small, contained box. If anything goes wrong with deliverability on the sending domain, your main domain and your everyday email stay completely safe.

    In short, a sending domain is a second domain you buy only for cold email. It looks like your main domain, so recipients still recognise your brand, but it is technically separate. For example, if your website is yourcompany.com, your sending domain could be yourcompany.co, getyourcompany.com or yourcompanyemail.com. The exact variation matters less than the separation itself. As a result, your main domain keeps its clean reputation, while your sending domain builds its own reputation from scratch — which is exactly what the warmup process in this guide is for.

    What happens if you skip the separate domain

    For example, imagine two founders. The first sends cold email from her main domain, skips warmup, and sends 500 emails on day one. Within a week, her domain reputation drops, her invoices start landing in spam, and her customers stop replying. The second founder buys a separate sending domain for a few pounds, sets up SPF, DKIM and DMARC, warms it up for three weeks, and sends 25 emails a day. Her main domain never notices a thing, and her cold emails land in the inbox. In other words, the second founder did not work harder — she just separated the risk. That is the whole idea, and it is the first thing every experienced cold email sender does.

    The golden rule: your main domain is for your business. Your sending domain is for cold email. Never mix the two — and never send a cold email from an address on your main domain, even once.

    Choosing and buying your sending domain

    To begin with, pick a sending domain that is close to your real brand, so recipients recognise you at a glance. Good options are a different ending on the same name — yourcompany.co, yourcompany.io or yourcompany.net — or a short prefix such as getyourcompany.com or tryyourcompany.com. In short, if someone reads the sender address, they should still know it is you. Avoid domains that look odd or unrelated, and avoid hyphens and numbers where you can, because they are harder to trust and harder to remember.

    Next, buy the domain from any normal registrar — the same place you bought your main domain is fine — and expect to pay only a few pounds or dollars a year for a standard ending. After that, you need a mailbox on the sending domain, because cold email tools send through a real inbox, not directly from the domain itself. In practice, most beginners use Google Workspace or Microsoft 365 for this: create the mailbox, for example hello@yourcompany.co, and connect it to your sending tool. As a result, your emails come from a real, working inbox that can receive replies, which is exactly what mailbox providers want to see.

    Create the mailbox and redirect the domain

    Finally, point the sending domain at your website with a simple redirect, so anyone who types it into a browser lands on your real site instead of an empty page. This takes two minutes at your registrar, and it makes the domain look like a normal part of your business rather than a throwaway address. In addition, it protects you if a curious recipient checks the domain before replying — they will see your real website, your real offer, and your real company. However, do not host a second copy of your website on the sending domain, and do not use it for anything else. One job, one domain: cold email only.

    A quick checklist before you move on

    • Sending domain bought — close to your brand, no hyphens or numbers if you can avoid them.
    • Mailbox created — for example, hello@yourcompany.co on Google Workspace or Microsoft 365.
    • Domain redirects to your website — so it looks like a real part of your business.
    • Nothing else uses this domain — no website, no invoices, no password resets.

    Once those four boxes are ticked, you are ready for the technical heart of this guide: the three DNS records. Do not worry — they are simpler than they sound, and your sending tool will hand you the exact values to paste in.

    Set up sending domain SPF DKIM DMARC, step by step

    Now for the three acronyms. When you set up sending domain SPF DKIM DMARC records, these are the three pieces you are adding. Together, SPF, DKIM and DMARC are your sending domain’s ID badge: they prove to Gmail, Outlook and every other mailbox provider that your emails really come from you, and that nobody is impersonating your domain. Without them, your emails look suspicious, and many will go straight to spam. With them, you look like a real sender. The good news is that you do not need to understand the cryptography behind them. You only need to copy three values into your domain’s DNS settings — the control panel at your registrar where your domain’s records live — and wait a day or two for them to take effect.

    SPF, DKIM and DMARC records in your domain DNS settings, each verified with a shield and checkmark
    Your three DNS records, pictured: SPF, DKIM and DMARC each get a shield and a checkmark once they are live. SPF lists who may send for you, DKIM signs each email, and DMARC tells receiving servers what to do with anything that fails. All three live in your domain’s DNS settings as simple text records.

    SPF: who may send for you

    SPF (Sender Policy Framework) is a public list of the servers allowed to send email for your domain. When Gmail receives your email, it checks the SPF record and asks: is this server on the approved list? If yes, the email passes its first check. If no, it looks like a forgery. Your sending tool or your mailbox provider — Google Workspace, for example — gives you the exact SPF value to add, and you paste it into DNS as a TXT record on your sending domain. For example, a Google Workspace SPF record looks like v=spf1 include:_spf.google.com ~all. Do not copy that value blindly, though: your sending tool may need its own entry added to the same record, because a domain should have exactly one SPF record. If your tool gives you an SPF value, add its include to your existing record rather than creating a second one.

    DKIM: the signature that proves it is you

    DKIM (DomainKeys Identified Mail) adds a digital signature to every email you send, like a wax seal on a letter. The receiving server checks the signature against a public key published in your DNS, and if they match, it knows the email really came from you and was not altered on the way. To set it up, generate the DKIM key in your mailbox provider’s admin console — Google Workspace calls this “Authenticate email”. Then paste the long key it gives you into DNS as a TXT record, and switch DKIM signing on. In short, the key is long and ugly, but all you do is copy and paste it. Allow up to 48 hours for DKIM to start working after you turn it on.

    DMARC: the rulebook that ties it together

    DMARC (Domain-based Message Authentication, Reporting and Conformance) is the rulebook that ties SPF and DKIM together. It tells receiving servers what to do when an email fails those checks: deliver it anyway, send it to spam, or reject it outright. It also tells them where to send you reports about who is sending mail as your domain — including anyone trying to impersonate you. Start with the gentlest policy, p=none, which means “just watch and report”. That way, you can see the reports for a week or two and check that your real emails are passing before you tighten anything. After that, you can move to p=quarantine (failed mail goes to spam) and eventually p=reject (failed mail is blocked). However, never jump straight to reject on day one — if one of your real senders is misconfigured, you will block your own emails.

    How to set up sending domain SPF DKIM DMARC records, in order

    1. Add your SPF record first. Paste the TXT value from your mailbox provider or sending tool into DNS at your registrar. Wait a few hours, then check it has published.
    2. Next, generate and add your DKIM key. Create the key in your admin console, paste it into DNS, and switch DKIM signing on. Allow up to 48 hours.
    3. Then wait 48 hours. Give SPF and DKIM time to settle before you add DMARC, so you know the first two are working.
    4. Finally, add your DMARC record at the host _dmarc, starting with p=none and a report address you actually read, such as rua=mailto:dmarc@yourdomain.com.
    5. Check all three with a free tool (see the testing section below) and fix anything it flags before you send a single email.

    In total, the copying and pasting takes about twenty minutes, and the waiting takes up to two days. That waiting is not wasted time: start your warmup the moment the records are live, and by the time the warmup finishes, your authentication will be fully settled. If you use Google Workspace, Google’s own help pages walk through each record with screenshots — search for the Google Workspace guide to setting up SPF, DKIM and DMARC, and follow it alongside this guide. Above all, remember the order: SPF, then DKIM, then wait, then DMARC at p=none. In addition, keep a note of exactly which values you added and where, so you can check them again later or hand them to someone helping you.

    Prefer to watch: the setup on screen

    Prefer to watch? Unspam’s walkthrough shows the same three records being set up for Google Workspace. It covers generating the DKIM key, adding the SPF record, and starting DMARC at p=none — with a real test send at the end:

    Video credit: “Google Workspace Emails in Spam? How to Fix It (DKIM, SPF)” by Unspam on YouTube. This video is the property of its creator and is embedded here via YouTube for educational purposes. OutreachCompare is not affiliated with Unspam and does not claim ownership of this content.

    Testing your SPF DKIM DMARC setup before you send

    Once you set up sending domain SPF DKIM DMARC records, test that all three are actually live before you send anything — even a warmup email. DNS records can take hours to publish, and a single typo can silently break authentication, so a two-minute check now saves days of confusion later. First, run your sending domain through a free checker such as MXToolbox, which shows your SPF, DKIM and DMARC records and flags anything missing or malformed. Next, send a test email from your new mailbox to a Gmail address you control, open it, and check that Gmail shows the message as authenticated. In short, if the checker shows all three records and Gmail is happy, you are ready. If anything is missing, go back to your DNS panel, check for typos, and wait a few more hours — DNS changes are not instant, and patience here is part of the job.

    Re-check your records after every change

    In addition, keep testing a habit, not a one-off. Re-check your records whenever you change sending tools, add a new mailbox, or connect a new service that sends email for you. Each new sender may need to be added to your SPF record or given its own DKIM key. For example, if you add a second tool later and your spam rate suddenly climbs, a missing SPF entry is one of the first things to check. As a result, a quick test after every change keeps small problems small. Finally, remember that authentication is necessary but not sufficient: SPF, DKIM and DMARC prove you are who you say you are, but they do not prove you are a good sender. That is what warmup and careful sending are for, and they come next.

    Setting up a custom tracking domain

    Most sending tools track opens and clicks by rewriting the links in your emails to go through a shared tracking domain first. That is convenient, but it has a hidden cost: if hundreds of other senders use the same shared tracking domain, and some of them send spam, your emails inherit that domain’s bad reputation. A custom tracking domain fixes this. It is a small subdomain of your own sending domain — for example, track.yourcompany.co — that only you use for link tracking. As a result, your reputation is yours alone, and nobody else’s behaviour can drag it down.

    To set one up, create a CNAME record in your DNS pointing your chosen subdomain at the address your sending tool gives you, then switch tracking on inside the tool and select your custom domain. The whole job takes about five minutes, and your tool will confirm when the subdomain is live. In practice, do this right after you set up sending domain SPF DKIM DMARC records and before you start warmup, so every warmup email already uses your own tracking domain from day one. However, keep the tracking domain boring and professional — track, click or links are all fine — and never use it for anything else. Finally, note that a custom tracking domain is a deliverability upgrade, not a magic fix: it protects your reputation, but it cannot rescue a domain that sends to bad lists or ignores its limits.

    Warming up your sending domain: the 2–4 week ramp

    Warmup is the part beginners are most tempted to skip — and the part that matters most. A brand-new domain has no sending history, so mailbox providers have no reason to trust it yet. If it suddenly sends hundreds of emails on day one, it looks exactly like a spammer’s new domain, and it will be treated like one. Warmup solves this by building a history of normal, human-looking email behaviour first: small volumes, real opens, real replies, and no spam complaints, increasing slowly over two to four weeks. In other words, warmup is how a new domain earns its reputation before it has to spend it.

    Cold email warmup ramp: daily sending volume rising gradually over four weeks, from a few emails a day to full volume
    The warmup ramp in pictures: four growing bars, one for each week, each topped with an envelope. Volume climbs a little at a time — a slow climb is what earns a new domain its reputation, so there is no shortcut worth taking here.

    How warmup actually works

    In practice, you do warmup with a warmup tool — either built into your sending tool or a standalone service. It exchanges emails with a network of real inboxes that open, reply and rescue your messages from spam. You switch it on, and it handles the daily sending for you. Your only job is to be patient and to watch the numbers. If open and reply rates look healthy and nothing lands in spam, you are on track. If anything looks off, slow down: drop the daily volume, wait a few days, and let the domain recover. As a result, a domain that gets flagged early is much harder to fix than one you warmed up patiently, so treat the ramp as a minimum, not a target to beat.

    A typical warmup ramp, week by week

    WeekWhat happensDaily warmup volume per mailbox
    Week 1Warmup starts. A handful of emails a day, opened and replied to by the warmup network. No real prospecting yet.5–10 emails a day
    Week 2Volume roughly doubles as replies come back and reputation builds. Keep watching spam placement.10–20 emails a day
    Week 3Approaching normal volume. Start sending a small number of real emails alongside warmup.20–30 emails a day
    Week 4Full daily pace, with warmup still running quietly in the background. Ready for real campaigns.25–30 emails a day

    This is a typical ramp, not a rule written in stone — your warmup tool will suggest its own daily numbers, and you should follow them. If your tool suggests fewer emails than the table above, trust it: slower is safer. Features and guidance can change, so please check your provider’s site before you buy.

    Keep warmup running after you start sending

    For example, when your warmup tool sets a starting pace of 10 emails a day, follow it — that number is deliberately cautious, and cautious is what keeps a new domain safe. In addition, keep warmup running even after you start sending to real prospects: most tools keep a low level of warmup activity going in the background, which protects your reputation while you send. Instantly’s guide to scaling email warm-up explains the slow-ramp approach in more detail, and it is worth a read before you set your daily numbers.

    However, warmup is not a cure for bad lists or bad emails. It builds reputation; it cannot hide spammy behaviour. Finally, if you ever pause sending for a month or more, warm the domain up again for a week before resuming full volume — a cold domain is treated much like a new one. Compare warmup tools on our Best Warmup Tools hub, and read the comparison table near the end of this guide.

    Watch the four-step launch

    Prefer to watch? CleanSignups’ short video walks through the whole new-domain launch in four steps — authenticate, test, warm up, and check inbox placement:

    Video credit: “How to Warm Up a New Domain Before Cold Email (4 Steps)” by CleanSignups on YouTube. This video is the property of its creator and is embedded here via YouTube for educational purposes. OutreachCompare is not affiliated with CleanSignups and does not claim ownership of this content.

    Sending limits and how to scale safely

    Once warmup is finished, the temptation is to send as much as possible. Resist it. To stay safe, start small: 25 to 30 emails per mailbox per day, never more than 40. That limit is not about your tool — it is about how mailbox providers judge you. A single mailbox that suddenly sends 200 emails a day looks automated, even if every email is personal and relevant. In contrast, a mailbox sending 25 to 30 a day, with replies coming back and a steady rhythm, looks like a normal human doing normal business. In short, the limit protects you.

    Add mailboxes, not volume

    Instead, to send more, add another mailbox on the same sending domain, rather than pushing one mailbox harder. For example, three mailboxes at 30 emails a day gives you 90 emails a day — safely — while one mailbox at 90 a day puts your domain at risk. Each new mailbox needs its own warmup, so add mailboxes a week or two before you need the volume, and warm each one up the same slow way. As a result, scaling becomes a matter of adding inboxes, not raising limits: five mailboxes at 30 a day is 150 emails a day, all within the safe range. That is how agencies and larger senders scale without burning domains.

    Finally, spread your sending across the working day instead of sending everything at 9am. Most tools do this automatically with sending windows and small random delays between emails, which makes your sending look human rather than scripted. In addition, keep your list clean: verify every address before you send, and remove anyone who bounces or asks to stop. High bounces and complaints are the fastest way to undo a good warmup, whatever your daily volume. For the full system — lists, writing and follow-ups — read our Cold Email for Beginners: The Complete 2026 Guide.

    Our verdict — the safe sending rule: 25 to 30 emails per mailbox per day, never more than 40. Want more volume? Add another mailbox and warm it up. Never raise one mailbox’s limit to compensate.

    Google Postmaster Tools: reading your reputation

    Once you set up sending domain SPF DKIM DMARC records and start sending, you need a way to see how Gmail judges your domain — and that is exactly what Google Postmaster Tools does. It is a free tool from Google that shows your domain reputation, your spam complaint rate, and whether your emails are passing SPF, DKIM and DMARC, all from Gmail’s point of view. Since Gmail is the largest mailbox provider, its view of your reputation matters more than any other single signal. In short, if Postmaster Tools says your reputation is high and your spam rate is low, you are in good shape. If it says otherwise, you will know early, while the problem is still small.

    Deliverability dashboard showing domain reputation gauge, spam rate dial and rising inbox placement trend
    What to watch in a deliverability dashboard: your domain reputation gauge, your spam complaint rate, and your inbox placement trend over time. Google Postmaster Tools shows all three for free, from Gmail’s point of view — check it weekly, and act the moment a number moves the wrong way.

    Setting up Postmaster Tools

    To set it up, sign in to Google Postmaster Tools with a Google account, add your sending domain, and verify it by adding the TXT record Google gives you to your DNS. After that, data appears once you are sending enough volume for Google to report on — usually within a few days of regular sending. Then, check it once a week, and watch three numbers in particular. First, domain reputation: Google rates it Bad, Low, Medium or High, and you want High. Next, spam rate: the share of your emails that recipients report as spam, which should stay under 0.1%. Finally, authentication: the share of your mail passing SPF, DKIM and DMARC, which should be close to 100%. If reputation drops or spam rate rises, slow down immediately, check your list and your targeting, and let the domain recover before you send more.

    What the numbers mean

    In addition, Postmaster Tools shows you feedback loops and delivery errors, which tell you whether specific problems — such as a broken authentication record or a sudden block — are behind a dip. For example, a sudden fall in reputation the week you added a new sending tool usually means the new tool’s SPF entry is missing, and the fix is a one-line DNS change. As a result, a weekly five-minute check in Postmaster Tools catches most deliverability problems while they are still cheap to fix. However, remember that Postmaster Tools only shows Gmail’s view. Outlook and other providers judge you separately, so keep your bounces and complaints low everywhere, not just in Gmail’s numbers.

    Measuring your sending domain success: bounce, spam and replies

    Once you start sending, measure what matters, and ignore vanity numbers. For example, open rates have become unreliable since Apple Mail Privacy Protection began masking them, so treat opens as a rough signal at best and judge success by replies instead. Instead, watch the numbers that actually tell you whether your sending domain is healthy and your emails are wanted. The table below gives the healthy targets we use across our guides.

    MetricHealthy target
    Bounce rateUnder 2%
    Spam complaint rateUnder 0.1%, never above 0.3%
    Reply rateAround 3% on average
    Positive reply rate1–3%
    Meetings booked2–3 per 100 emails sent

    What to do when your sending domain numbers are off

    High bounces mean your list needs verifying — run every address through a verification tool before you send, and read our guide to getting your first email addresses for the safest sources. High spam complaints mean your targeting is too broad: you are emailing people who do not want to hear from you, so narrow your list and sharpen your offer. Few replies usually point to the offer or the opening line — adjust one element, send again, and compare the results before changing anything else. In short, these numbers are your early warning system. A domain with bounces under 2% and spam under 0.1% is a healthy domain, and a healthy domain is one you can keep sending from for years. If any number drifts past its target, stop, fix the cause, and only then resume sending.

    Warmup tools compared

    At this stage, you do not need the most expensive tool — you need one that warms up reliably, works with your sending tool, and grows with you. To help you choose, here are four tools beginners use most for warmup, ranked for a first campaign. Compare them in full on our Best Warmup Tools hub and our Best Email Deliverability Tools hub.

    The four tools at a glance

    #ToolKey strengthsStarting point
    1Instantly
    ★ Best for: Beginners
    Best for beginners who want warmup built into their sending tool.
    ✓ Warmup built in, unlimited mailboxes
    ✓ Deliverability and inbox rotation
    Unlimited mailboxesVisit Site →Check the site for current pricing & trial
    2Smartlead
    ★ Best for: High volume
    Best for high-volume sending with deliverability-first warmup.
    ✓ Warmup built in, deliverability-first sending
    ✓ Multi-client workspaces
    Multi-clientVisit Site →Check the site for current pricing & trial
    3Lemlist
    ★ Best for: Personalisation
    Best for personalised outreach with warmup alongside it.
    ✓ lemwarm warmup and 450M+ contact database
    ✓ Images, video and LinkedIn steps
    14-day free trialVisit Site →Check the site for current pricing & trial
    4Woodpecker
    ★ Best for: Simple & reliable
    Best for a simple first campaign — pair it with a standalone warmup tool.
    ✓ Low learning curve
    ✓ Deliverability checks and smart follow-ups
    Low learning curveVisit Site →Check the site for current pricing & trial

    Last checked: 15 November 2026. Warmup availability is stated on each provider’s site — see the feature matrix below. Features and pricing can change, so please check the provider’s site before you buy. We do not guess at features, prices or trials.

    Our verdict for sending domain warmup

    Our verdict — Best for beginners: Instantly if you want warmup built into your sending tool from day one, Smartlead for high-volume sending, Lemlist if you also want personalised multichannel outreach. Woodpecker is the simplest start, but it has no built-in warmup, so pair it with a standalone warmup tool. See Best Warmup Tools, Best Email Verification Tools and Comparisons. We have not scored these tools yet — scores come only after hands-on testing. “Best for” labels reflect each tool’s stated focus.

    Quick comparison at a glance

    Same four tools, one view — so you can see at a glance which ones bundle warmup, multichannel steps or a contact database, and which keep it simple.

    FeatureInstantlySmartleadLemlistWoodpecker
    Built-in warmup✓✓✓—
    Multichannel (email + LinkedIn / calls)——✓—
    Built-in B2B data / lead finder—✓✓—
    Free trial or free plan—✓✓—

    ✓ = feature stated on the provider’s site or in its official video. — = not confirmed for this tool — check the provider’s site before you buy. We do not guess at features, prices or trials. Last checked: 15 November 2026.

    Common mistakes beginners make

    • Sending from your main domain. Always use a separate sending domain. Your main domain carries your website, your customers and your invoices — keep cold email far away from it.
    • Skipping SPF, DKIM or DMARC. In fact, all three records are needed before you send — Gmail treats unauthenticated mail as suspicious.
    • Jumping straight to DMARC reject. Start with p=none, watch the reports for a week or two, and only then tighten the policy.
    • Skipping warmup. A new domain needs two to four weeks of warmup, or your emails will land in spam.
    • Sending 100 emails a day from one mailbox. Instead, keep it to 25 to 30 per mailbox per day, and add mailboxes to scale.
    • Using a shared tracking domain. Set up your own custom tracking domain, so nobody else’s reputation becomes yours.
    • Never checking Postmaster Tools. Check your domain reputation weekly — a five-minute check catches problems while they are still cheap to fix.
    • Ignoring bounces and complaints. Above all, bounces over 2% or spam over 0.1% mean stop, fix the cause, and only then resume.

    Frequently asked questions

    What does it mean to set up a sending domain for cold email?

    To set up a sending domain for cold email means buying a separate domain for your outreach, creating a mailbox on it, and adding SPF DKIM DMARC records so mailbox providers can verify your emails really come from you. You then warm the domain up for two to four weeks before sending to real prospects. Your main domain stays untouched, so its reputation is never at risk.

    How do I set up sending domain SPF DKIM DMARC records?

    When you set up sending domain SPF DKIM DMARC records, add an SPF TXT record listing your approved senders. Then generate a DKIM key in your mailbox provider’s admin console and publish it in DNS. Wait 48 hours, then add a DMARC record at _dmarc starting with p=none. Your sending tool and mailbox provider give you the exact values to paste in — see the step-by-step section above for the full order.

    How long should I warm up a sending domain?

    Warm up a new sending domain for two to four weeks. Start with 5 to 10 emails a day in week one, roughly double in week two, and reach your normal volume of 25 to 30 emails per mailbox per day by weeks three to four. If open and reply rates look healthy and nothing lands in spam, you are ready for real campaigns. See the week-by-week ramp above.

    How many cold emails can I send per day per mailbox?

    Send 25 to 30 cold emails per mailbox per day, and never more than 40. To send more, add another mailbox on the same sending domain and warm it up, rather than pushing one mailbox harder. Three mailboxes at 30 a day gives you 90 emails a day — safely.

    What is a custom tracking domain and do I need one?

    A custom tracking domain is a subdomain of your own sending domain, such as track.yourcompany.co, used only by you for open and click tracking. You need one because shared tracking domains carry other senders’ reputations — including spammers’. Setting one up takes about five minutes with a single CNAME record, and you should do it before warmup starts.

    How do I know if my sending domain is healthy?

    Check Google Postmaster Tools weekly: you want a High domain reputation, a spam complaint rate under 0.1%, and SPF, DKIM and DMARC passing close to 100% of the time. Keep your bounce rate under 2% as well. If any number moves the wrong way, slow down, fix the cause, and let the domain recover before you send more.

    Prefer video?

    Two videos are embedded in this guide: Unspam’s Google Workspace authentication walkthrough in the SPF, DKIM and DMARC section and CleanSignups’ four-step new-domain launch in the warmup section. Both were checked on 15 November 2026, both belong to their creators, and both carry a full credit line underneath; OutreachCompare does not claim ownership of either one.

    Your next step

    By now, you know how to set up sending domain SPF DKIM DMARC authentication from scratch. Work through it in order: buy your separate sending domain, add SPF, DKIM and DMARC, test the records, set up your custom tracking domain, and start warmup the same day. Then, while the domain warms up, build your list and write your first emails — by the time warmup finishes in two to four weeks, you will be ready to send. Start with our Start Here hub, then How Cold Email Works, and read our Cold Email for Beginners: The Complete 2026 Guide for the full system. You are in the right place — set it up once, properly, and it will serve you for years.

    Keep reading — next in this series

    Your sending domain is set up. Go deeper with the guides that go with this one:

    Best for beginners: InstantlyStart your first cold email campaign Visit Site →
  • Is Cold Email Legal? The Simple Checklist

    Is Cold Email Legal? The Simple Checklist

    Is cold email legal? If you have ever hovered over the send button and wondered whether you were about to break the law, you are not alone. Almost every beginner asks the same question, and the honest answer is reassuring: yes, cold email is legal in most countries, including the United States, the European Union, the United Kingdom, Canada and Australia — as long as you follow a short checklist. Cold email is a normal, everyday part of business.

    Sales teams, founders and freelancers all use it to start conversations with people who might genuinely want what they offer. The law does not ban that. What the law does is set ground rules: be honest about who you are, only email people your offer is relevant to, and stop the moment someone asks you to. Follow those rules, and you are on solid ground. This guide gives you the checklist first, then walks through each country in plain English, so you can send with confidence.

    Last updated: 15 November 2026. General information, not legal advice — if you are sending at large scale, or if a regulator ever writes to you, speak to a lawyer in that country.

    Is cold email legal? The short version: yes — with a checklist

    Cold email to businesses is legal in the US, the EU, the UK, Canada and Australia when you follow the rules in this guide. Run the 10-point checklist below before every campaign, and keep this page bookmarked for the country rules.

    Run the 10-point checklist See the country rules at a glance

    Quick Answer

    Is cold email legal? Yes — in most countries, when you follow a short checklist. In the United States, the CAN-SPAM Act lets you email business contacts without prior consent, as long as you identify yourself, include your postal address, use an honest subject line and honour opt-outs within 10 business days. Across the European Union and the United Kingdom, most B2B cold email relies on legitimate interest under GDPR: the person must be relevant to your offer, you must be able to say where you found their details, and you must stop if they object.

    In Canada, CASL is stricter and generally needs consent first, including implied consent for published business addresses. In Australia, the Spam Act needs consent too, but a work address published for business contact can count. Two countries are the exception to the friendly rule: Germany and Austria generally require prior express consent, so use LinkedIn, calls or content marketing there instead. In short, cold email is legal — the checklist is what keeps it that way.

    Table of Contents

    The universal checklist: 10 checks before you send

    Before the country rules, here is the part that matters most. Almost every cold email law in the world boils down to the same ten checks. If you can tick all ten, you are doing what the law asks in the United States, the EU, the UK, Canada and Australia. Print this list, or keep it open beside your sending tool, and run through it before every campaign. It takes five minutes, and it is the single best habit a cold email beginner can build.

    Checks 1–5: who you email

    #CheckWhat it means in practice
    1Is this person relevant?
    Your offer must match their job, company and problem.
    Only email people who could reasonably want what you offer. A dentist does not need your software for hair salons. Relevance is not just good manners — under GDPR it is part of the legal test.
    2Is it a work address?
    Business contact details, not personal inboxes.
    Use work emails published for business contact. Personal addresses such as Gmail or Hotmail accounts are off limits for cold outreach in almost every country.
    3Do you know where you got it?
    Record the source and the date for every address.
    Write down where each address came from and when you found it. If anyone ever asks, you can answer precisely. See our guide to getting your first email addresses for the safest sources, in order.
    4Have you checked the country?
    The recipient’s country decides the rules, not yours.
    Look up the rules for every country on your list before you send. Germany and Austria need prior consent; Canada needs consent; the US, most of the EU and the UK do not, for relevant B2B mail. The country table below has the details.
    5Is the sender honest?
    Real name, real company, real reply address.
    Your emails must say who you are and which company you are writing from. Never hide behind a vague name, a fake role or a no-reply address.

    Checks 6–10: what goes in the email

    #CheckWhat it means in practice
    6Is the subject line honest?
    It must reflect what is inside the email.
    Do not pretend you have met before, fake an invoice, or promise something the email does not deliver. Misleading subject lines are banned under CAN-SPAM and are the fastest way to look like spam.
    7Does the email say what it is?
    The reader should know it is a sales email in seconds.
    State your purpose plainly in the first two or three lines. Nobody should have to read to the end to work out that you are selling something.
    8Is your postal address in the email?
    Required in the US, good practice everywhere.
    CAN-SPAM requires a valid physical postal address in every commercial email. Add yours to your email signature once, and it will be there every time.
    9Is there a clear way to opt out?
    One click, no login, no reply required.
    Every email needs a working unsubscribe link or a clear way to say stop. The link must work, and the request must be honoured fast — within 10 business days in the US, 5 business days in Australia, and immediately in practice everywhere else.
    10Have you checked the suppression list?
    Never email someone who already said stop.
    Keep one list of everyone who has opted out, complained or bounced, and check every campaign against it before you send. This is the check beginners skip most — and the one regulators care about most.

    The universal checklist: ten checks that cover the shared core of CAN-SPAM, GDPR, PECR, CASL and the Spam Act. Country-specific extras follow in the sections below. Last checked: 15 November 2026.

    Why a checklist beats memorising the law

    First, the law is written for lawyers, and you are a sender, not a lawyer. Next, the checklist turns long statutes into actions you can actually do before you press send. After that, it protects you in a second way: if anyone ever questions an email, your checklist habit — the recorded sources, the suppression list, the honest subject lines — is your evidence that you took the rules seriously. Finally, the checklist makes your emails better, not just safer. Relevant people, honest subject lines and a clear opt-out are exactly what makes people reply instead of reporting you as spam. In short, compliance and good cold email are the same thing.

    The one-line version: email the right person, at their work address, about something relevant to their job, say who you are, and stop the moment they ask. That is the whole checklist in one sentence — and it is legal in most countries.

    What makes an email “cold” — and what makes it spam

    A cold email is simply an email to someone you have not spoken to before, about something relevant to their work. Spam is different. Spam is untargeted, deceptive or sent to people who have already said no. The law cares about the difference, and so do your recipients. For example, a short, honest email to the operations manager of a dental clinic, offering software that solves a problem dental clinics actually have, is a cold email. In contrast, the same message sent to 10,000 random addresses, from a fake name, with a subject line that says “Your invoice is overdue”, is spam. As a result, the first email is legal in most countries, and the second is not — and would also destroy your sender reputation in days.

    Prefer to watch? This walkthrough shows how to spot the spam signals in your own emails before you send them, so your prospecting stays on the right side of the line:

    Video credit: “How to Identify Spam Emails and Avoid Sending Them in Prospecting”, as featured in Scrap.io’s Cold Email Compliance 2026 guide — watch it on YouTube. This video is the property of its creator and is embedded here via YouTube for educational purposes. OutreachCompare is not affiliated with the creator and does not claim ownership of this content.

    The three signs your cold email has become spam

    First, irrelevance. If the person could not reasonably want what you offer, the email is spam to them, whatever the law says. Next, deception. A misleading subject line, a fake sender name or a hidden sales pitch turns a cold email into spam in the eyes of every regulator. Finally, persistence after an opt-out. One email to a relevant person is a cold email. A second email after they said stop is spam — and in most countries, it is also unlawful. However, the good news is that all three signs are easy to avoid. Choose relevant people, write honest subject lines, and honour every opt-out the same day. In addition, keep your list small and clean: our guide to getting email addresses shows how to build a first list of 50 to 200 verified work addresses without buying anything.

    Is cold email legal in the United States? CAN-SPAM

    Yes. Is cold email legal in the United States? The answer is the friendliest of any major country. The US CAN-SPAM Act of 2003 does not require prior consent for commercial email, and it does not exempt B2B email — it covers all of it, business to business included. In other words, you can email a stranger in the US about your product without asking permission first. However, CAN-SPAM sets seven clear rules for how you send, and breaking any of them is where the trouble starts.

    First, do not use false or misleading header information: your “From”, “To” and reply address must identify who you really are. Next, do not use deceptive subject lines: the subject must reflect what is inside. Then, identify the message as an advertisement, tell the recipient where you are located with a valid physical postal address, and give them a clear way to opt out. Finally, honour opt-out requests promptly — within 10 business days — and monitor what anyone sending on your behalf is doing, because you are responsible for their emails too.

    Prefer to watch? QuickMail’s guide walks through CAN-SPAM and GDPR side by side, so you can see how the US opt-out model differs from Europe’s approach:

    Video credit: QuickMail’s cold email compliance video, embedded in its guide “Is Cold Email Illegal? How To Send Compliant Cold Emails (CAN SPAM & GDPR)” — watch it on YouTube. This video is the property of its creator and is embedded here via YouTube for educational purposes. OutreachCompare is not affiliated with QuickMail and does not claim ownership of this content.

    What CAN-SPAM does not require

    First, CAN-SPAM does not require you to get permission before you send. That is the biggest difference from Canada and the EU, and it is why the US is the easiest country to start cold email in. Next, it does not require a specific form of opt-out: a working unsubscribe link is enough, as long as it works for at least 30 days after you send. After that, it does not ban commercial email to businesses, and it does not require you to prove consent for a B2B contact.

    However, there are two catches. In the first place, the FTC can fine you per email, not per campaign — so one bad send to a large list multiplies fast. In addition, some US states have their own rules on top of CAN-SPAM, and private lawsuits under state law are possible. As a result, the checklist above is still your best protection, even in the friendliest country on the list. Read the rules in the regulator’s own words in the FTC’s CAN-SPAM compliance guide for business.

    Our verdict — United States: the easiest place to start cold email. No prior consent needed for B2B mail, but honest headers, honest subject lines, a postal address and a working opt-out are non-negotiable. Follow the checklist and you are compliant. General information, not legal advice.

    Is cold email legal in the EU? GDPR and legitimate interest

    Yes — with a little more paperwork than the US. Is cold email legal in the EU? GDPR did not ban cold email, despite what you may have heard. What GDPR bans is processing someone’s personal data without a lawful basis. A work email address that names a person, such as sarah@brightdental.example, is personal data. For most B2B cold email, the lawful basis is legitimate interest under Article 6(1)(f) of the GDPR.

    Recital 47 says direct marketing may be regarded as a legitimate interest, and that such an interest can exist where there is a relevant and appropriate relationship between you and the person you are contacting. In short, the law asks you to show your working: your interest in contacting this person is real, the email is necessary to pursue it, and it does not override their rights. That is a test you can pass, if you choose relevant people and write the reasoning down.

    A balance scale weighing a business email and handshake against a privacy shield, illustrating GDPR legitimate interest for cold email
    Legitimate interest, pictured: your business interest in reaching a relevant contact on one side, the person’s privacy on the other. The scale balances when the contact is relevant, the email is necessary, and their rights are respected — and you write that reasoning down.

    The three-part legitimate interest test

    Before you email anyone in the EU, run this three-part test — and write the answers down. That written record is called a Legitimate Interests Assessment, or LIA, and it is your evidence that you thought about the rules before you sent. First, the purpose test: is there a real, legitimate reason to contact this person? Selling a product that solves their problem counts. Emailing everyone in a directory does not. Next, the necessity test: is email the reasonable way to pursue that purpose?

    A short, relevant email to the right person usually passes. Finally, the balancing test: do the person’s interests and rights override yours? This is where relevance decides everything. A relevant email to a work address, from an identifiable sender, with a clear opt-out, rarely overrides anyone’s rights. In contrast, an irrelevant email to a personal address, sent in bulk, usually does. Read the text of the rule itself in Article 6 of the GDPR.

    The three-part testAsk yourselfPasses when…
    1. PurposeWhy am I contacting this person?There is a real business reason tied to their job or company.
    2. NecessityIs email the reasonable way to do it?A short, relevant email is proportionate to the goal.
    3. BalancingWould this person reasonably expect it?The email is relevant, the address is a work address, and opting out is easy.

    The legitimate interest test in brief. Keep your written LIA with your campaign notes — it is the document that shows you assessed the rules before you sent.

    What GDPR also requires you to do

    In addition to the test, GDPR gives every recipient three rights you must respect. First, the right to be informed: under Article 14, when you get someone’s details from a source other than the person themselves, you must tell them where you got their data, who you are, and why you are contacting them. In practice, that means saying in your first email who you are and where you found them — for example, “I found your work email on your company website.” Next, the right to object: under Article 21, anyone can object to direct marketing at any time, and you must stop immediately — no waiting period, no questions asked.

    Finally, the right to erasure: if someone asks you to delete their details, delete them, including from your suppression list’s active sending lists (keep only the minimum needed to remember never to email them again). However, GDPR also sets a limit on how long you keep data: do not keep addresses forever. If you have not emailed someone in months and have no reason to, delete the record. As a result, a small, fresh list is not just better for deliverability — it is what GDPR expects.

    The ePrivacy patchwork: France, Ireland, Germany and Austria

    Here is the part that catches beginners out. GDPR is only half the story in Europe. The ePrivacy Directive sits alongside it, and each EU country turned it into national law in its own way. As a result, the rules for B2B cold email change at the border, even though GDPR is the same everywhere. The four countries below are the ones that matter most to a beginner, because they show the full range — from friendly, to careful, to consent-first.

    France and Ireland: opt-out for role-relevant B2B email

    France and Ireland are the friendliest EU countries for B2B cold email. In both countries, you can email a business contact without prior consent when the message is relevant to their professional role, as long as you identify yourself and offer a clear opt-out. The French regulator CNIL takes this approach for B2B messages sent to professional addresses, provided the email relates to the recipient’s role. Ireland follows the same opt-out model for B2B mail. However, the same limits apply as everywhere else in the EU: the email must be relevant to the person’s job, the address must be a work address, and you must stop the moment they object. In addition, GDPR’s Article 14 disclosure and Article 21 objection rights still apply in full. As a result, France and Ireland feel much like the UK: friendly, but only for genuinely relevant B2B mail.

    Germany: prior express consent under UWG §7(2)

    Germany is the strictest major EU country for cold email, and it is the one beginners get wrong most often. Under §7(2) of the German Unfair Competition Act (UWG), sending advertising by email without the recipient’s prior express consent is unreasonable harassment — and that applies to B2B email as well. In practice, German courts and regulators treat unsolicited B2B emails as needing consent first, even when GDPR legitimate interest might otherwise apply. As a result, cold email to Germany is a high-risk channel for a beginner. The safe alternatives are LinkedIn outreach, phone calls, content marketing, or asking for consent first — for example, through a lead magnet or an event signup. If Germany is a key market for you, get local advice before you send anything. Do not assume that what works in France or Ireland will work in Germany.

    Austria: prior express consent under TKG §174

    Austria is just as strict as Germany. Under §174 of the Austrian Telecommunications Act (TKG), sending electronic mail for direct marketing purposes requires the recipient’s prior express consent — again, including B2B email. As in Germany, there is no general B2B exception to rely on. In short, treat Austria the same way as Germany: no cold email without consent, and use LinkedIn, calls or content to start the conversation instead. The good news is that both countries are the exception, not the rule. Most of the EU, including France and Ireland, allows relevant B2B cold email on an opt-out basis. But if you are building a Europe-wide list, split it by country first, and leave Germany and Austria off the cold email list entirely until you have consent.

    Is cold email legal in the UK? PECR and the corporate subscriber rule

    Yes — and the UK is one of the friendliest countries for B2B cold email. Is cold email legal in the UK? The answer turns on one distinction in the Privacy and Electronic Communications Regulations (PECR): corporate subscribers versus individual subscribers. A corporate subscriber is a limited company, a limited liability partnership, a Scottish partnership or a similar body with its own legal identity. You can send marketing emails to corporate subscribers without prior consent, as long as you say who you are and give a working opt-out.

    An individual subscriber is a sole trader, an ordinary partnership or another unincorporated business. For those, PECR requires consent first — or the “soft opt-in”, which only applies if you obtained their details in the course of a sale or negotiations for a sale, and you are marketing similar products. In short, email limited companies freely, but do not cold email sole traders without consent.

    The UK rule that saves beginners from mistakes

    First, check the business type before you send, not after. Next, if you cannot tell whether a business is a limited company or a sole trader, treat it as an individual subscriber — that is the ICO’s own guidance, and it keeps you on the safe side. After that, remember that UK GDPR still applies alongside PECR: if you email a named person at a company, you still need a lawful basis (usually legitimate interest), you still need to tell them where you got their details, and they can still object to direct marketing at any time.

    Finally, the UK’s penalty ceiling has risen sharply: under the Data (Use and Access) Act, the ICO can now fine up to £17.5 million or 4% of global turnover for PECR marketing breaches, where the old ceiling was £500,000. That change took effect in February 2026. As a result, the UK is friendly — but the friendly rules still have teeth. Read the regulator’s own explanation in the ICO’s guidance on direct marketing using electronic mail.

    Is cold email legal in Canada? CASL

    Mostly no — and Canada is the country beginners underestimate most. Is cold email legal in Canada? CASL, Canada’s Anti-Spam Legislation, is an opt-in law: you need consent before you send a commercial electronic message. There are two kinds of consent. Express consent is the clear kind: someone ticked a box, signed up, or said yes in writing. Implied consent is narrower, but it is the route most B2B senders rely on.

    It covers an existing business relationship, such as a current customer, and it covers a work address that has been conspicuously published for business contact — provided your message is relevant to the person’s role and there is no statement saying unsolicited messages are not wanted. In short, you can email a Canadian business contact whose work address is published on the company website, about something relevant to their job. What you cannot do is buy a list, scrape addresses, or email a personal address without consent.

    What every CASL email must contain

    First, your identification: who you are, and on whose behalf you are sending, with accurate contact details. Next, a working unsubscribe mechanism that stays functional for at least 60 days after you send, and is honoured within 10 business days. After that, keep records: CASL puts the burden of proving consent on you, so keep the source, the date and the reason you believed you had implied consent for every Canadian address. Finally, remember that CASL follows the recipient, not the sender. If you are based in Ireland, the UK or the US and you email someone in Canada, CASL applies to you. The CRTC enforces it, and it has fined senders for exactly the mistakes beginners make — bought lists and missing unsubscribe options. Read the regulator’s own answers in the CRTC’s frequently asked questions about CASL.

    Is cold email legal in Australia? The Spam Act

    Yes — in a narrower way than the US, and wider than Canada. Is cold email legal in Australia? The Spam Act 2003 sets three rules for every commercial electronic message: consent, identify, unsubscribe. Consent can be express, such as a signup form or a ticked box, or inferred — and the inferred route is the one that matters for cold email. Consent may be inferred from a work address that has been conspicuously published: a business address published with the organisation’s agreement, with no statement refusing unsolicited messages, where your message is relevant to the person’s role, functions or duties.

    In other words, emailing a published work address about something relevant to that person’s job is generally permitted. Emailing the same address about an unrelated offer is not. There is no B2B exemption in the Spam Act, so a cold sales email to a company director is treated the same as one to a consumer — the conspicuous publication route is the only allowance for true cold email.

    Australia’s three rules in practice

    First, identify yourself accurately: your name or business name and contact details that stay correct for at least 30 days after you send. Next, provide a working unsubscribe that is honoured within 5 business days and stays functional for at least 30 days — and never require someone to log in or create an account to unsubscribe. After that, remember the burden of proof: under the Spam Act it is up to you to prove you had consent, so record the source and date for every Australian address, just as you would under GDPR.

    Finally, do not send an email to ask for consent, because that email is itself a marketing message. ACMA, the Australian regulator, enforces the Act and has fined large brands for the most common failure of all: not honouring unsubscribe requests on lists they lawfully owned. In short, Australia rewards the same habits as everywhere else — relevant people, published work addresses, and an unsubscribe that actually works.

    Country rules at a glance

    Here is the whole guide on one screen. The rule that decides which row applies is the recipient’s country, not yours. So split your list by country first, then apply the right row to each group. If you only remember one thing from this article, make it this table — and the fact that Germany and Austria need consent first.

    A stylised world map with glowing pins over the United States, Europe, the United Kingdom, Canada and Australia, each with a small rule card
    One world, five rulebooks: the map shows why the recipient’s country decides the rules. The United States is opt-out, most of the EU and the UK are legitimate interest or opt-out for companies, Canada and Australia need consent — and Germany and Austria need it first.
    Country / regionLawCold B2B email without prior consent?Opt-out deadline
    United StatesCAN-SPAM Act✓ Yes — opt-out model, no consent neededWithin 10 business days
    European Union (most)GDPR + ePrivacy✓ Yes — legitimate interest, role-relevant onlyImmediately on objection
    France & IrelandGDPR + national ePrivacy law✓ Yes — opt-out for role-relevant B2B mailImmediately on objection
    GermanyGDPR + UWG §7(2)✗ No — prior express consent requiredImmediately on objection
    AustriaGDPR + TKG §174✗ No — prior express consent requiredImmediately on objection
    United KingdomUK GDPR + PECR✓ Yes — corporate subscribers only, no consent neededImmediately on objection
    CanadaCASL✓ Only with express or implied consentWithin 10 business days
    AustraliaSpam Act 2003✓ Only with express or inferred consentWithin 5 business days

    Country rules at a glance. “Yes” means cold B2B email is permitted when you follow the checklist and the country notes above — it never means you can email anyone about anything. Last checked: 15 November 2026. Rules change, so check the regulator’s guidance linked in each section before you send to a new country.

    How to use this table on a real list

    First, add a country column to your list sheet, next to the source and date columns you already keep. Next, sort the list by country and check each group against the table above. Then, remove Germany and Austria from the cold email list entirely, unless you already have their express consent. After that, check your Canadian and Australian contacts for consent — published work address, relevant message — and remove anyone who does not pass.

    Finally, send to the rest in small batches, and watch the replies: a relevant list answers, and an irrelevant one complains. In addition, keep the table with your campaign notes, so anyone who sends on your behalf follows the same rules. If you are still building your first list, our guide to getting email addresses shows the safest sources, in order — and the beginner’s guide walks through the whole system, from offer to first meeting.

    Honouring opt-outs: the rule every country agrees on

    Every law in this guide agrees on one thing: when someone says stop, you stop. The deadlines differ — 10 business days in the US and Canada, 5 business days in Australia, immediately in the EU and UK — but the habit should be the same everywhere: honour every opt-out the same day you receive it. Do not send a “just one more email” to confirm. Do not ask them to log in, fill in a form, or reply with a reason. One click, and they never hear from you again. That is not just the law. It is also the kindest and smartest thing you can do, because a person who asked to stop and keeps receiving your emails will mark you as spam — and spam complaints hurt your deliverability far more than one lost contact.

    A person clicking a large unsubscribe button on a laptop after receiving a cold email, while a checklist beside them shows one name crossed out
    The opt-out, done properly: one clear unsubscribe button, a friendly confirmation on screen, and the person’s name crossed off the list straight away. Honour every opt-out the same day — it is the rule every country in this guide agrees on.

    Build one suppression list and use it everywhere

    First, keep a single suppression list that covers every tool and every campaign you run — not one list per tool. Next, add to it the same day: every opt-out, every spam complaint, every hard bounce, and every “please remove me” reply, however it arrives. Then, check every new campaign against it before you send, even if the campaign uses a different tool.

    After that, never delete the suppression list itself: the names on it are the people you must never email again, and deleting it means you will email them again by accident. Finally, remember that a good suppression list is a sign of a healthy sender, not a failure. Lists that never lose anyone are usually lists that never emailed anyone real. Compare verification tools that keep your list clean on our Best Email Verification Tools hub, and sending tools with warmup built in on our Best Warmup Tools hub.

    Tools that make the checklist easier

    The checklist is a habit, not a product — but the right tools make it much easier to keep. These three are the ones beginners pick first, and each one covers a different part of the checklist: finding verified work addresses, sending with warmup and unsubscribe handling, and working from a licensed database instead of a bought list.

    #ToolHow it helps you stay compliant
    1Hunter
    ★ Best for: Verified work emails
    Finds work emails and verifies them before you see them.
    ✓ Verified work addresses, so you email real business contacts
    ✓ Source is clear: name + company domain
    Visit Site →Check the site for current pricing & trial
    2Instantly
    ★ Best for: Beginners
    Sending with warmup and unsubscribe handling built in.
    ✓ Warmup and sending in one place
    ✓ Unsubscribe handling for every campaign
    Visit Site →Check the site for current pricing & trial
    3Apollo
    ★ Best for: Data + sending
    Licensed B2B database and sending in one tool.
    ✓ Licensed database, so you know where data came from
    ✓ Sequences and sending built in
    Visit Site →Check the site for current pricing & trial

    Last checked: 15 November 2026. Tool descriptions match the checks in our beginner’s guide and our email addresses guide. Features and pricing can change, so please check the provider’s site before you buy. We do not guess at features, prices or trials.

    What happens if you get it wrong? Penalties in small print

    Let us keep this section short and in small print, because the numbers are not the point. The point is the checklist, and the numbers only exist to show that regulators take it seriously. In practice, regulators start with warnings, guidance and corrective orders — especially for small senders who made an honest mistake and fix it fast. The big fines you read about are for large-scale, repeated or deliberate breaches: bought lists, ignored opt-outs, and deceptive subject lines sent to thousands of people. So read the table below once, then forget the numbers and remember the checklist instead.

    LawMaximum penalty (small print)
    US CAN-SPAMUp to $53,088 per violating email (FTC, 2025 figure, unchanged for 2026)
    EU GDPRUp to €20 million or 4% of global annual turnover, whichever is higher (upper tier, Art. 83(5)); €10 million or 2% for the lower tier
    UK PECR / UK GDPRUp to £17.5 million or 4% of global turnover (since February 2026; previously £500,000 under PECR)
    Canada CASLUp to CAD $10 million per violation for organisations, CAD $1 million for individuals (CRTC)
    Australia Spam ActPenalties in penalty units; up to A$3.64 million per day for a repeat corporate offender (10,000 units at the 2026 unit value)

    Penalty maxima only, checked 15 November 2026 from the FTC, the GDPR text, the ICO, the CRTC and Australian Spam Act guidance. Maxima are ceilings, not forecasts: actual penalties are usually far lower, and small senders who fix mistakes quickly most often receive a warning first. This is general information, not legal advice.

    Common mistakes beginners make

    Mistakes to avoid when you ask “is cold email legal?”

    • Assuming one country’s rules apply everywhere. In fact, the recipient’s country decides the rules. A list that is fine in the US can break the law in Germany. Split your list by country first.
    • Emailing Germany or Austria like France or Ireland. Both need prior express consent for B2B email. Use LinkedIn, calls or content marketing there instead.
    • Buying a list. Above all, bought lists are the hardest addresses to defend: you cannot show where they came from or that anyone agreed to anything. Build your own list from the safest sources instead.
    • Using personal email addresses. Stick to work addresses published for business contact. Personal inboxes are off limits for cold outreach in almost every country.
    • Hiding who you are. First, a vague sender name looks like spam. Next, it breaks CAN-SPAM and GDPR’s disclosure rules. Say who you are in every email.
    • Writing a misleading subject line. If the subject promises something the email does not deliver, it is deceptive — and deceptive subject lines are banned under CAN-SPAM and treated as spam everywhere else.
    • Forgetting the postal address. CAN-SPAM requires a valid physical postal address in every commercial email. Add it to your signature once and it is there every time.
    • Ignoring opt-outs — or honouring them slowly. When someone says stop, stop the same day and add them to your suppression list. Slow opt-out handling is the most common reason regulators act.
    • Keeping addresses forever. Addresses go stale, people change jobs, and GDPR expects you to delete data you no longer need. Re-verify anything older than six months and delete the rest.
    • Treating the law as a one-time read. Rules change — the UK penalty ceiling rose in 2026, and penalty figures are adjusted for inflation. Re-check the country table every few months.

    Frequently asked questions

    Is cold email legal in the United States?

    Yes. Under the CAN-SPAM Act you can email US business contacts without prior consent, as long as you use honest headers and subject lines, identify yourself, include your postal address, and honour opt-outs within 10 business days. See the CAN-SPAM section above for the full list of rules.

    Is cold email legal in the EU under GDPR?

    Yes, in most EU countries, when you rely on legitimate interest under Article 6(1)(f), email only role-relevant work addresses, write down your legitimate interests assessment, tell recipients where you found their details, and stop immediately if they object. However, Germany and Austria generally require prior express consent, so do not cold email there without it.

    Is cold email legal in the UK?

    Yes, for corporate subscribers — limited companies, LLPs and similar bodies — without prior consent, as long as you identify yourself and give a working opt-out. Sole traders and ordinary partnerships need consent first under PECR, or the soft opt-in. If you cannot tell which type a business is, treat it as an individual subscriber.

    Is cold email legal in Canada?

    Only with consent. CASL is an opt-in law, but implied consent covers an existing business relationship and a work address conspicuously published for business contact, when your message is relevant to the person’s role. Bought lists and scraped addresses do not count. Every CASL email must also identify you and include an unsubscribe that works for at least 60 days.

    Do I need consent to send cold email?

    It depends on the country. The US needs no prior consent for B2B email. Across most of the EU, the UK, France and Ireland, you need a lawful basis — usually legitimate interest — rather than consent. Canada, Australia, Germany and Austria do need consent first, though Canada and Australia allow consent to be implied in the narrow cases explained above. When in doubt, ask for consent: it is the safest basis in every country.

    What happens if someone reports my cold email as spam?

    First, do not panic. One complaint does not bring a regulator to your door. Next, remove the person from your list the same day and add them to your suppression list. Then, check what went wrong: was the email relevant to them, was the subject line honest, and was the opt-out easy to find? Finally, fix the cause before you send again. Regulators act on patterns — repeated complaints, bought lists and ignored opt-outs — not on a single honest mistake that you fixed.

    Your next step

    By now you know the answer to “is cold email legal?” — yes, in most countries, when you follow a short checklist. Your next step is simple. First, save the 10-point checklist and run it against your next campaign before you send. Next, split your list by country and remove Germany and Austria from the cold email list until you have consent. Then, check that every email carries your name, your company, your postal address and a working unsubscribe link.

    After that, send a small batch — 50 relevant people is plenty — and watch the replies. Our Cold Email for Beginners: The Complete 2026 Guide walks through the whole system, from offer to first meeting, and our guide to getting email addresses shows how to build your list the safe way. You are in the right place — start with the checklist, and build from there. General information, not legal advice. Sending at large scale, or if you receive a regulator letter, speak to a lawyer.

    Keep reading — next in this series

    You know the rules now. Go deeper with the guides that go with this one:

    Best for beginners: InstantlyStart your first cold email campaign Visit Site →
  • How to Get Your First Email Addresses — the Safest Ways, in Order

    How to Get Your First Email Addresses — the Safest Ways, in Order

    Last updated: 15 November 2026. Written for complete beginners — no prior cold email experience needed.

    Every cold email starts with the same question: where do the addresses come from? It is a fair question, and it is the right one to ask first. After all, the list is the foundation of the whole campaign. A good list means your emails reach real people who might actually want what you offer. A bad list means bounces, spam complaints and a damaged sending reputation before you have even started. The good news is that learning how to get email addresses for cold email is simpler than it looks. You do not need a huge list, and you do not need an expensive database on day one. In fact, you need 50 to 200 real work addresses, found in the safest order, and verified before you send. This guide shows you that order, step by step.

    Our pick for beginners: start free, then scale

    Hunter for your first verified lookups on its free plan, Apollo when you also want a contact database and sending in one place. Compare all four finders in the table below — then build your first list of 50 to 200 people.

    Compare the finder tools See the safest order

    Quick Answer

    How to get email addresses for cold email, in one paragraph: start with the safest sources and work down the ladder. First, collect addresses people give you willingly through lead magnets and inbound content. Next, use your own network and past customers. Then, research people manually on LinkedIn and find their work email on the company website or with a finder tool. After that, use a licensed B2B database such as Apollo for scale. Finally, verify every address before you send, and record where and when you found each one. In short, never buy a bulk list and never scrape addresses in bulk — those are the fastest ways to ruin your deliverability and your reputation.

    Table of Contents

    How to get email addresses for cold email: the safest order

    Not all email addresses are equal. In fact, how you found an address matters almost as much as the address itself. An address someone gave you willingly is the safest kind there is. One you found on a public company website is also safe, because it was published for business contact. A licensed database is safe too, as long as the provider is reputable and the data is fresh. In contrast, an address from a bought list is risky, because you have no idea where it came from, how old it is, or whether the person ever agreed to be contacted. As a result, the safest way to build a list is to work down a ladder, from the safest source to the least safe, and to stop as soon as you have enough people.

    Why the order matters more than the tools

    For your first campaign, that means 50 to 200 people. In short, a small, accurate list beats a huge, doubtful one every time. First, 50 good addresses will teach you more about your offer than 5,000 bought ones. Next, every reply tells you something useful, while every bounce hurts your sender reputation. Finally, a small list keeps you honest: you have to choose people who genuinely fit, instead of emailing everyone and hoping. In addition, starting small costs almost nothing, because the safest sources in this guide are free or have a free plan.

    The safest-first ladder, in order: 1. Lead magnets & inbound  2. Your own network  3. Manual LinkedIn research  4. Licensed B2B databases  5. Publicly published work addresses. Avoid: bought lists and bulk scraping.

    Think of the ladder as a habit, not a one-time task. For example, every week you should add a few addresses from the top of the ladder before you reach for the lower rungs. As a result, your list gets safer over time, instead of riskier. However, if you ever feel tempted to skip ahead and buy a list, read the highest-risk section first. It explains exactly what goes wrong, and why the shortcut costs more than it saves.

    Before you collect a single email address for cold email

    When you are learning how to get email addresses for cold email, the first decision is who you are looking for. In practice, that means writing down your ideal customer in one or two sentences: the kind of company, the size, the location, and the job title of the person who feels the problem you solve. For example: “Operations managers at dental clinics in Dublin with 5 to 20 staff.” Next, that one sentence is your filter for everything that follows. If a person does not match it, they do not go on the list — however easy their address is to find.

    Set up your list sheet before you search

    After that, set up a simple place to keep your list. A spreadsheet is enough for your first 200 contacts. In addition, give it these columns from day one: first name, last name, company, job title, work email, source, and date found. The last two columns matter more than beginners expect. First, the source tells you where each address came from, so you can prove it was found safely. Next, the date tells you how fresh it is, so you can re-check old addresses before you use them. Finally, a list with sources and dates is a list you can trust — and a list you can defend if anyone ever asks where you got their address.

    Most importantly, decide your list size before you start collecting. Aim for 50 to 200 people for your first campaign, as we explain in our Cold Email for Beginners: The Complete 2026 Guide. In short, 50 is enough to learn from, and 200 is plenty to keep you busy for a week or two of sending. If you collect more than that before your first send, stop. In other words, you are collecting, not sending — and collecting feels productive while it quietly delays the real work.

    1. Lead magnets and inbound: addresses people give you

    The safest email address is one someone hands you themselves. That is what a lead magnet does. In short, a lead magnet is something useful you give away for free — a checklist, a template, a short guide, a calculator — in exchange for a work email address. For example, a cold email beginner could offer a one-page “first campaign checklist” on their site. A visitor who downloads it is telling you two things at once: they have the problem you solve, and they are happy to hear from you. As a result, these are the warmest addresses you will ever own.

    A visitor happily exchanging their work email for a useful downloadable guide and checklist on a laptop signup form
    A lead magnet in action: a visitor trades their work email for a useful checklist guide. The address arrives willingly, with the person’s interest already proven — the safest source on the ladder.

    How to set up your first lead magnet

    First, pick a magnet that solves one small, specific problem. Next, keep it short — a one-page checklist beats a 40-page ebook that nobody finishes. Then, put it behind a simple form on your website that asks for a first name and a work email, nothing more. After that, say clearly what the person will get, and what you will send them afterwards. For example: “Get the checklist, plus one short email a week with cold email tips. No spam, unsubscribe anytime.” In addition, that honesty is not just polite — it is the deal. People who know what they signed up for stay on your list and reply to your emails.

    However, lead magnets take time to work. A new website will not collect 200 addresses overnight. That is fine. In fact, even ten addresses from a lead magnet are worth more than a hundred bought ones, because those ten people asked to hear from you. Meanwhile, you can build the rest of your first list from the next rungs on the ladder. In the meantime, keep your magnet live and keep improving it: a better magnet collects better addresses, month after month, with no extra work from you. That is how to get email addresses for cold email without buying anything, and the addresses keep arriving while you focus on sending. If you want ideas for the form and the landing page itself, see our Best hub for the tools that handle forms and landing pages.

    What makes a good lead magnet

    • One problem, solved well. A checklist for one task beats a vague guide to everything.
    • Quick to use. If it takes more than ten minutes to get value from it, it is too long.
    • A match for your offer. The people who download it should be the same people you want to email.
    • Almost nothing asked in return. First name and work email only — every extra field loses signups.
    • Clear expectations. Say what emails will follow, and how often, right on the form.

    2. Your own network and past customers

    Your second-safest source is the people you already know. In fact, most beginners sit on a small list without realising it: past customers, past colleagues, people you met at events, suppliers, partners, and anyone who has emailed you first about your work. These people know who you are, so an email from you is not a surprise. As a result, they reply more often, and they forgive a clumsy first email far more easily than a stranger would.

    How to get email addresses for cold email from people you know

    First, open your inbox and your contacts and make a list of everyone who fits your ideal customer and who has had a real conversation with you. Next, add past customers first — even one-person businesses count — then people you have helped for free, then warm introductions you never followed up on. After that, ask yourself one honest question per name: would this person be surprised to hear from me? If the answer is no, they belong on the list. If the answer is yes, leave them off for now. In short, a warm list is small by nature, and that is exactly why it works.

    However, there is one rule: never add someone just because you have their address. For example, a supplier who sold you office chairs is not a prospect for your software, however friendly they are. In addition, never email a whole old list at once without checking it first. People change jobs, companies close, and addresses go stale. So verify every address from your network too — the verification section below shows how — and remove anyone who has asked you not to email them. Finally, if you are not sure someone wants to hear from you, ask them first. A short “mind if I send you something useful?” message takes thirty seconds and protects the relationship.

    3. Manual LinkedIn research: how to get email addresses for cold email by hand

    LinkedIn is where manual research shines. In practice, the method is simple: search LinkedIn for your ideal job title, industry and location, open the profiles that match, and note the person’s name and company. Then find their work email on the company website — the team page, the contact page, or a press release — or use an email finder tool to match the name to the company domain. For example, if you find “Sarah Byrne, Head of Sales at Bright Dental”, you now know exactly who to contact and why. In short, you are choosing people one by one, which is slow — and that slowness is the point.

    The manual LinkedIn workflow, step by step

    Manual LinkedIn research: a person comparing a professional profile page with a company website contact page, with a notebook checklist and magnifying glass
    Manual LinkedIn research, done properly: a profile on one side, the company website on the other, and a short checklist in a notebook. You pick each person by hand, then confirm their work email before they go on your list.

    First, use LinkedIn search filters: job title, industry, location and company size. Next, read each profile properly before you add the person — do they actually feel the problem you solve, or do they just share a job title? Then, check the company website for a published work email. Many companies list staff emails on team pages, and many founders list theirs on contact pages. After that, if the email is not published, use a finder tool: enter the person’s name and the company domain, and the tool returns the likely work address with a confidence score. Finally, record the source as “LinkedIn + company website” or “LinkedIn + Hunter” in your spreadsheet, with today’s date.

    Prefer to watch? Hunter’s official walkthrough shows the Email Finder in action — enter a name and a company domain, and it returns the verified work email:

    Video credit: Hunter’s official Email Finder walkthrough by Hunter on YouTube, embedded in Hunter’s own help centre guide to the Email Finder. This video is the property of its creator and is embedded here via YouTube for educational purposes. OutreachCompare is not affiliated with Hunter and does not claim ownership of this content.

    Manual research is slow — and that is the point

    A few honest limits apply. In the first place, manual research is slow: expect 10 to 20 good contacts per hour, not 200. In addition, LinkedIn limits how many profiles you can view and how many searches you can run without a paid plan, so spread the work across a few days. However, that pace is a feature, not a flaw. Each person you add has been chosen by a human — you — for a real reason. As a result, your emails will be more relevant, your replies will be warmer, and your bounce rate will stay low. For example, a list of 100 hand-picked LinkedIn contacts will usually outperform a bought list of 5,000 on every metric that matters.

    4. Licensed B2B databases: how to get email addresses for cold email at scale

    When you need more than manual research can provide, licensed B2B databases are the next rung down. In short, these are companies that collect, check and license business contact data — names, job titles, companies and work emails — and let you search it with filters. For example, you can search for “marketing managers at software companies with 11 to 50 staff in Ireland” and get a list of matching people. The best-known option for beginners is Apollo, which combines a large contact database with email sequences in one tool. In addition, tools such as Hunter and Snov.io also offer searchable databases alongside their finders.

    How to get email addresses for cold email with a database

    First, pick one database and learn its filters properly, instead of opening accounts at five tools at once. Next, build a tight search: one industry, one company size band, one or two job titles, and one location. Then, look at the first 20 results by hand before you export anything. Are these really your ideal customers? If half of them are not, tighten the filters. After that, export only the people who fit, and verify the list before you send — even licensed data goes stale, because people change jobs every day. Finally, keep your exports small: 50 to 100 at a time is plenty for a beginner campaign.

    Watch Apollo’s finder in action

    Watch how it works: Apollo’s official guide walks through finding an email address for free, including its Chrome extension:

    Video credit: “How to Find an Email Address (for free) with Apollo” by Apollo on YouTube, embedded in Apollo’s own guide to its email finder. This video is the property of its creator and is embedded here via YouTube for educational purposes. OutreachCompare is not affiliated with Apollo and does not claim ownership of this content.

    However, databases have limits you should know about. In the first place, no database is perfectly accurate — Apollo itself describes its data as verified, but job changes and old records still slip through, so verification is never optional. In addition, most databases run on credits: revealing an email costs credits, and credits run out faster than beginners expect, especially for phone numbers. As a result, start on a free plan and test the data on your own ideal customers before you pay anything. If the data is wrong for your niche, you will know within a day — and you will have spent nothing. Compare the main database options in full on our Best B2B Data Providers hub.

    Email finder tools compared: how to get email addresses for cold email faster

    At this stage, you need one finder tool, not five. To help you choose, here are four finder tools that beginners actually use, ranked for a first list. Each one finds work emails a different way, and each one has a free way to start. Compare them in full on our Best B2B Data Providers hub, and on our Best Email Verification Tools hub for the verification side.

    #ToolKey strengthsStarting point
    1Hunter
    ★ Best for: Beginners
    Best for beginners: simple finder with verification built in.
    ✓ Domain Search and Email Finder
    ✓ Every email verified before you see it
    Free plan — 50 credits a monthVisit Site →Check the site for current pricing & trial
    2Apollo
    ★ Best for: Data + sending
    Best if you also need a database and sending in one place.
    ✓ Large searchable B2B database
    ✓ Free Chrome extension, sequences built in
    Free plan availableVisit Site →Check the site for current pricing & trial
    3Findymail
    ★ Best for: Low bounces
    Best for keeping bounce rates low.
    ✓ Find and verify in one step
    ✓ Catch-all verification, under-5% bounce guarantee
    10 free credits, no cardVisit Site →Check the site for current pricing & trial
    4Snov.io
    ★ Best for: All-in-one
    Best for finder, verification, warmup and sending in one account.
    ✓ Email Finder plus 7-tier verifier
    ✓ Warmup and drip campaigns included
    Free Trial — 50 credits a monthVisit Site →Check the site for current pricing & trial

    Last checked: 15 November 2026. Features checked on the providers’ official sites: Hunter, Apollo, Findymail and Snov.io. Features and pricing can change, so please check the provider’s site before you buy. We do not guess at features, prices or trials.

    Our verdict for first-time list builders

    Our verdict — Best for beginners: Hunter for the simplest start on a free plan, Apollo if you also want a contact database and sending in one tool, Findymail if low bounces matter most to you, Snov.io if you want warmup included. Finally, start with one finder, then add verification — see Best Email Verification Tools and Best Warmup Tools. We have not scored these tools yet — scores come only after hands-on testing. “Best for” labels reflect each tool’s stated focus.

    Quick comparison at a glance

    Same four tools, one view — so you can see at a glance which ones find by domain, which verify as they find, and which bundle sending as well.

    FeatureHunterApolloFindymailSnov.io
    Find by name + company✓✓✓✓
    Domain search (everyone at a company)✓✓—✓
    Bulk find from a list✓✓✓✓
    Verification built into finding✓✓✓✓
    Chrome extension✓✓✓✓
    Searchable contact database✓✓—✓
    Cold email sending built in✓✓—✓
    Free plan or trial✓✓✓✓

    ✓ = feature stated on the provider’s site or in its official video. — = not confirmed for this tool — check the provider’s site before you buy. We do not guess at features, prices or trials. Last checked: 15 November 2026.

    The highest-risk ways to get email addresses for cold email

    Buying an email list feels like a shortcut. In reality, it is the most expensive mistake a beginner can make. First, bought lists are usually old. People change jobs, companies close, and addresses go stale fast — a list that was fresh a year ago can bounce on a third of its addresses today. Next, bought lists are full of people who never agreed to hear from you. As a result, they mark your emails as spam, complain, or simply ignore you. In addition, bought lists often contain spam traps: addresses that exist only to catch senders who email lists they should not have. Finally, one spam trap hit can damage your sending reputation for weeks.

    Scraping addresses in bulk is just as risky. In short, scraping means automatically harvesting addresses from websites, directories or social profiles without permission. First, scraped addresses are often personal, out of date, or published for a different purpose entirely. Next, scraping at scale breaks the terms of most websites, and it breaks trust with the people you contact. As a result, your emails look like spam — because, frankly, that is how they were collected. However, there is a clear line here: finding one work email that a company published on its own website is normal research. Harvesting ten thousand addresses with a bot is not. If you are ever unsure which side of the line you are on, ask this: would I be comfortable explaining to this person, in my first email, exactly where I found their address? If the answer is no, do not email them.

    Why bought lists hurt your deliverability

    Most importantly, the damage from a bad list is not theoretical. High bounces tell Gmail and Outlook that you do not know your recipients. Spam complaints tell them your recipients do not want your emails. Together, they push your future emails — including the good ones — into spam folders. In contrast, a small list built the safe way keeps your bounce rate under 2%, which is the healthy target we explain in our beginner’s guide. In short, the shortcut costs you the very thing you were trying to build: a sender reputation you can rely on. That is why buying lists and scraping sit at the very bottom of how to get email addresses for cold email — they are the rungs to avoid, not the rungs to start on.

    Verify every address before you send

    Verification is the step beginners skip most — and the step that matters most. In short, verification means checking that an email address is real, deliverable, and safe to send to, before you ever send to it. That check is the final step of how to get email addresses for cold email safely: no address joins your sending list until it passes. First, a verifier checks the syntax and the domain. Next, it checks the mail server and whether the mailbox exists. Then, it flags catch-all domains, where the server accepts everything and the address cannot be confirmed. Finally, it gives you a simple result: valid, invalid, risky, or unknown. In addition, many finder tools verify as they find, so the addresses you get back are already checked. However, addresses from any other source — your network, a website, a spreadsheet — still need a separate check.

    Email list verification: a screen showing a list of addresses with green verified ticks and a shield, while one red invalid address is removed before sending
    Verification before sending: most addresses pass with green ticks, and the one bad address is removed before it can bounce. Run this check on every list, every time — it is what keeps your bounce rate under 2%.

    Verify, then send — every time

    First, run your whole list through a verifier before your first send. Next, remove every address marked invalid, and treat risky and catch-all addresses with care: either leave them out of your first campaign, or email them only in a small test batch. Then, re-verify any list you have not used in three to six months, because addresses go stale while they sit. After that, keep your bounce rate under 2% — if it climbs above that, stop sending and clean the list again. Finally, remember that verification is not a one-time job. It is a habit, like the ladder itself, and it protects every campaign you will ever send. Compare dedicated verifiers on our Best Email Verification Tools hub.

    Record the source and date for every address

    A list without sources is a list you cannot trust. First, recording the source and date for every address takes seconds when you collect it, and hours to reconstruct later. Next, it answers the three questions that matter: where did this address come from, when did I find it, and is it still fresh? After that, it helps you in practical ways too. For example, if your bounce rate rises, you can check which source the bounces came from — and stop using that source. In addition, if someone asks where you got their address, you can answer honestly and precisely. Finally, under data protection rules in the EU and UK, being able to say where you got an address is part of showing you handled it properly.

    NameCompanyWork emailSourceDate found
    Sarah ByrneBright Dentalsarah@brightdental.exampleLead magnet download10 Nov 2026
    Tom KellyNorthside Clinictom@northsideclinic.exampleLinkedIn + company website12 Nov 2026
    Ana RuizHarbour Physioana@harbourphysio.exampleApollo database14 Nov 2026

    Example rows only — the addresses above are illustrative, not real people. Your own sheet should use the same five columns for every contact you collect.

    Five columns are enough

    Keep the system simple so you actually use it. In practice, five columns are enough: name, company, work email, source, and date found. First, write the source in plain words — “lead magnet”, “LinkedIn + company website”, “Apollo database”, “past customer” — not a code you will forget. Next, add the date you found the address, not the date you plan to email them. Then, add a short note if the source needs explaining, such as which lead magnet they downloaded. Finally, review the sheet every month: remove anyone who asked to be removed, re-verify anything older than six months, and delete addresses you no longer have a reason to keep. As a result, your list stays small, fresh and honest — and every address in it is one you can stand behind.

    How to get email addresses for cold email legally

    Cold email to businesses is legal in most countries when you follow a short checklist — and how you got the address is part of that checklist. In the US, CAN-SPAM requires honest subject lines and headers, your postal address in the email, and an opt-out honoured within 10 business days. See the FTC CAN-SPAM compliance guide. For the EU and UK, most B2B cold email relies on legitimate interest under GDPR: the contact must be relevant to your offer, and you must be able to say where you got their details. In addition, Canada’s CASL is consent-first, with implied consent for existing relationships and for work addresses published for business contact. However, Germany and Austria are stricter, and generally require prior express consent — so use LinkedIn, calls or content marketing there instead.

    Why the safe ladder is also the compliant one

    In short, the safest-first ladder in this guide is also the most compliant way to build a list. First, addresses people gave you come with consent built in. Next, published work addresses and licensed database contacts fit the legitimate-interest model, as long as the person is relevant and you say where you found them. In contrast, bought lists are the hardest to defend, because you cannot show where the addresses came from or that the people agreed to anything. As a result, if you follow the ladder, keep your sources recorded, and honour every opt-out immediately, you are already doing most of what the law asks. General information, not legal advice. Sending at large scale, or if you receive a regulator letter, speak to a lawyer. Read the full checklist on our Is Cold Email Legal? page.

    Common mistakes beginners make

    Mistakes to avoid when you get email addresses for cold email

    • Buying a list to save time. In fact, bought lists bounce, complain and damage your sender reputation. Start with 50 to 200 addresses from the safe sources above.
    • Collecting without a filter. If you have not written down your ideal customer, every address looks like a good one. First, define who you want. Next, collect only those people.
    • Skipping verification. Above all, verify every address before you send, even ones from your own network. An unverified list is a bounce waiting to happen.
    • Forgetting to record the source. A list with no sources cannot be cleaned, defended or trusted. Record the source and date for every address, the day you find it.
    • Scraping in bulk. Harvesting thousands of addresses with a bot is not research. It is the fastest way to look like spam, and to be treated like it.
    • Using personal addresses. Stick to work emails published for business contact. Personal inboxes are off limits for cold outreach.
    • Keeping old lists forever. Addresses go stale in months. Re-verify anything older than six months, and delete what you no longer need.
    • Ignoring opt-outs. When someone says stop, stop the same day, and add them to a suppression list so they never hear from you again.

    Frequently asked questions

    How to get email addresses for cold email without buying a list?

    Work down the safest-first ladder: lead magnets and inbound first, then your own network, then manual LinkedIn research, then a licensed B2B database such as Apollo. In short, you can build a first list of 50 to 200 verified work addresses without buying anything — and that list will perform better than any bought list.

    How many email addresses do I need to start cold email?

    Start with 50 to 200 people. In fact, 50 good addresses are enough to learn from, and 200 will keep you busy for a week or two of sending. A small, accurate list beats a huge, doubtful one every time.

    Is it legal to find someone’s work email on LinkedIn?

    Yes, in most countries, when you use it for relevant B2B outreach. First, find the person on LinkedIn. Next, get their work email from the company website or a finder tool. Then, say who you are and where you found them in your first email, and honour any opt-out immediately. However, rules vary by country — Germany and Austria generally require prior consent. See our Is Cold Email Legal? page.

    Should I verify email addresses before sending?

    Yes — always. Verification checks that an address is real and deliverable before you send, and it keeps your bounce rate under 2%. In addition, re-verify any list you have not used in three to six months, because addresses go stale while they sit. Compare verifiers on our Best Email Verification Tools hub.

    What is the safest way to get email addresses for cold email?

    The safest way is a lead magnet: someone gives you their work email in exchange for something useful, such as a checklist or a template. After that, your own network comes next, then manual LinkedIn research, then a licensed database. Buying lists and bulk scraping are the least safe ways, and the ones to avoid.

    Which email finder should a beginner start with?

    For cold email beginners, Hunter is the simplest start, with a free plan and verification built in. Apollo is best if you also want a contact database and sending in one tool, Findymail is best for low bounces, and Snov.io is best if you want warmup included. Compare all four in the finder tools table above.

    Your next step

    By now, you know how to get email addresses for cold email the safe way: start at the top of the ladder, work down one rung at a time, verify everything, and write down where each address came from. Your next step is simple. First, write down your ideal customer in one sentence. Next, build your first list of 50 people from the safest sources above. Then, verify the list, set up your sending domain, and send your first short emails. Our Cold Email for Beginners: The Complete 2026 Guide walks through the whole system, from offer to first meeting. You are in the right place — start with one rung, and build from there.

    Keep reading — next in this series

    You know where addresses come from now. Go deeper with the guides that follow it:

    Best for beginners: HunterFind your first verified emails free Visit Site →
  • Cold Email for Beginners: The Complete 2026 Guide

    Cold Email for Beginners: The Complete 2026 Guide

    Last updated: 15 November 2026. Written for complete beginners — no prior cold email experience needed.

    For cold email beginners, the first email is the hardest part — and it gets much easier after that. Cold email sounds intimidating when you have never sent one. It is not. It is a short, honest email to a person you have never met, offering something that could genuinely help their business — and asking for a short reply. Thousands of startups, agencies and solo founders use it every day to win first customers and book first meetings. If you are starting from zero, you are in exactly the right place.

    Our pick for beginners: start simple, then scale

    Woodpecker or Mailshake for the simplest first campaign, Instantly when you are ready for high volume, Apollo if you also need to find contacts. Compare all six in the table below — then pick one and send your first 25 emails.

    Compare the best tools Jump to the comparison table

    Quick Answer

    Cold email for beginners, in one paragraph: first, pick a clear offer and a narrow group of people who need it, find their work addresses from safe, public sources, set up a separate sending domain with SPF, DKIM and DMARC, warm it up for two to four weeks, verify every address, then send short emails — 60 to 120 words, one clear ask — to 25 to 30 people a day per mailbox, follow up three or four times, and measure replies, not opens. In most cases, most beginners see first meetings within four to six weeks.

    Table of Contents

    What cold email is (and isn’t)

    In short, cold email is an unsolicited business email sent to someone you have no prior relationship with, for a legitimate business reason. The word “cold” describes the relationship, not the tone. Above all, a good cold email is warm, short and relevant. It is not spam. In contrast, spam is bulk, irrelevant, misleading email sent to huge lists with no thought for the recipient. Cold email, done properly, is the opposite: small lists, carefully chosen recipients, a real offer, and an easy way to opt out. In other words, you are contacting a business person, at their work address, about something related to their work — a normal, widely used part of B2B sales.

    Who cold email is for — and who should not use it

    For example, cold email works best if you sell to businesses, not consumers. It is ideal for founders and solo senders, agencies, B2B software companies and consultants — anyone whose customers are easy to identify by job title, industry or company size. For example, if you can name the 100 companies that would benefit most, it is probably a good fit.

    How cold email works, end to end

    In practice, the whole process has seven steps, in order: define your offer and ideal customer; build a small list; set up a separate sending domain and mailbox; warm that domain up; verify every address; write and send short emails, then follow up; read the replies, learn what works, and scale it.

    In short, that is the entire system — no secret step, and no expensive software needed to begin.

    The 7 steps, in order: 1. Offer & ideal customer  2. Small list (50–200)  3. Separate sending domain  4. Warmup (2–4 weeks)  5. Verify every address  6. Send short emails + follow-ups  7. Measure replies, learn, scale.

    Your first week as a cold email beginner

    For cold email beginners, a one-week plan beats a perfect plan. First, spend Monday on your offer and your ideal customer — one sentence each, written down, not in your head. Next, on Tuesday, build your list of 50 to 200 people from the safest sources above, and check every address against the company website. Then, on Wednesday, buy your sending domain, set up SPF, DKIM and DMARC, and start the warmup the same day.

    After that, use Thursday to write your first email and two follow-ups, and ask a friend to read them out loud — if they sound stiff, rewrite them in plain words. Finally, on Friday, send your first 25 emails, then stop and read every reply carefully.

    As a result, by the end of week one you will know three useful things: whether your offer makes sense to real people, which subject lines get opened, and what your first replies actually ask for. In addition, you will have a warmup running, a clean list, and a sending domain that is getting safer every day.

    However, do not rush the warmup to send more in week one — a new domain that suddenly sends hundreds of emails looks like spam, and that is exactly what you are trying to avoid. For example, if your warmup tool suggests 10 emails on day one, trust it, even if 10 feels slow. In short, week one is for learning, not for volume. Most cold email beginners who follow this order book their first meeting in week three or four, once the warmup has finished and the follow-ups have had time to work.

    Your offer and your ideal customer

    Before you write a single email, first answer two questions in one sentence each: what do you offer, and who is it for? For example: “We help dental clinics in Dublin fill empty appointment slots with Google Ads.” For example, vague offers — “we help businesses grow” — do not work, because nobody can tell if it applies to them.

    Next, your ideal customer profile has two layers: the company — industry, size, location and a trigger, like hiring a sales rep — and the person, the job title who feels the problem and can say yes, usually a founder, head of sales or marketing manager. As a result, a narrow list that fits beats a huge list that does not.

    Getting your first email addresses

    To begin with, aim for 50 to 200 people for your first campaign. In short, a small, accurate list is safer and more effective.

    Safest ways to get email addresses, in order

    1. Your own network and customers. People you already know and past clients — your warmest contacts.
    2. Lead magnets and inbound. A useful guide or checklist on your site that visitors exchange for their work email.
    3. Manual LinkedIn research. Search for your ideal job title and industry, and find the work email publicly listed on the company website.
    4. Licensed B2B databases. Tools such as Apollo let you search verified business contacts from a reputable provider.
    5. Publicly published work addresses. Addresses shown on a company website or speaker page for business contact.

    Avoid buying bulk email lists and avoid scraping addresses in bulk. In fact, bought lists are usually old and inaccurate, which hurts your deliverability and reputation. Start with the safe sources above — more than enough for your first 200 contacts. Read more in our Best B2B Data Providers hub.

    Setting up a sending domain: SPF, DKIM, DMARC and warmup

    Most importantly, never send cold email from your main business domain. Buy a similar, separate sending domain — for example, yourcompany.co if your site is yourcompany.com — and send only cold email from it. As a result, if anything goes wrong with deliverability, your main domain and regular email stay safe.

    Then set up three small technical records on that sending domain. At first, they sound technical, but your domain provider or your sending tool will walk you through them, and they take about 20 minutes in total. SPF says which servers are allowed to send email for your domain. DKIM adds a digital signature proving the email really came from you. DMARC tells receiving servers what to do if an email fails those checks. Together, they are the ID badge that tells Gmail and Outlook you are a real sender, not an impersonator.

    Sending domain setup for cold email: SPF, DKIM and DMARC authentication protecting your domain
    SPF, DKIM and DMARC are your domain’s ID badge. SPF lists the servers allowed to send for you, DKIM signs each email to prove it really came from you, and DMARC tells Gmail and Outlook what to do with anything that fails those checks. Set all three up before you send a single cold email.

    Warm up your new domain

    Finally, warm the domain up before you send to real prospects. Your warmup tool sends a small number of emails each day, gradually increasing over two to four weeks, while other warmup inboxes open and reply. See our Best Warmup Tools hub.

    A typical ramp looks like this: a handful of emails a day in week one, roughly double that in week two as replies come back, and your normal daily volume by weeks three to four. If open and reply rates look healthy and nothing lands in spam, you are ready to send to real prospects. If anything looks off, slow down — a domain that gets flagged early is much harder to fix than one you warmed up patiently.

    Cold email warmup timeline: gradually increasing sending volume over two to four weeks
    Warmup, week by week: start with just a few emails a day in week one, build steadily in week two, and reach your normal daily volume by weeks three to four. The rising envelopes show the ramp — never rush a new domain.

    Prefer to watch? Instantly’s official beginner tutorial walks through this exact setup — separate domain, warmup and SPF, DKIM and DMARC — live on screen:

    Video credit: “The BEST Cold Email Tutorial For Beginners in 2026” by Instantly on YouTube. This video is the property of its creator and is embedded here via YouTube for educational purposes. OutreachCompare is not affiliated with Instantly and does not claim ownership of this content.

    Writing your first email

    Above all, a good first cold email is short: 60 to 120 words, in plain language, written as if to one person — because it is. As a rule, long emails do not get read.

    • Subject line: short, specific and honest — for example, “Quick question about [their company]”. No clickbait or “Re:” tricks.
    • First line: a real observation about their company — a recent hire, a new product, or an industry problem.
    • One sentence on what you do: the outcome, not a feature list. “We help clinics like yours fill empty slots” beats a paragraph about your software.
    • One sentence of proof: a result or a number, if you have one. If not, skip it — do not invent one.
    • One clear ask: “Open to a 10-minute call on Tuesday?” One ask, not three.
    • Sign-off: your first name, your company, and a one-line opt-out.

    Personalisation means one genuine, specific line at the top that could only apply to them, on top of a clear template for the rest.

    Watch how the pros write it: Y Combinator’s Startup School episode on writing cold emails that convert — short, specific and easy to reply to:

    Video credit: “How To Convert Customers With Cold Emails” by Y Combinator Startup School on YouTube. This video is the property of its creator and is embedded here via YouTube for educational purposes. OutreachCompare is not affiliated with Y Combinator and does not claim ownership of this content.

    Here is the anatomy of that email, part by part — use it as a checklist before you hit send:

    Anatomy of a first cold email for beginners: subject line, greeting, short message and call to action
    Anatomy of a first cold email: a short, specific subject line at the top, one personal opening line, one sentence on the outcome you offer, one line of proof if you have it, and a single clear ask at the end — 60 to 120 words in total.

    A worked example, start to finish

    Here is a complete first email a cold email beginner could actually send. First, notice how short it is — 78 words — and how every line earns its place. Next, notice the one personal line at the top, the one outcome in the middle, and the one clear ask at the end.

    Subject: Quick question about [Clinic Name]

    Hi Sarah,

    I noticed [Clinic Name] has two empty Tuesday slots most weeks, and you are hiring a receptionist — so I guessed filling the diary is on your mind.

    We help dental clinics in Dublin fill empty appointment slots with Google Ads. One clinic added 11 bookings in its first month.

    Open to a 10-minute call on Tuesday to see if it would work for you?

    Thanks,
    Matthew, OutreachCompare
    Not interested? Reply “stop” and I will not email again.

    Why does this work? For example, the subject line is honest and specific, so it does not feel like a trick. In addition, the first line proves the sender looked at this clinic, not a list of ten thousand. As a result, the reader knows in seconds what is offered, what proof exists, and what to do next. However, the proof line only works if it is true — never invent a number, a client or a result. If you have no proof yet, simply leave that sentence out; a short, honest email beats a long, invented one every time.

    A cold email beginner’s pre-send checklist

    Before you press send, run through this list. First, is the email under 120 words? Next, does it name one real thing about this person or company? Then, is there exactly one ask — not two or three? After that, check the subject line: would you open it yourself? Finally, does the email include your name, your company and an easy opt-out? If any answer is no, fix that one thing before sending. In short, this two-minute check catches most beginner mistakes, and it is the habit that separates cold email beginners who get replies from those who get ignored.

    Sending limits and follow-ups

    To stay safe, start small: 25 to 30 emails per mailbox per day, never more than 40. Instead, to send more, add another mailbox on the same sending domain, rather than pushing one mailbox harder.

    In fact, most replies come from follow-ups, not the first email, so plan three or four: day 0, the first email; day 3, a short bump; day 7, a new angle or useful link; day 12–14, a final check-in; day 19–20, a polite close. In addition, each follow-up should add something new, and always stop immediately if someone asks you to stop.

    What to do when someone replies

    Replies are the whole point, so handle them well. First, answer the same day — a reply that waits three days goes cold, and a fast answer shows you are a real person who cares. Next, sort replies into three piles: interested, not now, and not interested. When someone is interested, offer two specific times for a short call, and keep the call to 10 or 15 minutes. When the answer is “not now”, thank them, ask when a better time would be, and note it down — then stop emailing until then. When the answer is no, thank them politely and add them to your suppression list immediately, so they never hear from you again.

    In addition, watch for the replies that are not replies at all: out-of-office messages, wrong-person forwards, and “please contact my colleague” notes are all useful, because they tell you who the right person is. As a result, every reply — even a no — makes your list better. However, never argue with someone who opts out, and never email them again to ask why. Finally, keep a simple note of what worked: which subject lines, first lines and offers got the warmest replies, and use more of those next week. That is how cold email beginners improve fast — not by sending more, but by learning from every reply.

    Measuring success

    Once you start sending, measure what matters, and ignore vanity numbers. For example, opens are unreliable since Apple Mail Privacy Protection, so do not optimise for opens alone. Instead, watch these.

    MetricHealthy target
    Bounce rateUnder 2%
    Spam complaint rateUnder 0.1%, never above 0.3%
    Reply rateAround 3% on average
    Positive reply rate1–3%
    Meetings booked2–3 per 100 emails sent

    High bounces mean your list needs verifying. High spam complaints mean your targeting is too broad. Low replies mean your offer or first line needs work — change one thing at a time and compare.

    Yes — cold email to businesses is a normal, widely used practice, and it is legal in most countries when you follow a short checklist. In other words, the rules stop spam and protect people, not you contacting a business about something relevant.

    • Contact the right person, for a relevant reason — a work email and a role that matches your offer.
    • Next, say who you are. Your real name, your company, and how you found them, in the first email.
    • Then, give an easy opt-out in every email — and honour it the same day, by adding them to a suppression list.
    • Keep data minimal and fresh, and remove people who ask to be removed.
    • In the US, follow CAN-SPAM: honest subject lines and headers, your postal address, and an opt-out honoured within 10 business days. See the FTC CAN-SPAM compliance guide.
    • For the EU and UK, most B2B cold email relies on legitimate interest under GDPR — document why the contact is relevant, and tell them where you got their details.
    • Canada, by contrast, CASL is consent-first, with implied consent for existing relationships and for work addresses published for business contact.
    • Germany and Austria are stricter: prior express consent is generally required, so use LinkedIn, calls or content marketing there instead.

    General information, not legal advice. Sending at large scale, or if you receive a regulator letter, speak to a lawyer. See our Is Cold Email Legal? page.

    Best tools to start with

    At this stage, you do not need the most expensive tool — you need one that is easy to use, sends reliably, and grows with you. To help you choose, here are six starter tools, ranked for a first campaign. Compare them in full on our Best Cold Email Software hub.

    #ToolKey strengthsStarting point
    1Instantly
    ★ Best for: High-volume sending
    Best for high-volume sending from unlimited mailboxes.
    ✓ Deliverability and inbox rotation
    ✓ Unlimited mailboxes and warmup built in
    14-day free trial Visit Site →Check the site for current pricing & trial
    2Smartlead
    ★ Best for: Agencies & scale
    Best for agencies and teams sending at scale.
    ✓ Deliverability-first sending
    ✓ Multi-client workspaces, Smart Prospect lead data
    14-day free trial Visit Site →Check the site for current pricing & trial
    3Lemlist
    ★ Best for: Personalised outreach
    Best for personalised, multichannel outreach.
    ✓ Images, video and LinkedIn steps
    ✓ lemwarm warmup and 650M+ contact database
    14-day free trial Visit Site →Check the site for current pricing & trial
    4Woodpecker
    ★ Best for: Simple & reliable
    Best for a simple, reliable first campaign.
    ✓ Low learning curve
    ✓ Deliverability checks and smart follow-ups
    14-day free trial Visit Site →Check the site for current pricing & trial
    5Apollo
    ★ Best for: Data + sending
    Best if you also need to find contacts.
    ✓ Built-in B2B database
    ✓ Data and sending in one tool
    Free plan available Visit Site →Check the site for current pricing & trial
    6Mailshake
    ★ Best for: Simple sequences
    Best for simple sequences and A/B testing.
    ✓ Easy sequences
    ✓ A/B testing and reply handling
    No free trial Visit Site →Check the site for current pricing & trial

    Last checked: 15 November 2026. The trial and starting-point details above come from each provider’s official pricing page — see the linked source note under the feature matrix below. Features and pricing can change, so please check the provider’s site before you buy.

    Our verdict for cold email beginners

    Our verdict — Best for beginners: Woodpecker or Mailshake for the simplest start, Instantly for high-volume sending, Apollo if you also need to find contacts. Finally, start with one tool, then add verification and warmup — see Best Email Verification Tools, Best Warmup Tools and Comparisons. We have not scored these tools yet — scores come only after hands-on testing. “Best for” labels reflect each tool’s stated focus.

    Quick comparison at a glance

    Same six tools, one view — so you can see at a glance which ones bundle warmup, multichannel steps or a contact database, and which keep it simple.

    FeatureInstantlySmartleadLemlistWoodpeckerApolloMailshake
    Cold email sending✓✓✓✓✓✓
    Built-in warmup✓✓✓✓✓✓
    Multichannel (email + LinkedIn / calls)—✓✓✓✓—
    Built-in B2B data / lead finder✓✓✓✓✓✓
    Free trial or free plan✓✓✓✓✓—

    Last checked: 15 November 2026. The features and trial information in this table are based on what we found on each provider’s official website on that date — Instantly, Smartlead, Lemlist, Woodpecker, Apollo, Mailshake. Features and pricing can change, so please check the provider’s site before you buy. ✓ = the feature is stated on the provider’s site (some features only on certain plans — see the notes below). — = not confirmed for this tool. We do not guess at features, prices or trials.

    Plan notes, so the ticks above are not overstated: Instantly’s 450M+ lead database is a separate Credits/bundle plan, not the base Outreach plan, and Instantly is email-only (no LinkedIn or call steps). Smartlead’s LinkedIn steps run via HeyReach/Aimfox integrations and calls via the SmartDialer add-on; its verified prospect emails are free on Unlimited plans and a $59/month add-on on Base/Pro. Lemlist’s LinkedIn, SMS and calling need the Multichannel plan. Woodpecker’s LinkedIn steps need the Multichannel or LinkedIn plan, and it includes 100 Lead Finder credits. Apollo’s warmup is on paid plans (1 mailbox included); its LinkedIn steps are manual tasks and its dialer is on Professional. Mailshake has no free trial — payment is collected upfront; its LinkedIn tasks are manual, and Data Finder credits are plan-limited.

    Common mistakes beginners make

    • Sending from your main domain. Always use a separate sending domain. After all, your main domain is too valuable to risk.
    • Skipping warmup. In fact, a new domain needs two to four weeks of warmup, or your emails will land in spam.
    • Buying a huge list. Start with 50 to 200 verified contacts. In the end, quality beats quantity, every time.
    • Writing long emails. For instance, if it is over 120 words, cut it in half.
    • Only sending once. Most replies come from follow-ups. Instead, plan three or four, each adding something new.
    • Optimising for opens. Optimise for replies and meetings instead.
    • Ignoring replies. Above all, answer fast, and stop emailing anyone who opts out — immediately.

    Frequently asked questions

    Is cold email legal for beginners?

    Yes, in most countries, when you follow a short checklist: contact a relevant business person, say who you are, give an easy opt-out, and honour it immediately. However, rules vary by country — Germany and Austria generally require prior consent. See our Is Cold Email Legal? page.

    How many cold emails should I send per day?

    Start with 25 to 30 per mailbox per day, never more than 40. To send more, add another mailbox.

    Do I need a separate domain for cold email?

    Yes. Use a separate sending domain with SPF, DKIM and DMARC, and warm it for two to four weeks.

    How long does cold email take to work?

    In most cases, most beginners see first meetings within four to six weeks, including warmup. Expect 2 to 3 meetings per 100 emails sent as a healthy start.

    What is a good reply rate for cold email?

    As a guide, around 3% reply rate, with 1 to 3% positive replies, is healthy. Focus on positive replies and meetings, not opens.

    Which cold email tool should a beginner start with?

    For cold email beginners, Woodpecker or Mailshake is the simplest start, Instantly is best for high volume, and Apollo if you also need contacts. Compare them in our Best Cold Email Software hub.

    Prefer video?

    Two videos are embedded in this guide: Instantly’s official beginner tutorial in the sending domain section and Y Combinator’s Startup School episode in the writing section. Both were verified on 15 November 2026. Both videos belong to their creators and are embedded via YouTube with credit beneath each one; OutreachCompare does not claim ownership of them.

    Your next step

    By now, you know the whole system. Work through it in order: start with our Start Here hub, then How Cold Email Works, then compare tools on Best and Best Cold Email Software, and read individual tool write-ups in Reviews. Our Guides hub has templates and more. You are in the right place.

    Keep reading — next in this series

    You have the beginner system now. Go deeper with the guides that follow it:

    Best for beginners: InstantlyStart your first cold email campaign Visit Site →
  • Hello world!

    Welcome to WordPress. This is your first post. Edit or delete it, then start writing!

OutreachCompare

Compare B2B email outreach tools — cold email, deliverability, data and verification, tested and ranked for startups, agencies and enterprises.

Compare B2B email outreach tools — cold email, deliverability, data and verification, tested and ranked for startups, agencies and enterprises.

© 2026 OutreachCompare. All rights reserved.

Designed with WordPress