Author: OutreachCompare Team

  • Inbox Placement Guide 2026

    Inbox Placement Guide 2026

    Delivered is not the same as seen. Placement is the whole game.

    This inbox placement guide shows how to get cold emails into the primary inbox instead of spam, promotions, or nowhere at all: authentication done properly, a warmup that builds real trust, a clean list, content that reads like a person wrote it, and placement tests that tell you the truth before your prospects do.

    Visit Smartlead →Explore Warmforge →See Instantly →

    Prices checked 16 November 2026 on the official sites of all seven providers. Features and pricing can change, so please check the provider’s site before you buy. We do not guess at features, prices or trials.

    Quick Answer

    Inbox placement is the share of your sent emails that land in the recipient’s primary inbox, rather than in spam, the promotions tab, or nowhere at all, and it matters more than your open rate because an email in spam reaches no reader, earns no reply, and wastes the send. Five things decide placement, working together: authentication, sender reputation, engagement, content, and list quality.

    Start with a separate sending domain, publish SPF, DKIM and DMARC, warm the domain for two to four weeks, keep bounces under 2% and spam complaints under 0.1%, cap each mailbox at 25 to 30 sends a day, and test placement every week. Smartlead SmartDelivery is the best pick for placement testing from $49 a month, Warmforge is the best pick for dedicated warmup from $10 a slot a month, and Instantly is the best pick for warmup built into a sending tool from $47 a month.

    Why this inbox placement guide starts with a number nobody shows you

    Firstly, most cold email advice obsesses over open rate, and that focus is understandable. Opens are visible in every dashboard, they move when you change a subject line, and they feel like progress. Yet the open rate only counts the emails that reached a folder where opening is possible. An email that lands in spam never reaches a reader, never earns a reply, and never counts as a failure in your open rate, because it never had the chance to fail. This inbox placement guide therefore starts with the number nobody shows you: the share of your mail that actually reaches the primary inbox.

    Secondly, the gap between delivered and seen is larger than most senders realise. A sending tool reports an email as delivered when the receiving server accepts it, which is a technical handshake, not a placement decision. After that handshake, Gmail or Outlook decides whether the message goes to the primary inbox, the promotions tab, the spam folder, or nowhere at all. A campaign can report 99% delivered and still have a third of its mail sitting in spam, invisible to every prospect it targeted.

    Finally, we checked every price and feature in this inbox placement guide on the official sites on 16 November 2026. Where a vendor publishes no price, or where we could not confirm a figure on the page, the guide says so in plain language. Jump to the tool comparison when the budget is the constraint, and start at the top when the goal is understanding how placement actually works.

    What inbox placement is, and why it beats open rate
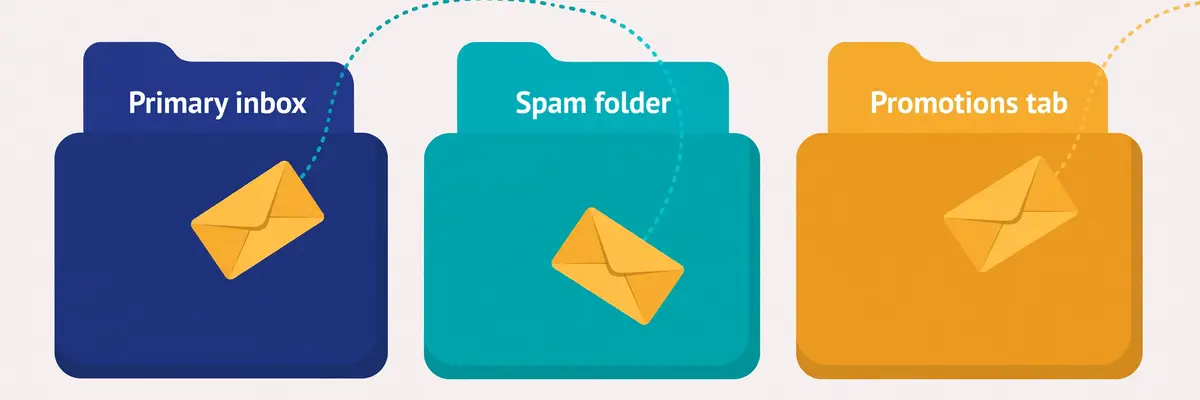
    Inbox placement guide: an email envelope flying on a dotted path into a Primary inbox folder, while other envelopes drift toward Spam and Promotions
    The three destinations that decide a campaign: the primary inbox, where prospects read their mail; the promotions tab, where they skim it; and spam, where nobody ever sees it.

    In fact, inbox placement is the percentage of your sent emails that arrive in the recipient’s primary inbox. The rest of your mail goes somewhere else: the promotions tab, the spam folder, or the provider rejects it outright and it never arrives. Placement is the first filter in the whole cold email funnel, and it sits before the subject line, before the first line, and before every other metric you track. A brilliant email in spam earns nothing. A decent email in the primary inbox earns replies.

    Moreover, placement matters more than open rate for a simple reason: open rate is a rate of the emails a prospect could open, while placement decides how many emails that is. A 50% open rate sounds excellent until you learn that only half your mail reached the inbox, which means a quarter of your list ever saw the email. A sender who fixes placement from 60% to 90% has grown their real audience by half without writing a better subject line, without buying a bigger list, and without spending another cent on tools.

    Inbox placement guide: the four places your email can land

    Firstly, the primary inbox is the destination you want. Mail here arrives in the main stream, it triggers a notification on most phones, and the prospect reads it in the same session as the rest of their real mail. Gmail’s primary tab, Outlook’s focused inbox, and Apple Mail’s main view all work this way. This is the only folder where a cold email behaves like a normal email.

    Secondly, the promotions tab is the polite waiting room. Gmail sorts marketing-style mail here, and many prospects check it once a day or less. Mail in promotions is not dead, and prospects open some of it, but it competes with newsletters, receipts, and every other bulk sender at once. A cold email that lands in promotions has already lost the first impression, because it arrived looking like bulk mail.

    Spam, and the silent fourth destination

    For example, the spam folder is where trust runs out. The provider hides mail here by default and deletes it automatically after thirty days, and most prospects never look inside it at all. Worse still, every email that lands in spam trains the filter to distrust the next one from the same domain, so a spam problem compounds. A domain that sends to spam today will send more mail to spam tomorrow, unless something changes.

    In sum, the fourth destination is the one nobody sees: rejection. Gmail and Yahoo now reject mail outright from senders who fail the basic rules, and a rejected email does not even reach spam. It bounces back with an error, and the sender often has no idea why. Our Deliverability Guide 2026 covers the whole system this guide sits inside, and our Best Email Deliverability Tools 2026 article compares the wider toolkit.

    How spam filters decide where your email lands

    Secondly, spam filters are not a single test. They are a scoring system that weighs five kinds of evidence at once, and no single factor decides placement on its own. Authentication proves who you are. Reputation records how you have behaved. Engagement shows how recipients have reacted to you. Content gives the filter something to read. List quality shows whether you mail real people. A sender who is strong on four of the five can still land in spam on the fifth.

    In fact, the filter’s job is to protect the recipient, not to punish the sender. Every day, Gmail and Outlook process billions of messages, and recipients never asked for most of them. The filter’s question is always the same: does this message look like mail the recipient wants? A sender who behaves like a legitimate correspondent, mailing a small number of real people who reply and never complain, looks like mail the recipient wants. A sender who behaves like a bulk mailer looks like bulk mail, whatever the copy says.

    Inbox placement guide: the five decision factors at a glance

    FactorWhat the filter asksWhat good looks likeWhat bad looks like
    AuthenticationCan this sender prove who they are?SPF, DKIM and DMARC all pass, alignedMissing or failing records
    ReputationHas this domain and IP behaved well?Steady volume, low complaints, no blocklistsNew domain, sudden spikes, blocklist hits
    EngagementDo recipients open, reply and move mail?Replies, forwards, moves to the inboxDeletes unread, marks as spam, ignores
    ContentDoes this read like a person wrote it?Plain text, short, one link or noneImage-heavy, many links, tracked redirects
    List qualityAre these real people who might want this?Verified, recent, targeted, opted-in where possibleScraped, stale, bought, full of traps

    The five factors above are the framework this inbox placement guide uses throughout: every fix in the later sections strengthens one of these five. Last checked: 16 November 2026.

    Inbox placement guide: why authentication comes first

    Moreover, authentication comes first because it is the only factor that is purely mechanical. A filter can check SPF, DKIM and DMARC in milliseconds, before it reads a word of your copy, and a failure there colours everything after it. Since February 2024, Google and Yahoo have required authentication from bulk senders, and providers increasingly reject mail that fails it outright rather than filtering it to spam. Authentication is the entry ticket: it does not guarantee the inbox, but without it the inbox is out of reach.

    For example, engagement is the factor most senders underestimate, because it is the only one they cannot set up in an afternoon. Filters watch what recipients do with your mail: opens, replies, forwards, moving a message from spam to the inbox, and adding you to contacts all count as positive signals. Deleting unread, marking as spam, and ignoring you for weeks all count as negative ones. This is why warmup works, and why a list of people who reply is worth more than a list ten times its size that never does.

    The factor most senders ignore

    Finally, list quality is the factor most senders ignore, because it is the least visible. A list full of dead addresses bounces, and bounces damage reputation. Spam traps in the list can damage a domain in a single send: someone planted those addresses to catch bulk mailers. A list of people who never asked to hear from you complains, and complaints damage reputation faster than anything else. The verification section later in this inbox placement guide shows how to keep a list clean without spending a fortune on it.

    Authentication deep dive: SPF, DKIM and DMARC
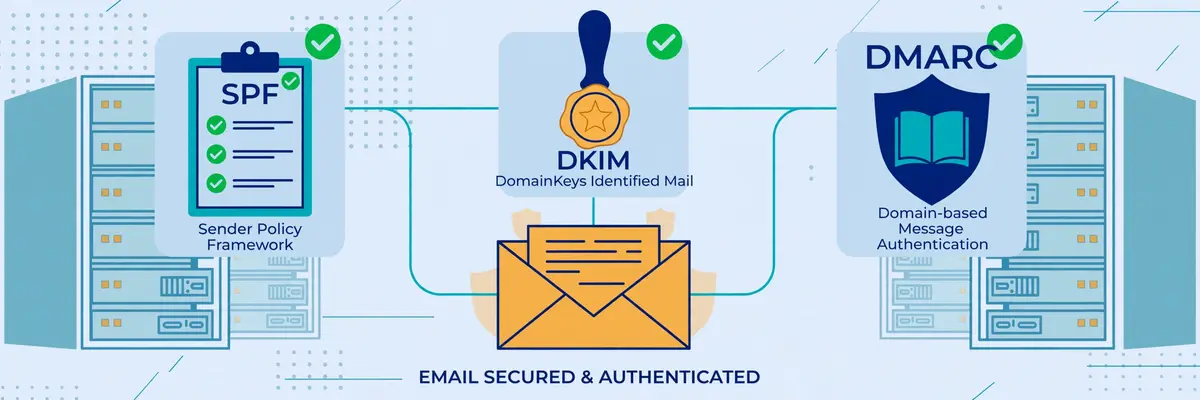
    Inbox placement guide: three security checkpoints guarding an email envelope — an SPF checklist, a DKIM wax seal, and a DMARC shield with green checkmarks
    The three authentication records, each doing a different job: SPF lists who may send, DKIM seals the message, and DMARC sets the rules when either check fails.

    Secondly, authentication is three DNS records that answer three different questions, and every sending domain needs all three. SPF answers whether the server may send for the domain. DKIM answers whether the message arrived unaltered, signed by the domain. DMARC answers what should happen when either check fails, and asks for reports back. Together they prove to a receiving server that the mail really came from the domain it claims, which is the first thing any filter wants to know.

    In fact, the three records work as a team, and a team with a missing player loses. SPF alone can pass while a forwarder breaks it, because forwarding changes the sending server. DKIM alone can pass while signing with the wrong domain, because a signature proves the domain signed the message, not that the signer matches the visible sender. DMARC alone does nothing at all, because it has no check of its own. It only ties the other two to the domain the recipient sees, through alignment, and sets a policy for failures.

    Inbox placement guide: what each record does

    RecordPlain-English jobWhere it livesHow it fails
    SPFLists the servers allowed to send for your domainOne TXT record on the domainToo many lookups, two records, missing include
    DKIMSigns each message so tampering is detectableTXT record on a selector subdomainWrong key, cut-off value, unsigned sender
    DMARCTies SPF and DKIM to the visible From domain, sets policyTXT record on _dmarc subdomainNo record, no alignment, policy stuck on none

    The table above covers the three records every sending domain needs. Check each one with a free checker before the first real send. Last checked: 16 November 2026.

    Inbox placement guide: SPF, the authorised senders list

    Moreover, SPF is a single TXT record that lists every server and service allowed to send mail for your domain. When a receiving server gets your message, it looks up the record and checks whether the sending server is on the list. A match passes. A server that is not on the list fails. The receiving server checks the record against the hidden envelope address in the headers, not the From address your recipient sees, which is why SPF alone cannot prove identity.

    For example, the three classic SPF mistakes are easy to make and easy to avoid. Publishing two SPF records breaks the check entirely, because the standard allows only one, and two records produce an error. Exceeding ten DNS lookups breaks it too, because every include, a, mx and redirect in the record counts, and a chain of includes from several tools adds up fast. And forgetting an include breaks it silently: a tool that sends on your behalf but does not appear on the list will fail SPF on every single email it sends.

    DKIM: the tamper-proof seal

    Finally, DKIM signs every outgoing message with a private key, and publishes the matching public key in DNS. The receiving server verifies the signature, and if anyone altered the message in transit, or if the signature does not match, DKIM fails. Unlike SPF, DKIM survives most forwarding, because the signature travels with the message itself rather than depending on which server delivered it.

    In sum, DKIM’s common mistakes are quieter than SPF’s. Pasting a key value into DNS can cut it off, which leaves the domain unverified, and a key that is too short, 1024 bits where 2048 is now recommended, weakens the signature. A sender that signs with one domain while the visible From shows another will pass DKIM and still fail DMARC, because DMARC requires alignment, and alignment is the part that ties the signature to the sender the recipient actually sees.

    DMARC: the rulebook, and the road to reject

    Secondly, DMARC sits on top of the other two and does three things at once. It sets a policy for messages that fail SPF or DKIM, it requires alignment between the authenticated domain and the visible From domain, and it asks receiving servers to send reports back to you. The three policies run from gentle to strict: p=none only monitors and reports, p=quarantine sends failing mail to spam, and p=reject refuses it outright.

    Moreover, the safe road is to start at p=none, read the reports for two to four weeks, fix every legitimate sender that is failing, and only then move to quarantine, and later to reject. A domain that jumps straight to reject will refuse its own legitimate mail from any service with a faulty setup. And a domain that stays on none forever gets the monitoring without the protection, which is better than nothing, but not the point. Our guide to setting up a sending domain walks through the same three records step by step.

    Video: Email Health Check: Test SPF, DKIM and DMARC at Once by Unspam Email on YouTube. This video is the creator’s property, embedded via YouTube for education. OutreachCompare is not affiliated with Unspam Email and does not claim ownership of this video.

    For example, the video above shows a free health check that tests all three records at once, plus BIMI and thirteen domain blacklists, and scores the domain out of 100. Run a check like this before the first campaign, and again after any change to your sending setup. A score that drops after a change tells you exactly which record broke, and a score of 100 tells you authentication is no longer the reason your mail misses the inbox.

    Sender reputation: the score you cannot see

    Secondly, sender reputation is the filter’s memory of how your domain and your sending IP have behaved, and it is the factor no dashboard shows as a single number. Gmail and Outlook each keep their own view of it, built from your sending history: how long the domain has sent mail, how steady the volume has been, how many recipients complained, how many addresses bounced, and whether the domain or IP has appeared on a blocklist. Senders earn reputation slowly and lose it quickly, which is exactly why warmup exists.

    In fact, domain age matters more than most senders expect. A domain registered last week has no history at all, and filters treat a blank history with suspicion, because most spam comes from brand-new domains. A domain that has sent a small, steady volume of wanted mail for months has a history the filter can trust. This is why the first rule of cold email infrastructure is never to send from your main domain: a burned sending domain is replaceable, and a burned main domain is a disaster.

    Inbox placement guide: the numbers that guard your reputation

    MetricStay underWhy it matters
    Bounce rateUnder 2%Bounces mean dead addresses, and dead addresses mean a dirty list
    Spam complaint rateAim under 0.1%, never 0.3%Google’s bulk sender limit is 0.3%; complaints are the fastest reputation killer
    Sends per mailbox per day25 to 30, maximum 40Human-scale volume per mailbox looks human; spikes look automated
    Warmup periodTwo to four weeksA new domain needs time to build a sending history before real volume

    The guardrails above are the numbers this inbox placement guide uses throughout: keep bounces under 2%, spam complaints under 0.1%, and each mailbox at 25 to 30 sends a day. Last checked: 16 November 2026.

    Inbox placement guide: complaint rate, the fastest way to lose the inbox

    Moreover, the spam complaint rate is the single most dangerous number a sender tracks. Google’s bulk sender rules set the limit at 0.3%, and this inbox placement guide aims lower, at 0.1%, because a sender who hovers at the limit is one bad campaign away from crossing it. Complaints come from recipients who mark your mail as spam, and each complaint tells the filter that a real person did not want the message. A handful of complaints per thousand sends is survivable. A steady rate above 0.3% is not.

    For example, volume spikes damage reputation in a different way. A domain that sends ten emails a day for a month and then sends a thousand in one morning looks like someone hijacked it, because that is exactly how a stolen domain behaves. Filters throttle sudden volume, and the excess mail lands in spam or gets rejected. The fix is a ramp: start small, increase gradually, and let the filter watch the volume grow at a pace a real business would grow at.

    Spam traps and blocklists

    Finally, spam traps are the hidden hazard in any list. A trap is an address that was never owned by a real person, planted to catch bulk mailers, and mailing one tells the filter that the sender does not know where their addresses came from. A pristine trap, an address that never opted in to anything, can damage a domain in a single send. A recycled trap, an old address abandoned by its owner and turned into a trap, signals a stale list. Both are avoided the same way: verify every address, and never mail a list you did not build or buy from a source you trust.

    In sum, blocklists work the same way at a larger scale. Services such as Spamhaus list domains and IPs that send unwanted mail, and many filters check those lists before accepting a message. A domain on a blocklist will struggle everywhere until the list operator removes it, and delisting takes time and a clean record. Check your domain and IP against the major blocklists every week, and treat a listing as an emergency, not a warning.

    Warmup done right: two to four weeks that pay for themselves
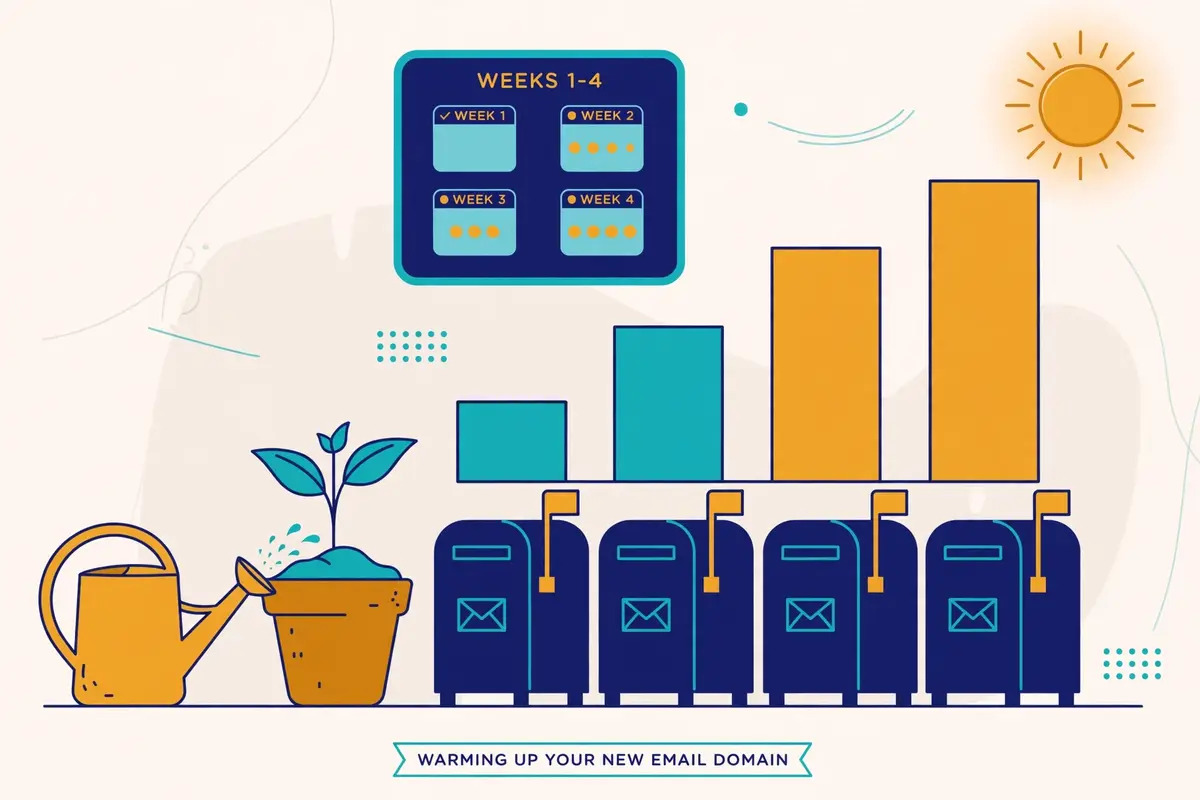
    Inbox placement guide: a seedling growing beside a row of mailboxes, with a calendar showing weeks one to four and a gradually rising bar chart
    Warmup, drawn as it works: a new domain grows slowly over two to four weeks, with volume rising a little each day until the mailbox is ready for real campaigns.

    Secondly, warmup is the process of building a sending history for a new mailbox before it carries real campaigns. A warmup tool sends a small number of emails from the new mailbox to a network of real inboxes, those inboxes open the mail, reply to it, move it out of spam when it lands there, and mark it as important. The filter watches this behaviour and learns that the new mailbox belongs to a real person who sends wanted mail. After two to four weeks, the mailbox has a history, and real campaigns can start at a modest volume.

    In fact, warmup works because it mimics exactly the behaviour filters reward. Opens, replies, and messages moved out of spam are the strongest positive engagement signals a filter can see, and a warmup network produces them on purpose, every day, for every mailbox in the pool. A properly warmed mailbox arrives at its first campaign with a reputation already built, instead of arriving with a blank history and hoping for the best.

    Inbox placement guide: what a good warmup looks like

    Firstly, a good warmup starts tiny and grows slowly. A handful of emails a day in week one, rising gradually through weeks two and three, and reaching the full daily volume only in week four. A warmup that jumps to full volume in three days is not a warmup at all. It is a spike, and spikes are exactly what warmup exists to avoid. The best warmup tools ramp automatically, and the sender’s only job is to leave them alone and let the ramp run.

    Secondly, a good warmup is not just sending. It is also rescuing: when a warmup email lands in spam, the receiving inbox pulls it out and marks it as not spam, which teaches the filter that mail from this domain belongs in the inbox. It is also replying: warmup inboxes reply to the mail they receive, which teaches the filter that the sender starts conversations. A warmup service that only sends, without opening, replying, and rescuing, is doing half the job.

    Warmup tools compared, priced and verified

    Warmup optionPrice, checked 16 Nov 2026What you get
    Warmforge$10/slot/mo billed quarterly, $9 annualDedicated warmup, 1 free slot, 1 free placement test a month, DNS and blacklist health checks
    Smartlead warmupIncluded on all plans; premium pool $59/mo add-on on Base and Pro, free from Unlimited SmartUnlimited AI warmup with spam rescues, plus the premium Warmup Pool on higher plans
    Instantly warmupIncluded from $47/mo GrowthUnlimited warmup across a 4.2M+ account pool, built into the sending tool
    Inframail DFY$797/mo, minimum 3 monthsPremium warmup included, but only on the done-for-you plan; the $147 and $387 plans do not include it

    We read the warmup prices above on the official sites on 16 November 2026. Warmforge has no free trial, and unlimited Warmforge slots are free on every Salesforge plan. Last checked: 16 November 2026.

    Inbox placement guide: the warmup mistakes that waste the whole month

    Moreover, the most common warmup mistake is impatience. A sender buys a new domain on Monday, warms it for three days, and launches a thousand-email campaign on Friday, and then wonders why the mail lands in spam. Three days of warmup is not a history. It is a rumour. Two weeks is the minimum this inbox placement guide recommends, and four weeks is better for a domain that will carry real volume.

    For example, the second mistake is warming up and then going quiet. A mailbox that is warmed for a month and then sits unused for a month loses the reputation it built, because filters trust recent behaviour, not old behaviour. Warmup is not a one-off event. It is a habit: keep the warmup running alongside real campaigns, at a low level, so the mailbox keeps earning positive signals every day.

    Finally, the third mistake is warming up a mailbox and then sending it a dirty list. Warmup builds reputation, and one campaign to unverified addresses can spend it in a day. Verify the list before the first real send, keep the volume modest, and watch the bounce and complaint rates like a hawk for the first two weeks. Our How to Warm Up a New Email Domain 2026 article covers the day-by-day schedule in full.

    List hygiene: verification, re-verification and suppression

    Secondly, list hygiene is the unglamorous work that protects everything else in this inbox placement guide. A clean list means every address on it is real, belongs to a real person, and has some reason to hear from you. A dirty list means bounces, traps, complaints, and a reputation that falls apart faster than any warmup can rebuild it. Hygiene is not a one-off clean-up. It is a routine, like warmup, and it pays for itself in placement.

    In fact, verification is the first step, and it should happen before the first send to any new list. A verification tool checks whether each address exists, whether the domain accepts mail, whether the address is a catch-all that accepts everything, and whether it looks like a disposable or role address. Remove addresses that fail. Set risky addresses aside, such as catch-alls, for a smaller, slower send, or drop them entirely. Never mail a list that nobody has verified.

    Inbox placement guide: how often to re-verify

    Firstly, re-verify on a schedule, because lists go stale fast. People change jobs, companies close, and domains expire, and every month a small share of any list quietly dies. A list that was clean in January will have dead addresses by April, and those dead addresses bounce. This inbox placement guide recommends re-verifying the whole list every three months, and re-verifying any segment before a big campaign, even if it was checked recently.

    Secondly, the cadence depends on how the list was built. A list of people who opted in recently stays clean longer, because the addresses are fresh and the owners expect mail. A list built from scraping or enrichment goes stale faster, because the data was already old when it was collected. A bought list should be treated as suspect from the start: verify it twice, mail it slowly, and watch the bounce rate on the first send like a hawk.

    Inbox placement guide: suppression lists, the do-not-mail file

    Moreover, a suppression list is the other half of hygiene. It holds every address you must never mail again: people who unsubscribed, people who complained, people who bounced hard, people who asked to be removed, and competitors or clients who should never receive a cold email. Every sending tool should hold the suppression list centrally, and every campaign should check against it automatically. A sender who mails a suppressed address is not just wasting a send. They are inviting a complaint.

    For example, suppression lists also protect the sender from their own success. Suppress a prospect who replied “not now” for three months; do not mail them again next week. Suppress a prospect who unsubscribed from one campaign from all of them. A customer who already bought should never receive a cold email asking them to buy. Hygiene is not only about dead addresses. It is about respecting the people on the list, and respect is a deliverability signal too.

    In sum, the cost of verification is small next to the cost of a burned domain. Bouncer sells pay-as-you-go credits from $8 per 1,000, with credits that never expire, and ZeroBounce and NeverBounce offer similar pay-as-you-go options. Our Email Verification Guide 2026 compares the verifiers in depth, and our Best Verification Tools Compared article prices them side by side.

    Content that triggers filters, and the myths that do not

    Secondly, content is the factor senders argue about most, and the one where the myths are loudest. Filters do read your email, and they do weigh what it contains, but they weigh it far less than reputation and engagement. A perfectly written email from a burned domain lands in spam. A plain email from a trusted domain lands in the inbox. Content is the finishing touch, not the foundation, and the fixes below are cheap once the foundation is solid.

    In fact, the content signals that matter are structural, not lexical. Filters look at the ratio of images to text, the number of links, whether the links use tracking redirects, whether the HTML is clean or broken, and whether the message looks like it was written by a person or assembled by a template. A short plain-text email with one link, or no link at all, looks like a person wrote it. A long HTML email with five images, eight links, and a tracking domain that does not match the sender looks like bulk mail, because that is what bulk mail looks like.

    The 1,000-test video: what the evidence says

    Video: I Ran 1,000 Email Deliverability Tests. Here is What Works in 2026 by Lead Gen Jay on YouTube. This video is the creator’s property, embedded via YouTube for education. OutreachCompare is not affiliated with Lead Gen Jay and does not claim ownership of this video.

    Moreover, the video above is the most useful single piece of evidence in this inbox placement guide. The creator ran more than 1,000 inbox placement tests on real marketing emails, and the findings cut against most of the received wisdom. Swapping out words like free, guarantee and discount did not move the needle for most emails. A big image plus a link moved seven of eleven test emails to the promotions tab. Dropping the www prefix from a link moved all eleven test emails from promotions to primary. Test results beat folklore, and this video shows the tests.

    Inbox placement guide: three myths worth dropping

    Firstly, the trigger-word myth says that certain words send an email straight to spam. The test evidence says otherwise: single words rarely decide placement on their own, and a filter that blocked every email containing “free” would block half the legitimate mail on the internet. Words matter in combination with everything else, and a short, plain email that happens to contain the word free will still reach the inbox from a trusted domain.

    Secondly, the spam-score myth says that a perfect score on a spam checker guarantees the inbox. It does not. A spam checker tests content against known rules, and a 10 out of 10 means the content passes those rules. It says nothing about the domain’s reputation, the list’s quality, or whether recipients have complained about the sender before. Use a spam checker as a content sanity check, and use a placement test for the real answer.

    Inbox placement guide: what actually helps, in order

    For example, what actually helps is simple and cheap. Keep emails short, under 120 words, with short paragraphs that read well on a phone. Use plain text, or nearly plain text, with at most one image and at most one link. Send the link on your own domain, or use a custom tracking domain that matches your sending domain, because a tracking link on a stranger’s domain is a red flag. And personalise the first line so the email could only have been written for this prospect, because a filter cannot tell a personalised email from a template, but a prospect can, and a prospect who replies is the best deliverability signal there is.

    Finally, never buy a list of “verified” addresses and mail it cold at full volume. Verification checks whether an address exists, not whether the owner wants your mail, and a list of real people who never asked to hear from you will complain at a rate that burns the domain. Our guide to writing cold emails that get replies covers the copy itself, and our A/B testing guide shows how to test content changes properly, with sample sizes worked out rather than guessed.

    Monitoring: Postmaster Tools, placement tests and what the numbers mean

    Secondly, monitoring is the difference between knowing placement is broken and guessing. A sender who never tests placement finds out about a spam problem from a prospect, or from a month of silence, and by then the domain is already burned. A sender who tests every week finds out on Tuesday, fixes it on Wednesday, and loses a week of sends instead of a month. Monitoring is cheap, and the tools below cost less than a single burned domain.

    In fact, Google Postmaster Tools is the first monitor every sender should set up, because it is free and it shows what Gmail actually thinks. It reports the domain’s spam rate, its reputation as Google sees it, authentication pass rates, and delivery errors, all from Google’s own data. A spam rate creeping towards 0.3% shows up here before it shows up anywhere else, and a reputation that drops from high to medium is a warning to slow down and check the list. Set it up on the day the sending domain is bought, not the day the problem appears.

    Inbox placement guide: placement tests, explained

    Firstly, a placement test sends your real campaign email to a panel of seed inboxes at Gmail, Outlook, Yahoo and others, and reports which folder each one landed in. It answers the only question that matters: where does this email actually land? Run one before every big campaign, and run one every week on an active sending domain. A test that shows 90% inbox placement is a green light. A test that shows 60% is a problem to fix before the next send, not after it.

    Secondly, the numbers a placement test returns are simple, and the thresholds are the same ones used throughout this inbox placement guide. Inbox placement above 90% is healthy. Between 80% and 90% is a warning: check the list, check the content, and check the blocklists. Below 80% is a problem: pause the campaigns, work through the recovery plan, and do not resume at full volume until a test shows the numbers recovering.

    Monitoring tools compared, priced and verified

    Monitoring optionPrice, checked 16 Nov 2026What it watches
    Google Postmaster ToolsFreeSpam rate, domain reputation, authentication, delivery errors, all from Gmail data
    Smartlead SmartDeliveryFrom $49/moPlacement tests per campaign sequence, up to 50 sender accounts per test
    Warmforge Placement Pro$32.50/mo annual, $39 monthly100 placement tests a month, 50 mailboxes per test
    Warmforge Placement Growth$140.80/mo annual, $169 monthlyUnlimited placement tests, 250 mailboxes per test
    Bouncer Deliverability KitFrom $25/moInbox placement tests, blocklist monitoring, SPF, DKIM and DMARC checks, SpamAssassin analysis

    Monitoring prices above were read on the official sites on 16 November 2026. Postmaster Tools is free and should be set up on every sending domain. Last checked: 16 November 2026.

    Inbox placement guide: the weekly routine that catches problems early

    Moreover, the routine itself takes less than an hour a week. Check Postmaster Tools for the spam rate and reputation. Run a placement test on the live campaign. Check the domain and IP against the major blocklists. Glance at the bounce rate and the complaint rate for the week. If all four are green, send on. If any one of them is amber, slow the volume and find the cause before the next campaign. A sender who does this every week will never be surprised by a spam problem again.

    For example, keep a simple log of the numbers, even a spreadsheet with one row a week. Placement, spam rate, bounce rate, complaint rate, and volume. A log turns a vague feeling that “deliverability has been worse lately” into a date, a number, and a cause: the week the new list went out, the week the volume doubled, the week the tracking domain changed. The log is the cheapest diagnostic tool in this inbox placement guide, and it costs nothing at all.

    Recovery plan: a domain already landing in spam
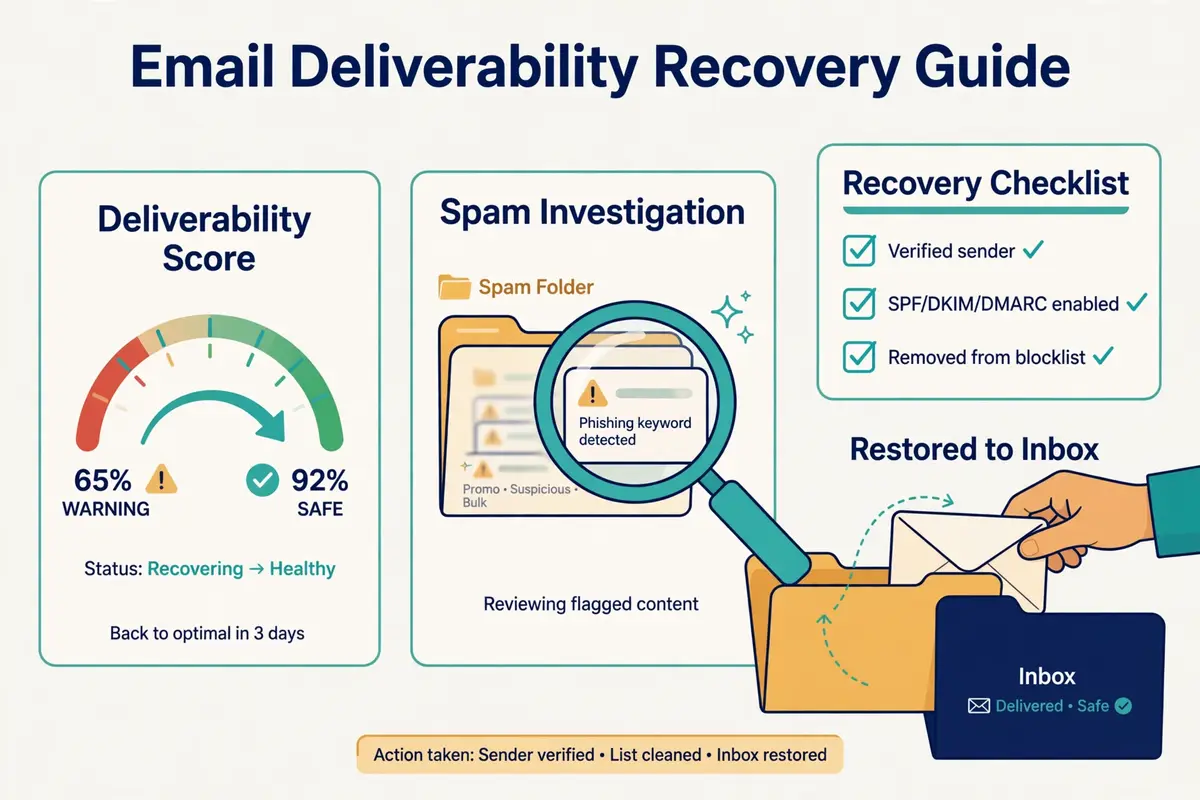
    Inbox placement guide: a dashboard gauge moving from red back to green, a magnifying glass over a spam folder, and an envelope being rescued back into the inbox
    Recovery, drawn as it works: diagnose first, pause the damage, fix the cause, and rebuild trust slowly until the gauge moves back to green.

    Secondly, a domain that is already landing in spam can be recovered, and the plan below is the order that works. The instinct is to send more, to make up for the lost replies, and that instinct is exactly wrong: more mail from a distrusted domain lands in more spam, earns more complaints, and digs the hole deeper. Recovery starts with stopping, not with sending.

    In fact, the whole recovery takes four to six weeks, and there is no honest shortcut. A domain that was burned over a month will not be trusted again in a day, because filters trust recent behaviour, and recent behaviour has to be good for long enough to matter. A sender who follows the plan below, patiently, will get the domain back. A sender who rushes it will burn the domain again, and a twice-burned domain is often not worth saving.

    Inbox placement guide: the seven-step recovery plan

    StepActionHow long
    1. PauseStop all campaigns from the domain at onceImmediately
    2. DiagnoseCheck SPF, DKIM, DMARC, blocklists, Postmaster Tools, and the last list mailedDay 1 to 2
    3. FixRepair every failing record, request delisting, drop the bad list segmentDay 2 to 5
    4. CleanRe-verify the whole list, suppress every complainer and bouncerWeek 1
    5. Re-warmRestart warmup at a handful of emails a day, rising slowlyWeeks 2 to 4
    6. TestRun placement tests weekly; resume only above 90% inboxWeeks 3 to 5
    7. ResumeRestart campaigns at half the old volume, to the cleanest segment firstWeeks 4 to 6

    The recovery plan above is the order that works: pause, diagnose, fix, clean, re-warm, test, and only then resume. Last checked: 16 November 2026.

    Inbox placement guide: when to recover, and when to start over

    Moreover, recovery is worth it when the domain is a few months old, the problem is recent, and the cause is known: a bad list, a broken record, a volume spike. In that case the domain has a history worth saving, and four to six weeks of patient work will save it. Recovery is also worth it when the domain carries a brand the sender cannot easily replace, such as a domain printed on business cards or linked from a website.

    For example, starting over is the better call when the domain is new, the problem is old, and the cause is unclear. A fresh sending domain costs a few dollars a year, and a proper warmup costs two to four weeks, which is the same time recovery would take. A sender with no brand tied to the domain, and no history worth saving, should buy a new domain, set it up properly from day one, and treat the old domain as a lesson. Our Best Warmup Tools Compared article covers the warmup services that carry a recovery.

    Tool comparison: seven placement tools, priced and verified

    Secondly, the seven tools below cover the whole placement job between them: placement testing, warmup, infrastructure, and monitoring. No single tool does all of it, and the right choice depends on which part of the job is broken. When warmup is the problem, the answer is Warmforge or Instantly. A sender who cannot see where mail lands needs SmartDelivery or the Bouncer Kit. Infrastructure trouble points to Mailforge, Inframail, or Do You Mail.

    In fact, all seven prices were read on the official sites on 16 November 2026, and the table notes where a figure could not be read on the page itself. Where a vendor publishes no price for a feature, the guide says so rather than guessing. The comparison is split into two tables so each one stays readable: the first covers what each tool does for placement, and the second covers what it costs.

    Inbox placement guide: what each tool does for placement

    ToolPlacement testingWarmupInfrastructureMonitoring
    Smartlead SmartDeliveryYes, per campaign sequenceWarmup Pool add-on, $59/moSmartServers, $39/server/moYes, placement data per test
    WarmforgeYes, Placement Pro and GrowthYes, dedicated warmupNo, warmup onlyYes, DNS and blacklist health checks
    MailforgeNoNoYes, shared mailboxes, auto DNSNo
    InframailNoOnly on the $797/mo DFY planYes, unlimited inboxes, auto SPF, DKIM, DMARCYes, domain health dashboard
    Do You MailNoNoYes, dedicated servers, auto SPF, DKIM, DMARCNo
    Bouncer Deliverability KitYes, inbox placement testsNoNoYes, blocklists, SPF, DKIM, DMARC, SpamAssassin
    InstantlyYes, inbox placement testsYes, unlimited warmup includedYes, SISR dedicated IP pools on Light SpeedYes, reputation protection and bounce detection

    The table above covers what each tool does for placement. Warmforge and SmartDelivery are the testing specialists; Mailforge, Inframail and Do You Mail are the infrastructure specialists. Last checked: 16 November 2026.

    What each tool costs

    ToolStarting priceBest for
    Smartlead SmartDelivery$49/moAgencies testing placement per campaign
    Warmforge$10/slot/mo billed quarterly, $9 annualDedicated warmup for any sending tool
    Mailforge$3/mailbox/mo billed monthly, $2.40 yearlyCheap shared infrastructure at scale
    Inframail$147/mo UnlimitedUnlimited inboxes on a flat fee
    Do You Mail$39/server/moDedicated servers with full control
    Bouncer Deliverability Kit$25/mo StarterPlacement and blocklist monitoring alone
    Instantly$47/mo GrowthWarmup and sending in one tool

    Prices above were read on the official sites on 16 November 2026. Features and pricing can change, so please check the provider’s site before you buy. We do not guess at features, prices or trials.

    Reading the comparison honestly

    Moreover, the comparison shows a real split in the market. SmartDelivery, Warmforge and the Bouncer Kit are specialists: they test and monitor, and they leave sending to another tool. Instantly is the all-in-one: warmup, placement tests and sending in a single subscription. Mailforge, Inframail and Do You Mail are infrastructure: they build the domains and inboxes that the sending tools run on. A sender who buys a specialist and expects it to send mail will be disappointed, and a sender who buys infrastructure and expects warmup will be too.

    For example, the cheapest option is not always the cheapest outcome. Mailforge at $3 a mailbox a month looks cheap next to Do You Mail at $39 a server a month, until the sender counts the warmup tool, the placement tests, and the time spent managing shared infrastructure. A flat fee that includes the whole job can cost less than three cheap tools that each do a third of it. Add up the whole stack before choosing, not just the headline price.

    Pros and cons: the honest case for each tool

    Secondly, every tool below has a real weakness, and this inbox placement guide names it plainly. A review that only lists strengths is an advertisement, not a guide. The weaknesses matter because they decide who should not buy the tool, and a sender who knows the weakness in advance can plan around it.

    Smartlead SmartDelivery: the agency tester

    Firstly, SmartDelivery’s strength is depth: placement tests run per campaign sequence, with up to 50 sender accounts on the Growth plan and 200 on Pro, and the Pro plan adds placement-optimised copy and campaign copy warmup. Its weakness is price and scope: $49 a month buys testing only, and a sender who also needs warmup pays the $59 a month Warmup Pool add-on on top, or buys Smartlead’s Unlimited Smart plan, where the pool is free. A solo sender with one mailbox will find cheaper testing elsewhere.

    Warmforge: the warmup specialist

    Secondly, Warmforge’s strength is focus: it does warmup and placement testing, and nothing else, and it does both well, with health checks for DNS and blacklists included. Its weakness is that it is a second subscription: a sender still needs a sending tool and an infrastructure provider, and there is no free trial, only one free slot and one free placement test a month to try it with.

    Mailforge: the budget infrastructure

    Moreover, Mailforge’s strength is price: $3 a mailbox a month, or $2.40 on annual billing, with automatic DNS setup and a minimum of ten slots, is the cheapest way to stand up real infrastructure. Its weakness is sharing: the IPs are shared, not dedicated, and there is no warmup and no placement testing built in, so the sender buys those elsewhere. A sender who needs dedicated IPs should look at Do You Mail or Inframail instead.

    Inframail: the flat-fee scale play

    For example, Inframail’s strength is scale on a flat fee: unlimited inboxes for $147 a month, with automatic SPF, DKIM and DMARC, and a domain health dashboard that watches blocklists and submits delisting requests. Its weakness is warmup: the $147 and $387 plans do not include it, and the only plan that does is the $797 a month done-for-you plan, with a three-month minimum. A sender who buys Inframail still needs a warmup tool.

    Do You Mail: the dedicated-server choice

    Finally, Do You Mail’s strength is control: dedicated US or EU servers, unlimited inboxes and domains, and automated authentication, for $39 a server a month. Its weakness is that it is infrastructure only, with no sequences, no warmup, no placement testing and no reply inbox, and no free trial advertised on the official site. A sender who wants a managed experience will find it hands-on.

    Bouncer Deliverability Kit: the monitor

    In sum, the Bouncer Kit’s strength is breadth of monitoring: placement tests, blocklist checks, SPF, DKIM and DMARC checks, and SpamAssassin analysis, from $25 a month. Its weakness is that it only watches: it does not warm up, it does not send, and it does not fix what it finds. Pair it with a warmup tool and a sending tool, and treat its verification credits, from $8 per 1,000, as a separate purchase for list hygiene.

    Instantly: the all-in-one

    Secondly, Instantly’s strength is that warmup, placement tests and sending live in one subscription, from $47 a month, with unlimited warmup across a large pool and a placement test built in. Its weakness is that the deeper placement features sit on higher plans: Hypergrowth at $107 a month carries 125,000 emails, and the SISR dedicated IP system arrives only on Light Speed at $358 a month. A sender who outgrows Growth will feel the price steps.

    Who should pick which: a decision framework

    Secondly, the right pick depends on the sender’s situation, not on the tools’ feature lists. The framework below starts from the problem, because a sender who buys a warmup tool for a monitoring problem has spent money and solved nothing. Find the row that matches, and the pick follows.

    Inbox placement guide: pick the tool that matches the problem

    Your situationPick thisWhy
    New domain, no history yetWarmforgeDedicated warmup from $10 a slot, with health checks included
    Agency testing many campaignsSmartlead SmartDeliveryPer-sequence placement tests, up to 200 sender accounts on Pro
    Solo sender, one tool for everythingInstantly GrowthWarmup, placement tests and sending from $47 a month
    Scaling to hundreds of inboxesInframail UnlimitedUnlimited inboxes on a flat $147 a month
    Need dedicated servers and controlDo You MailDedicated IPs and full control for $39 a server a month
    Cheapest infrastructure at volumeMailforge$2.40 a mailbox a month on annual billing, auto DNS
    Just want to watch placement and blocklistsBouncer Deliverability KitMonitoring only, from $25 a month, no sending needed

    The framework above starts from the problem, not the feature list. Match the row to your situation first, then check the price on the provider’s site. Last checked: 16 November 2026.

    Two questions before you buy anything

    Moreover, ask two questions before spending anything. First, which part of the job is actually broken: warmup, testing, infrastructure, or monitoring? A placement test will answer that in a day, and Google Postmaster Tools will answer it for free. Second, what does the whole stack cost, including the sending tool, the warmup, the tests, and the infrastructure? The cheapest headline price is rarely the cheapest stack, and the dearest tool is rarely dearest once the stack is counted.

    For example, a solo sender with one domain and three mailboxes needs Instantly Growth, or Warmforge plus a sending tool, and nothing else. An agency with twenty clients needs SmartDelivery for testing, Inframail or Do You Mail for infrastructure, and a warmup service that runs across all of it. A sender who buys the agency stack for a solo problem has bought a lorry to carry a suitcase, and a sender who buys the solo stack for an agency problem will outgrow it in a month.

    Frequently asked questions

    Inbox placement guide: what is a good inbox placement rate?

    Firstly, above 90% in the primary inbox is healthy, and it is the target this inbox placement guide uses throughout. Between 80% and 90% is a warning to check the list, the content, and the blocklists. Below 80% is a problem: pause the campaigns and work through the recovery plan before sending again. A placement test, not the delivery rate in your sending tool, is how you measure it.

    How long does warmup take?

    Secondly, two to four weeks for a new domain, starting with a handful of emails a day and rising gradually. Two weeks is the minimum, four weeks is better for a domain that will carry real volume, and warmup should keep running at a low level alongside real campaigns, so the mailbox keeps earning positive signals every day.

    Does SPF, DKIM and DMARC guarantee the inbox?

    Moreover, no. Authentication is the entry ticket, not the whole game. It proves who you are, and without it the inbox is out of reach, but a perfectly authenticated email from a domain with a poor reputation, a dirty list, or a climbing complaint rate will still land in spam. Authentication gets you considered for the inbox. Reputation, engagement, content and list quality decide whether you land there.

    What is the difference between delivered and inbox placement?

    For example, delivered means the receiving server accepted the message, which is a technical handshake. Inbox placement means the message arrived in the primary inbox, rather than promotions, spam, or rejection. A campaign can report 99% delivered and still have a third of its mail in spam, which is why placement tests matter more than the delivery rate in a dashboard.

    How often should I re-verify my list?

    Finally, re-verify the whole list every three months, and re-verify any segment before a big campaign, even if it was checked recently. Lists go stale fast as people change jobs and domains expire, and a list that was clean in January will have dead addresses by April. Verify before the first send to any new list, and never mail a list that has never been verified.

    Can a domain that lands in spam be fixed?

    In sum, yes, in most cases, with four to six weeks of patient work: pause all campaigns, diagnose and fix the cause, clean the list, re-warm slowly, test weekly, and resume at half volume only when placement tests show above 90% inbox. Recovery is worth it when the domain has a history worth saving. When the domain is new and the cause is unclear, a fresh domain with a proper warmup is often the faster call.

    The verdict

    The verdict

    Inbox placement is a system, not a trick. A separate sending domain, SPF, DKIM and DMARC done properly, two to four weeks of warmup, a verified list, bounces under 2%, spam complaints under 0.1%, and 25 to 30 sends per mailbox a day will put most senders above 90% inbox placement. No single tool does all of it, and no single fix rescues a domain that is broken in three places at once.

    Best for placement testing: Smartlead SmartDelivery, from $49 a month, for agencies that test every campaign. Warmforge leads on dedicated warmup, from $10 a slot a month, for any sender who wants warmup done properly. Instantly leads as the all-in-one, from $47 a month, for a solo sender who wants warmup, testing and sending in one place. Inframail Unlimited leads on infrastructure at scale, $147 a month, for unlimited inboxes on a flat fee. We have not hands-on tested these tools ourselves, so there are no numeric scores here, only the verified prices and the honest trade-offs above.

    Start today, and start small

    Secondly, start today, and start small. Set up Google Postmaster Tools, run a placement test on your live campaign, and check the three authentication records. Those three steps cost nothing, take less than an hour, and tell you exactly where you stand. If the numbers are green, keep sending and keep testing every week. If they are not, work through the recovery plan, one step at a time, and do not rush it. The inbox rewards patience, and it punishes haste, every single time.

    Finally, remember that placement is the first step in the funnel, not the last. An email in the primary inbox still needs a subject line worth opening, a first line worth reading, and an offer worth replying to. Our Cold Email Sequencing Guide 2026 shows what to do once the email is seen, and our guide to writing cold emails that get replies covers the copy itself.

    Keep reading

    Inbox placement guideSmartDelivery from $49/mo · Warmforge from $10/slot/mo · Instantly from $47/mo Visit Smartlead →
  • Cold Email Sequencing Guide 2026

    Cold Email Sequencing Guide 2026

    One email rarely wins the meeting. A sequence does.

    This cold email sequencing guide shows how to build a sequence that earns replies: five emails over three weeks, each with a different job, sent slowly enough to stay out of spam, tested properly, and run on the right tool for your volume and budget.

    Visit Instantly →Explore Smartlead →See Lemlist →

    Prices checked 16 November 2026 on the official sites of all seven providers. Features and pricing can change, so please check the provider’s site before you buy. We do not guess at features, prices or trials.

    Quick Answer

    A cold email sequence is a short series of planned emails, usually four to five in total, sent to the same prospect over two to three weeks, where each email has a different job and the sequence stops the moment the prospect replies. Follow-ups matter because 42% of all cold email replies arrive after the first email, according to Instantly’s 2026 benchmark report, so a single email throws away nearly half of the replies a campaign could earn.

    Send the opener on day 0, then follow up on days 3, 7, 14 and 21, keep every email under 120 words, and cap each mailbox at 25 to 30 sends a day. Instantly is the best pick for high-volume email-only sequences from $47 a month, Smartlead is the best pick for agencies from $39 a month, and Lemlist is the best pick for multichannel sequences from $69 a month.

    Why this cold email sequencing guide starts with the second email

    Firstly, most cold email advice obsesses over the first email, and that focus is understandable. The opener carries the subject line, the first line, and the whole first impression. Yet the opener is only the start of the conversation. A campaign built around one email is a campaign that gives up after a single try. This cold email sequencing guide therefore starts with the second email, because the follow-ups are where most campaigns are won or lost.

    Secondly, the numbers make the case plainly. Instantly’s 2026 benchmark report, built on billions of cold email interactions, puts the average reply rate at 3.43%, and finds that 58% of all replies come from the first email while 42% come from follow-ups. A sender who mails once and stops keeps the 58% and throws away the 42%. A sender who follows up properly keeps both. That is the whole argument for sequencing, in two numbers.

    Finally, every price and feature in this cold email sequencing guide was checked on the official sites on 16 November 2026. Where a vendor publishes no price, or where a figure could not be confirmed on the page, the guide says so in plain language. Jump to the tool comparison when the budget is the constraint, and start at the top when the goal is understanding how a good sequence actually works.

    What a cold email sequence is, and why it works

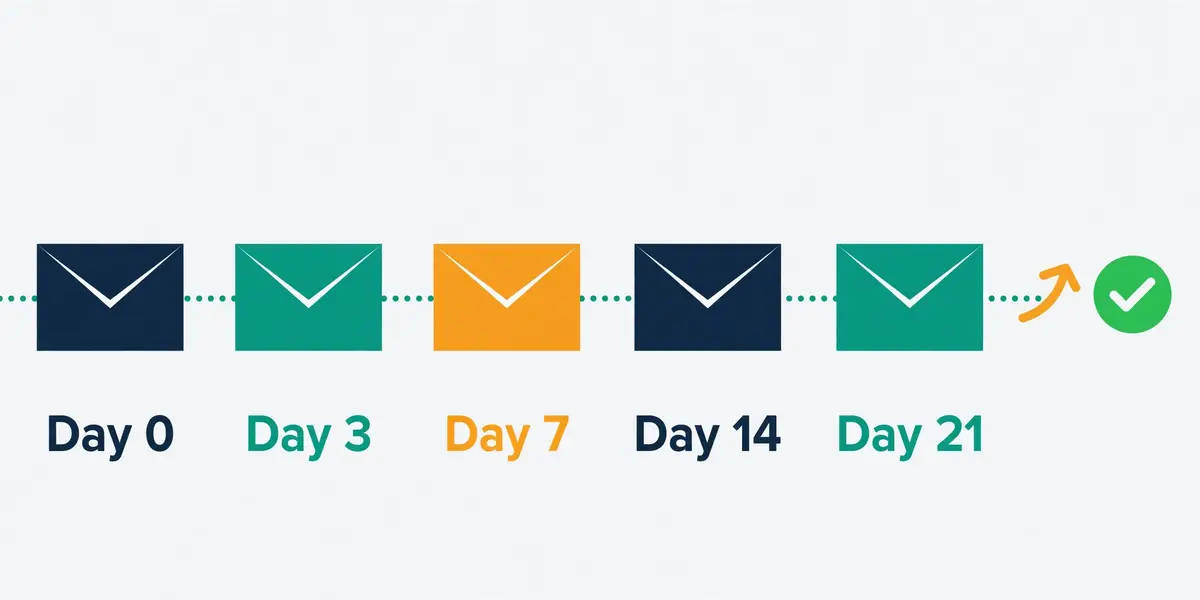
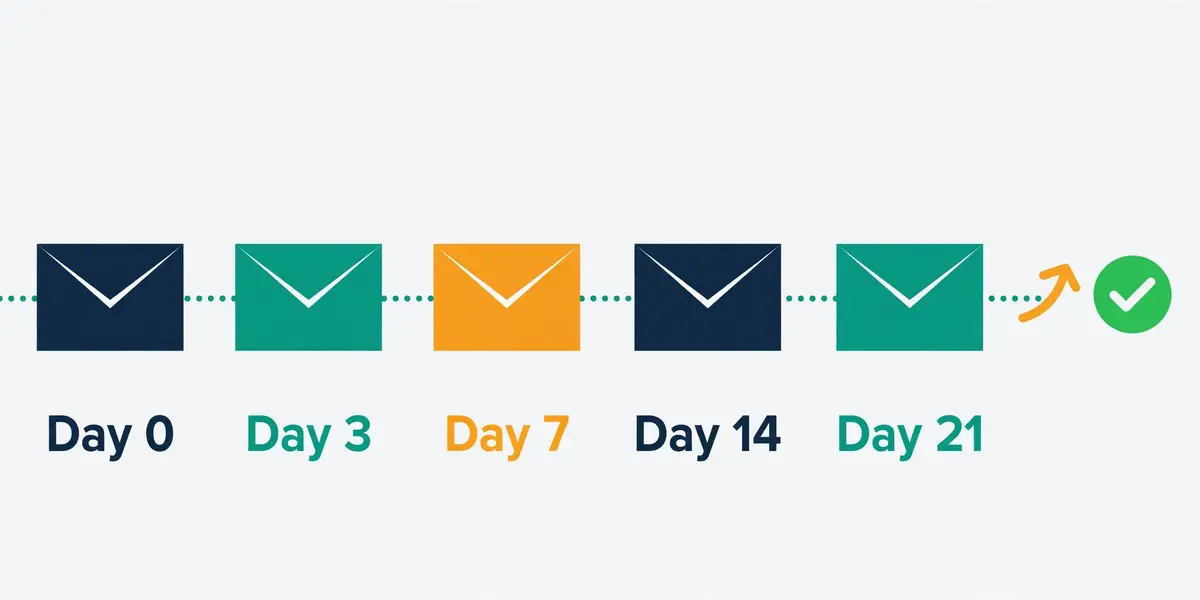
    Cold email sequencing guide: a five-email timeline running from day 0 to day 21, with envelope icons joined by a dotted line and a green checkmark at the reply
    The five-email timeline at the heart of this cold email sequencing guide: an opener on day 0, follow-ups on days 3, 7 and 14, and a break-up on day 21, with the sequence stopping at the first reply.

    In fact, a cold email sequence is a short series of planned emails sent to the same prospect over a set period, usually starting with an initial cold email followed by several follow-ups if the prospect does not respond. The sequence is written in advance, scheduled in advance, and sent automatically by a sequencing tool, which stops the remaining steps the moment a reply arrives. A sequence is not a drip campaign, which mails on a fixed calendar whatever the prospect does. A sequence listens, and it stops.

    Moreover, a sequence works because busy people do not reply to the first email they receive from a stranger. They mean to reply, and then a meeting starts, and then the email sinks below the fold, and then the day ends. A polite follow-up three days later surfaces the same email at the top of the inbox, at a moment when the prospect may have thirty seconds to spare. Nothing about the offer has changed. The timing has. That is why follow-ups earn replies that the opener never would.

    Cold email sequencing guide: the three reasons sequences beat single emails

    Firstly, sequences beat single emails for three reasons, and each one is easy to see in the data. Reach improves, because four or five touches catch a prospect on a good day rather than betting everything on one day. Trust improves, because a sender who follows up with new value looks persistent rather than desperate, and persistence reads as confidence. Learning improves, because a sequence that tests four different angles tells the sender which angle works, while a single email tells the sender nothing.

    Secondly, the scale of the gain is larger than most senders expect. Instantly’s 2026 benchmark finds that sequences of four to seven steps generate roughly three times the replies of sequences of one to three steps. Four to seven steps is the sweet spot, and the gain comes from the follow-ups, not from a better opener. A sender who writes one brilliant email and mails it once is outplayed by a sender who writes five decent emails and mails them in order.

    What a sequence is not

    For example, a sequence is not a licence to pester. Five emails over three weeks is persistence. Fifteen emails over six weeks is harassment, and it earns spam complaints instead of replies. A sequence is also not a substitute for a good list, because mailing the wrong people five times is five times worse than mailing them once. And a sequence is not automation for its own sake: every step should have a reason to exist, and any step that repeats the last one should be cut.

    In sum, a sequence is a plan for a conversation that has not started yet. The opener starts it, the follow-ups keep it alive, and the break-up closes it gracefully. Our Cold Email for Beginners guide covers the foundations this guide builds on, and our Cold Email Follow-Up Sequences 2026 article goes deeper on the follow-up emails themselves.

    Sequence anatomy: the five jobs every sequence must do

    Secondly, every email in a sequence has one job, and no email should try to do two. Step one opens the loop. Next, the first follow-up surfaces the email again. The second follow-up adds proof. Then the third follow-up changes the angle. Finally, the break-up closes the loop. A sequence where every email repeats the same pitch is not a sequence at all. It is the same email sent five times, and prospects notice.

    In fact, the anatomy below is the default structure this cold email sequencing guide recommends, and it fits most B2B campaigns. Shorter sequences work for warm lists, where three emails are enough. Longer sequences work for high-value deals, where a seventh touch can still pay. The five-email shape is the starting point. The testing section later in this guide shows how to adapt it to your own numbers.

    Cold email sequencing guide: the opener, days 0

    Firstly, the opener has one job: earn a reply, not a meeting. Keep it between 60 and 120 words, lead with a first line that could only have been written for this prospect, name one specific problem they have, and close with a soft question rather than a calendar link. No links, no attachments, no long company history. A prospect who has never heard of you will not read a 300-word introduction. A prospect who would read one does not need it.

    Secondly, the subject line belongs to the opener, and it should sound like a subject line a colleague would write. Short, lowercase, specific, and free of sales words. A subject line that mentions their company, their role, or a recent event will beat a clever subject line every time, because relevance beats cleverness in a crowded inbox. Our guide to writing cold emails that get replies covers the opener in full, with examples.

    The first follow-up, day 3: the nudge

    Moreover, the first follow-up is a nudge, and it should be the shortest email in the sequence. Reply in the same thread, keep it under 75 words, and add one new proof point that was not in the opener. A quick question works well here, because a question is easier to answer than a pitch is to evaluate. The goal is simply to surface the email again, at a moment when the prospect has time to read it.

    For example, a good first follow-up reads like a human checking in, not like a system sending step two. Mention the original note by name, add one sentence of new value, and ask whether the timing is wrong rather than whether the offer is wrong. A prospect who replies “not now” has still replied, and a reply is the start of a conversation.

    Cold email sequencing guide: the second follow-up, day 7

    Finally, the second follow-up adds social proof, and proof means numbers, not adjectives. One specific result for a similar company, in one sentence, with a number in it. A case study link can go here, because the prospect has now seen the sender twice and may be curious enough to click. Keep the email short, lead with the result, and close with the same soft question as before.

    In sum, social proof works because it answers the question every prospect asks after the opener: has this worked for someone like me? A claim without a number is a slogan. A number without a name is a rumour. A named company, a real result, and a number together are proof, and proof is what turns a polite reader into a reply.

    The third follow-up, day 14: the new angle

    Secondly, the third follow-up changes the angle completely. The first three emails argued one case. The prospect did not reply, so arguing it a fourth time will not help. Pick a different pain point, a different benefit, or a different question, and write the email as if the earlier ones never happened. A prospect who ignored a cost argument may reply to a time argument. A prospect who ignored a feature may reply to a risk.

    For example, a sequence selling a deliverability tool might open on bounce rates, follow up on inbox placement, add proof on reply rates, and then change angle entirely to the cost of a burned domain. Each angle reaches a different prospect, and the sequence as a whole reaches more people than any single angle could. The testing section shows how to find which angle earns the most replies.

    Cold email sequencing guide: the break-up, day 21

    Moreover, the break-up email closes the loop, and it should be short, honest, and free of guilt. Tell the prospect plainly that this is the last email, summarise the offer in one sentence, and ask whether the door should stay open or close. Break-up emails often earn the strongest reply rates in a sequence, because they remove pressure instead of adding it.

    In fact, the break-up also protects the sender. A sequence that ends cleanly leaves the prospect with a good impression. A good impression means a future campaign can mail the same person again. A sequence that never ends leaves the prospect with a spam complaint, and a spam complaint hurts every future campaign. End every sequence on purpose, and never let one drift.

    Timing and spacing: the day-by-day schedule

    Secondly, timing is the part of sequencing most senders get wrong, because the instinct is to follow up fast. A follow-up sent the next morning feels eager, and a follow-up sent three days later feels patient. Research quoted across the 2026 follow-up guides finds that waiting three business days before the first follow-up lifts replies by about 31% compared with next-day nudges. Patience pays, and the schedule below is the default this cold email sequencing guide recommends.

    In fact, the schedule spreads five emails across 21 days, with the gaps widening as the sequence goes on. Early gaps are short, because the prospect has just seen the opener and the memory is fresh. Later gaps are long, because the prospect has seen the sender three times and needs space to decide. A schedule that mails every two days for three weeks feels automated. A schedule that widens its gaps feels human.

    Cold email sequencing guide: the default 21-day schedule

    StepDayEmailJob of this emailLength
    1Day 0OpenerOpen the loop, name one problem60 to 120 words
    2Day 3Follow-up 1, the nudgeSurface the email again, add one proof pointUnder 75 words
    3Day 7Follow-up 2, social proofOne named result, with a number60 to 100 words
    4Day 14Follow-up 3, new angleChange the argument completely60 to 100 words
    5Day 21Break-upClose the loop, ask if the door stays openUnder 60 words

    The schedule above is the default from the 2026 follow-up guides, including the day 0, 3, 7, 14 and 21 cadence, and the 3 to 4 business day gap before the first follow-up. Last checked: 16 November 2026.

    Why the gaps widen

    Moreover, widening gaps protect both the reply rate and the sender reputation. A prospect who sees the same sender every two days for three weeks will mark the fourth email as spam, even if the first three were welcome. A prospect who hears from the sender on days 0, 3, 7, 14 and 21 sees a rhythm that looks like a person following up, not a system blasting. The gap is the message, and the message is patience.

    For example, avoid a strict seven-day interval between every step, because emails that always land on the same weekday start to look automated, and prospects notice the pattern. A three-day gap, then four, then seven, then seven breaks the rhythm enough to feel human. Send Tuesday to Thursday, between 9 and 11 in the morning in the recipient’s timezone, when reply rates run highest, and let the tool handle the timezone sending.

    When to shorten, and when to stretch

    Finally, shorten the schedule for warm lists and stretch it for cold ones. A prospect who downloaded a resource, visited a pricing page, or replied once before can take a three-email sequence over ten days, because the relationship already exists. A prospect who has never heard of the sender needs the full 21 days, because trust takes time to build. A high-value deal can stretch to 28 days with a sixth touch, while a low-value offer should stop at three emails and move on.

    In sum, the schedule is a default, not a law. Test it, watch the reply rate by step, and adjust the gaps that underperform. The testing section later in this cold email sequencing guide shows how to run that test properly, with sample sizes worked out rather than guessed.

    Video: This Exact Cold Email Sequence Closed a $6500 Client (Steal This) by Instantly on YouTube. This video is the creator’s property, embedded via YouTube for education. OutreachCompare is not affiliated with Instantly and does not claim ownership of this video.

    Secondly, the video above walks through a real sequence that closed a $6,500 client, step by step. It shows the anatomy and timing from this section in action on a live campaign. The lesson to take from it is the same as the lesson of this cold email sequencing guide: every email has a different job, the gaps widen, and the sequence ends cleanly. Watch how the opener hooks, how the follow-ups add value instead of repeating the pitch, and how the break-up closes the loop.

    Follow-up strategy: what changes each time

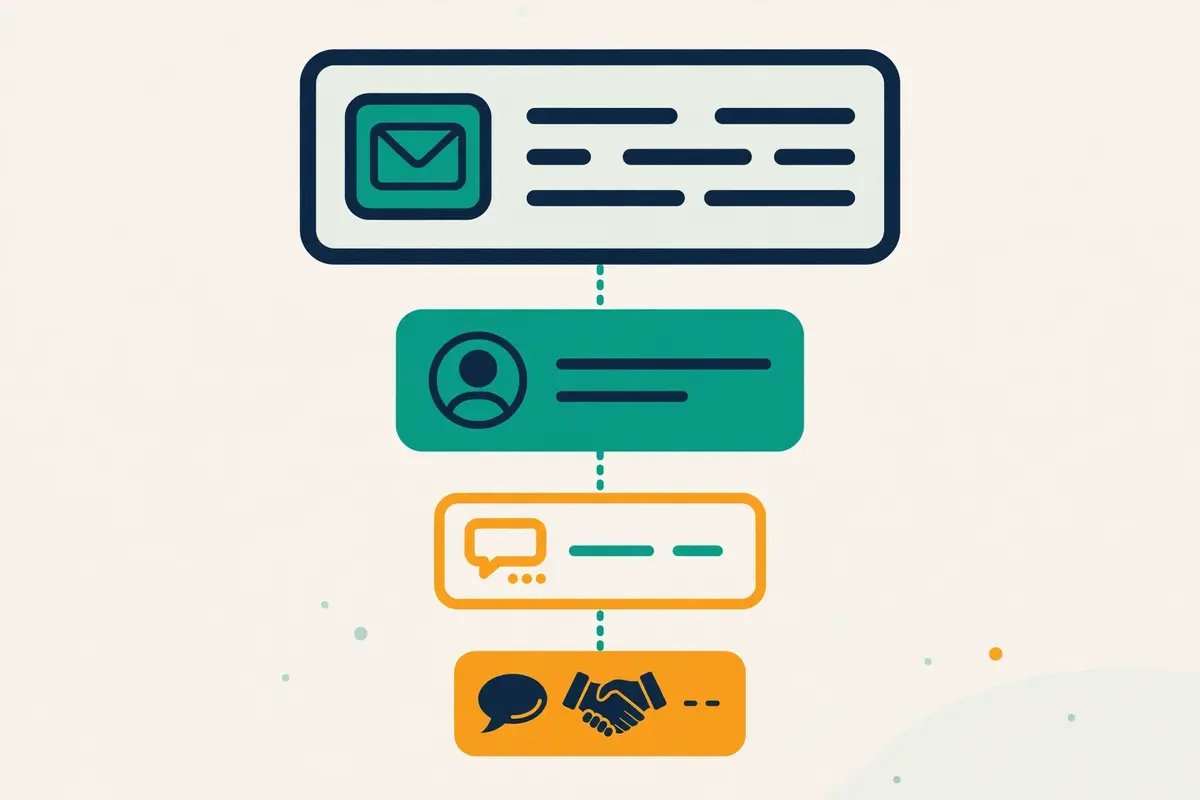
    Cold email sequencing guide: four email cards stacked in one thread, each shorter than the last, ending with a warm reply bubble and a handshake
    Follow-ups in this cold email sequencing guide: four cards in one thread, each shorter and friendlier than the last, ending with a reply instead of another pitch.

    Secondly, the single rule of follow-ups is simple: every follow-up must give the prospect a new reason to reply. A follow-up that repeats the opener is not a follow-up. It is a reminder that the sender has nothing new to say. It teaches the prospect to ignore the next one too. The four follow-ups in the default sequence each change something different: the nudge changes the timing, the proof email changes the evidence, the angle email changes the argument, and the break-up changes the stakes.

    In fact, the data behind that rule is strong. Instantly’s 2026 benchmark finds that 42% of all replies arrive after the first email. Sequences of four to seven steps earn roughly three times the replies of one-to-three-step sequences. The follow-ups are not an afterthought. They are where nearly half the replies live, and where the sequence earns its keep.

    Cold email sequencing guide: the four follow-up rules

    Firstly, reply in the same thread. A follow-up that starts a new thread looks like a new cold email, and the prospect reads it as one. A follow-up in the same thread looks like a conversation, and the prospect can see the earlier emails above it. Most sequencing tools offer a same-thread option, and it should be switched on for every step after the opener.

    Secondly, get shorter as the sequence goes on. The opener earns its 60 to 120 words, because it must explain the problem and the offer. Under 75 words is enough for the first follow-up, because it only needs to surface the email. And under 60 words is enough for the break-up, because it only needs to close the loop. A sequence that gets longer with each step is a sequence that has run out of things to say and is filling the space with words.

    Cold email sequencing guide: one new thing per email

    Moreover, add one new thing per email, and only one. A new proof point, a new case study, a new angle, a new question, or a new resource. One new thing is easy to read and easy to reply to. Three new things in one email is a newsletter, and a newsletter is not a follow-up. The discipline of one new thing per email is what keeps a five-email sequence readable.

    For example, change the subject line only when the email starts a new thread, and keep it the same when it does not. A follow-up in the same thread inherits the opener’s subject line, which is exactly right, because the prospect recognises the thread. Changing the subject line while staying in the thread looks confused. A follow-up that starts a new thread with a new subject line looks like a stranger. Match the subject to the thread, and the thread will do the work.

    What to do when a prospect replies

    Finally, stop the sequence the moment a prospect replies, whatever the reply says. A “yes” needs a human, not another automated email. A “no” needs respect, not another automated email. A “not now” needs a note in the CRM and a new sequence in three months, not another automated email this week. Every sequencing tool in the comparison below stops on reply automatically, and that behaviour should never be switched off.

    In sum, reply handling is where sequences earn their reputation. A sender who stops on reply looks professional. A sender who keeps mailing after a reply looks like a robot. The prospect will say so, publicly, in a screenshot. Our Cold Email Follow-Up Sequences 2026 article covers follow-up copy in depth, with templates for each step.

    Cold email sequencing guide: when to stop early

    Secondly, stop a sequence early when the signals say to. A prospect who opens every email yet never replies is interested but not ready. A LinkedIn visit or a short personal note will do more than a fourth email. No opens after two emails means no interest, and a fifth email will not change that. Any bounce, out-of-office note saying the person has left, or unsubscribe should end the sequence at once. The record should be cleaned rather than mailed again.

    For example, a sequence that stops early is not a sequence that failed. It is a sequence that listened. The tools in the comparison below track opens, clicks and replies per step. The sender who reads those numbers will know exactly where each sequence should stop. The deliverability section explains the numbers to watch, and the limits that keep a sequence safe.

    Personalisation at scale: where it pays, and where it is wasted

    Cold email sequencing guide: an email draft on a laptop screen with the first line, company name and job title highlighted as personalised fields, beside a magnifying glass over a profile card
    Personalisation in this cold email sequencing guide: the first line, the company name and the job title highlighted as the fields that earn a reply, found by research rather than guessed.

    Secondly, personalisation is the difference between an email that feels written for one person and an email that feels written for ten thousand. The first line is where it lives. A first line that names a real event, a real problem, or a real detail about the prospect’s company will be read. A first line that says “I hope you are doing well” will not be read, because it could have been written for anyone, and the prospect knows it.

    In fact, the 2026 data puts a number on the gap. Signal-based personalisation, built on a real trigger such as a job change, a funding round, or a hiring spike, achieves reply rates near 18%, against about 3.4% for generic outreach, according to the benchmarks quoted in the 2026 cadence guides. Personalisation is not a garnish. It is the single biggest lever in a sequence, and it is worth more than any subject line trick.

    Cold email sequencing guide: the three layers of personalisation

    Firstly, personalisation has three layers, and each one costs a different amount of effort. Variables are the cheapest layer: first name, company name, job title, and industry, merged into a template. They cost nothing, and every sequencing tool supports them, yet they are also the weakest layer, because every sender uses them and prospects have learned to spot them.

    Secondly, triggers are the middle layer: a job change, a funding round, a new hire, a tech-stack change, or a hiring spike, used as the first line. Triggers cost research, and the research is where the reply rate lives. A trigger that is real and recent will beat a variable every time, because it proves the sender looked. Lemlist, Instantly and Saleshandy all sell intent and trigger data for this layer, and the enrichment section of our B2B Data Enrichment Guide 2026 explains where triggers come from.

    Moreover, AI icebreakers are the newest layer: a short, personal opening line generated from a prospect’s LinkedIn profile, website, or recent post. Lemlist’s AI icebreakers, Instantly’s AI sequence generator, and Salesforge’s AI personalisation all do this. The quality depends on the data they are fed. An icebreaker built on a real post is sharp. An icebreaker built on a job title is a variable with better grammar.

    Where personalisation is wasted

    For example, personalisation is wasted in three places, and knowing them saves hours. It is wasted on the break-up email, which should be short and honest rather than clever. It is wasted on the subject line of a follow-up in the same thread, because the thread already carries the opener’s subject. And it is wasted on a list that was never segmented, because a personal first line on an email to the wrong person is still an email to the wrong person.

    Finally, personalisation is also wasted when it is wrong. A first line that names the wrong company, the wrong role, or an event from three years ago is worse than no personalisation at all, because it proves the sender did not look. Spintax helps here: rotating two or three versions of a sentence keeps the copy fresh, and every tool in the comparison supports it. Verify every merge field before sending, and send a test to yourself first.

    Cold email sequencing guide: spintax, variables and AI icebreakers

    In sum, the practical setup is simple. Use variables for the fields that never change, such as first name and company. Triggers belong on the first line of the opener and the angle email, where the reply rate lives. AI icebreakers should draft the copy, and every one needs editing by hand before sending, because an unedited icebreaker reads like a machine wrote it. Spintax can rotate the wording of the follow-ups, so no two prospects in the same company receive identical emails.

    Secondly, keep the personalisation budget honest. A list of one thousand prospects cannot take an hour of research each. A list of fifty cannot take five minutes each. Match the effort to the value: deep research for the fifty accounts that matter most, triggers for the five hundred that matter next, and variables for the rest. The sequence that personalises the right emails, rather than every email, is the sequence that scales.

    Conditional branches and subsequences: replies that steer the sequence

    Secondly, a conditional branch is a fork in a sequence: if the prospect does something, the sequence takes one path, and if they do something else, it takes another. An opener opened three times but never replied to can trigger a shorter, sharper follow-up. A link clicked can trigger a case-study email. A reply marked positive can trigger a meeting request, while a reply marked neutral can trigger a resource instead. The sequence stops being a straight line and becomes a map.

    In fact, branches are the feature that separates a basic sequencer from a serious one. Woodpecker builds its sequences around condition-based steps, with up to 16 steps per campaign, mixing emails with manual, LinkedIn and call tasks. Instantly and Smartlead both offer behaviour-based subsequences, which move a prospect into a different sequence when they open, click, or reply. Lemlist and Reply.io branch across channels, so a prospect who ignores email can receive a LinkedIn visit instead.

    Cold email sequencing guide: the branches worth building first

    Firstly, build the reply branch first, because it is the only branch every sequence needs. A positive reply should stop the sequence and alert a human at once. When the reply is neutral, move the prospect into a short nurture subsequence, with a resource and a check-in a month later. A negative reply should stop the sequence and mark the record do-not-mail. Remember that a reply is a person talking back, and no automated step should ever follow one.

    Secondly, build the engagement branch next. A prospect who opened the opener three times is interested. A short personal email will do more than another automated step. Clicks signal even more warmth, and a case study or a demo offer is the right next step. Someone who opened nothing after two emails is cold. The sequence should shorten rather than lengthen, with the break-up arriving early.

    Moreover, build the channel branch only when the tool supports it well. A prospect who ignores three emails may answer a LinkedIn connection request. A prospect who ignores LinkedIn may answer a call. Lemlist, Klenty and Reply.io all run multichannel branches, and La Growth Machine is built around them. The 2026 cadence data favours sequential multichannel, email first and other channels only after interest shows, with about a 30% higher positive reply rate than hitting every channel at once.

    Subsequences: the sequence inside the sequence

    For example, a subsequence is a short sequence that runs when a branch fires. It is the cleanest way to handle common situations. An out-of-office reply can trigger a subsequence that waits a week and then resumes. A “not now” reply can trigger a subsequence that checks in after ninety days. A bounced email can trigger a subsequence that tries a different address, once, and then stops. Subsequences keep the main sequence clean, because the exceptions live somewhere else.

    Finally, do not overbuild branches. A sequence with twenty branches is a sequence nobody can debug. A branch that fires once a month is a branch that should not exist. Build three branches, reply, engagement, and channel, and add a fourth only when the numbers prove it earns replies. The feature matrix later in this cold email sequencing guide shows which tools support branches and subsequences, and which do not.

    A/B testing sequences: what to test, and how many sends you need

    Cold email sequencing guide: two email variants labelled A and B above a bar chart where variant B's bar is taller, with a green upward arrow
    A/B testing in this cold email sequencing guide: variant A against variant B, judged on replies per variant, with the winner taking the next campaign.

    Secondly, A/B testing a sequence means changing one thing, sending both versions to similar prospects, and keeping the version that earns more replies. One thing is the discipline: change the subject line, or the first line, or the call to action, or the timing, and change nothing else. A test that changes three things at once tells the sender nothing, because the winner could have won for any of the three reasons.

    In fact, the most common testing mistake is stopping too early. A test with two hundred sends per variant and a 3% reply rate cannot tell a 3% variant from a 4% variant, because the difference is smaller than the noise. The sample sizes below are computed, not guessed, at 80% power and 95% confidence. They show how many sends a real answer needs. Our A/B Testing for Cold Email 2026 guide covers the maths in full.

    Cold email sequencing guide: sample sizes, computed not guessed

    Reply rate, variant AReply rate, variant BSends needed per variantWhat this means
    1%2%About 2,300Doubling a low rate still needs thousands of sends
    2%3%About 3,800A one-point gain at a low base is the hardest to prove
    3%4.5%About 2,500A 50% lift on the average 3.4% reply rate
    5%10%About 430Big lifts on strong baselines prove fast

    Sample sizes computed at 80% power and 95% confidence. At 200 sends per variant with a 3% baseline, only a jump to about 7.8% is detectable, so most small tests prove nothing. Last checked: 16 November 2026.

    What to test first

    Moreover, test in order of impact, and start with the subject line. The subject line decides whether the email is opened. An unopened email cannot reply, so a subject-line test moves the whole funnel. Test two subject lines that argue different things, one specific and one curious, and run the test until the sample size above is reached. A subject line that wins by a point on two thousand sends is a real win.

    For example, test the first line next, because the first line decides whether the opened email is read. Test a trigger-based first line against a variable-based one. The trigger will usually win, because it proves the sender looked. Then test the call to action: a soft question against a meeting request, or a resource offer against a direct ask. Test the timing last, because a timing test needs the same care as a copy test, and it is the easiest to misread.

    Cold email sequencing guide: what not to test

    Finally, do not test the whole sequence at once. A test that changes the opener, the follow-ups, and the timing together is not a test. It is two different campaigns, and the winner teaches nothing about which change mattered. Test one step at a time, keep the winner, and move to the next step. A sequence improves one test at a time. A sequence that improves every week will out-reply a sequence that was never tested at all.

    In sum, record every test, even the ones that lose. A test that loses teaches the sender what not to send. A record of lost tests stops the team from re-running them. Note the date, the change, the sample size, and the reply rate per variant, in the same place every time. The sender who keeps that record will know, after three months, exactly which subject lines, first lines and calls to action their market answers.

    Video: 15 Mins to Become an Expert at Cold Emailing by Prospeo on YouTube. This video is the creator’s property, embedded via YouTube for education. OutreachCompare is not affiliated with Prospeo and does not claim ownership of this video.

    Secondly, the video above compresses the craft of cold emailing into fifteen minutes, from the first line to the follow-up. It is a useful companion to this section. Watch it once before writing a sequence, and once after the first test results arrive, because the advice lands differently when the sender has real numbers to compare it against.

    Deliverability guardrails inside sequences

    Secondly, deliverability is the guardrail that keeps a sequence in the inbox, and it matters more than any copy trick. A sequence that lands in spam earns no replies, whatever its subject lines say. The guardrails below are the numbers this cold email sequencing guide recommends. They come from the 2026 benchmark data and the deliverability guides that track it. Break them, and the sequence will pay for it in spam complaints.

    In fact, the first guardrail is volume. Send 25 to 30 emails per mailbox per day, and never more than 40, even on a warmed mailbox. A new mailbox should start far lower, at five to ten a day, and ramp up over two to four weeks of warmup. Volume is the fastest way to burn a domain. A burned domain hurts every campaign that follows, not just the one that burned it.

    Cold email sequencing guide: the numbers to watch every day

    MetricHealthyWarningStop and fix
    Bounce rateUnder 2%2% to 5%Above 5%: pause, clean the list
    Spam complaint rateAim under 0.1%0.1% to 0.3%Never 0.3% or above
    Reply rateAbove 5% is strong1% to 3% is normalUnder 1%: targeting is wrong
    Positive reply rate1% to 3%Under 1%Near 0%: the offer or angle is wrong
    Open rateAbout 21% averageUnder 15%Unreliable since Apple MPP: judge on replies

    Benchmarks from Instantly’s 2026 benchmark report, which puts the average reply rate at 3.43%, and the 2026 deliverability guides. Open rates are unreliable since Apple Mail Privacy Protection inflates them. Last checked: 16 November 2026.

    Warmup, rotation and the sending domain

    Moreover, warmup is the step that makes volume safe. A new domain needs two to four weeks of warmup before it carries a real campaign, with sending volume rising gradually and engagement building day by day. Inbox rotation spreads the sending across several mailboxes, so no single mailbox carries the whole load. A separate sending domain keeps the main domain safe, so a problem with a campaign never touches the company’s real email.

    For example, every tool in the comparison below offers warmup and inbox rotation in some form, yet the details differ. Instantly includes unlimited warmup across a 4.2M+ account pool on every plan. Smartlead includes unlimited AI warmup with spam rescues, with its premium Warmup Pool as a $59 a month add-on on Base and Pro, free only from Unlimited Smart. Woodpecker includes warmup slots that rise with the plan, from 2 on entry. Lemlist’s lemwarm, Saleshandy’s warmup, Reply.io’s deliverability tools and Klenty’s rotation all cover the same ground. Our guide to warming up a new email domain covers the schedule in full.

    Cold email sequencing guide: verification before the first send

    Finally, verify every email before the first send, because bounces are the fastest route to spam. A list that bounces above 2% tells the receiving servers that the sender does not know their own list. The servers respond by filtering the rest. Enrich first, verify second, and send third, in that order, every time. Our Email Verification Guide 2026 explains the checks, and our Deliverability Guide 2026 covers the whole system these numbers belong to.

    In sum, deliverability is a system, not a setting. A verified list, a warmed domain, a separate sending domain, inbox rotation, a patient daily volume, and a sequence that stops on reply will keep a sender in the inbox for years. Skip one piece, and the system leaks. Skip two, and the sequence lands in spam. The guardrails above are the checklist to run before every campaign.

    Tool comparison: seven sequencers, priced and verified

    Secondly, seven tools cover the sequencing market for most senders, and they differ more in pricing model than in features. Instantly and Smartlead price by sending volume, with unlimited mailboxes. Lemlist, Reply.io and Klenty price per user, with multichannel steps. Woodpecker prices by contacted prospects, with agency controls. Saleshandy prices by credits, with a low entry point. The table below shows the entry price of each, checked on 16 November 2026, with the catches flagged beside each one.

    In fact, no tool in this cold email sequencing guide has been tested hands-on yet, so the comparison below rests on the features and prices published on the official sites, and on Matthew’s verified tool profiles where they add detail. A price that could not be confirmed on the official page is marked “check the site” rather than guessed. A figure that changed since an earlier article is flagged in plain language.

    Cold email sequencing guide: the seven tools, priced

    ToolEntry planNext plan upFree trialBest for
    InstantlyGrowth $47/mo; $37.60 annual
    5,000 emails, 1,000 contacts
    Hypergrowth $107/mo; $85.58 annual
    125,000 emails, 25,000 contacts
    No trial shown
    On the pricing page
    High-volume email-only sequences
    SmartleadBase $39/mo; $32.50 annualPro $94/mo; $78.30 annualCheck the siteAgencies, deliverability-first sending
    LemlistEmail $69/mo; $55 annual
    Flat workspace price
    Multichannel $109/mo; $87 annual
    Per user
    14-day trial
    Plus 200 free credits
    Multichannel sequences, LinkedIn-first
    Woodpecker$35/mo monthly; $23.33 annual
    500 prospects, 8,000 emails, 2 warm-ups
    $67/mo
    2,000 prospects, 32,000 emails
    14-day trial
    No card required
    Agencies, condition-based sequences

    Cold email sequencing guide: the other three tools, priced

    ToolEntry planNext plan upFree trialBest for
    SaleshandyStarter $34/mo annual; $41 monthlyPro $76/mo annual; $99 monthly7-day trial
    No card required
    Low-cost start, verified data included
    Reply.ioEmail Volume from $59/moMultichannel from $99/user/mo14-day trialMultichannel plus an AI SDR
    KlentyStarter $50/mo annual
    Email-only
    Growth $70/user/mo14-day trial
    No card required
    Sales teams, calling plus email

    Instantly Hypergrowth rose from $97 to $107 a month, and the pricing page shows both 100,000 and 125,000 emails for the plan, so confirm the limit on the site. Smartlead Unlimited Smart is $174 a month ($144.50 annual) and Unlimited Prime is $379 ($314.60); SmartDelivery is $49, $174 and $599 a month, and SmartServers is $39 per server a month.

    Woodpecker also lists $99 (4,000 prospects), $159 (8,000), $188 (10,000) and $262 (15,000) a month; its Multichannel and LinkedIn prices are not stated on the page, so check the site. Reply.io annual figures of $49 and $89, Jason at $800 a month, and Agency at $166 were visible on 15 November but not in the 16 November fetched page, so confirm them on the site. Last checked: 16 November 2026. Features and pricing can change, so please check the provider’s site before you buy. We do not guess at features, prices or trials.

    What the entry price really buys

    Moreover, the entry price buys a different shape of tool at each provider. Instantly’s Growth buys unlimited mailboxes, unlimited warmup, inbox rotation, custom tracking domains, and an AI sequence generator, with 5,000 emails and 1,000 uploaded contacts a month. Smartlead’s Base buys unlimited mailboxes, inbox rotation, dynamic ESP matching, bounce auto-protection, and a master inbox, with warmup through its premium pool as a $59 a month add-on. Lemlist’s Email plan buys a flat workspace price, a 650M+ database, lemwarm, spintax, AI icebreakers, and A/B testing, with enrichment at $20 a month and intent at $29.

    For example, Woodpecker’s entry plan buys condition-based sequences with up to 16 steps, automated warmup, inbox rotation, bounce shield, AI copywriting, spintax, and a built-in database of 1B+ contacts with free verification through Bouncer. Saleshandy’s Starter buys sending, warmup, an 852M+ contact database, and an 8-provider waterfall with verification inside the credit. Reply.io’s Email Volume buys sequences, a dialer, and Jason, its AI SDR, from $500 a month as a separate tier. Klenty’s Starter buys email-only sequences for 15,000 contacts and 75,000 emails, with calling from Growth at $70 a user a month.

    Cold email sequencing guide: the feature matrix at a glance

    ToolUnlimited mailboxesBehaviour subsequencesMultichannel stepsBuilt-in warmupA/B testing
    InstantlyYesYes—Yes, unlimitedYes
    SmartleadYesYes—Yes, unlimited AI warmupYes
    Lemlist—YesYes, email, LinkedIn, callsYes, lemwarmYes
    Woodpecker—Yes, condition-basedYes, via LinkedIn tasksYes, slots by planYes
    Saleshandy—Yes—YesYes
    Reply.io—YesYes, email, LinkedIn, calls, SMSYesYes
    Klenty—YesYes, email, LinkedIn, calls—Yes

    “Yes” means the feature is stated on the provider’s site or in Matthew’s verified tool profiles; “—” means not confirmed. Instantly and Smartlead price by volume with unlimited mailboxes, while Lemlist, Reply.io and Klenty price per user. Last checked: 16 November 2026. Features and pricing can change, so please check the provider’s site before you buy. We do not guess at features, prices or trials.

    The pricing traps to watch

    Secondly, three pricing traps catch buyers, and all three are visible in the table above. The first is the per-user trap: Lemlist Multichannel at $109 a user a month, Reply.io Multichannel at $99 a user a month, and Klenty Growth at $70 a user a month all multiply with every seat. Instantly and Smartlead charge one flat price however many mailboxes are connected. A team of five pays five times the headline at a per-user tool, and once at a volume tool.

    Moreover, the second trap is the add-on trap. Lemlist enrichment costs $20 a month and intent costs $29, Smartlead’s premium Warmup Pool costs $59 a month on Base and Pro, Reply.io charges $69 for LinkedIn and $29 for calls and SMS. Klenty charges $45 a user a month for its Parallel Dialer and $50 a seat a month for Dynamic Presence. The headline price is rarely the bill. Add the add-ons before comparing.

    For example, the third trap is the allowance trap. Instantly Growth allows 5,000 emails and 1,000 uploaded contacts a month. The uploaded-contact cap is a lifetime limit, not a monthly allowance that resets. Woodpecker charges by contacted prospects, from 500 on entry, so a sender who mails the same prospect five times pays for one prospect, not five. Saleshandy charges by credits, with 1 credit per verified email and nothing for unverified results. Read the allowance, not just the price.

    Pros and cons: the honest case for each tool

    Secondly, every tool in this cold email sequencing guide has a genuine strength and a genuine weakness. The honest case for each one is worth stating. A guide that lists only strengths is a sales page. A guide that lists only weaknesses is a hit piece. The version below gives each tool its due, in plain language, so the reader can weigh the trade-off rather than taking a recommendation on trust.

    Cold email sequencing guide: Instantly, the volume pick

    Firstly, Instantly is the best tool for high-volume email-only sequences, and its strength is scale at a flat price. Unlimited mailboxes, unlimited warmup across a 4.2M+ account pool, inbox rotation, custom tracking domains, behaviour subsequences, an AI sequence generator, and Unibox for replies, from $47 a month. Its weakness is the stack: lead data, credits and the CRM are separate subscriptions, no trial is shown on the pricing page. The Hypergrowth email limit is stated as both 100,000 and 125,000 on the same page. A sender who mails in volume and wants one flat bill should buy it. A sender who needs LinkedIn steps should look at Lemlist.

    Smartlead, the agency pick

    Secondly, Smartlead is the best tool for agencies, and its strength is deliverability infrastructure. Unlimited mailboxes, inbox rotation, dynamic ESP matching, bounce auto-protection, unlimited AI warmup with spam rescues, conditional subsequences, a master inbox, and white-label client portals, from $39 a month. Its weakness is the warmup pool: the premium Warmup Pool costs $59 a month extra on Base and Pro, and is free only from Unlimited Smart at $174 a month. A sender who runs client campaigns and needs every mailbox protected should buy it. A solo sender who mails a small list should start cheaper.

    Cold email sequencing guide: Lemlist, the multichannel pick

    Moreover, Lemlist is the best tool for multichannel sequences, and its strength is that email, LinkedIn, calls, WhatsApp and SMS live in one sequence. A 650M+ database, AI icebreakers, personalised images and video, spintax, lemwarm, and a 14-day trial with 200 free credits, from $69 a month for email. Its weakness is price per user: Multichannel costs $109 a user a month, and enrichment and intent are paid add-ons at $20 and $29 a month. A sender whose prospects live on LinkedIn should buy it. A sender who mails email only should buy Instantly.

    Woodpecker, the agency sequencer

    For example, Woodpecker is the best tool for agencies that need control, and its strength is condition-based sequencing. Up to 16 steps per campaign, mixing emails with manual, LinkedIn and call tasks, automated warmup, inbox rotation, bounce shield, AI copywriting, spintax, a 1B+ contact database, and free verification through Bouncer, from $35 a month. Its weakness is the slider: prices are set by contacted prospects. The Multichannel and LinkedIn prices are not stated on the page, so the buyer must check the site. A sender who builds branches and runs client campaigns should buy it. A sender who wants the cheapest flat price should look at Saleshandy.

    Cold email sequencing guide: Saleshandy, the value pick

    Finally, Saleshandy is the best value sequencer, and its strength is fairness at a low price. Sending, warmup, an 852M+ contact database, an 8-provider waterfall with verification inside the credit, 1 credit per verified email and nothing for unverified results, from $34 a month, with a 7-day trial and no card required. Its weakness is scope: no free plan is shown, its multichannel steps are thinner than Lemlist’s or Reply.io’s. It is a smaller vendor with a narrower brand footprint. A sender who wants the lowest paid entry price should buy it. A sender who wants a free plan should look elsewhere.

    Reply.io, the AI SDR pick

    In sum, Reply.io is the best tool for teams that want an AI SDR, and its strength is breadth. Email Volume from $59 a month, Multichannel from $99 a user a month, LinkedIn, calls and SMS in one sequence, and Jason, its AI SDR, from $500 a month. Its weakness is transparency: the annual figures of $49 and $89, Jason at $800 a month, and Agency at $166 were visible on 15 November but not in the 16 November fetched page, so the buyer must confirm them on the site. A team that wants AI to handle replies should buy it. A team that wants a simple flat price should buy Instantly.

    Cold email sequencing guide: Klenty, the sales-team pick

    Secondly, Klenty is the best tool for sales teams that call as well as email, and its strength is the dialer. Email, LinkedIn and calling in one sequence, a parallel dialer, coaching, and CRM sync, from $50 a month for email-only Starter, with a 14-day trial and no card required. Its weakness is the per-user maths: Growth costs $70 a user a month, Plus costs $99, the Parallel Dialer adds $45 a user a month. Dynamic Presence adds $50 a seat a month, so a team of five pays far more than the headline. A sales team that lives on the phone should buy it. A solo sender should start with Saleshandy or Instantly.

    Who should pick which: a decision framework

    The choice is simpler than the comparison suggests, because most senders fall into one of four groups, and each group has an obvious pick. Name the group that describes the sender, and the shortlist shrinks from seven tools to one or two. Leave the question unanswered, and the shortlist stays seven wide, which helps nobody. The framework below covers the volume sender, the agency, the multichannel sender, and the beginner.

    Pick Instantly when you send in volume, by email only

    Firstly, pick Instantly when the volume is high and the channel is email. Its Growth plan costs $47 a month, or $37.60 on annual billing, and buys unlimited mailboxes, unlimited warmup, inbox rotation, and 5,000 emails a month. A solo founder mailing thousands of prospects, a startup running its first big campaign, or a team that needs one flat bill should all start here. The only reason to look elsewhere is a need for LinkedIn steps, or for an AI SDR.

    Pick Smartlead when you run client campaigns

    Secondly, pick Smartlead when the campaigns belong to clients. Its Base plan costs $39 a month, or $32.50 on annual billing, and buys unlimited mailboxes, dynamic ESP matching, bounce auto-protection, and a master inbox, with white-label portals from the higher plans. An agency running ten client domains, a team that needs every mailbox protected, or a sender whose deliverability has burned before should all pick Smartlead. The only reason to look elsewhere is the $59 a month Warmup Pool add-on on the lower plans.

    Pick Lemlist or Reply.io when the sequence leaves email

    Moreover, pick Lemlist when the prospects live on LinkedIn, because its Multichannel plan at $109 a user a month runs email, LinkedIn, calls, WhatsApp and SMS in one sequence, with AI icebreakers and a 650M+ database. Pick Reply.io when the team wants an AI SDR as well, because Jason at $500 a month handles replies that Lemlist leaves to a human. A sender whose sequence is email only should not pick either, because a per-user multichannel price is wasted on an email-only campaign.

    Pick Woodpecker, Saleshandy or Klenty when the shape is specific

    For example, pick Woodpecker when the sequence needs branches, because its condition-based steps with up to 16 per campaign are the most flexible here, from $35 a month. Pick Saleshandy when the budget is tightest, because $34 a month is the lowest paid entry price in this cold email sequencing guide, with verified data included. Pick Klenty when the team calls as well as emails, because its dialer and coaching are built for sales teams, from $50 a month for email-only Starter.

    In sum, the framework is a ladder, not a leap. Start with the cheapest tool that fits the pattern, run the first sequence, and watch the bounce rate and the reply rate. If bounces stay below 2% and replies stay above 3.4%, the tool is doing its job, and the sender should stay with it. If the volume grows, or the channels change, the sender can switch, because a sequencing subscription is not a marriage. Picking by pattern keeps the bill low, keeps the inbox safe, and saves the team from switching tools every quarter.

    Frequently asked questions

    Cold email sequencing guide: how many emails should a sequence have?

    A cold email sequence should have four to five emails in total, sent over 21 days: an opener on day 0, follow-ups on days 3, 7 and 14, and a break-up on day 21. Instantly’s 2026 benchmark finds that sequences of four to seven steps earn roughly three times the replies of one-to-three-step sequences, while more than eight emails risks spam complaints.

    Cold email sequencing guide: how long should I wait between follow-ups?

    Wait three business days before the first follow-up, then widen the gaps: day 3, day 7, day 14 and day 21. Waiting three business days lifts replies by about 31% compared with next-day nudges, according to the 2026 follow-up guides, and widening gaps keep the sequence feeling human rather than automated.

    Cold email sequencing guide: how many cold emails can I send per day?

    Send 25 to 30 emails per mailbox per day, and never more than 40, even on a warmed mailbox. A new mailbox should start at five to ten a day and ramp up over two to four weeks of warmup. Spread the sending across several mailboxes with inbox rotation, and use a separate sending domain to protect the main domain.

    Cold email sequencing guide: what is a good reply rate for a sequence?

    A good reply rate for a cold email sequence is above 5%, while the average is about 3.4% according to Instantly’s 2026 benchmark report, with a positive reply rate of 1% to 3%. A reply rate below 1% means the targeting is wrong, whatever the bounce rate says. A bounce rate above 2% means the list needs cleaning.

    Cold email sequencing guide: should follow-ups be in the same thread?

    Yes, follow-ups should reply in the same thread as the opener, so the prospect sees one conversation rather than five separate cold emails. Most sequencing tools offer a same-thread option, and it should be switched on for every step after the opener. Change the subject line only when the email starts a new thread.

    Cold email sequencing guide: which tool is best for cold email sequences?

    Instantly is the best tool for high-volume email-only sequences from $47 a month, Smartlead is the best tool for agencies from $39 a month. Lemlist is the best tool for multichannel sequences from $69 a month. Woodpecker suits agencies that need branches from $35 a month, Saleshandy suits the tightest budgets from $34 a month. Klenty suits sales teams that call as well as email from $50 a month.

    The verdict

    Secondly, the verdict in this cold email sequencing guide is a set of best-for labels, not a numeric score, because no hands-on testing has been done yet. A score without testing would be a guess. The labels below come from the features and prices checked on the official sites on 16 November 2026, and from the way each tool fits a volume sender, an agency, a multichannel sender, and a beginner.

    For example, Instantly is the best pick for high-volume email-only sequences, from $47 a month, with unlimited mailboxes and unlimited warmup. Smartlead is the best pick for agencies, from $39 a month, with dynamic ESP matching and bounce auto-protection. Lemlist is the best pick for multichannel sequences, from $69 a month, with LinkedIn, calls and AI icebreakers in one sequence.

    Cold email sequencing guide: the rest of the verdict

    Moreover, Woodpecker is the best pick for agencies that need condition-based branches, from $35 a month, with up to 16 steps per campaign. Saleshandy is the best value pick, from $34 a month, with verified data included and nothing charged for unverified results. Reply.io is the best pick for teams that want an AI SDR, with Jason from $500 a month. Klenty is the best pick for sales teams that call as well as email, from $50 a month.

    Finally, a sequence is the cheapest leverage in cold email. The senders who build one properly are the senders who keep hearing back year after year. Start with five emails over 21 days, keep every email under 120 words, personalise the first line with a real trigger, test one thing at a time, and stop the moment a prospect replies. An honest sequence, a verified list, a warmed domain, and a patient daily volume will take a sender further than any single tool ever will.

    Our verdict on this cold email sequencing guide

    For high-volume email-only sequences, choose Instantly, from $47 a month, with unlimited mailboxes and unlimited warmup. Smartlead is the best pick for agencies, from $39 a month, with dynamic ESP matching and bounce auto-protection. Lemlist is the best pick for multichannel sequences, from $69 a month, with LinkedIn, calls and AI icebreakers. Woodpecker suits agencies that need branches, from $35 a month, and Saleshandy is the best value, from $34 a month. No number is attached to these labels, because the tools have not been tested hands-on yet.

    Start here: build the five-email, 21-day sequence, send 25 to 30 emails per mailbox a day, and test one thing at a time until the reply rate climbs past 5%.

    Keep reading

    Cold email sequencing guideInstantly from $47/mo · Smartlead from $39/mo · Lemlist from $69/mo Visit Instantly →
  • B2B Data Enrichment Guide 2026

    B2B Data Enrichment Guide 2026

    Your list knows a name and a company. Enrichment fills in everything else.

    This B2B data enrichment guide explains what enrichment adds to the records you already have, which data types matter most for cold email, how waterfall enrichment finds the contacts a single source misses, what accuracy claims really mean, and what seven leading providers charge, checked on 16 November 2026.

    Visit Apollo →Explore Saleshandy →See Lemlist →

    Prices checked 16 November 2026 on the official sites of all seven providers. Features and pricing can change, so please check the provider’s site before you buy. We do not guess at features, prices or trials.

    Quick Answer

    It is the process of adding missing fields to the contact and company records you already have, such as a verified work email, a direct dial, a job title, company size, tech stack and buying-intent signals, so every record is complete enough to target, personalise and send to. A single data source typically finds 40 to 70% of the emails you ask for, while a waterfall that queries several providers in sequence lifts coverage to 75 to 95%.

    Apollo is the best all-round starting point, with a free plan and 240M+ contacts from $49 a month. Saleshandy is the best value waterfall, with 1 credit per verified email and $0 for unverified results. In short, enrich every list before you verify it, pay only for results you can use, and refresh the data every quarter.

    Why this B2B data enrichment guide starts with the record, not the email

    Firstly, most cold email advice starts with writing, and that order is backwards. A brilliant email means nothing when it goes to the wrong person, at a company that would never buy, with a first line that guesses at a job title the person left two years ago. Enrichment is the step that stops all three mistakes before the email is written. This B2B data enrichment guide therefore starts with the record itself, the humble row in a spreadsheet, and shows how a good record turns into a reply.

    Secondly, the good news is that enrichment is cheap, fast and largely automatic. A list of one thousand contacts can be enriched for the price of a single month on an entry plan, often under $50. The work takes minutes rather than the days of manual research it replaces. Compared with the cost of mailing the wrong people, burning a domain on bounces, or paying a sales rep to research every prospect by hand, enrichment is the cheapest leverage in cold email. Every provider in this B2B data enrichment guide exists to make that leverage easy to buy.

    Finally, every price and feature in this B2B data enrichment guide was checked on the official sites on 16 November 2026. Where a vendor publishes no price, or where a figure comes from a reported third-party breakdown, the guide says so in plain language. Jump to the pricing section when the budget is the constraint, and start at the top when the goal is understanding how enrichment actually works.

    What B2B data enrichment is, and why it matters for cold email

    In fact, B2B data enrichment is the process of taking a contact or company record you already own and adding the fields that are missing. A list usually starts thin: a name, a company, perhaps a LinkedIn URL. Enrichment fills in the rest. It adds a verified work email, a direct dial or mobile number, a job title and seniority, the company size and industry, the technologies the company uses, and signals that the company is ready to buy. The record that comes back is the same person, described properly.

    Moreover, enrichment matters for cold email because every part of a campaign depends on the record behind it. Targeting depends on firmographics: the sender needs to know the company is the right size, in the right industry, in the right place. Personalisation depends on contact and technographic data: the sender needs a real job title, a real tech stack, a real recent event to mention. Deliverability depends on verification: the sender needs an email that exists, not a guess. Enrichment feeds all three, which is why it sits at the start of the workflow rather than the end.

    B2B data enrichment guide: enrichment is not the same as finding

    Firstly, two words get mixed up, and the mix-up causes real confusion. Finding is the job of discovering new contacts, usually by searching a database for people who match a description. Enrichment is the job of completing records you already have, usually by matching a name and company against several databases and adding whatever they know. A tool can do one, the other, or both, and most of the providers in this B2B data enrichment guide do both. The distinction matters when a tool claims a huge database yet only enriches the contacts you bring it. A database of 850 million contacts is a finding asset. A waterfall that completes your own list is an enrichment asset. Buy the one you need.

    Secondly, enrichment is also different from verification, which is a narrower job. Verification checks whether an email address is real and able to receive mail. Enrichment adds the address in the first place, along with everything else about the person and the company. A record should be enriched first and verified second, because verifying a thin record wastes credits on addresses that were never the right person. Our Email Verification Guide 2026 covers the verification step in full, and our Email Finders Guide covers the finding step.

    B2B data enrichment guide: the three things enrichment changes

    For example, enrichment changes three things about a campaign, and all three show up in the numbers. Replies rise, because the email reaches the right person with a first line that is actually about them. Bounces fall, because the email address came from a verified source rather than a pattern guess. Time collapses, because a rep who used to spend twenty minutes researching each prospect now spends two. A team that enriches properly mails fewer people, writes better emails, and hears back more often, which is the opposite of the spray-and-pray approach that gives cold email a bad name.

    In sum, enrichment is not a nice extra, and it is not a task for later. Do it first with any new list, and do it again whenever a list gets old. B2B data decays by roughly a fifth each year, as people change jobs, companies close, and inboxes get abandoned. A list enriched in January is a different list by June. The rest of this B2B data enrichment guide shows which data types matter, how waterfall enrichment works, and which provider to buy.

    Data types explained: firmographic, technographic, contact, intent and job-change signals

    B2B data enrichment guide: four stacked layers forming one complete contact record, a company building, a laptop, a person with an envelope, and a flame with a bell
    The four layers of enrichment in this B2B data enrichment guide: firmographic data about the company, technographic data about its tools, contact data about the person, and intent and job-change signals about timing.

    Secondly, enrichment adds five kinds of data, and each kind answers a different question. Firmographic data describes the company: its size, industry, location, revenue and growth. Technographic data describes the tools the company uses: its CRM, its email provider, its marketing stack. Contact data describes the person: their name, title, seniority, email and phone. Intent data describes timing: signals that the company is researching a purchase right now. Job-change signals describe movement: people who just started a new role, and the roles they left behind. A complete record has all five, and the table below shows what each one adds.

    The five data types at a glance

    Data typeWhat it addsExample fieldsWhat it changes for cold email
    FirmographicCompany factsSize, industry, location, revenue, headcount growthTargeting: only the right companies enter the list
    TechnographicTools the company usesCRM, email provider, marketing stack, hiring toolsPersonalisation: the email can name the stack they run
    ContactPerson detailsVerified email, direct dial, title, seniority, LinkedInDelivery: the email reaches a real person who can reply
    IntentBuying signalsTopic surges, funding news, hiring spikes, tech changesTiming: mail the companies researching a purchase now
    Job-changePeople on the moveNew role, start date, previous company, vacated roleWarmth: a new hire is the easiest door to open

    Last checked: 16 November 2026. Features and pricing can change, so please check the provider’s site before you buy. We do not guess at features, prices or trials.

    Firmographic data: who the company is

    Moreover, firmographic data is the foundation, because it decides whether a company belongs on the list at all. Selling to companies with 50 to 500 staff calls for a headcount filter. Manufacturers call for an industry filter. European sales call for a location filter. Apollo covers 30M+ company accounts, ZoomInfo covers 100M+ companies, and Saleshandy covers 42M+ company profiles, so the coverage is there. The practical rule is simple: filter on firmographics first, and only enrich the companies that survive the filter, because enriching companies you would never mail wastes credits.

    For example, a firmographic filter can cut a list of ten thousand companies to two thousand in seconds. The two thousand that remain are the ones worth enriching. A sender who enriches first and filters second pays to enrich eight thousand records that were never going to be mailed. Order matters, and the order is filter, then enrich, then verify.

    Technographic data: what the company runs

    Finally, technographic data is the personalisation goldmine, because it tells the sender what the company already uses. HubSpot users will care about a HubSpot integration. Salesforce shops will care about a Salesforce sync. Companies that just adopted a rival’s tool have a budget and a live problem. Apollo, ZoomInfo and Cognism all sell technographic filters, and Lemlist surfaces the stack inside its enrichment. The first line of an email that names the prospect’s actual tool is a first line that could only have been written for them.

    In sum, technographics also sharpen targeting in a way firmographics cannot. Two companies can be the same size, in the same industry, in the same city, yet one runs a modern cloud stack and the other runs software from 2009. The first is a buyer for a modern tool. The second is a project. Technographic data is what tells them apart. It is the field most beginners skip, which is exactly why it works so well when it is used.

    B2B data enrichment guide: contact data, the field that gets mailed

    Secondly, contact data is the field that actually gets mailed, so it deserves the most scrutiny. A verified work email is worth more than a guessed one, a direct dial is worth more than a switchboard number. A correct job title is worth more than a seniority guess. Apollo charges 1 credit for an email and 8 for a phone number. Saleshandy charges 1 credit for a verified email and 6 for a phone, and charges nothing when the email cannot be verified. La Growth Machine charges 5 credits for an email and 20 for a phone. The credit cost is the price of the field, and the guide compares it properly in the pricing section.

    Moreover, contact data decays fastest of all, because people change jobs. Roughly a fifth of the contacts on a list go stale every year. A phone number goes stale faster than an email. That is why the refresh step matters, and why a provider that re-verifies on a schedule, such as Cognism with its 30-day decision-maker refresh, is worth more than a provider that enriches once and forgets.

    Intent data: the timing signal

    For example, intent data answers the question every sender asks: why now? A company researching a topic, hiring for a role, raising funding, or switching tools is a company with a live need. An email that arrives in that week lands differently from an email that arrives in a random one. ZoomInfo tracks 4,500+ intent topics, Cognism bundles Bombora Surge intent with 12 topics from a pool of 11,000+ on its Pro plan. Lemlist sells buying intent signals as a $29 a month add-on, or $21 on annual billing. Intent is the most expensive data type, and the most powerful, which is why it is usually plan-gated rather than included everywhere.

    Finally, intent data works best as a priority signal, not a filter. A sender who mails only the companies showing intent will run out of list quickly, because most companies are not showing intent on any given week. A sender who mails the whole list, and mails the intent companies first, with the sharpest first lines, gets the best of both worlds: volume and timing. Treat intent as a sorting key, and it pays for itself.

    Job-change signals: the warmest door in B2B

    In fact, job-change signals are the warmest door in B2B outreach, and the cheapest to act on. A person who started a new role in the last ninety days is settling in, choosing tools, and open to conversations that would have bounced off their predecessor. A role that was just vacated is a gap someone needs to fill. Apollo, ZoomInfo and Amplemarket all track job changes, and Amplemarket lets a Startup plan follow 500 contacts for job-change alerts. A campaign built around new hires will reply at a higher rate than any other segment on the list, and it costs nothing extra to run.

    In sum, the five data types stack. Firmographics choose the companies, technographics choose the angle, contact data chooses the person, intent chooses the week, and job changes choose the warmest names. A record with all five is a record that writes its own first line. The next section explains how waterfall enrichment assembles that record when no single source has all of it.

    Waterfall enrichment: why several sources beat one

    B2B data enrichment guide: three data provider boxes pouring envelopes and phone icons down through a funnel into one verified contact card with a green checkmark
    Waterfall enrichment in this B2B data enrichment guide: three providers queried in sequence, their results funnelled into one verified contact card, with the cascade stopping as soon as a provider finds a match.

    Secondly, waterfall enrichment is a simple idea with a big payoff. Instead of asking one data provider for a missing field, the tool asks several providers in sequence, one after another, until one of them returns a verified result. The first provider is asked first. If it finds the email, the cascade stops. If it finds nothing, the record falls to the second provider, then the third, and so on until every provider has been tried. A single provider typically finds 40 to 70% of the emails it is asked for. A waterfall lifts that to 75 to 95%, according to the industry guides that track these figures. The gap between those two ranges is the reason waterfall enrichment exists.

    In fact, the waterfall matters because no single database covers everyone. Apollo holds 240M+ contacts, ZoomInfo holds 500M+. Saleshandy searches 852M+, yet each of them is thin somewhere: one is strong in the United States, another in Europe, a third in small companies. A provider that is strong in one place is weak in another. The weakness only shows when the list reaches that place. A waterfall covers the gaps by asking the next provider, and the next, until the record is filled.

    How a waterfall runs, step by step

    Firstly, a waterfall run starts with the records you already have, usually a name and a company, or a LinkedIn URL, or a domain. The tool normalises the inputs first, because a waterfall is only as good as its inputs: a misspelled company name will fail at every provider, not just the first. Then it queries the providers in a fixed order, usually the cheapest or most accurate first. It stops the moment one returns a verified result. The result is written back with its source, so the sender knows which provider found it, and the record moves on to verification.

    Secondly, the order of the providers matters more than the number of them. A waterfall that asks a weak provider first will return weak results early and stop, because the cascade stops at the first result, not the best result. A waterfall that asks the strongest provider first will return the best result it can, and only fall through to the weaker ones when the strong one has nothing. The best tools let the sender set the order, or set it intelligently themselves. Saleshandy, for instance, runs an 8-provider waterfall that includes verification inside the same credit, so the result that comes back is already verified. Lemlist runs a 14+ provider waterfall, and La Growth Machine runs one across 9 providers.

    B2B data enrichment guide: how credit costs stack in a waterfall

    Moreover, the credit cost of a waterfall depends on how the tool charges, and the models differ sharply. Some tools charge one credit per result, however many providers were queried, which is the fairest model. Saleshandy charges exactly that: one credit covers the whole job, all 8 providers checked, the email verified, and nothing charged when the result is unverified. Other tools charge per provider queried, so a record that falls through four providers costs four credits, which punishes the sender for the tool’s own gaps. A third model charges per field, so an email costs one credit and a phone costs more, whatever the waterfall did. Apollo charges 1 credit for an email and 8 for a phone. La Growth Machine charges 5 credits for an email and 20 for a phone, with top-ups at €0.01 a credit.

    For example, a list of one thousand contacts enriched through a fair one-credit-per-result waterfall costs one thousand credits. The sender knows the price before starting. The same list through a per-provider waterfall can cost two or three thousand credits, and the sender only finds out afterwards. Before buying, ask one question: do I pay per result, or per provider queried? The answer decides whether the waterfall is a bargain or a trap.

    When a waterfall does not help

    Finally, a waterfall has one honest limit, and it is worth stating plainly. It cannot find what no provider holds. Very small businesses, tradespeople, and companies without a polished LinkedIn presence or a corporate email domain are thin in every database. A waterfall will shrug and walk away just as a single provider would. The Scrap.io guide that accompanies the video below makes this point well: over 80% of the businesses on Google Maps fall into that bucket. A waterfall is a multiplier on good coverage, not a cure for no coverage. A sender whose list is mostly local businesses should enrich from a different source, such as a maps-based scraper, rather than a corporate waterfall.

    Video: How to Automate Data Enrichment? by Scrap-io on YouTube. This video is the creator’s property, embedded via YouTube for education. OutreachCompare is not affiliated with Scrap-io and does not claim ownership of this video.

    In sum, the video above walks through two ways to automate enrichment, a pure enrichment tool and a scraper that enriches at the same time. It shows the waterfall idea in action on a real file. The lesson to take from it is the same as the lesson of this section: ask several sources, stop at the first verified result, pay per result rather than per provider, and know when the list needs a different kind of source entirely.

    How to read accuracy claims: vendor numbers against independent benchmarks

    Secondly, every enrichment vendor claims high accuracy, and the claims are hard to compare, because each vendor measures accuracy differently. ZoomInfo claims 96% email deliverability and 87% mobile accuracy. Amplemarket claims a bounce rate below 3% and 96.5% phone accuracy, figures that come from its own vendor blog and are flagged as untested here. Cognism talks about Diamond Data and phone-verified contacts rather than a single percentage. Saleshandy publishes customer quotes, including a claim of 23% higher email accuracy than Apollo, which is a vendor claim from a customer testimonial, not a measurement. These are vendor claims, measured by the vendors themselves, and no neutral audit exists that tests them all the same way. Saying so matters, because it changes how much weight any claim deserves.

    The independent benchmarks that exist paint a more complicated picture, and they do not agree with each other. An Anymail Finder benchmark measured how many found addresses were actually verified, and found Hunter at 37.6% and Snov.io at 20.1%. A Tomba benchmark from February 2026 found Skrapp at 42.8% verified, against its own claim of 92% search success. Both benchmarks are genuine third-party work, and neither one is a neutral audit. The difference is what counts as a success: a finder that returns an address pattern for 92% of the names it tries has a 92% search rate, yet only 42.8% of those addresses may pass verification. Both figures can be true at once. The gap between them is the addresses that look right yet do not exist.

    B2B data enrichment guide: what a database size really means

    Firstly, database size is the most quoted number in enrichment, and the most misunderstood. Apollo claims 240M+ contacts, ZoomInfo claims 500M+, Lemlist claims 650M+, and Saleshandy claims 852M+. A bigger database is not automatically a better one, because the number counts records, not live people. A database with 852 million records and a fifth of them stale is a database with 680 million live records, while a database with 240 million records refreshed monthly can be more useful. The number to ask for is not the size, but the refresh cadence: how often the records are re-checked, and how the vendor knows when a person changes jobs. Cognism refreshes decision-maker data every 30 days, which is a concrete promise. A vendor that publishes no refresh cadence is asking to be trusted on faith.

    Secondly, database size also hides a geography question. Cognism holds 200M+ European contacts and 70M+ US mobiles, which tells a sender exactly where it is strong. A vendor that claims a single global total tells the sender nothing about the region that matters. A sender mailing German companies should ask about European coverage, not global totals. A sender mailing American companies should ask about US mobiles. The headline number is marketing. The regional number is the buying decision.

    The accuracy checklist before you buy

    Moreover, four questions separate a good enrichment provider from a good sales page. Does it charge only for results, or for every provider queried? Will it verify the email it returns, or hand back an unverified guess? Are its records refreshed on a published schedule, or left to decay? Does it screen against do-not-call lists and honour opt-outs, as Cognism does with its DNC screening across 15 to 16 countries? A provider that answers all four well is worth its price. A provider that dodges them is not, whatever the headline claims.

    The practical accuracy test is simple: run a list you already know through the provider. Take one hundred contacts you know well, with emails and phones you have confirmed yourself, and run them through the provider. Count how many come back right, how many come back wrong, and how many come back empty. A provider that returns wrong data is dangerous, because a wrong email bounces and a wrong phone wastes a call. A provider that returns nothing is honest yet unhelpful. Many empty results are fine when the provider charges nothing for them, as Saleshandy does, and expensive when it charges anyway. That test costs a few dollars in credits, and it reveals more than any vendor claim ever will.

    Compliance: enrichment must respect the law

    Finally, enrichment must respect data law, and the sender carries the responsibility. Enrichment uses personal data, so the provider must source it lawfully. The sender must have a lawful basis to mail the people it enriches. In Europe, that means GDPR: use providers that publish how they source and process data, honour opt-outs and do-not-call lists, and keep records current. Cognism’s DNC screening and its Diamond Data verification exist for exactly this reason. A provider that cannot explain where its data comes from is a provider to avoid, whatever its price, because the fine for mailing unlawfully sourced data dwarfs any saving on credits.

    The full enrichment workflow, step by step

    B2B data enrichment guide: a circular six-step workflow loop around a central envelope, with a magnifying glass, a plus sign, a shield, stacked cards, a paper plane and a calendar refresh step
    The enrichment workflow in this B2B data enrichment guide: find, enrich, verify, segment, send, and refresh on a calendar, in a loop that repeats every quarter.

    Secondly, enrichment works best as a workflow, not a one-off chore. The workflow has six steps, and each step takes minutes. A sender who follows it will keep bounce rates below 2% without thinking about it, and will mail people who actually match the offer. Skip a step, and the sender is left guessing why the replies dried up. The six steps are: find, enrich, verify, segment, send, and refresh. The rest of this section walks through each one.

    In fact, the workflow matters more than the provider. The best enrichment tool in the world cannot save a list that was never filtered. The cheapest tool in the world is enough for a sender who follows the steps. Buy the provider that fits the budget, then follow the workflow every time, and the results will take care of themselves.

    B2B data enrichment guide: step 1, find the companies

    Firstly, find the companies from a source that describes them properly. A database such as Apollo, ZoomInfo or Saleshandy lets the sender filter by size, industry, location, tech stack and hiring signals, and the filter is the whole point. A sender who filters well starts with two thousand companies that match, rather than ten thousand that mostly do not. Our Lead Generation and List Building Guide 2026 and our guide to building a cold email list cover the finding step in full.

    Secondly, keep the source with the record. A column that records where each contact came from, and when, turns a list into a traceable asset. When a campaign bounces, the sender can see which source produced the bad records and stop using it. When a source produces 90% verified emails month after month, the sender can trust it more. A list without sources is a list without a memory.

    Step 2, enrich every record before anything else

    Moreover, enrich every record before verifying, segmenting or sending. Upload the list, or connect the CRM, and let the waterfall fill in the missing fields: verified email, phone, title, seniority, company size, industry, tech stack and intent signals. Do not enrich a sample and mail the rest, because the sample is not the list. The untested half is where the wrong people live. Do not enrich after the first campaign, because the first campaign is where the damage happens.

    For example, a sender with a list of one thousand contacts should expect enrichment to cost between $34 and $71 for a month on an entry plan, depending on the provider, and to take minutes. The cost table later in this B2B data enrichment guide shows the exact figures for each provider at each volume. The time saved is the real return: a rep who used to research twenty minutes per prospect now spends two. The list is ready the same day.

    B2B data enrichment guide: step 3, verify what enrichment found

    Finally, verify every email that enrichment returns, before the first send. Enrichment finds addresses. Verification confirms they can receive mail. The two steps are different jobs, and skipping the second is how a list enriched at 90% coverage still bounces at 8%. Upload the enriched list to a verifier, delete the Invalid addresses, and keep the Valid ones. Our Email Verification Guide 2026 explains the checks and the results in full, and our Best Email Verification Tools Compared article compares the verifiers.

    In sum, verification also catches the enrichment mistakes. A waterfall that returns a guessed email will pass the enrichment step and fail the verification step, which is exactly what verification is for. A sender who verifies after enriching pays a few dollars to catch the guesses, and saves a domain from the bounces they would have caused.

    Step 4, segment on the enriched fields

    Secondly, segment the enriched list before sending, using the fields enrichment just added. Companies showing intent go first, with the sharpest first lines. New hires go next, with a congratulations opener. Companies on a named tech stack go into their own segment, with an email that names the stack. Small companies go into a segment with a different offer from the enterprise one. Segmentation is what turns five data types into five sensible campaigns, instead of one blunt one.

    Segmentation doubles as protection: when one segment goes wrong, the rest of the campaign keeps running. If the intent segment bounces above 2%, the sender pauses that segment only, while the main campaign keeps running. Mailed as one campaign, the same bounces would have hurt the whole domain at once. Think of segments as bulkheads: a leak in one compartment does not sink the ship.

    B2B data enrichment guide: step 5, send slowly and watch the numbers

    For example, send the enriched, verified list slowly, at thirty to fifty emails a day per mailbox, and watch the bounce rate after the first hundred sends. An enriched and verified list should bounce under 2%, and under 1% is better. A bounce rate above 2% on a verified list means something went wrong: the list was enriched too long ago, the waterfall returned guesses, or the sending domain has a problem of its own. Pause, investigate, and do not push through. The Deliverability Guide 2026 covers the whole system those numbers belong to.

    Finally, watch the reply rate beside the bounce rate. Replies are the number enrichment is really judged on, because a list that bounces little yet replies never was enriched for the wrong people. A reply rate above 5% on a cold campaign is strong. A reply rate below 1% means the targeting was wrong, whatever the bounce rate says. Enrichment fixes targeting, and the reply rate is where that fix shows.

    Step 6, refresh on a calendar

    In fact, refresh every enriched list every three months, and enrich again 24 to 48 hours before any big campaign. B2B data decays by roughly a fifth each year, as people change jobs and companies close, so a list enriched in January is a different list by June. A refresh costs the same per record as the first enrichment. It is cheaper than the bounces and wrong-person emails it prevents. Put the refresh on the calendar, next to the campaign dates, so it happens before the send rather than after the damage.

    Video: B2B Data Enrichment with Snov.io: A Step-by-Step Guide by Snovio on YouTube. This video is the creator’s property, embedded via YouTube for education. OutreachCompare is not affiliated with Snovio and does not claim ownership of this video.

    In sum, the video above walks through the same workflow this section describes, from building a prospect list to enriching it with AI and turning the results into personalised cold email openers. The workflow is a loop, not a line. Find, enrich, verify, segment, send, and refresh, then find more companies and start again. Every pass round the loop leaves the list cleaner and the sender safer.

    Pricing compared: seven providers, honest numbers

    Secondly, pricing is where the seven providers differ most, and the difference is larger than most senders expect. Apollo starts free and reaches $119 a seat a month. Saleshandy starts at $34 a month. Lemlist starts at $69 a month with enrichment as a $20 add-on. La Growth Machine starts at €60 a month per identity. Amplemarket starts at $600 a month. ZoomInfo and Cognism publish no prices at all. Below, the figures appear exactly as the official sites show them, checked on 16 November 2026, catches flagged beside each one.

    In fact, every provider in this B2B data enrichment guide charges in a different currency of its own. Apollo and Saleshandy charge in credits per seat or per account. Lemlist charges per user plus a monthly enrichment add-on. La Growth Machine charges per identity plus credits per field. ZoomInfo and Cognism charge per licence plus credits per profile. Amplemarket charges a flat monthly fee with an annual contact allowance. The differences are the minimum purchase, the credit cost per field, and what happens to credits that go unused. Read the footnotes, not just the headline.

    B2B data enrichment guide: the self-serve providers, priced

    ProviderFree planEntry planTop plan shownEnrichment cost
    Apollo$0, 75 credits a monthBasic $49/mo; $65 monthly
    2,500 credits a month
    Organization $119/mo annual-only
    6,000 credits a month, min 3 seats
    1 credit per email
    8 credits per phone
    Lemlist14-day trial
    200 free credits
    Email $69/mo; $55 annual
    Enrichment add-on $20; $16 annual
    Multichannel $109/mo; $87 annual
    Intent add-on $29; $21 annual
    Add-on $16/mo annual
    14+ provider waterfall
    SaleshandyNo free plan shownStarter $34/mo; $41 monthly
    1,500 credits a month
    Scale $149/mo; $189 monthly
    8,000 credits a month
    1 credit per verified email
    6 per phone; $0 if unverified
    La Growth Machine14-day trial
    No card required
    Basic €60/mo; €50 annual
    1,250 credits per identity a month
    Ultimate €180/mo; €150 annual
    5,000 credits per identity a month
    5 credits per email
    20 per phone; top-up €0.01

    Apollo Professional is $79 a month, or $99 on monthly billing, for 4,000 credits a month. Saleshandy Pro is $76 a month, or $99 monthly, for 4,000 credits a month. La Growth Machine Pro is €120 a month, or €100 annual, for 2,000 credits per identity a month. Last checked: 16 November 2026. Features and pricing can change, so please check the provider’s site before you buy. We do not guess at features, prices or trials.

    What the self-serve prices really buy

    Moreover, the four self-serve providers sell different things beside enrichment, and the bundle matters. Apollo sells a whole sales platform: sequences, a dialer, LinkedIn tasks and a CRM sync share the same credits as enrichment, so the $49 a month buys far more than data. Lemlist sells outreach first and enrichment second: the $55 a month Email plan buys sending, warmup and a 650M+ database. The enrichment add-on is $16 on top. Saleshandy sells the same shape at a lower price: $34 a month buys sending, warmup and an 852M+ database with the waterfall included, not added on. La Growth Machine sells multichannel outreach per identity: €50 a month buys LinkedIn and email sending with enrichment credits bundled in.

    For example, the free starting point also differs in a way that matters to a beginner. Apollo gives a real free plan, 75 credits a month forever, which is enough to enrich a small list every month. Lemlist and La Growth Machine give 14-day trials, which are enough to test the tool once, and then the card is charged. Saleshandy shows no free plan on its pricing page. A beginner who wants to try before buying should start with Apollo’s free plan, then test the two trials, then compare the paid plans on the credit maths in the next section.

    B2B data enrichment guide: the quote-only providers, priced by report

    ProviderPublished priceFree planDatabaseHow enrichment is charged
    ZoomInfoQuote only
    No prices on the pricing page
    Lite, 10 credits a month
    25 with Community Edition
    500M+ contacts
    100M+ companies
    1 credit per exported profile
    Licences plus credits
    CognismQuote only
    Reported Standard ~$22,500 a year*
    None shown200M+ European contacts
    70M+ US mobiles
    1 credit per reveal
    Reuse free until job change
    AmplemarketStartup $600/mo annual term
    Growth and Elite custom
    Free trial on all plans200M+ verified contacts†13,500 email credits a year
    Per user, Startup plan

    * Cognism figures are reported, not published: Standard around $22,500 a year for 5 seats and Pro around $37,500 a year, with a Vendr median of $32,750 across 94 contracts, reported 22 October 2026. † Amplemarket’s 200M+ database figure comes from its vendor blog, not the pricing page, and is flagged as untested. ZoomInfo’s pricing page publishes no prices. Last checked: 16 November 2026. Features and pricing can change, so please check the provider’s site before you buy. We do not guess at features, prices or trials.

    Reading the quote-only prices: ask for the credit maths

    Secondly, the quote-only providers are the hardest to compare, because the price depends on the deal. ZoomInfo prices by licences plus credits, with one credit per exported profile, and its free Lite plan gives 10 credits a month, or 25 with Community Edition, which is enough to test the data before talking to sales. Cognism prices by seats, with one credit per reveal. The reveal can be reused for free until the person changes jobs, which makes its credits stretch further than a per-export model. Amplemarket prices by plan, with 27,000 contacts and 13,500 email credits per user a year on Startup, which works out at $0.27 per email credit over the year across its 2 included users (27,000 credits for $7,200 a year).

    In sum, a buyer talking to any of the three should ask four questions before signing. How many credits does the deal include, and what does one credit buy? Do unused credits roll over, or expire at the end of the term? What does the renewal cost, and is it capped? And what happens to the enriched data if the contract ends? A quote-only deal hides its true cost in those answers. The sender who asks them will pay less than the sender who does not. Our Apollo vs ZoomInfo vs Cognism comparison covers the three in depth, and our Best B2B Data Providers 2026 article compares the databases side by side.

    B2B data enrichment guide: the feature matrix at a glance

    ProviderContactsWaterfallIntent signalsCRM enrichmentFree start
    Apollo240M+YesYes, 6 to 12 topicsYesFree plan
    ZoomInfo500M+YesYes, 4,500+ topicsYesLite plan
    Cognism200M+ EUYesYes, Bombora Surge, Pro onlyYes—
    Lemlist650M+Yes, 14+ providersYes, $29 add-onYes14-day trial
    Saleshandy852M+Yes, 8 providersHiring signalsYes—
    Amplemarket200M+†YesYes, AI intentYesFree trial
    La Growth Machine27M+ companiesYes, 9 providers—Yes, Ultimate14-day trial

    † Amplemarket’s database figure comes from its vendor blog and is flagged as untested. “Yes” means the feature is stated on the provider’s site; “—” means not confirmed. Last checked: 16 November 2026. Features and pricing can change, so please check the provider’s site before you buy. We do not guess at features, prices or trials.

    Cost per enriched contact at 1,000, 5,000 and 10,000 contacts

    Secondly, the headline price is rarely the price a sender pays, because the credit cost per field changes the maths completely. A $49 plan that gives 2,500 credits enriches 2,500 emails at 1 credit each, while a €50 plan that gives 1,250 credits enriches only 250 emails at 5 credits each. The table below shows the cheapest way to enrich each volume from the three providers whose credit maths can be worked out from their published pages, using the figures checked on 16 November 2026. Each figure carries its working beside it, so the reader can check the maths.

    The cost table: three providers, three volumes

    Volume (emails only)Apollo Basic $49/mo annualSaleshandy Starter $34/mo annualLa Growth Machine Basic €50/mo annual
    1,000 enriched emails$49
    1 month, within 2,500 credits; $0.049 each
    $34
    1 month, within 1,500 credits; $0.034 each
    €200
    4 months at 5 credits each; €0.20 each
    5,000 enriched emails$98
    2 months at 2,500 credits; $0.0196 each
    $136
    4 months at 1,500 credits; $0.0272 each
    €1,000
    20 months at 5 credits each; €0.20 each
    10,000 enriched emails$196
    4 months at 2,500 credits; $0.0196 each
    $238
    7 months at 1,500 credits; $0.0238 each
    €2,000
    40 months at 5 credits each; €0.20 each

    Arithmetic: Apollo Basic gives 2,500 credits a month and charges 1 credit per email, so 1,000 emails fit in one month and 10,000 take four months. Saleshandy Starter gives 1,500 credits a month and charges 1 credit per verified email, so 5,000 emails take four months and 10,000 take seven. La Growth Machine Basic gives 1,250 credits a month per identity and charges 5 credits per email, so 1,000 emails need 5,000 credits, or four months. At its €0.01 top-up rate, the marginal cost is €0.05 per email: €50 for 1,000, €250 for 5,000 and €500 for 10,000. Last checked: 16 November 2026. All figures are arithmetic from the published plans and credit costs; check the provider’s site before you buy.

    Three lessons from the cost table

    The table teaches three lessons. The first is that the credit cost per field matters more than the plan price. La Growth Machine looks cheap at €50 a month, yet at 5 credits per email it is the most expensive way to enrich emails in this B2B data enrichment guide, at €0.20 each from its allowance. The second is that Apollo and Saleshandy are close at every volume, with Saleshandy cheaper at 1,000 contacts and Apollo cheaper at 10,000, because Apollo’s allowance is larger. The third is that a sender who enriches phones as well as emails should re-run the maths, because Apollo charges 8 credits per phone and Saleshandy charges 6, while La Growth Machine charges 20, which changes the ranking fast.

    For example, a sender who enriches 1,000 contacts with emails only should buy Saleshandy Starter for $34, because it fits in one month’s allowance. A sender who enriches 10,000 contacts should buy Apollo Basic for $196 over four months, because the larger allowance wins at volume. A sender who enriches through La Growth Machine should buy top-up credits at €0.01 each rather than waiting for the monthly allowance, because the top-up halves the cost per email. The right price depends on the field, not just the volume.

    Why Lemlist, ZoomInfo, Cognism and Amplemarket are not in the cost table

    Finally, four providers are missing from the cost table. The reason is honest: their cost per enriched contact cannot be worked out from their published pages. Lemlist sells enrichment as a $16 a month add-on on annual billing, yet its pricing page does not state how many credits the add-on includes, so no per-contact figure can be calculated.

    ZoomInfo and Cognism publish no prices at all, so their cost per contact is whatever the sales call produces. Amplemarket publishes its allowance, 13,500 email credits per user a year on Startup, which works out at $0.27 per email credit over the year across its 2 included users (27,000 credits for $7,200 a year), yet that figure bundles sending, sequencing and intent tools as well, so it is not a pure enrichment cost. A guide that invented figures for these four would be guessing, and this B2B data enrichment guide does not guess.

    Pros and cons: the honest case for each provider

    Secondly, every provider in this B2B data enrichment guide has a genuine strength and a genuine weakness. The honest case for each one is worth stating. A guide that lists only strengths is a sales page. A guide that lists only weaknesses is a hit piece. The version below gives each provider its due, in plain language, so the reader can weigh the trade-off rather than taking a recommendation on trust.

    B2B data enrichment guide: Apollo, the all-rounder

    Firstly, Apollo is the best all-round enrichment provider, and its strength is breadth at a low price. It holds 240M+ contacts and 30M+ accounts, it enriches with a waterfall, it verifies, it sequences, it dials. It starts free with 75 credits a month, which is enough to test the data properly before paying. Its weakness is depth: its accuracy claims are thinner than ZoomInfo’s or Cognism’s, its credits do not roll over. A rival’s customer testimonial claims 23% higher email accuracy against it, which is a vendor claim yet worth noting. When one platform should cover the whole job, Apollo is the pick. A sender who needs the deepest enterprise data should look at ZoomInfo.

    ZoomInfo, the enterprise database

    Secondly, ZoomInfo is the best enterprise enrichment database, and its strength is scale and depth. It holds 500M+ contacts, 100M+ companies, 300M+ verified emails and 135M+ direct dials, it tracks 4,500+ intent topics. It claims 96% email deliverability and 87% mobile accuracy. Its weakness is price and access: the pricing page publishes no prices, the deal is licences plus credits. The platform is built for teams with a sales budget, not for a solo sender. A team with an enterprise budget and a large sales org should buy it. A beginner should start with Apollo instead.

    B2B data enrichment guide: Cognism, the European specialist

    Moreover, Cognism is the best enrichment provider for European outreach, and its strength is compliance and depth in Europe. It holds 200M+ European contacts and 70M+ US mobiles, it refreshes decision-maker data every 30 days, it verifies mobiles on demand. It screens against do-not-call lists across 15 to 16 countries. Its weakness is price and transparency: the plans are quote-only, reported figures put Standard near $22,500 a year for 5 seats. Bombora intent is limited to 12 topics on Pro. A team mailing Europe under GDPR should buy it. A team on a small budget should not.

    Lemlist, the enrichment inside outreach

    For example, Lemlist is the best enrichment inside an outreach platform, and its strength is that the data never leaves the sending tool. It holds a 650M+ database, it runs a 14+ provider waterfall, it adds AI enrichment and intent signals. The enrichment add-on costs $20 a month, or $16 on annual billing, on top of an Email plan from $69 a month. Its weakness is that the credit allowance is not published on the pricing page, so the cost per enriched contact cannot be calculated before buying. The enrichment is an add-on rather than the core product. A sender who already sends with Lemlist should buy it. A sender who needs enrichment alone should buy Apollo or Saleshandy.

    B2B data enrichment guide: Saleshandy, the value pick

    Finally, Saleshandy is the best value enrichment provider, and its strength is fairness. It searches 852M+ contacts and 42M+ companies, it runs an 8-provider waterfall with verification inside the same credit, it charges 1 credit per verified email and nothing for unverified results, and it starts at $34 a month. Its weakness is scope: it shows no free plan, its intent signals are hiring-based rather than topic-based. It is a smaller vendor than Apollo or ZoomInfo, with a narrower brand footprint. A sender who enriches in volume and wants to pay only for results should buy it. A sender who wants a free plan should look at Apollo instead.

    Amplemarket, the all-in-one platform

    In sum, Amplemarket is the best enrichment inside an all-in-one sales platform, and its strength is consolidation. It bundles a 200M+ verified contact database, AI intent signals, multichannel sequences, a dialer and a copilot into one platform, with 13,500 email credits per user a year on its Startup plan. Its weakness is price: $600 a month on an annual term is the highest entry price in this B2B data enrichment guide, and its database and accuracy figures come from its vendor blog rather than the pricing page, so they are flagged as untested. A funded team that wants one platform for everything should buy it. A small team should start cheaper.

    La Growth Machine, the multichannel enricher

    Secondly, La Growth Machine is the best enrichment for multichannel outreach, and its strength is the identity model. It enriches from 9 providers against a database of 27M+ companies, it works across LinkedIn and email in one sequence, and teammates who only prepare campaigns join free. Its weakness is the credit cost per field: 5 credits per email and 20 per phone make it the most expensive way to enrich emails in this B2B data enrichment guide when the monthly allowance is used, though top-ups at €0.01 a credit halve that cost. A sender whose outreach is LinkedIn-first should buy it. A sender who enriches emails in bulk should not.

    Who should pick which: a decision framework

    The choice is simpler than the comparison suggests, because most senders fall into one of four groups, and each group has an obvious pick. Answer which group describes the sender, and the choice narrows from seven providers to one or two. Skip the question, and the choice stays seven wide, which is no choice at all. The framework below covers the beginner, the volume enricher, the enterprise team. The sender whose outreach lives in one platform.

    Pick Apollo when you are starting out, or want one platform

    Firstly, pick Apollo when the budget is small, or when one platform should do everything. Its free plan gives 75 credits a month forever, its Basic plan costs $49 a month on annual billing. The same subscription enriches, verifies, sequences and dials. A freelancer building a first list, a startup enriching its first thousand leads, or a team that wants to stop paying for three tools should all start with Apollo. The only reason to look elsewhere is a need for deeper enterprise data, or for European compliance depth.

    Pick Saleshandy when you enrich in volume and hate waste

    Secondly, pick Saleshandy when enrichment runs in volume and every wasted credit hurts. Its 1-credit-per-verified-email model with $0 for unverified results is the fairest in this B2B data enrichment guide, and its $34 a month entry price is the lowest paid plan here. A team enriching ten thousand contacts a month, an agency enriching client lists, or a sender who has been burned by paying for empty results should all pick Saleshandy. The only reason to look elsewhere is a need for a free plan, or for topic-based intent signals.

    Pick ZoomInfo or Cognism when the data must be deepest

    Moreover, pick ZoomInfo when the team is large, the budget is enterprise. The data must cover the whole market, with 500M+ contacts and 4,500+ intent topics. Pick Cognism when the market is Europe, the law is GDPR. The data must be phone-verified and refreshed every 30 days, with do-not-call screening across 15 to 16 countries. A sales org with dozens of reps should pick one of the two. A solo sender should not, because the price will not make sense at that scale.

    Pick Lemlist, Amplemarket or La Growth Machine when outreach lives in one place

    For example, pick Lemlist when the sending already happens there, because its $16 a month enrichment add-on keeps the data inside the outreach tool. Pick Amplemarket when the team wants one platform for data, intent, sequences and calling, and can afford $600 a month. Pick La Growth Machine when the outreach is LinkedIn-first and multichannel, because its identity model and 9-provider waterfall fit that shape. A sender who buys enrichment separately from sending should not pick any of the three, because a standalone enricher is cheaper per contact.

    In sum, the framework is a ladder, not a leap. Start with the cheapest provider that fits the pattern, enrich the first list, and watch the bounce rate and the reply rate. If bounces stay below 2% and replies stay above 5%, the provider is doing its job, and the sender should stay with it. If the volume grows, or the needs change, the sender can switch, because enrichment credits are not a marriage. Choosing by pattern rather than by brand keeps spending down, keeps bounces down, and means fewer switches later.

    Frequently asked questions

    B2B data enrichment guide: what is B2B data enrichment, in one sentence?

    It is the process of adding missing fields to the contact and company records you already have, such as a verified work email, a direct dial, a job title, company size, tech stack and buying-intent signals, so every record is complete enough to target, personalise and send to.

    B2B data enrichment guide: how much does data enrichment cost?

    Data enrichment costs from $0 on Apollo’s free plan, to $34 a month on Saleshandy Starter and $49 a month on Apollo Basic, up to $600 a month on Amplemarket Startup, with ZoomInfo and Cognism quote-only. At 1,000 enriched emails, Saleshandy costs $34 and Apollo costs $49 from their monthly allowances, while La Growth Machine costs €200 from its allowance, or €50 on top-up credits.

    B2B data enrichment guide: what is waterfall enrichment?

    Waterfall enrichment queries several data providers in sequence, one after another, until one returns a verified result. A single provider typically finds 40 to 70% of the emails it is asked for, while a waterfall lifts coverage to 75 to 95%. Saleshandy runs an 8-provider waterfall, Lemlist runs 14+ providers, and La Growth Machine runs 9 providers.

    B2B data enrichment guide: how accurate is enriched data?

    Vendor claims run from 87% mobile accuracy to 96% email deliverability at ZoomInfo, and below 3% bounce at Amplemarket, yet no neutral audit exists, and independent benchmarks disagree. Third-party tests found only 37.6% of Hunter’s found addresses and 42.8% of Skrapp’s verified, against much higher search-success claims. Test any provider on a list you know before trusting its headline.

    B2B data enrichment guide: how often should I refresh enriched data?

    Refresh every enriched list every three months, and enrich again 24 to 48 hours before any big campaign. B2B data decays by roughly a fifth each year, as people change jobs and companies close, so a list enriched in January is a different list by June. Refreshing costs the same per record as the first enrichment, and it is cheaper than the bounces it prevents.

    B2B data enrichment guide: is data enrichment legal under GDPR?

    Enrichment uses personal data, so the provider must source it lawfully and the sender must have a lawful basis to mail the people it enriches. Use providers that publish how they source and process data, honour opt-outs and do-not-call lists, and keep records current. Cognism’s do-not-call screening across 15 to 16 countries and its 30-day decision-maker refresh exist for exactly this reason.

    The verdict

    Secondly, the verdict in this B2B data enrichment guide is a set of best-for labels, not a numeric score, because no hands-on testing has been done yet. A score without testing would be a guess. The labels below come from the features and prices checked on the official sites on 16 November 2026, and from the way each provider fits a beginner, a volume enricher, an enterprise team. A sender whose outreach lives in one platform.

    For example, Apollo is the best all-round enrichment provider, with a free plan and 240M+ contacts from $49 a month. Saleshandy is the best value enrichment provider, with 1 credit per verified email and $0 for unverified results from $34 a month. Lemlist is the best enrichment inside an outreach platform, with a 14+ provider waterfall from $16 a month on top of its Email plan.

    B2B data enrichment guide: the enterprise verdict

    Moreover, ZoomInfo is the best enterprise enrichment database, with 500M+ contacts and 4,500+ intent topics, priced by quote. Cognism is the best enrichment provider for European outreach, with 200M+ European contacts, phone verification and do-not-call screening. Amplemarket is the best all-in-one enrichment platform, with a 200M+ database and AI intent from $600 a month. La Growth Machine is the best enrichment for multichannel outreach, with a 9-provider waterfall from €50 a month per identity.

    Finally, enrichment is the cheapest leverage in cold email. The senders who invest in it are the ones still landing in the inbox year after year. Start with Apollo when the budget is tight, move to Saleshandy when volume grows, and move to ZoomInfo or Cognism when the data must be deepest. An enriched list, a verified email, a separate sending domain, a patient warmup and a careful pace will take a sender further than any single tool ever will.

    Our verdict on this B2B data enrichment guide

    For the best all-round enrichment, choose Apollo, free to start and from $49 a month, with 240M+ contacts. Saleshandy is the best value, from $34 a month, with 1 credit per verified email and $0 for unverified results. Lemlist is the best enrichment inside outreach, with a 14+ provider waterfall from $16 a month. ZoomInfo is the best enterprise database, with 500M+ contacts, priced by quote. No number is attached to these labels, because the tools have not been tested hands-on yet.

    Start here: pick the provider that fits how often you enrich, filter first, enrich second, verify third, and refresh every three months.

    Keep reading

    B2B data enrichment guideApollo free to start · Saleshandy from $34/mo · Lemlist enrichment from $16/mo Visit Apollo →
  • Email Verification Guide 2026

    Email Verification Guide 2026

    Every cold email starts with one question: is this address real?

    This email verification guide answers that question properly. It explains what verification actually checks, how to read the results, what it costs at real volumes, and which verifier fits a beginner, a scaling team, or a sender who only cleans a list now and then. All six verifiers were priced on their official sites on 16 November 2026.

    Visit Bouncer →Explore ZeroBounce →See NeverBounce →

    Prices checked 16 November 2026 on the official sites of all six providers. Features and pricing can change, so please check the provider’s site before you buy. We do not guess at features, prices or trials.

    Quick Answer

    Email verification is the check that confirms an email address is real, formatted correctly and able to receive mail, before you ever send to it. A good verifier runs seven checks, from syntax to a live SMTP handshake, and returns a simple result: Valid, Risky, Catch-all, Invalid or Unknown. Keep bounces below 2% and spam complaints below 0.1%, and your sender reputation stays healthy.

    Bouncer is the best value for most senders, at $8 for 1,000 credits that never expire. ZeroBounce is the best all-round verifier, with a 99.6% accuracy guarantee from $39 for 2,000 credits. In short, verify every list before the first send, drop the Invalids, and re-verify every three to four months.

    Why this email verification guide starts with the bounce, not the subject line

    Firstly, most cold email advice starts with writing, and that order is backwards. A brilliant subject line means nothing when the email bounces, because a bounced email reaches nobody. Every bounce tells the mailbox providers that the sender mails dead addresses, and enough bounces tell them the sender is a spammer. This email verification guide therefore starts at the bounce, the one number that can end a campaign before the copy is even read.

    Secondly, the good news is that verification is simple, cheap and fast. A list of ten thousand addresses costs between $8 and $129 to check, depending on the verifier, and the check takes minutes. Compared with the cost of a burned domain, a blocked sending account, or a month of replies that never arrive, verification is the cheapest insurance in cold email. Every tool in this email verification guide exists to make that insurance easy to buy.

    Finally, every price and feature in this email verification guide was checked on the official sites on 16 November 2026. Where a vendor publishes no figure, or where a number comes from a third-party breakdown of the vendor’s own volume selector, the guide says so in plain language. Jump to the pricing section when the budget is the constraint, and start at the top when the goal is understanding how verification actually works.

    What email verification is, and why it matters for cold email

    In fact, email verification is the process of checking whether an email address is real and able to receive mail, without sending a message to it. The verifier runs a series of technical checks against the address and its domain, then returns a verdict for each address. A list that has been verified contains only addresses that passed those checks, so the campaign that follows it bounces far less. Verification answers one question: can this address receive an email?

    Moreover, the reason verification matters for cold email is the bounce rate. Mailbox providers watch how many of a sender’s emails bounce. They treat a high bounce rate as evidence of sloppy or spammy sending. Keep bounces below 2% and the sender looks careful. Let them rise above 2% and the sender starts landing in spam. Let them rise much further and the sending account can be restricted or closed. Verification is the step that keeps the bounce rate under control. It is the only step that does it before the first send.

    Email verification guide: verification is not the same as validation

    Firstly, two words get mixed up, and the mix-up causes real confusion. Validation checks whether an address is formatted correctly and whether its domain can receive mail. Verification goes further: it checks whether the specific mailbox exists, usually by talking to the receiving server. Most modern tools do both in one pass, which is why the words are used interchangeably, yet the distinction matters when a tool claims to verify and only validates. A tool that stops at the domain check will pass addresses whose mailboxes closed years ago.

    Secondly, verification is also different from double opt-in, which is a different job entirely. Double opt-in asks the owner of an address to confirm they want the mail, usually by clicking a link. Verification asks the server whether the address exists. Cold email lists are built from public sources, not from sign-up forms, so double opt-in does not apply to them. Verification is the right check for a cold list, and it is the check this email verification guide is about.

    Email verification guide: the three numbers verification protects

    For example, verification protects three numbers, and all three decide whether cold email works. The bounce rate should stay below 2%, and below 1% is better. The spam complaint rate should stay below 0.1%, and Gmail treats anything above 0.3% as a problem. Inbox placement should stay at 90% or more in the primary inbox. A verified list helps all three, because dead addresses bounce, risky addresses complain, and spam traps destroy placement. Our Deliverability Guide 2026 explains the whole system these numbers belong to.

    In sum, verification is not a nice extra, and it is not a task for later. It is the first thing to do with any new list, and the first thing to repeat when a list gets old. Lists decay: people change jobs, companies close, and inboxes get abandoned. Roughly a fifth of the addresses on a list go stale every year, so a list verified in January is a different list by June. The rest of this email verification guide shows how the checks work, how to read the results, and which verifier to buy.

    Verification types explained: the seven checks behind one result

    Email verification guide: five connected cards showing the verification pipeline, from an envelope with an @ symbol through a globe, a server rack, a handshake and a shield with a checkmark
    The verification pipeline in this email verification guide: five checks in a row, from syntax and domain to the server handshake and the final verdict, each one catching a different kind of bad address.

    Secondly, a verifier does not run one check. It runs a pipeline, usually six or seven checks in a row, and each check catches a different kind of bad address. An address must pass all of them to come back Valid. The pipeline runs in milliseconds per address, and the whole list is checked in minutes. Understanding the pipeline matters, because it explains why two verifiers can disagree about the same address: they run different checks, or they run the same checks with different strictness.

    In fact, the checks run in a sensible order, from the cheapest to the most expensive. A syntax check costs nothing, so it runs first. A domain check costs a DNS lookup, so it runs second. The SMTP handshake costs a live connection to the receiving server, so it runs last, and only for addresses that passed everything before it. A verifier that skipped the cheap checks would waste time and money talking to servers about addresses that were never deliverable.

    Email verification guide: syntax, the cheapest check of all

    Firstly, the syntax check asks whether the address is even written correctly. It checks for the @ symbol, a valid local part before it, a valid domain after it, and no forbidden characters or spaces. An address such as john@@example.com or sarah@example fails here, and so does an address with a space in the middle. Typos are the most common cause of failure at this stage. The fix is often obvious: a missing letter, a doubled @, or a domain typed as gamil instead of gmail. Some verifiers suggest the correction automatically.

    Secondly, syntax alone proves almost nothing. An address can be perfectly written and still belong to nobody. Syntax is a gate, not a verdict: it removes the addresses that could never work, so the expensive checks are spent only on addresses that might. A verifier that stopped at syntax would be a spellchecker, not a verifier.

    Email verification guide: domain and MX records, the address book check

    Moreover, the domain check asks whether the domain exists and whether it can receive mail. The verifier looks up the domain’s DNS records, and specifically its MX records, which name the mail servers that accept mail for that domain. A domain with no MX records cannot receive email at all, so every address on it is Invalid. A domain that exists but has no mail server, such as a parked domain, fails the same way. This check catches the addresses collected from companies that closed, domains that lapsed, and typos that produced a real-looking but mail-less domain.

    For example, the MX check also reveals how the domain is set up. A domain whose MX records point to Google Workspace or Microsoft 365 is a normal business domain. A domain whose MX records point nowhere, or to a server that refuses connections, is a dead end. The verifier records all of this, because the later checks depend on knowing which server to talk to.

    Email verification guide: the SMTP handshake, the check that matters most

    Finally, the SMTP handshake is the check that separates verification from validation. The verifier connects to the receiving mail server and asks, in the language of email servers, whether it would accept a message for this address, then disconnects before sending anything. The server answers with a code: 250 means the mailbox exists, 550 means it does not. No email is ever sent, and the recipient never sees anything. This is the only check that can confirm a specific mailbox exists. It is the reason verification works at all.

    In sum, the handshake has one honest limit, and every verifier shares it. Some servers refuse to answer, or answer the same way for every address, to stop exactly this kind of probing. Microsoft 365, for instance, blocks sender verification entirely on many domains. When the server will not answer, the verifier cannot know. The address comes back Unknown or Catch-all instead of Valid or Invalid. That limit is not a flaw in one tool. It is a property of email itself, and it is why no verifier can honestly promise 100%.

    Email verification guide: catch-all, disposable, role-based and spam traps

    Secondly, four extra checks sort the addresses that pass the handshake but are still risky. A catch-all domain accepts mail for any address, real or invented, so the handshake says yes for every address on it. The verifier must flag the whole domain as Catch-all. A disposable address comes from a temporary inbox service that self-destructs after minutes or hours, so it is real today and dead tomorrow. A role-based address, such as info@, support@ or sales@, belongs to a team rather than a person. It bounces less yet replies less, and complains more. A spam trap is an address that was never owned by a real person, planted to catch senders who mail scraped lists, and mailing one can damage a domain’s reputation badly.

    Moreover, these four checks are where verifiers genuinely differ. Catch-all detection needs a probe address that does not exist, to see whether the server accepts it anyway. Disposable detection needs a maintained list of temporary-mail domains, which changes constantly. Spam trap detection needs a database of known traps, which no vendor publishes in full. A cheap verifier may skip one or more of these checks. The addresses it misses are the ones that cost the sender later. The feature matrix in this email verification guide shows which verifiers cover each check.

    Bulk, API and real-time verification: three ways to check

    Secondly, verification comes in three forms, and most senders need only one of them. Bulk verification uploads a list, usually as a CSV file, and checks the whole list at once. API verification checks one address at a time, called from another piece of software. Real-time verification checks an address at the moment it is typed into a form, before the form is even submitted. The checks inside are the same. The difference is when they run, and who triggers them.

    In fact, bulk verification is the form this email verification guide is mostly about, because it is the form cold email uses. A sender builds a list, uploads it, waits a few minutes, downloads the results, and mails only the Valid addresses. Every verifier in this email verification guide sells bulk verification. It is priced in credits: one credit per address checked, with some verifiers charging nothing for Unknown results or duplicates.

    Email verification guide: bulk verification, the cold email standard

    Firstly, bulk verification suits any list that is checked before a campaign. The list is uploaded, the verifier works through it. The results come back as a file with a status on every row. The sender then segments the list: Valid addresses go into the campaign, Invalid addresses are deleted. The rest are handled according to the rules in the next section. A list of ten thousand addresses typically takes five to thirty minutes to check, depending on the verifier and the domains involved.

    Secondly, bulk verification has one practical rule: keep the original list. Never overwrite the only copy with the verified version, because the results are a snapshot, not a permanent truth. A list verified in January will have decayed by June. The sender who kept the original can re-verify it in one upload. A sender who deleted the original must rebuild the list from scratch.

    Email verification guide: API verification, for software that checks as it goes

    Moreover, API verification suits teams whose software collects addresses continuously. A CRM, a sign-up flow, or a lead-generation tool calls the verifier’s API for each new address. The result decides what happens next: a Valid address enters the pipeline, an Invalid one is rejected with a polite message. All six verifiers in this email verification guide offer an API. The credit cost is the same as bulk, one credit per address. The difference is the plumbing, not the price.

    For example, API verification is how a team stops bad addresses entering the system at all, rather than cleaning them out later. A form that verifies in real time never stores the typo, the disposable address, or the fake. A CRM that verifies on import never fills up with dead contacts. The cost is the same per address, yet the saving is larger, because a bad address that never enters the system never needs cleaning, segmenting or deleting.

    Email verification guide: real-time verification, the form guard

    Finally, real-time verification is API verification with a user interface: it checks the address while the visitor is still typing, and warns them before they submit. Bouncer sells this as a separate product, Bouncer Shield, from $2 a month for 1,000 checks. ZeroBounce includes real-time checks in its ONE plan. For a cold email sender, real-time verification matters less than bulk, because cold lists do not come from forms. For a team that also runs a website with sign-up forms, it is the cheapest way to keep the house list clean from day one.

    Video: How to Verify Any Email Address and Reduce Bounce Rates by Snovio on YouTube. This video is the creator’s property, embedded via YouTube for education. OutreachCompare is not affiliated with Snovio and does not claim ownership of this video.

    In sum, the video above walks through the same pipeline this section describes, from the first syntax check to the final result. It shows the checks running on a real list. Pick bulk verification when the list already exists, pick the API when addresses arrive continuously, and pick real-time checks when the addresses come from a form. Most cold email senders need bulk only, and that is the honest starting point.

    How to read a verification result: Valid, Risky, Catch-all, Invalid, Unknown

    Email verification guide: a laptop screen showing four stacks of envelopes sorted by result, green with a checkmark, amber with a question mark, grey with a shield, and red with a cross
    Reading a verification result in this email verification guide: four stacks, green Valid, amber Catch-all, grey Risky, and red Invalid, each with a different rule for what to do next.

    Secondly, every verifier returns the same five results, even when the names differ slightly. Valid means the address passed every check and is safe to mail. Invalid means the address failed a check and will bounce. Catch-all means the domain accepts everything, so the verifier cannot confirm the mailbox. Risky means the address passed the technical checks yet carries a warning, such as a role-based inbox, a disposable domain, or a spam trap signal. Unknown means the server would not answer, so the verifier could not decide. Five results, five different actions, and the most expensive mistake in verification is treating them all the same.

    In fact, the rules are simple once they are written down. Mail the Valid addresses, and mail nothing else without thinking first. Delete the Invalid addresses at once, and never mail them again. Treat Catch-all as a maybe, and decide by value: mail the high-value catch-alls slowly, in a separate campaign, and drop the rest. Risky deserves a no for cold email, with one exception: a role-based address at a small company can be worth one careful email, while a disposable address is never worth one. Unknown is a retry, not a verdict: check it again in a week, and if it stays Unknown, drop it.

    Email verification guide: Valid, the only green light

    Firstly, a Valid result means the address passed syntax, domain, MX, SMTP and the risk checks, and the mailbox exists. Valid addresses are the campaign. A list that returns 80% Valid is a healthy list. A list that returns 50% Valid was built from stale or careless sources. The sender should ask where it came from before mailing it. The valid share is the first quality signal a list gives. It is worth reading before any email is written.

    Secondly, Valid does not mean engaged, interested, or even human. It means the mailbox exists and can receive mail. A Valid address can still ignore the email, mark it as spam, or belong to someone who left the company and whose inbox is now monitored by a colleague. Verification proves deliverability, not receptiveness, and no verifier claims otherwise. The copy still has to earn the reply.

    Email verification guide: Invalid, the address to delete at once

    Moreover, an Invalid result means the address will bounce, and mailing it is pure cost. The bounce hurts the sender reputation, the sending tool may count it against the account, and the address will never reply. Delete Invalid addresses from the sending list immediately, and keep them in a suppression list so they are never re-added by a fresh import. A sender who mails Invalid addresses after verification has paid for the check and then ignored it, which is the worst of both worlds.

    For example, the Invalid share also diagnoses the list source. A scraped list with 30% Invalid was scraped badly. A bought list with 40% Invalid was bought from a seller who does not verify. A list built by hand from company websites should return under 10% Invalid, and if it does not, the building process has a flaw, usually a typo pattern or a stale source. The Invalid rate is a report card on the list, not just a cleaning step.

    Email verification guide: Catch-all, the honest maybe

    Finally, a Catch-all result is the hardest call in verification, because it is not a verdict at all. The domain accepts every address, so the verifier cannot tell whether the mailbox exists. Mailing a catch-all is a gamble: the address may be real, or it may bounce, or it may land in a catch-all inbox that nobody reads. The right approach is to mail catch-alls separately, slowly, and only when the person matters. A list with 20% catch-all is normal in B2B, where many small companies run catch-all domains. A list with 50% catch-all is a warning that the list was built from guesses rather than findings.

    In sum, the catch-all share is also where verifiers earn their money. A verifier with good catch-all handling probes the domain with a fake address to confirm the catch-all, and then applies extra signals, such as pattern checks and historical data, to guess whether the address is real. A verifier with poor catch-all handling marks everything on the domain as Catch-all and leaves the sender to guess. The accuracy section of this email verification guide shows how much that difference matters in practice.

    The full verification workflow, step by step

    Email verification guide: a circular workflow loop around a central envelope, with finding contacts, verifying the list, cleaning, sending the campaign and a calendar refresh step
    The verification workflow in this email verification guide: find, verify, clean, segment, send, and re-verify on a calendar, in a loop that repeats every few months.

    Secondly, verification works best as a workflow, not a one-off chore. The workflow has six steps, and each step takes minutes. A sender who follows it will keep bounce rates below 2% without thinking about it. A sender who skips steps will keep wondering why replies stopped. The six steps are: find, verify, clean, segment, send, and re-verify. The rest of this section walks through each one.

    In fact, the workflow matters more than the verifier. The best verifier in the world cannot save a list that was never cleaned. The cheapest verifier in the world is enough for a sender who follows the steps. Buy the verifier that fits the budget, then follow the workflow every time, and the results will take care of themselves.

    Email verification guide: step 1, find the addresses

    Firstly, find the addresses from a source that publishes them. Company websites, LinkedIn profiles, directories and databases such as Apollo, Hunter and Snov.io are the honest sources. A finder that returns a verified address is worth more than a finder that returns a guess, because a guess costs a verification credit and often bounces anyway. Our Email Finders Guide and our guide to building a cold email list cover the finding step in full.

    Secondly, keep the source with the address. A column that records where each address came from, and when, turns a list into a traceable asset. When a campaign bounces, the sender can see which source produced the bad addresses and stop using it. When a source produces 90% Valid addresses month after month, the sender can trust it more. A list without sources is a list without a memory.

    Email verification guide: step 2, verify the whole list

    Moreover, verify the whole list before the first send, in one bulk upload. Do not verify a sample and mail the rest, because the sample is not the list. The untested half is where the bounces live. Do not verify after the first campaign, because the first campaign is where the damage happens. Upload the list, wait for the results, and download the file with the status on every row. The cost is a few dollars per thousand addresses, and the check takes minutes.

    For example, a sender with a list of ten thousand addresses should expect the check to cost between $8 and $129, depending on the verifier, and to take five to thirty minutes. A sender with a list of one hundred thousand should expect $400 to $649 on pay-as-you-go, or less on a monthly plan. The cost table later in this email verification guide shows the exact figures for each verifier at each volume.

    Email verification guide: step 3, clean the list

    Finally, clean the list by deleting every Invalid address and every disposable address, and by suppressing every spam trap. This is the step that protects the domain. A list that was 80% Valid becomes a campaign that bounces under 2%, because the 20% that would have bounced is gone. Keep the deleted addresses in a suppression file, not in the bin, so a careless re-import cannot bring them back.

    In sum, cleaning is also the moment to fix typos. A verifier that flags gamil.com or hotmal.com has found an address that is one letter from being right, and the fix is a single keystroke. Some verifiers suggest the correction automatically. A sender who fixes the typos recovers addresses that would otherwise be lost. A list that gains 2% back from typos is a list that was worth verifying twice over.

    Email verification guide: step 4, segment what is left

    Secondly, segment the cleaned list before sending. Valid addresses go into the main campaign. Catch-all addresses go into a separate, slower campaign, with a lower daily volume and a closer eye on bounces. Role-based addresses go into a third segment, mailed only when the company is small enough that info@ reaches a real person. Unknown addresses go into a holding segment, to be re-checked in a week. Segmentation is what turns five results into five sensible decisions, instead of one blunt one.

    Moreover, segmentation also protects the sender when a segment goes wrong. If the catch-all segment bounces above 2%, the sender pauses that segment only, while the main campaign keeps running. If the whole list had been mailed as one campaign, the same bounces would have damaged the whole domain. Segments are bulkheads: a leak in one does not sink the ship.

    Email verification guide: step 5, send slowly and watch the numbers

    For example, send the verified list slowly, at thirty to fifty emails a day per mailbox, and watch the bounce rate after the first hundred sends. A verified list should bounce under 2%, and under 1% is better. A bounce rate above 2% on a verified list means something went wrong: the list was verified too long ago, the verifier missed a pattern, or the sending domain has a problem of its own. Pause, investigate, and do not push through. Our guide to warming up a new email domain explains the sending pace in full.

    Finally, watch the spam complaint rate beside the bounce rate. Complaints should stay below 0.1%, and Gmail treats anything above 0.3% as a problem. A verified list rarely produces complaints, because dead addresses cannot complain, yet a verified list mailed to the wrong people certainly can. Verification protects deliverability. Targeting protects reputation. Both numbers need watching, every week, for every campaign.

    Email verification guide: step 6, re-verify on a calendar

    In fact, re-verify every list every three to four months, and verify again 24 to 48 hours before any big campaign. Lists decay by roughly a fifth each year, as people change jobs and companies close, so a list that was clean in January is a different list by June. A re-verification costs the same per address as the first check, and it is cheaper than the bounces it prevents. Put the re-verification on the calendar, next to the campaign dates, so it happens before the send rather than after the damage.

    In sum, the workflow is a loop, not a line. Find, verify, clean, segment, send, and re-verify, then find more addresses and start again. Each pass through the loop makes the list a little cleaner and the sender a little safer. A sender who runs the loop every quarter will never face a bounce crisis, because the crisis was prevented three months earlier, in a ten-minute upload.

    Pricing compared: six verifiers, honest numbers

    Secondly, pricing is where the six verifiers differ most, and the difference is larger than most senders expect. At ten thousand verifications, the cheapest option costs $48 a month and the most expensive costs $129 for a single purchase, a gap of nearly three times for the same job. At one hundred thousand, the gap is wider still. The tables below show the figures exactly as they appear on the official sites, checked on 16 November 2026, with the catches flagged beside them.

    In fact, every verifier in this email verification guide charges in credits, and one credit verifies one address. The differences are the minimum purchase, the expiry rule, the free allowance, and what happens to Unknown results and duplicates. A credit that never expires is worth more than a credit that expires in twelve months. A verifier that does not charge for Unknown results is cheaper than its price list suggests. Read the footnotes, not just the headline.

    Email verification guide: the three specialists, priced

    VerifierFree allowancePay-as-you-goMonthly planCredits expire?
    ZeroBounce100 credits a month
    Freemium plan, $0
    From $39 for 2,000
    $69 for 5,000; $129 for 10,000
    ONE $99/mo; $79 annual
    10,000 credits a month
    Never while subscribed
    PAYG: 2 years after last purchase*
    NeverBounceFree first list
    No card required; no ongoing free plan
    $8 for 1,000
    $50 for 10,000; $400 for 100,000
    Growth $49/mo
    Allowance not stated on the page†
    Yes, 12 months
    After purchase, PAYG only
    Bouncer100 free credits
    On signup, no card
    $8 for 1,000
    $60 for 10,000; $400 for 100,000
    20% less than PAYG
    $48 a month for 10,000
    Never
    Neither PAYG nor subscription

    * ZeroBounce credit expiry depends on the account: credits never expire on accounts created on or before 1 June 2026, or while a ONE subscription is active. On newer accounts, purchased credits expire two years after the most recent purchase. † NeverBounce’s Growth page shows $49 a month with no credit allowance stated; third-party breakdowns of the page’s volume selector list $49 for up to 10,000 emails, $99 for 50,000, $159 for 100,000 and $999 for 1,000,000 a month. Last checked: 16 November 2026. Features and pricing can change, so please check the provider’s site before you buy. We do not guess at features, prices or trials.

    What the specialists bundle beside verification

    Moreover, the three specialists sell different things beside verification. ZeroBounce ONE bundles a deliverability suite: warmup seeds, inbox placement tests, blacklist monitors, a DMARC monitor and an email finder, which is why it costs $99 a month for the same 10,000 credits that cost $129 as a one-off purchase. NeverBounce Growth adds automatic CRM sync, AI scoring and 200 AI-picked leads a month, which is why it suits teams that verify continuously. Bouncer sells its extras separately: a Deliverability Kit from $25 a month, and Bouncer Shield real-time checks from $2 a month. A sender who wants the extras should compare the bundle, not just the credit price.

    For example, the free allowance also differs in a way that matters to a beginner. ZeroBounce gives 100 credits every month, forever, which is enough to test the tool on a real sample each month. Bouncer gives 100 credits once, at signup, which is enough to test the tool once. NeverBounce gives a free first list with no card, which is generous for a first clean, yet there is no ongoing free tier after it. A beginner who wants to try before buying should start with ZeroBounce’s monthly 100, then test Bouncer’s 100, then run the first real list through NeverBounce.

    Email verification guide: the three finders, priced

    FinderFree planEntry planTop plan shownHow verification is charged
    Hunter$0, 50 credits a monthStarter $49/mo; $34 annual
    2,000 credits a month
    Scale $299/mo; $209 annual
    25,000 credits a month
    1 credit per email found
    0.5 credit per verification
    Snov.ioTrial, 50 credits
    100 recipients
    Starter $39/mo; $29.25 annualUltra $738/mo; $553.50 annualVerification included
    Part of the credit allowance
    Skrapp$0, 50 credits a monthProfessional $39/mo; $29 annual
    2,000 credits a month, 2 users
    Enterprise $349/mo; $262 annual
    50,000 credits a month, 15 users
    Only Valid and Catch-all charged
    Credits roll over

    Hunter Growth is $149 a month, or $104 on annual billing, for 10,000 credits. Snov.io Pro S is $99, Pro M $189 and Pro L $369 a month. Last checked: 16 November 2026. Features and pricing can change, so please check the provider’s site before you buy. We do not guess at features, prices or trials.

    Reading the finder prices: credits do double duty

    Secondly, the finders are not pure verifiers, and their pricing shows it. Hunter charges half a credit per verification, so a Starter plan with 2,000 credits verifies up to 4,000 addresses a month when nothing is spent on finding, which is a quiet bargain for a sender who already has a list. Skrapp charges only for Valid and Catch-all results, so the Invalid addresses that a list is full of cost nothing, and its credits roll over to the next month. Snov.io bundles verification into a wider platform, so the verification price is inseparable from the finding, warmup and CRM features that share the same credits.

    In sum, the finder prices make sense only when the finding is counted too. A sender who needs finding and verification in one tool should compare Hunter, Snov.io and Skrapp on the combined cost, not on verification alone. A sender who already has a list should compare the three specialists instead, because a pure verifier is cheaper per check than a finder’s credits. Our Best Email Verification Tools Compared article puts all six side by side, and our Hunter vs Skrapp comparison covers the two finders in depth.

    What 1,000, 10,000 and 100,000 verifications actually cost

    Secondly, the headline price is rarely the price a sender pays, because the minimum purchase, the volume discount and the subscription all change the maths. The table below shows the cheapest way to buy each volume from each specialist, using the figures checked on 16 November 2026. The arithmetic is shown beside each figure, so the reader can check it. Where a figure comes from a third-party breakdown rather than the vendor’s own headline, the note says so.

    VolumeZeroBounceNeverBounceBouncer
    1,000 checks$39 PAYG
    Minimum pack is 2,000 credits
    $8 PAYG
    1,000 credits at $0.008 each
    $8 PAYG
    1,000 credits at $0.008 each
    10,000 checks$99 ONE / $129 PAYG
    $99 is $0.0099 per check
    $49 Growth / $50 PAYG
    $49 is $0.0049 per check
    $48 monthly / $60 PAYG
    $48 is $0.0048 per check
    100,000 checks$449 ONE / $649 PAYG
    $449 is $0.0045 per check
    $159 Growth† / $400 PAYG
    $159 is $0.0016 per check
    $320 monthly / $400 PAYG
    $320 is $0.0032 per check

    † NeverBounce Growth at 100,000 comes from a third-party breakdown of the pricing page’s volume selector, not from the page headline, which states only $49 a month with no allowance. Last checked: 16 November 2026. All figures are arithmetic from the published packs and plans; check the provider’s site before you buy.

    Three lessons from the cost table

    Moreover, three lessons fall out of the table. The first is that ZeroBounce is the most expensive at every volume. The gap is largest at the smallest volume, where its $39 minimum pack costs nearly five times the $8 that NeverBounce and Bouncer charge for 1,000 checks. The second is that NeverBounce Growth is the cheapest at every volume above 1,000, when the third-party volume figures hold, at $49, $159 and $999 a month for 10,000, 100,000 and 1,000,000 checks. The third is that Bouncer is the cheapest honest pay-as-you-go option at every volume, and the only one whose credits never expire, which makes it the best choice for a sender who verifies irregularly.

    For example, a sender who verifies 10,000 addresses once, and then nothing for six months, should buy Bouncer pay-as-you-go for $60, because the credits will still be there in six months. A sender who verifies 10,000 addresses every month should buy NeverBounce Growth at $49 a month, or Bouncer’s monthly plan at $48, because both beat a one-off purchase. A sender who verifies 10,000 addresses a month and also wants placement tests, warmup and a DMARC monitor should buy ZeroBounce ONE at $99, because the bundle is worth more than the $50 gap to the cheapest option. The right price depends on the pattern, not just the volume.

    See a bulk verification run in action

    Video: Avoid Sending Emails to Invalid Contacts by ZeroBounce on YouTube. This video is the creator’s property, embedded via YouTube for education. OutreachCompare is not affiliated with ZeroBounce and does not claim ownership of this video.

    In sum, the video above shows the ZeroBounce workflow in action, from uploading a list to downloading the cleaned results. It is the clearest picture of what a bulk verification run looks like in practice. The prices in the table are the ones to compare against it: the workflow is the same at every verifier, and the price is what differs.

    The accuracy reality: vendor claims against independent benchmarks

    Secondly, every verifier claims high accuracy, and the claims are hard to compare, because each vendor measures accuracy differently. ZeroBounce guarantees 99.6% accuracy, with a footnote that the figure depends on its Verify+ service. Without it, the figure is 96% for some providers such as Yahoo. NeverBounce claims 99.9%. Bouncer claims 99.5%. Snov.io claims 98%. These are vendor claims, measured by the vendors themselves, on their own tests, and no neutral audit exists that tests them all the same way. That fact should be stated plainly, because it changes how much weight the claims deserve.

    In fact, the independent benchmarks that do exist tell a more complicated story, and they disagree with each other. A thirty-day test by La Growth Machine found NeverBounce at 99.9% and ZeroBounce at 99.0%, which supports both vendors’ claims. A stricter benchmark by Hunter, which counted Unknown results as failures, found NeverBounce at 63.17% and ZeroBounce at 60.7%. Both tests are real, both are third-party, and neither is a neutral audit. The difference is what counts as a failure: a verifier that says Unknown is being honest, yet a benchmark that counts Unknown as wrong will punish it for that honesty.

    What the finder benchmarks found

    Firstly, the finder benchmarks are the most surprising numbers in this email verification guide. An Anymail Finder benchmark from September 2025 and a Tomba benchmark from February 2026 both measured how many found addresses were actually verified, and both found low figures: Skrapp at 42.8% verified, against its own claim of 92% search success, and Hunter at 37.6%. These figures measure finding plus verification together, not verification alone, so they do not mean the verifiers are wrong 60% of the time. They mean that finding an address and verifying it are different jobs, and that a finder’s search success is not a verification rate.

    Secondly, the lesson is to read the claim, not just the number. A claim of 92% search success means the finder found an address pattern for 92% of the names it tried. A claim of 42.8% verified means only 42.8% of those addresses passed the verification checks. Both can be true at once, and the gap between them is the addresses that look right yet do not exist. A sender who buys a finder for its search rate, and then mails the unverified results, will bounce far more than a sender who verifies first.

    Why no verifier can promise 100%

    Moreover, no verifier can promise 100% accuracy, because the email system itself will not allow it. Some servers refuse to answer the SMTP handshake, some domains accept every address, and some mailboxes close between the check and the send. A verifier that promises 100% is either counting Unknown results as correct, or it is not telling the truth. The honest promise is a low bounce rate on Valid addresses. ZeroBounce states it directly: Valid addresses should bounce below 2%. That is a testable promise, and it is the one to hold a verifier to.

    For example, the practical way to judge accuracy is to test it on a known list. Take one hundred addresses that are known to be real, and one hundred that are known to be dead, run both through the verifier, and count the mistakes. A verifier that marks dead addresses as Valid is dangerous. Marking real addresses as Invalid is wasteful. Many Unknown results are honest yet unhelpful. The test costs a few dollars in credits, and it tells the sender more than any vendor claim ever will.

    Email verification guide: the accuracy checklist before you buy

    Finally, four questions separate a good verifier from a good sales page. Does it charge for Unknown results, or only for answers? Will it run a catch-all probe, or mark every address on a catch-all domain the same way? Does it check for spam traps and disposable domains, or only for syntax and MX records? Is there a published bounce-rate promise for Valid addresses, or only an accuracy percentage? A verifier that answers all four well is worth its price. A verifier that dodges them is not, whatever the headline claims.

    Pros and cons: the honest case for each verifier

    Secondly, every verifier in this email verification guide has a genuine strength and a genuine weakness. The honest case for each one is worth stating. A guide that lists only strengths is a sales page. A guide that lists only weaknesses is a hit piece. The table-free version below gives each verifier its due, in plain language, so the reader can weigh the trade-off rather than taking a recommendation on trust.

    Email verification guide: ZeroBounce, the all-rounder

    Firstly, ZeroBounce is the best all-round verifier, and its strength is breadth. It checks more than thirty statuses, it bundles placement tests, warmup, DMARC monitoring and an email finder into ONE. It guarantees 99.6% accuracy with a promise of bounces below 2% on Valid addresses. Its weakness is price: it is the most expensive verifier at every volume, its minimum purchase is $39 for 2,000 credits, and its accuracy guarantee carries the Verify+ footnote that drops the figure to 96% for some providers. A sender who wants one vendor for verification and deliverability should buy it. A sender who wants only verification should not.

    NeverBounce, the monthly workhorse

    Secondly, NeverBounce is the best verifier for a team that verifies every month, and its strength is the Growth plan. At $49 a month it is the cheapest monthly option above 1,000 checks, it syncs automatically with the CRM, it charges only for new unique emails. It adds AI scoring and 200 AI-picked leads a month. Its weakness is transparency: the Growth page states no credit allowance, so the buyer must trust third-party breakdowns for the higher tiers, and its pay-as-you-go credits expire after twelve months. A sender who verifies monthly should buy it. A sender who verifies twice a year should not.

    Email verification guide: Bouncer, the value pick

    Moreover, Bouncer is the best value verifier, and its strength is fairness. Its credits never expire, it never charges for duplicates or Unknown results, it gives 100 free credits at signup. It is the cheapest pay-as-you-go option at every volume. Its weakness is scope: it has no ongoing free plan, its deliverability tools cost extra from $25 a month. It is a smaller vendor than its two rivals, with a narrower integration list. A sender who verifies irregularly should buy it. A sender who wants a free monthly allowance should look at ZeroBounce instead.

    Hunter, the finder that verifies cheaply

    For example, Hunter is the best finder for a sender who already has a list, and its strength is the half-credit verification. A Starter plan with 2,000 credits verifies up to 4,000 addresses a month, which makes it cheaper than a specialist for verification alone. It also finds addresses, runs campaigns and tracks replies. Its weakness is accuracy: independent benchmarks measured only 37.6% of its found addresses as verified, and its verification is a feature of a wider platform rather than a specialist’s core job. A sender who needs finding and verification together should buy it. A sender who needs verification only should buy a specialist.

    Email verification guide: Snov.io, the platform play

    Finally, Snov.io is the best verifier inside a wider platform, and its strength is integration. Verification sits beside finding, warmup, drip campaigns and a CRM in one subscription, the video above shows its verification workflow clearly, and its 98% accuracy claim is backed by a stated 1% bounce rate on Valid addresses. Its weakness is price clarity: verification shares credits with every other feature, so the cost of verification alone is hard to isolate. The entry plan is $39 a month for a bundle the sender may not need. A sender who wants one platform for everything should buy it. A sender who wants a cheap standalone verifier should not.

    Skrapp, the rollover specialist

    In sum, Skrapp is the best verifier for a sender who verifies in bursts, and its strength is the rollover. Credits roll over to the next month, only Valid and Catch-all results are charged. The Professional plan gives 2,000 credits a month for $39, or $29 on annual billing. Its weakness is the benchmark gap: independent tests measured 42.8% of its found addresses as verified, against its own 92% search-success claim, which means the finding is stronger than the verification. A sender who finds on LinkedIn and verifies in bursts should buy it. A sender who needs a pure verification specialist should buy Bouncer or ZeroBounce.

    Who should pick which: a decision framework

    Secondly, the decision is simpler than the comparison suggests, because most senders fall into one of four groups, and each group has an obvious pick. Answer which group describes the sender, and the choice narrows from six verifiers to one or two. Skip the question, and the choice stays six wide, which is no choice at all. The framework below covers the beginner, the monthly sender, the irregular sender, and the sender who needs finding as well.

    Pick Bouncer when the budget is tight or the volume is irregular

    Firstly, pick Bouncer when the budget is tight, or when verification happens a few times a year rather than every month. Its credits never expire, so a $60 pack bought in January is still there in September, and its $8 minimum purchase is the lowest in this email verification guide. A freelancer cleaning one list a quarter, a startup verifying its first thousand leads, or a team that inherited a stale list and needs one big clean should all start with Bouncer. The only reason to look elsewhere is a need for a free monthly allowance, or for a deliverability bundle in the same subscription.

    Pick ZeroBounce when one vendor should do everything

    Secondly, pick ZeroBounce when the sender wants one vendor for verification, placement testing, warmup and DMARC monitoring. The ONE plan at $99 a month, or $79 on annual billing, is expensive for verification alone, yet it replaces three or four separate subscriptions, and its 100 free credits a month let a beginner test it indefinitely. A marketing team with a large opt-in list, a sender who already pays for placement tests elsewhere, or a team that wants the strongest accuracy guarantee should all pick ZeroBounce. The only reason to look elsewhere is price, and the price gap is real.

    Pick NeverBounce when verification runs every month

    Moreover, pick NeverBounce when verification is a monthly habit rather than a one-off chore. The Growth plan at $49 a month syncs with the CRM automatically, charges only for new unique emails, and adds AI scoring and leads on top, which makes it the cheapest monthly option above 1,000 checks. A sales team that adds leads every week, a company with a signup form that never stops, or an agency that cleans client lists monthly should all pick NeverBounce. The only reason to look elsewhere is the unstated allowance, which the buyer should confirm on the site before committing, or a volume pattern that is irregular rather than monthly.

    Pick Hunter, Snov.io or Skrapp when finding comes first

    For example, pick Hunter when the list still needs building and the budget is small, because its half-credit verification stretches a $49 plan to 4,000 checks a month. Pick Snov.io when the team wants finding, verification, warmup and campaigns in one platform, and is willing to pay $39 a month for the bundle. Pick Skrapp when the finding happens on LinkedIn and verification happens in bursts, because its credits roll over and only Valid and Catch-all results are charged. A sender who already has a list should not pick any of the three, because a specialist verifier is cheaper per check.

    In sum, the framework is a ladder, not a leap. Start with the cheapest verifier that fits the pattern, verify the first list, and watch the bounce rate. If the bounce rate stays below 2%, the verifier is doing its job, and the sender should stay with it. If the volume grows, or the needs change, the sender can switch, because verification credits are not a marriage. A sender who picks by pattern will spend less, bounce less, and switch less than a sender who picks by brand.

    Frequently asked questions

    Email verification guide: what is email verification, in one sentence?

    Email verification is the check that confirms an email address is real, formatted correctly and able to receive mail, before you ever send to it. A verifier runs checks from syntax to a live SMTP handshake, then returns Valid, Risky, Catch-all, Invalid or Unknown for each address. The sender mails only the Valid ones.

    Email verification guide: how much does email verification cost?

    Email verification costs from $8 for 1,000 checks at Bouncer and NeverBounce, to $39 for 2,000 checks at ZeroBounce, with the price per check falling sharply at volume. At 10,000 checks, the cheapest options are Bouncer at $48 a month and NeverBounce Growth at $49 a month, while ZeroBounce ONE costs $99 a month. At 100,000 checks, NeverBounce Growth is cheapest at $159 a month on third-party volume figures, against $320 at Bouncer and $449 at ZeroBounce.

    Email verification guide: how accurate is email verification?

    Vendor claims run from 98% to 99.9%, yet no neutral audit exists, and independent benchmarks disagree. A thirty-day test found NeverBounce at 99.9% and ZeroBounce at 99.0%, while a stricter benchmark that counted Unknown results as failures found both near 60%. The honest promise to hold a verifier to is a bounce rate below 2% on Valid addresses, which ZeroBounce states directly.

    Email verification guide: what should I do with catch-all addresses?

    Mail catch-all addresses separately, slowly, and only when the person matters. A catch-all domain accepts every address, so the verifier cannot confirm the mailbox, and mailing the whole segment at full speed risks bounces. A list with 20% catch-all is normal in B2B. A list with 50% catch-all was probably built from guesses, and the sender should rebuild it from real sources.

    Email verification guide: how often should I re-verify my list?

    Re-verify every list every three to four months, and again 24 to 48 hours before any big campaign. Lists decay by roughly a fifth each year, as people change jobs and companies close, so a list verified in January is a different list by June. Re-verification costs the same per address as the first check, and it is cheaper than the bounces it prevents.

    Email verification guide: does verification guarantee my emails reach the inbox?

    No. Verification proves an address can receive mail, which keeps bounces low, yet inbox placement also depends on authentication, sender reputation, warmup, content and engagement. A verified list mailed from an unauthenticated domain with no warmup will still land in spam. Verification is the first step, not the whole job, and our Deliverability Guide 2026 covers the rest.

    The verdict

    Secondly, the verdict in this email verification guide is a set of best-for labels, not a numeric score, because no hands-on testing has been done yet. A score without testing would be a guess. The labels below come from the features and prices checked on the official sites on 16 November 2026, and from the way each verifier fits a beginner, a monthly sender, an irregular sender, and a sender who needs finding as well.

    For example, Bouncer is the best value verifier, at $8 for 1,000 credits that never expire, with no charge for duplicates or Unknown results. ZeroBounce is the best all-round verifier, with a 99.6% accuracy guarantee and a deliverability suite bundled into ONE from $99 a month. NeverBounce is the best verifier for monthly senders, with automatic CRM sync and the cheapest Growth plan above 1,000 checks. Hunter is the best finder that verifies cheaply, at half a credit per check.

    Email verification guide: the finder verdict

    Moreover, Snov.io is the best verifier inside a wider platform, with finding, warmup, campaigns and a CRM sharing one subscription from $39 a month. Skrapp is the best verifier for LinkedIn-first senders who verify in bursts, with credits that roll over and charges only for Valid and Catch-all results. Meanwhile, the advice that matters most is not a tool pick: verify every list before the first send, delete the Invalids, segment the catch-alls, and re-verify every three to four months.

    Finally, verification is the cheapest insurance in cold email. The senders who buy it are the senders who keep landing in the inbox year after year. Start with Bouncer when the budget is tight, move to NeverBounce when verification becomes monthly, and move to ZeroBounce when one vendor should do everything. A verified list, a separate sending domain, a patient warmup and a careful pace will take a sender further than any single tool ever will.

    Our verdict on this email verification guide

    For the best value, choose Bouncer, from $8 for 1,000 credits that never expire. ZeroBounce is the best all-round verifier, with a 99.6% accuracy guarantee from $39 for 2,000 credits. NeverBounce is the best choice for monthly senders, with automatic CRM sync from $49 a month. Hunter is the best finder that verifies cheaply, at half a credit per check from $49 a month. No numeric score is given, because no hands-on testing has been done yet.

    Start here: pick the verifier that fits how often you verify, upload the list, delete the Invalids, segment the catch-alls, and re-verify every three to four months.

    Keep reading

    Email verification guideBouncer from $8/1,000 · ZeroBounce from $39/2,000 · NeverBounce from $49/mo Visit Bouncer →
  • Hunter vs Skrapp 2026

    Hunter vs Skrapp 2026

    One finder starts from company domains, the other starts from LinkedIn profiles

    Hunter vs Skrapp is the comparison to read when you need verified business emails and you cannot decide between the two best-known finders. Hunter starts from a company domain and finds everyone who works there, verifies each address, and then sends the email itself. Skrapp starts from a LinkedIn profile and finds that person’s verified business email in one click, for less money, with credits that roll over. This Hunter vs Skrapp comparison checks pricing, finding, verification, accuracy, bulk tools, sequences, integrations and data handling on both official sites, so you can pick by fit, not by habit.

    Visit Hunter →See Skrapp Plans →

    Prices checked 16 November 2026 on Hunter’s and Skrapp’s official pricing pages. Features and pricing can change, so please check the provider’s site before you buy.

    Quick Answer

    Skrapp wins on price and flexibility. Professional costs $39 a month for 2,000 credits, against Hunter Starter at $49 a month for the same 2,000 credits, and Skrapp’s unused credits roll over while Hunter’s expire at month end. Hunter wins on breadth. It finds emails from whole company domains, shows the public sources behind every address, and includes Sequences for sending, so one subscription covers finding, verifying and outreach. Choose Skrapp if your prospecting starts on LinkedIn and you want the cheapest verified emails. Choose Hunter if you build lists from company domains and want to send from the same tool.

    Above all, this Hunter vs Skrapp comparison is good news for buyers, because both tools are proven, affordable and easy to start. Hunter serves more than 7 million users and has been the default email finder for a decade. Skrapp serves more than 2 million professionals and has built its whole product around one fast workflow: open a LinkedIn profile, click once, get a verified email. Both tools have earned their reputations, and each one leads in different places. Skrapp is the cheaper finder with the fairer credit rules, while Hunter is the fuller platform with domain search and sending built in. Read on for the full Hunter vs Skrapp head-to-head, with pricing checked today, feature tables, real costs at four volumes, honest pros and cons, and a clear verdict.

    Hunter vs Skrapp at a glance

    Firstly, it helps to see the two tools side by side before the detail begins. Hunter is an all-in-one outreach platform from France that finds, verifies and sends cold emails in one account. Its best-known tools are Domain Search, which lists the people at a company from its domain. Email Finder, which finds one person’s address from a name and a company. Skrapp is a focused B2B email finder that works across LinkedIn, company websites and its own lead search database, with a Chrome extension that finds verified emails while you browse profiles. Both tools cover the same core job — finding verified business emails — so at first glance they look like twins.

    Hunter vs Skrapp: the shape of the choice

    In fact, the difference shows up in where each tool starts. Hunter starts from a company domain, which suits teams that build lists from target accounts and want every contact at each company. Skrapp starts from a LinkedIn profile, which suits recruiters and sellers who already know the person they want to reach. For example, a team targeting 200 companies would use Hunter’s Domain Search to pull every relevant contact from each domain, while a recruiter working from a Sales Navigator list would use Skrapp’s extension to pull verified emails from those profiles one by one. That starting point is the single biggest fact in this Hunter vs Skrapp comparison. Everything else in the article helps you judge which one matches how you prospect.

    A fuller platform, against a sharper finder

    Moreover, the two tools differ on how much of the job they cover. Hunter is a fuller platform: finding, verification, a B2B database called Discover, lead enrichment, and Sequences for sending campaigns all live in one subscription. Skrapp is a sharper finder: Email Finder, Email Verifier, AI Enrichment, lists and CRM sync, with no sending tool of its own. In sum, Hunter is the tool you buy when you want finding and sending in one place, while Skrapp is the tool you buy when you already have a sending tool and want the cheapest verified emails to feed it. Whether that extra breadth is worth $10 a month more is a question this Hunter vs Skrapp comparison answers section by section.

    HunterSkrapp
    From$49/mo monthly ($34/mo annual)
    Free plan: $0, 50 credits/mo
    $39/mo monthly ($29/mo annual)
    Free plan: $0, 50 credits, 1 user
    Entry credits2,000 credits/mo (Starter)2,000 credits/mo (Professional)
    Unused creditsLost — reset monthly, no rolloverRoll over — kept even after cancelling
    Starts fromCompany domain or person’s nameLinkedIn profile or company website
    Sending toolYes — Sequences includedNo — finder and verifier only
    Best forDomain search plus sending in one toolLinkedIn-first finding on a budget

    Last checked: 16 November 2026 on Hunter’s pricing page and Skrapp’s pricing page. Features and pricing can change, so please check the provider’s site before you buy. We do not guess at features, prices or trials.

    What the numbers say at a glance

    To sum up the shape of the choice, think of it this way. Hunter is the tool to pick when you want one subscription, one login and one price that covers finding, verifying and sending, with every address backed by public sources you can check. Skrapp is the tool to pick when your prospecting lives on LinkedIn, your budget is tight, and you want credits that never expire at month end. Both approaches work, and the rest of this Hunter vs Skrapp guide shows exactly where each one pulls ahead.

    Pricing in 2026: Hunter vs Skrapp head to head

    To start with, here is the pricing head-to-head, checked on the official pricing pages on 16 November 2026. Hunter sells four paid plans, Starter, Growth, Scale and Enterprise, plus a free plan. Skrapp sells two paid plans, Professional and Enterprise, plus a free plan, and both paid plans scale up on sliders. The two tools charge in similar ways — monthly credits, with annual billing cheaper — so this Hunter vs Skrapp pricing comparison is unusually easy to read side by side.

    Hunter vs Skrapp pricing compared: credit allowances on a scale, with rollover credits on one side
    Hunter vs Skrapp pricing starts from the same idea: a monthly credit allowance, with annual billing cheaper. The entry allowance is 2,000 credits on both tools, at $49 a month with Hunter and $39 with Skrapp, and the tables below show the full head-to-head.

    Hunter vs Skrapp pricing table: Hunter plans

    PlanPrice fromWhat you getBest forVisit
    Hunter — FreeBest for trying it out$0
    50 credits/mo
    Basic Discover filters, AI Assistant in Discover, 1 email account, 500 recipients per sequence, unlimited team membersA first test of the finderVisit Site →
    Hunter — StarterBest for small lists$49/mo monthly ($34/mo annual)
    2,000 credits/mo
    Auto-verification, lead enrichment, advanced Discover filters, 3 email accounts, AI Writing Assistant, 2,500 recipients per sequenceA solo sender or small teamCheck Hunter Pricing →
    Hunter — GrowthBest for growing teams$149/mo monthly ($104/mo annual)
    10,000 credits/mo
    Everything in Starter, plus 10 email accounts, 5,000 recipients per sequence, 10M saved leadsA team building bigger listsSee Hunter Growth →
    Hunter — ScaleBest for high volume$299/mo monthly ($209/mo annual)
    25,000 credits/mo
    Everything in Growth, plus 20 email accounts, 15,000 recipients per sequence, account managerHigh-volume prospecting teamsView Hunter Scale →
    Hunter — EnterpriseBest for custom needsCustom
    Custom credits
    Custom credits and email accounts, account manager, priority supportLarge teams with custom volumeContact Hunter →

    Prices last checked: 16 November 2026 on Hunter’s pricing page. Annual billing: Starter $408 a year, Growth $1,248 a year, Scale $2,508 a year. Features and pricing can change, so please check the provider’s site before you buy. We do not guess at features, prices or trials.

    Hunter vs Skrapp pricing table: Skrapp plans

    PlanPrice fromWhat you getBest forVisit
    Skrapp — FreeBest for trying it out$0
    50 credits, 1 user
    Email Finder, Email Verifier, LinkedIn Basic, Sales Navigator and Recruiter, Companies WebsitesA first test of the extensionVisit Site →
    Skrapp — ProfessionalBest for most buyers$39/mo monthly ($29/mo annual)
    2,000 credits/mo, 2 users
    Fair Credit Policy, credits roll over, Multi-Page Enrichment, Auto-Connect, List Saver, List Exports, List CRM Sync, AI EnrichmentLinkedIn-first prospecting teamsCheck Skrapp Pricing →
    Skrapp — EnterpriseBest for large teams$349/mo monthly ($262/mo annual)
    50,000 credits/mo, 15 users
    Everything in Professional, plus API Integration, SSO Authentication, accelerated support, dedicated account managerLarge teams and high volumeSee Skrapp Enterprise →

    Prices last checked: 16 November 2026 on Skrapp’s pricing page. Both paid plans scale up on sliders — the price at a higher credit volume is not shown on the static page, so check the site for your volume. Features and pricing can change, so please check the provider’s site before you buy. We do not guess at features, prices or trials.

    Hunter vs Skrapp: how a credit is counted

    Similarly, the credit rules decide what a plan really buys, and here the two tools differ in ways that matter every month. Hunter counts 1 credit for each email found through Domain Search, Email Finder or Bulk Email Finder, and 1 credit buys up to 10 emails through Bulk Domain Search, while verification costs 0.5 credit per email. If no email is found, no credit is used, and if verification fails, no credit is counted. Hunter counts the same search only once per billing period. Skrapp counts 1 credit for each email found or verified, yet it only charges for deliverable emails marked Valid or Catch-all, so Invalid and Unknown results cost nothing. That last rule is the fairest credit rule in this Hunter vs Skrapp comparison, because you never pay for an address you cannot use.

    In contrast, the rollover rule is where Skrapp pulls clearly ahead. Hunter’s credits reset monthly and do not roll over, so unused credits are lost at month end. Skrapp’s unused credits roll over to the next month, and you keep your credits even if you cancel your subscription. For a team whose prospecting volume varies — busy one month, quiet the next — rollover is worth real money. A quiet month on Hunter wastes credits you paid for, while a quiet month on Skrapp banks them for the busy month that follows.

    Hunter vs Skrapp trials and free plans

    For example, both tools let you start free, and neither one asks for a credit card to do it. Hunter’s free plan gives 50 credits a month, basic Discover filters, the AI Assistant in Discover and one connected email account, with 500 recipients per sequence. Skrapp’s free plan gives 50 credits to start, with the Email Finder, Email Verifier and the LinkedIn integrations included. Skrapp’s homepage says paid plans start at $30 a month, which rounds its $29 annual Professional price; the pricing page itself shows $29 a month billed annually and $39 billed monthly. Those are the figures this Hunter vs Skrapp comparison uses. Neither tool advertises a time-limited free trial, because the free plan never expires. You can test each one properly before paying.

    Add-ons that change the real bill

    Moreover, add-ons deserve a close read on the Hunter side, because Skrapp sells almost none. Hunter sells Inbox Protection from $7.50 a month per email account, managed email accounts, extra email account slots from $10 a month per account, custom domains and email accounts from $6 a month per account, and extra Credit Packs. Skrapp’s pricing page lists no add-ons at all: the API, SSO and accelerated support sit in Enterprise, and extra team members beyond the plan allowance need a custom quote from sales. In sum, Hunter’s add-ons can push the real monthly bill past the headline price, while Skrapp’s bill is the plan price, full stop.

    What 1,000 to 10,000 finds actually cost

    Headline prices hide the true cost, so here is the maths for four typical volumes. Every figure below is labelled so you can check it. One honest warning first: a credit buys a slightly different thing on each tool, because Hunter charges half a credit for a verification and lets one Bulk Domain Search credit buy up to 10 emails, while Skrapp charges nothing for Invalid or Unknown results. The table lines the tools up at similar finding volumes anyway, and it says plainly where the comparison is rough.

    The cost table: 1,000 and 2,000 finds

    Finds per monthHunterSkrappSnov.io (benchmark only)
    1,000 finds$49/mo monthly ($34/mo annual)
    Starter, 2,000 credits — 1,000 within plan
    $39/mo monthly ($29/mo annual)
    Professional, 2,000 credits — 1,000 within plan
    $39/mo monthly
    Starter, 1,000 credits exactly (post 177)
    2,000 finds$49/mo monthly ($34/mo annual)
    Starter, 2,000 credits exactly
    $39/mo monthly ($29/mo annual)
    Professional, 2,000 credits exactly
    $99/mo monthly
    Pro S, 5,000 credits (Starter only has 1,000)

    Costs at higher volumes

    Finds per monthHunterSkrappSnov.io (benchmark only)
    5,000 finds$149/mo monthly ($104/mo annual)
    Growth, 10,000 credits
    Check the site
    Professional scales up on a slider; next fixed tier is Enterprise $349/mo monthly ($262/mo annual, 50,000 credits)
    $99/mo monthly
    Pro S, 5,000 credits exactly — cheapest at this volume

    What 10,000 finds cost

    Finds per monthHunterSkrappSnov.io (benchmark only)
    10,000 finds$149/mo monthly ($104/mo annual)
    Growth, 10,000 credits exactly
    $262/mo annual ($349/mo monthly)
    Enterprise, 50,000 credits, or scaled Professional — check the site
    —
    Not benchmarked at this volume in our three-way comparison

    Arithmetic: at entry, Hunter costs $49 ÷ 2,000 = about $0.025 per find monthly ($34 ÷ 2,000 = $0.017 annual), and Skrapp costs $39 ÷ 2,000 = about $0.020 per find monthly ($29 ÷ 2,000 = $0.015 annual). Snov.io figures are the benchmark from our Hunter vs Snov.io vs Skrapp comparison, checked 16 November 2026. Skrapp’s slider price at 5,000 credits is not shown on the static pricing page, so we do not guess it — check the site. Last checked: 16 November 2026.

    Hunter vs Skrapp: the cheapest way to start

    Firstly, the cheapest way to start is a clear win for Skrapp. Both free plans give 50 credits, yet the first paid step costs $39 a month with Skrapp against $49 with Hunter, for the same 2,000 credits. On annual billing the gap holds: $29 a month against $34. Skrapp also wins the value argument at 2,000 finds, because its credits roll over and invalid results cost nothing, while Hunter’s credits expire at month end. A team that finds 2,000 emails a month saves $120 a year on monthly billing with Skrapp, or $60 a year on annual billing, and keeps every unused credit.

    In contrast, the 5,000-find row is where this Hunter vs Skrapp comparison gets interesting. Hunter Growth costs $149 a month for 10,000 credits. Skrapp’s Professional plan scales up on a slider whose price at 5,000 credits is not shown on the static page. The next fixed Skrapp tier is Enterprise at $349 a month monthly, or $262 annual, for 50,000 credits, which is far more than 5,000 finds need. Snov.io Pro S is cheapest at this volume at $99 a month for exactly 5,000 credits, which is why our three-way comparison flags it. If you regularly find around 5,000 emails a month, check Skrapp’s slider price before you decide, because it may beat Hunter Growth, and compare it with Snov.io Pro S too.

    Hunter vs Skrapp: verification costs and the real total

    Moreover, verification changes the maths in Hunter’s favour, because it charges only half a credit per verification. Verifying 4,000 addresses costs 2,000 Hunter credits, which fits Starter at $49 a month, while the same 4,000 verifications would cost up to 4,000 Skrapp credits if every one came back Valid or Catch-all. Skrapp softens that with its fair credit rule: Invalid and Unknown results are free, so 4,000 verification attempts cost less than 4,000 credits whenever some results come back unusable. In practice, a team that verifies far more than it finds should price Hunter, while a team that finds far more than it verifies should price Skrapp.

    Finally, work out your true monthly total before comparing either headline price. Add Hunter’s Inbox Protection, extra email accounts and credit packs on one side. Remember that Skrapp has no add-ons to add. Then compare the totals, not the starting prices. That habit will save you from the most common surprise in this Hunter vs Skrapp comparison, which is a bill that is much higher than the number on the pricing page.

    Finding emails: domain search against LinkedIn-first prospecting

    Next, finding emails is where the two tools feel most different in daily use, because each one starts from a different place. Hunter’s Domain Search takes a company name or domain and returns the people who work there, with their email addresses, job titles and the public sources where each address was seen. Its Email Finder takes one person’s first and last name plus a company or domain, and returns that person’s address with a confidence score. Skrapp’s Email Finder works the same way from a name and a domain, yet its signature workflow is the Chrome extension: open a LinkedIn profile or a Sales Navigator list, click the extension, and get verified business emails without leaving LinkedIn.

    Hunter vs Skrapp finding emails: domain search on a laptop against LinkedIn profile enrichment with verification checkmarks
    Hunter vs Skrapp finding starts from different places. Hunter starts from a company domain and lists everyone who works there, while Skrapp starts from a LinkedIn profile and finds that person’s verified email in one click. The sections below show how each approach works in practice.

    Hunter vs Skrapp: domain search in action

    Video: How to Find a List of Verified Emails using Hunter.io’s Bulk Email Finder by Hunter on YouTube. This video is the creator’s property, embedded via YouTube for education. OutreachCompare is not affiliated with Hunter and does not claim ownership of this video.

    In fact, Hunter’s domain search is the strongest reason to pick it, and it is worth understanding properly. Type a domain into Domain Search and Hunter returns the people at that company, grouped by department, with each email address, its confidence score and the public source where it was found. Bulk Domain Search does the same for a whole list of domains at once, and one credit buys up to 10 emails there, which makes it the cheapest way to build a list from target accounts. Bulk Email Finder does the same for a list of names and companies. Every address comes with sources you can check yourself, so you can judge whether to trust it before you send.

    By contrast, Hunter’s database, called Discover, is where its prospecting starts when you do not yet have a list of target companies. Discover offers firmographic filters, an AI Assistant that searches in plain language, proactive lead suggestions every week, and signals from your existing leads, with 30 AI searches a month on the free plan rising to 900 on Scale. Hunter does not publish a headline database size on its pricing page. This Hunter vs Skrapp comparison does not claim one for it. What it does claim, from its own site, is that every found email carries public sources and a confidence score, which is a transparency feature Skrapp does not match in the same way.

    Hunter vs Skrapp: LinkedIn-first finding

    Similarly, Skrapp’s LinkedIn workflow is the strongest reason to pick it, and it is built for speed. Install the Chrome extension, open any LinkedIn profile, Sales Navigator search or Recruiter list, click the extension, and Skrapp returns verified business emails with job titles, seniority and company data. Multi-Page Enrichment processes whole search results pages at once, List Saver stores Sales Navigator lists inside Skrapp. Auto-Connect can send connection requests from LinkedIn profiles. For a recruiter or seller who lives on LinkedIn all day, that workflow removes the copy-and-paste between LinkedIn and a separate finder.

    Moreover, Skrapp’s own database is the bigger one you can measure clearly. Its homepage, checked today, claims 200M+ B2B leads, 40M+ company profiles and 3B+ searches processed, with the database refreshed daily. The Email Finder searches that database from a name and a domain. Companies Websites, a separate feature, finds emails from company sites directly. In sum, Skrapp wins on published database size, while Hunter wins on showing its sources. A team that prospects from LinkedIn will feel Skrapp’s database every day, while a team that prospects from target accounts will feel Hunter’s domain search every day.

    Above all, the finding workflow you already use should decide this section. If your day starts with a list of target companies, Hunter’s Domain Search and Bulk Domain Search will save you hours. If your day starts with LinkedIn and Sales Navigator, Skrapp’s extension will save you hours. Neither workflow is better in the abstract. The wrong pick here costs more time than the $10 monthly price gap ever will.

    Verification and accuracy: what the vendor claims really mean

    Firstly, verification is where both tools earn their keep, because an unverified list is a deliverability problem waiting to happen. Hunter verifies every email it returns automatically, with a status and a confidence score. Verification costs half a credit per address. Skrapp verifies every email in real time as it finds it. Only charges for results marked Valid or Catch-all, so Invalid and Unknown results are free. Both tools verify before you send. Both tools are right to make verification central, because sending to dead addresses is the fastest way to damage a sending domain.

    Hunter vs Skrapp accuracy: vendor claims against independent tests

    In fact, the accuracy claims need a careful read, because the vendors and the independent tests measure different things. Skrapp’s homepage claims a 92% average email search success rate and 97% verification accuracy, from 3B+ searches processed. Hunter’s site emphasises confidence scores and public sources rather than a single headline accuracy figure. Every found address carries a confidence score so you can judge it yourself. Those are vendor claims, and they describe whether the tool found an email and whether its own verifier passed it, not whether the address truly belongs to that person and accepts mail.

    By contrast, two third-party benchmarks measured much lower verified rates. An Anymail Finder benchmark from September 2025 measured Skrapp at a 42.8% verified rate, and a Tomba benchmark from February 2026 landed at the exact same number, 42.8%, across 2,500 domain searches and 2,500 company name searches. The same Anymail Finder benchmark measured Hunter at a 37.6% verified rate. State that plainly: on those tests, Skrapp found more verified emails than Hunter, yet both tools landed far below their vendor claims. These are third-party benchmarks, not neutral audits, and their methods differ from the vendors’ own measures, so treat them as a warning, not a verdict.

    Hunter vs Skrapp: why the two numbers differ

    Moreover, the gap between a 92% search success rate and a 42.8% verified rate is easy to explain once you see what each number counts. Skrapp’s 92% measures search success: did the tool find an email address at all. The benchmarks measure verified rate: did an independent check confirm the address as valid and deliverable. A found email is not the same as a verified email. A vendor’s own verifier is not the same as an independent check. That distinction matters for your budget too, because Skrapp only charges for Valid and Catch-all results, which softens the cost of the gap, while Hunter charges half a credit per verification and shows a confidence score so you can filter the doubtful ones out yourself.

    Hunter vs Skrapp: how to protect your own accuracy

    Similarly, the honest advice is to test both tools on your own list before you commit. Take 100 real prospects from your market, run them through Hunter and through Skrapp, and check the results with a dedicated verifier such as ZeroBounce or NeverBounce. That small test tells you more than any vendor claim or benchmark, because accuracy varies by industry, company size and country. Our verification tools comparison explains how dedicated verifiers work and why they catch what finders miss.

    Finally, whatever the accuracy numbers say, send only to addresses marked Valid, keep Catch-all addresses for a separate slower test, and never send to an address you have not verified. That habit protects your domain more than any single tool choice in this Hunter vs Skrapp comparison. It is the cheapest deliverability insurance there is.

    Bulk tools, API and browser extensions compared

    Next, bulk tools decide how fast you can build a list, and here each tool has a clear strength. Hunter’s bulk tools are built around lists: Bulk Domain Search finds emails for a list of domains, with one credit buying up to 10 emails. Bulk Email Finder finds emails for a list of names and companies. Bulk Email Verifier checks a whole list at half a credit per address. Skrapp’s bulk tools are built around LinkedIn: Multi-Page Enrichment processes whole search results pages, List Saver stores Sales Navigator lists. Bulk email finding works from names, companies, domains and LinkedIn profiles together.

    Hunter vs Skrapp: the Skrapp LinkedIn extension in action

    Video: How to Enrich LinkedIn Profiles with Verified Emails Using Skrapp by Skrapp – Lead Search and Enrichment At Scale on YouTube. This video is the creator’s property, embedded via YouTube for education. OutreachCompare is not affiliated with Skrapp – Lead Search and Enrichment At Scale and does not claim ownership of this video.

    For example, a team building a list of 5,000 contacts from 500 target companies would move faster on Hunter, because Bulk Domain Search turns each domain into up to 10 emails for a single credit. A recruiter building a list of 500 candidates from Sales Navigator would move faster on Skrapp, because Multi-Page Enrichment turns each results page into verified emails without leaving LinkedIn. In sum, bulk domain work favours Hunter, while bulk LinkedIn work favours Skrapp, and the right pick follows the list you actually build.

    Hunter vs Skrapp: API access and spreadsheets

    In contrast, the API story favours Hunter at entry level and Skrapp only at the top. Hunter includes API access across its plans, with an MCP server for AI assistants, a Google Sheets add-on and browser extensions for Chrome and Firefox. Skrapp’s API Integration sits in Enterprise only, at $349 a month monthly. A small team that wants to pipe Skrapp data into its own stack must pay for the top tier. Both tools export lists as CSV, and both tools offer a Chrome extension, yet Hunter’s extension finds emails from any website you visit, while Skrapp’s extension is built for LinkedIn, Sales Navigator and Recruiter.

    Moreover, the Sheets add-on deserves a mention for Hunter, because it brings finding into a spreadsheet where many teams already work. You can find and verify emails from a sheet of names and domains without opening the Hunter app at all. Skrapp answers with List CRM Sync, which pushes lists straight into Salesforce or HubSpot, and with list exports in CSV and Excel formats. Neither tool is hard to use at bulk scale, and both tools handle lists of thousands without fuss.

    Campaigns and sequences: Hunter sends while Skrapp finds

    Firstly, campaigns are the clearest win in this Hunter vs Skrapp comparison, because only one tool has them. Hunter includes Sequences, its email outreach tool, on every plan including free. You can connect email accounts, build follow-up sequences, rotate sending across accounts, A/B test subject lines, track opens and links, use a custom tracking domain, and run evergreen sequences that keep sending to new leads. The free plan allows one connected account and 500 recipients per sequence, Starter allows three accounts and 2,500 recipients, Growth allows ten accounts and 5,000 recipients. Scale allows twenty accounts and 15,000 recipients.

    By contrast, Skrapp has no sending tool at all. It finds and verifies emails, enriches them with AI, stores them in lists and syncs them to your CRM, and then hands the sending job to another tool. That is an honest limit, and it matters. If you buy Skrapp, you still need a sending tool such as Instantly, Smartlead or Woodpecker, which adds its own monthly price to your stack. If you buy Hunter, one subscription covers finding, verifying and sending, which is why its $49 entry price is fairer than it looks next to Skrapp’s $39.

    Hunter vs Skrapp: what Hunter Sequences covers

    In fact, Hunter Sequences covers the essentials well, although it is not a full multichannel platform. It sends email only, with no native LinkedIn steps, calls or SMS, and its AI Writing Assistant drafts emails inside sequences. Inbox Protection, sold as an add-on from $7.50 a month per email account, guards deliverability. Managed email accounts are available as an add-on for teams that want Hunter to run their sending infrastructure. For a small team sending straightforward email sequences, that is enough. For a team that needs LinkedIn and calls in the same sequence, neither tool in this Hunter vs Skrapp comparison is the answer, and our Lemlist and Reply.io reviews cover tools that do.

    Similarly, the cost of Skrapp’s missing sender is worth counting before you decide. Skrapp Professional at $39 a month plus a sending tool such as Instantly Growth at $47 a month costs $86 a month, against Hunter Starter at $49 a month alone. Skrapp only wins on total cost when you already pay for a sending tool, or when you send so little that Hunter’s sequences add nothing. In sum, Hunter wins campaigns clearly, while Skrapp wins finding value clearly. The right pick depends on whether you need a sender or already own one.

    Integrations, CRM sync and data handling

    Next, integrations decide how well each finder fits the stack you already run. Hunter integrates with CRMs, offers browser extensions, a Google Sheets add-on, an API and an MCP server, so it plugs into modern sales stacks and AI assistants alike. Skrapp integrates natively with Salesforce and HubSpot, offers a REST API on Enterprise, CSV and Excel exports, and List CRM Sync on Professional. Both tools cover the essentials. The difference sits in the details: Hunter covers more developer tooling, while Skrapp covers CRM sync at a lower price.

    Hunter vs Skrapp: CRM sync and exports

    For example, a HubSpot team will be happy with either tool, because both sync with HubSpot natively. A Salesforce team will be happy with either tool too, because both list Salesforce among their integrations. A team that builds its own stack around an API will prefer Hunter, because its API is available without paying for Enterprise, while Skrapp’s API needs the $349-a-month tier. A team that lives in spreadsheets will prefer Hunter’s Sheets add-on, while a team that lives in Sales Navigator will prefer Skrapp’s List Saver. In short, check your own stack before you check the feature list.

    Moreover, data handling and compliance are strong on each platform, which counts when you hand a tool your prospect data. Hunter presents itself as compliant by design, sources its data transparently, shows the public sources behind every address, and helps you comply with data protection rules. Skrapp states full GDPR compliance on its homepage, processes only publicly available business contact information, offers data deletion on request, and includes built-in consent management tools. Either tool is a safe choice for a European team handling prospect data at scale. Our cold email legal checklist covers the consent and opt-out rules that vary by country.

    Hunter vs Skrapp: team seats

    Finally, team handling differs in a small but useful way. Hunter lets you invite as many team members as you like at no extra cost on every plan, and everyone shares the same credit pool. Skrapp’s free plan allows one user, Professional allows two users, and Enterprise allows fifteen, with extra seats by custom quote. A team of three or more will pay nothing extra for seats on Hunter, while the same team needs Professional’s two seats plus a custom quote on Skrapp, or a step up to Enterprise. That seat rule is easy to miss, so check it before you buy.

    Hunter vs Skrapp feature matrix

    To start with, here is the finding and verification matrix. You can see the two tools side by side on the features that decide whether your lists are accurate. A tick means the feature is stated on the provider’s official site. A dash means it is not confirmed there.

    Finding and verification matrix

    FeatureHunterSkrapp
    Domain Search (whole company)✓ With public sources and confidence scores✓ Companies Websites feature
    Email Finder (one person)✓ Name + company or domain✓ Name + domain, or LinkedIn profile
    Bulk Domain Search✓ 1 credit buys up to 10 emails— Bulk finding from lists, no per-domain bulk credit deal
    Bulk Email Finder✓✓
    Bulk Email Verifier✓ 0.5 credit per address✓ 1 credit, free if Invalid or Unknown
    Auto-verification on every find✓✓ Real-time verification
    Confidence score shown✓—
    Public sources shown per email✓—
    Published database size— No headline size on pricing page✓ 200M+ leads, 40M+ company profiles
    LinkedIn extension✓ Finds emails on any website✓ LinkedIn, Sales Navigator, Recruiter
    Free plan✓ 50 credits/mo✓ 50 credits, 1 user
    Credits roll over— Reset monthly, no rollover✓ Roll over, kept after cancelling

    Last checked: 16 November 2026 on Hunter’s pricing page and Skrapp’s pricing page. A tick means the feature is stated on the provider’s official site. A dash means it is not confirmed there. Features and pricing can change, so please check the provider’s site before you buy. We do not guess at features, prices or trials.

    Hunter vs Skrapp feature matrix: sending, data and team

    Next, here is the second matrix, covering sending, data, integrations and team features. Read both matrices together: the first covers finding, and the second covers everything around it.

    FeatureHunterSkrapp
    Email sequences included✓ Sequences on every plan, incl. free— Finder and verifier only
    Connected email accounts✓ 1–20 by plan, extra from $10/mo—
    A/B testing✓—
    Custom tracking domain✓—
    Inbox Protection add-on✓ From $7.50/mo per account—
    AI writing assistant✓ AI Writing Assistant—
    AI enrichment✓ Lead enrichment✓ AI Enrichment on Professional
    Lead database (Discover / search)✓ Discover with AI Assistant✓ 200M+ leads, AI-powered search
    CRM integrations✓ CRM sync, API, MCP✓ Salesforce, HubSpot, List CRM Sync
    API access✓ All plans✓ Enterprise only
    Google Sheets add-on✓—
    Unlimited team members✓ Every plan, shared credit pool— 1 user free, 2 on Professional, 15 on Enterprise
    GDPR compliance stated✓ Compliant by design✓ Full GDPR compliance
    Starting price$49/mo monthly$39/mo monthly

    Last checked: 16 November 2026 on Hunter’s pricing page and Skrapp’s pricing page. A tick means the feature is stated on the provider’s official site. A dash means it is not confirmed there. Features and pricing can change, so please check the provider’s site before you buy. We do not guess at features, prices or trials.

    Pros and cons: the honest picture for each tool

    Of course, no tool is perfect, and this Hunter vs Skrapp comparison would not be honest without the downsides. Here is the balanced picture for each tool, based on what each provider publishes on its own site and what its plans actually include.

    Hunter vs Skrapp: what we like about Hunter

    Domain search with sources. Domain Search lists everyone at a company from its domain. Every address comes with public sources and a confidence score you can check yourself. Bulk Domain Search value. One credit buys up to 10 emails, which makes list building from target accounts the cheapest in this Hunter vs Skrapp comparison. Cheap verification. Verification costs half a credit per address, so checking a list costs half as much as finding it. Sequences included. Finding, verifying and sending live in one subscription, on every plan including free. Unlimited team members. Every plan lets you invite as many colleagues as you like without paying per seat.

    Strong developer tooling. An API on all plans, an MCP server, a Google Sheets add-on and browser extensions suit teams that automate their stack. Transparent data. Public sources behind every address help you judge accuracy yourself instead of trusting a vendor claim.

    Hunter vs Skrapp: where Hunter falls short

    Credits expire monthly. Unused credits are lost at month end, with no rollover, so a quiet month wastes money you already paid. Dearest at entry. Starter costs $49 a month against Skrapp Professional at $39, for the same 2,000 credits. No headline database size. Hunter does not publish a database size on its pricing page, so you cannot compare its coverage with Skrapp’s 200M+ leads on paper. Weakest verified rate in the benchmarks. The Anymail Finder benchmark measured Hunter at 37.6% verified, below Skrapp at 42.8%, so test it on your own list. Email only. Sequences cover email, with no native LinkedIn steps, calls or SMS. Inbox Protection costs extra from $7.50 a month per account.

    Hunter vs Skrapp: what we like about Skrapp

    Cheapest verified emails at entry. Professional costs $39 a month for 2,000 credits, $10 less than Hunter Starter for the same allowance, and $29 a month on annual billing. Fairest credit rules. Unused credits roll over, you keep them after cancelling, and Invalid or Unknown results cost nothing. LinkedIn-first workflow. The Chrome extension finds verified emails from LinkedIn, Sales Navigator and Recruiter in one click, with Multi-Page Enrichment and List Saver for bulk work. Published database size. 200M+ leads, 40M+ company profiles and 3B+ searches processed, refreshed daily. Better benchmark result. The Anymail Finder and Tomba benchmarks both measured Skrapp at 42.8% verified, ahead of Hunter at 37.6%.

    Simple bill. No add-ons on the pricing page, so the plan price is the real price. Strong ratings. A 4.7 average across 900+ reviews on G2, Capterra and Chrome, with the Chrome extension rated 4.9 from 554 reviews.

    Hunter vs Skrapp: where Skrapp falls short

    No sending tool. Skrapp finds and verifies only, so you still need a separate sender, which adds its own monthly price to your stack. API locked behind Enterprise. API access needs the $349-a-month tier, so small teams cannot pipe Skrapp data into their own stack cheaply. Limited seats. One user on free, two on Professional and fifteen on Enterprise, against unlimited members on every Hunter plan. Big gap to the next tier. Professional scales on a slider whose price is not shown on the static page. The next fixed tier is Enterprise at $349 a month, which is a steep jump. Accuracy claims still far above benchmarks. A 92% search success claim sits next to a 42.8% verified rate in two third-party benchmarks, so treat the headline number with care.

    Who should pick which: the Hunter vs Skrapp decision framework

    Firstly, the decision is simpler than the feature lists suggest, because it turns on three questions. Where does your prospecting start, do you need a sending tool, and how steady is your monthly volume? Answer those three questions honestly, and the answer will be obvious.

    Hunter vs Skrapp decision guide: a salesperson at a fork, one path to domain search and sending, the other to LinkedIn finding
    Hunter vs Skrapp comes down to three questions. Where does your prospecting start, do you need a sending tool, and how steady is your monthly volume? Answer those three honestly and the winner for your team will be clear.

    Pick Hunter when you build lists from company domains

    Pick Hunter when you build lists from target companies, because Domain Search and Bulk Domain Search turn each domain into a full contact list, with sources and confidence scores on every address. Choose Hunter when you want finding, verifying and sending in one subscription, because Sequences are included on every plan and one $49-a-month Starter plan replaces a finder plus a sender. Larger teams should pick Hunter when they need unlimited members at no extra cost, because everyone shares one credit pool. A team that verifies far more than it finds should pick Hunter too, because verification costs half a credit per address.

    Pick Skrapp when your prospecting starts on LinkedIn

    Pick Skrapp when your prospecting starts on LinkedIn or Sales Navigator, because the Chrome extension finds verified emails without leaving the profile page. Multi-Page Enrichment handles whole search results at once. Choose Skrapp when your budget is tight, because $39 a month for 2,000 credits is the cheapest entry in this Hunter vs Skrapp comparison, and the credits roll over. Recruiters should pick Skrapp when they work candidate lists daily, because List Saver and Auto-Connect fit that workflow exactly. Skrapp also makes sense when you already pay for a sending tool, because then you only need the cheapest verified emails to feed it.

    Variable-volume teams should pick Skrapp when their prospecting volume swings month to month, because rollover credits bank the quiet months for the busy ones. Hunter’s monthly reset punishes exactly that pattern. A team with spiky volume will waste credits on Hunter and save them on Skrapp.

    Hunter vs Skrapp: the five-minute decision test

    In short, try this test before you buy either tool. Write down where your last 100 prospects came from, whether you own a sending tool already, and how many emails you found in each of the last three months. If the answer is mostly company domains, no sender yet, and steady volume, Hunter is the pick. If the answer is mostly LinkedIn profiles, you already own a sender, and your volume swings, Skrapp is the pick. When you still cannot decide, open both free plans on the same day, run the same 50 prospects through each finder, and check the results with a dedicated verifier. The tool that finds more verified emails for your market is the right one for your team, whatever this Hunter vs Skrapp comparison says.

    Switching later is always possible

    Remember too that moving to the other tool later is always possible, and it is no disaster. Lists export as CSV, credits on Skrapp are kept even after cancelling. Hunter lets you take a subscription for a single month and cancel when your work is done. Picking the wrong one costs a few weeks of learning, not a lost year. So pick the tool that matches how you prospect today, test it with a live list, and move on if your team outgrows it. That beats chasing the longest feature list every time.

    Our verdict on Hunter vs Skrapp

    Our verdict — Best for domain search plus sending: Hunter. Best for LinkedIn-first finding on a budget: Skrapp.

    Hunter is the strongest pick when a team builds lists from company domains and wants finding, verifying and sending in one subscription, with every address backed by public sources and a confidence score. Domain Search, Bulk Domain Search at one credit per ten emails, half-price verification and Sequences included make $49 a month fair value for a team that uses the whole platform. Skrapp is the strongest pick when prospecting starts on LinkedIn, the budget is tight, or monthly volume swings, because $39 a month buys the same 2,000 credits with rollover, free Invalid results and the fastest LinkedIn workflow we have seen. Begin with the free plan of the tool that suits your prospecting, build a small verified list, and run a genuine test on your own market before committing.

    We have not given either tool a numeric score yet, because scores only follow hands-on testing. Best-for labels reflect each tool’s stated focus.

    Visit Hunter →Check Skrapp Pricing →

    The longer version of the verdict

    Overall, that is the short version of this Hunter vs Skrapp comparison. The longer version is simple too. Skrapp wins on price and flexibility. It does not win every single category. Hunter wins on breadth and sending. Skrapp wins on LinkedIn workflow and credit fairness. Hunter wins on domain search and verification cost. Yet no rival covers as much of the outbound job in one subscription as Hunter, and no rival in this Hunter vs Skrapp comparison finds verified LinkedIn emails as cheaply as Skrapp. In the end, for most teams that start from target companies, Hunter’s breadth at $49 a month is worth more than a specialist edge in one area, while for teams that start from LinkedIn, Skrapp’s $39 price and rollover credits are worth more than a sending tool they may never use.

    No matter which tool you settle on, the setup advice stays the same. Begin with a dedicated sending domain, verify each address before sending, keep your first lists small and well targeted, and test both finders on your own prospects before you commit to one. Read our list building guide before your first campaign, and read our cold email legal checklist before you launch, since the rules change by country. The tool you pick matters less than the list you build and the offer you write, and both tools in this Hunter vs Skrapp comparison will serve you well if you set them up properly.

    Hunter vs Skrapp: frequently asked questions

    Which is cheaper, Hunter or Skrapp?

    Skrapp is cheaper at the volumes most teams start at. Skrapp Professional costs $39 a month for 2,000 credits, against Hunter Starter at $49 a month for the same 2,000 credits, and Skrapp’s unused credits roll over while Hunter’s expire at month end. On annual billing the gap holds: $29 a month against $34. At 5,000 finds a month the picture changes, because Hunter Growth costs $149 a month for 10,000 credits while Skrapp’s Professional slider price at that volume is not shown on the static page, so check the site. Snov.io Pro S is cheapest at 5,000 finds, at $99 a month, according to our three-way comparison.

    Is Skrapp really more accurate than Hunter?

    On the third-party benchmarks we found, yes, but the gap is smaller than the vendor claims suggest. An Anymail Finder benchmark from September 2025 measured Skrapp at a 42.8% verified rate and Hunter at 37.6%, and a Tomba benchmark from February 2026 measured Skrapp at 42.8% again. Skrapp’s own homepage claims a 92% search success rate and 97% verification accuracy, which measure something different: whether an email was found, not whether an independent check confirmed it. These are third-party benchmarks, not neutral audits, so test both tools on your own list before you decide.

    Do Hunter credits roll over?

    No. Hunter’s credits reset monthly and do not roll over, so unused credits are lost at month end. Skrapp’s unused credits roll over to the next month, and you keep your credits even if you cancel your subscription. That rollover rule is one of the biggest practical differences in this Hunter vs Skrapp comparison, especially for teams whose prospecting volume varies from month to month.

    Does Skrapp have email sequences?

    No. Skrapp is a finder and verifier only: it finds emails, verifies them, enriches them with AI and syncs them to your CRM. It does not send campaigns. Hunter includes Sequences, its email outreach tool, on every plan including free, with follow-ups, A/B testing, open and link tracking and a custom tracking domain. If you buy Skrapp, budget for a separate sending tool as well.

    Which tool is better for LinkedIn prospecting?

    Skrapp is better for LinkedIn prospecting, because its Chrome extension finds verified emails from LinkedIn, Sales Navigator and Recruiter in one click, with Multi-Page Enrichment, List Saver and Auto-Connect built for that workflow. Hunter’s extension finds emails from any website you visit. Its Discover database covers LinkedIn-style prospecting from inside the app, yet it does not match Skrapp’s LinkedIn-native workflow. If LinkedIn is your main channel, Skrapp wins this part of the Hunter vs Skrapp comparison clearly.

    Can I try Hunter or Skrapp for free?

    Yes — each tool offers a free plan that never expires, and neither one asks for a credit card to start. Hunter’s free plan gives 50 credits a month, basic Discover filters, the AI Assistant and one connected email account. Skrapp’s free plan gives 50 credits to start, with the Email Finder, Email Verifier and the LinkedIn integrations included. Use the free plan to run a real test on your own prospects — only genuine finding shows accuracy, speed and list quality as they truly behave. When you outgrow the free credits, move to a paid plan on either tool.

    Keep reading — next in this series

    You have the full Hunter vs Skrapp picture now. Go deeper with the reviews and guides that support it:

    Best for domain search plus sending: Hunter — from $49/mo · Best for LinkedIn finding: Skrapp — from $39/mo Visit Hunter
  • Woodpecker vs Smartlead 2026

    Woodpecker vs Smartlead 2026

    Pay for the prospects you contact, against flat-rate infrastructure for unlimited mailboxes

    Woodpecker vs Smartlead is the comparison to read when you want a proven cold email tool and you cannot decide between simple usage pricing and flat-rate sending infrastructure. Woodpecker now charges by contacted prospects, from $35 a month for 500 prospects, with warmup, verification and a 1B+ lead database built in. Smartlead charges a flat monthly price from $39 a month, with unlimited mailboxes, inbox rotation and white-label client portals, and it scales to half a million sends a month. This Woodpecker vs Smartlead comparison checks pricing, deliverability, databases, multichannel steps, AI, inbox handling, integrations and agency features on both official sites, so you can pick by fit, not by hype.

    Visit Woodpecker →See Smartlead Plans →

    Prices checked 16 November 2026 on Woodpecker’s and Smartlead’s official pricing pages. Features and pricing can change, so please check the provider’s site before you buy.

    Quick Answer

    Woodpecker wins on simplicity and included warmup. Entry costs $35 a month for 500 contacted prospects and 8,000 emails, with 2 warm-ups, unlimited email verification and 100 Lead Finder credits included, and unlimited team members at no extra cost. Smartlead wins on scale and agency infrastructure. Base costs $39 a month for 2,000 contacts and 6,000 sends, with unlimited mailboxes and inbox rotation, while Unlimited Smart costs $174 a month for 150,000 sends and includes the premium Warmup Pool free. Pick Woodpecker when you send to a modest list, want warmup included in the price, and like paying only for the prospects you contact. Pick Smartlead when you run high volume across many mailboxes, manage clients, or need white-label portals and dedicated sending servers.

    Above all, this Woodpecker vs Smartlead comparison is good news for buyers, because both tools are proven at scale and the choice is genuinely about fit. Woodpecker has been sending cold email since 2015 and publishes what it learns from tens of millions of emails. Smartlead serves more than 100,000 businesses and was built by an agency for agencies, so its infrastructure thinking runs deep. Neither tool is a poor purchase, and neither one takes every category. Woodpecker is the simpler tool with the friendlier price at low volume, while Smartlead is the deeper infrastructure platform for senders who live at high volume. Read on for the full Woodpecker vs Smartlead head-to-head, with pricing checked today, feature tables, real team costs, honest pros and cons, and a clear verdict.

    Woodpecker vs Smartlead at a glance

    First of all, it helps to see the two tools side by side before the detail begins. Woodpecker is a cold email automation platform from Poland that has focused on one job for a decade: sending personalised cold email that lands in the inbox. Smartlead is a cold email infrastructure platform that grew out of agency work, and it now serves more than 100,000 businesses, from solo founders to Fortune 500 teams. Both tools cover the same core job — finding leads, sending sequences, warming mailboxes and gathering replies in one inbox — so at first glance they look like twins.

    How the two tools charge differently

    In practice, the difference shows up in how they charge and what they include. Woodpecker charges by contacted prospects on a slider, so your bill rises only when you contact more people. Warmup, verification and team members are included in the price. Smartlead charges a flat monthly price per workspace, so your bill stays the same when you add mailboxes. It caps sends and contacts instead. For example, contacting 500 prospects a month costs $35 with Woodpecker, while Smartlead Base costs $39 a month and covers 2,000 contacts and 6,000 sends. At 15,000 contacted prospects, Woodpecker costs $262 a month, while Smartlead Unlimited Smart costs $174 a month for 150,000 sends. That crossover is the single biggest fact in this Woodpecker vs Smartlead comparison. Everything else in the article helps you judge which side of it you sit on.

    A focused sender, against an infrastructure platform

    Similarly, the two tools differ on what they are for. Woodpecker is a focused sender with a real lead database, condition-based sequences, LinkedIn steps and calling through Aircall, which means one subscription covers most of the outbound job. Smartlead is an infrastructure platform with unlimited mailboxes, dynamic ESP matching, bounce auto-protection, SmartDelivery placement testing and SmartServers, which means it is built for senders who run many mailboxes at once. In short, Woodpecker is the tool you buy when you want to start sending well this week, while Smartlead is the tool you buy when you want to scale sending across many mailboxes and clients. Whether that scale is worth the extra moving parts is a question this Woodpecker vs Smartlead comparison answers section by section.

    To sum up the shape of the choice, think of it this way. Woodpecker is the tool to pick when you want one subscription, one login and one price that follows your prospect volume, with warmup and verification already inside it. Smartlead is the tool to pick when your sending operation runs across dozens of mailboxes, or when you manage outreach for clients and need white-label portals. Both approaches work, and the rest of this Woodpecker vs Smartlead guide shows exactly where each one pulls ahead.

    Woodpecker vs Smartlead pricing in 2026

    To start with, here is the pricing head-to-head, checked on the official pricing pages on 16 November 2026. Woodpecker sells one email plan on a volume slider, plus Multichannel and LinkedIn plans and a custom Scale plan. Smartlead sells four flat-rate plans, Base, Pro, Unlimited Smart and Unlimited Prime, plus a managed SmartServices offer. The two models measure different things, so read the table carefully before you compare any two numbers.

    Woodpecker vs Smartlead pricing models compared: a pay-per-prospect slider against flat-rate tiers
    Woodpecker vs Smartlead pricing starts from two different ideas. Woodpecker charges by contacted prospects on a slider, so a small list costs little, while Smartlead charges a flat monthly price per workspace, so adding mailboxes costs nothing extra. The table below shows the full head-to-head.

    For clarity, one warning belongs right here, because Woodpecker changed how it charges. Our earlier Woodpecker review, published 15 November 2026, listed $39 a month for 5,000 emails and $26 a month on annual billing, with 3 warm-ups included, verified 30 October 2026. That pricing is now out of date. Woodpecker’s official pricing page now charges by contacted prospects on a slider, verified today from the page’s own embedded pricing data: entry is $35 a month for 500 contacted prospects, 2,000 stored contacts, 8,000 emails a month and 2 warm-ups, with $23.33 a month on annual billing. Annual billing saves 33%. If you read the older review, treat its pricing as history and use the figures in this Woodpecker vs Smartlead comparison instead.

    Woodpecker vs Smartlead pricing table

    PlanPrice fromWhat you getBest forVisit
    Woodpecker — EmailBest for usage-priced sending$35/mo monthly ($23.33/mo annual)
    500 contacted prospects, 8,000 emails/mo
    2 warm-ups, unlimited verification, 100 Lead Finder credits, unlimited team members and mailboxesA solo sender or small team with a modest listVisit Site →
    Woodpecker — Email, larger volumeBest for growing lists$67/mo (2,000 prospects)
    $99/mo (4,000 prospects)
    $159/mo (8,000 prospects)
    6, 10 or 16 warm-ups by tier, 32,000–128,000 emails/mo, more stored contactsTeams whose list keeps growingCheck Woodpecker Pricing →
    Woodpecker — Multichannel / LinkedInBest for LinkedIn outreachCheck the site
    Prices not shown on the static page
    Email + LinkedIn in one campaign; LinkedIn plan: 1 account, up to 250 DMs/day, 50 InMails/moSenders who work LinkedIn dailySee Woodpecker Plans →
    Smartlead — BaseBest for starting out$39/mo monthly ($32.50/mo annual)
    2,000 contacts, 6,000 sends/mo
    Unlimited mailboxes, inbox rotation, Master Inbox, 2,000 verified emails/moA solo founder testing cold emailVisit Site →
    Smartlead — ProBest for growing teams$94/mo monthly ($78.30/mo annual)
    30,000 contacts, 90,000 sends/mo
    30,000 verified emails/mo, clients from Pro, CRM and call accessA growing team or small agencyCheck Smartlead Pricing →
    Smartlead — Unlimited SmartBest for high volume$174/mo monthly ($144.50/mo annual)
    Unlimited contacts, 150,000 sends/mo
    50,000 verified emails/mo, premium Warmup Pool free, most popular planHigh-volume senders and agenciesView Smartlead Pricing →
    Smartlead — Unlimited PrimeBest for agency scale$379/mo monthly ($314.60/mo annual)
    Unlimited contacts, 500,000 sends/mo
    170,000 verified emails/mo, premium Warmup Pool free, 3 SmartServers and 3 clients includedAgencies and enterprise teamsSee Smartlead Prime →

    What the pricing table leaves out

    Woodpecker prices last checked: 16 November 2026 on woodpecker.co/pricing, from the page’s own embedded pricing data (entry $35/mo monthly, $23.33/mo annual; $67 at 2,000 prospects, $99 at 4,000, $159 at 8,000, $188 at 10,000, $262 at 15,000). Multichannel and LinkedIn plan prices are not shown on the static page — check the site. Smartlead prices last checked: 16 November 2026 on smartlead.ai/pricing; annual billing saves 17%. Features and pricing can change, so please check the provider’s site before you buy. We do not guess at features, prices or trials.

    Trials and what they actually include

    In fact, the trial terms are part of the price, because they decide how long you get to test before you pay. Woodpecker offers a 14-day free trial with no credit card required and all features included, which gives you two full weeks to connect a mailbox, build a sequence and send a real campaign. Smartlead offers a free trial with no credit card required, according to its pricing page FAQ, which answers the question of whether a card is needed without stating a length on the page we fetched. Fourteen days with everything included is a fair test on the Woodpecker side. It is one of the clearest small wins for Woodpecker in this Woodpecker vs Smartlead comparison.

    Neither tool has a free-forever plan, either. The trial is your only free look at either one. Once the trial ends, you move to a paid plan on both tools. That makes the trial period worth using properly. Hook up a mailbox on day one, build a small list, and run a genuine test sequence to real prospects — only a live campaign reveals deliverability, reply handling and reporting as they truly behave.

    Add-ons that change the real bill

    Add-ons deserve a close read on each side, because they shift the real monthly bill. Woodpecker sells extra warm-ups at $5 a month per email account, mailboxes at $4 a month or $6 for premium, LinkedIn at $29 a month, integrations, API, webhooks, MCP and CLI at $20 a month, a dedicated Infraforge server at $59 a month, and extra Lead Finder credits from $10 a month for 500 credits. Its Agency Panel costs $27 a month per active client, with white label at $5 a month per active client.

    Smartlead sells its premium Warmup Pool at $59 a month on Base and Pro, SmartDelivery placement testing at $49, $174 or $599 a month, SmartServers at $39 a month per server, whitelabel at $29 a month per client workspace, and email verification credits as a paid add-on. SmartSenders, its mailbox and domain shop, sells domains from $13 a year and mailboxes from $3.99 to $5 a month, or $9 a month pre-warmed. In sum, Woodpecker’s add-ons are cheaper and fewer, while Smartlead’s add-ons are the price of its infrastructure depth. The $59 Warmup Pool is the one to budget for first.

    What a solo sender, a team of five and an agency actually pay

    Headline prices hide the true cost, so here is the maths for three typical buyers. Every figure below is labelled so you can check it. One honest warning first: Woodpecker charges by contacted prospects, while Smartlead charges a flat price for a bundle of contacts and sends. The two models are not directly comparable. The table lines them up at similar sending volumes anyway, and it says plainly where the comparison is rough.

    Woodpecker vs Smartlead cost table

    BuyerWoodpeckerSmartleadThe gap
    Solo sender, 500 prospects/mo$35/mo monthly ($23.33/mo annual)
    500 contacted, 8,000 emails, 2 warm-ups included
    $39/mo monthly ($32.50/mo annual, Base)
    2,000 contacts, 6,000 sends, Warmup Pool +$59/mo
    Smartlead costs $4/mo more before warmup, or $63/mo more with the Warmup Pool add-on
    Solo sender, 2,000 prospects/mo$67/mo monthly ($44.67/mo annual)
    2,000 contacted, 32,000 emails, 6 warm-ups included
    $39/mo monthly (Base)
    2,000 contacts, 6,000 sends — sends cap is tight at this volume
    Woodpecker costs $28/mo more, but includes 32,000 emails against Smartlead’s 6,000 sends
    Team of 5, modest volume$35/mo monthly ($23.33/mo annual)
    Unlimited team members included
    $39/mo monthly (Base)
    Flat per workspace, not per user
    Woodpecker is $4/mo cheaper; neither tool charges per seat at entry
    Team of 5, 15,000 prospects/mo$262/mo monthly ($174.67/mo annual)
    15,000 contacted, 240,000 emails, 30 warm-ups
    $174/mo monthly ($144.50/mo annual, Unlimited Smart)
    150,000 sends, premium Warmup Pool free
    Smartlead is $88/mo cheaper on monthly billing at this volume
    Agency, 10 clientsScale: custom
    Agency Panel $27/mo per active client ($270/mo) + white label $5/client
    $379/mo monthly (Unlimited Prime, $314.60 annual)
    3 clients included, whitelabel $29/mo per extra client workspace
    Smartlead’s headline is fixed; Woodpecker’s agency cost depends on the custom Scale quote
    Adding placement testingDeliverability Monitor included
    No separate placement-testing add-on listed
    SmartDelivery from $49/mo
    $174/mo Pro, $599/mo for the top tier
    Smartlead charges extra for placement testing; Woodpecker bundles its monitor

    Arithmetic: Woodpecker annual figures are the monthly price with 33% off ($35 → $23.33, $67 → $44.67, $262 → $174.67). Smartlead annual figures are the monthly price with 17% off ($39 → $32.50, $174 → $144.50, $379 → $314.60). The two tools count volume differently — contacted prospects against sends and contacts — so treat cross-tool rows as a guide, not an exact match. Last checked: 16 November 2026.

    The warmup gap at entry level

    Above all, the solo-sender row is where this Woodpecker vs Smartlead comparison turns into a real decision. A solo sender contacting 500 prospects a month pays $35 with Woodpecker, warmup included, against $39 with Smartlead Base, plus $59 a month for the premium Warmup Pool if they want Smartlead’s warmup. That makes the honest entry comparison $35 against $98 a month, which is a difference of $756 a year. Smartlead’s Base plan does not include the premium warmup pool. That single fact changes the value argument completely for a new sender.

    By contrast, the high-volume row flips the other way, and it is worth noticing. A team contacting 15,000 prospects a month pays $262 with Woodpecker, against $174 with Smartlead Unlimited Smart, where the premium Warmup Pool is free and the plan covers 150,000 sends. The difference is $88 a month on monthly billing, or about $1,056 a year, in Smartlead’s favour. Smartlead is not expensive everywhere. Its pricing only looks steep at entry level, once you add the Warmup Pool. It looks fair at scale, where the flat price covers far more sending.

    Work out your true monthly total before comparing either headline price. Add the Warmup Pool, SmartDelivery and SmartServers on the Smartlead side, and add the extra warm-ups, LinkedIn and integrations on the Woodpecker side. Then compare the totals, not the starting prices. That habit will save you from the most common surprise in this Woodpecker vs Smartlead comparison, which is a bill that is much higher than the number on the pricing page.

    Woodpecker vs Smartlead deliverability and warmup: who keeps you out of spam

    First of all, deliverability is where cold email succeeds or fails, and both tools treat it as a core feature rather than an add-on. Woodpecker warms up mailboxes as part of the plan, with inbox rotation, a deliverability monitor, adaptive sending, ESP matching, human-like sending randomisation and a spam words and links checker. Smartlead warms up through its Warmup Pool, with inbox rotation, dynamic ESP matching, bounce auto-protection and SmartDelivery placement testing. On paper, the two lists look almost identical, so the differences sit in what is included and what costs extra.

    Woodpecker vs Smartlead deliverability: included warmup and verification against a premium warmup pool and placement testing
    Woodpecker vs Smartlead deliverability comes down to included warmup against infrastructure breadth. Woodpecker includes warm-ups in the plan price and verifies every address free, while Smartlead sells its premium Warmup Pool and placement testing as add-ons below Unlimited Smart. Allow two to four weeks of patient warmup before sending at volume.

    Warmup included, against warmup as an add-on

    For example, Woodpecker includes warm-ups in every plan, with 2 at the 500-prospect entry tier, 6 at 2,000 prospects, 10 at 4,000 and 30 at 15,000, and extra warm-ups cost $5 a month per email account. You can fine-tune daily limits and sending intervals. The deliverability monitor watches your sender reputation while adaptive sending adjusts the pace. Smartlead’s premium Warmup Pool costs $59 a month on Base and Pro. It is free only from Unlimited Smart upwards. In practice, both warmups do the same job. No warmup can ready a brand-new domain in a day, so allow two to four weeks before sending at volume, whichever tool you pick.

    Woodpecker deliverability in action

    Video: Woodpecker Cold Email – Feature overview by Woodpecker.co on YouTube. This video is the creator’s property, embedded via YouTube for education. OutreachCompare is not affiliated with Woodpecker.co and does not claim ownership of this video.

    Each tool also puts reasonable limits around unlimited mailboxes. Woodpecker connects as many sending mailboxes as you want with no per-inbox fees. Every plan includes unlimited email accounts and unlimited team members. Smartlead includes unlimited email accounts on every plan at no extra cost, according to its pricing page FAQ, and it rotates sending across all connected mailboxes automatically, which spreads volume evenly and protects each sender’s reputation. In short, unlimited means unlimited on both sides, so very high-volume senders should still read the fair usage notes first.

    Bounce protection and placement testing

    Moreover, Smartlead goes further on infrastructure that Woodpecker does not sell in the same way. Bounce auto-protection pauses sending when bounces spike, dynamic ESP matching picks the right sending setup per mailbox. SmartDelivery runs placement tests across up to 500 sender accounts on its top tier, with placement-optimised copy and campaign copy warmup. Woodpecker answers with its own strengths, including a bounce shield, duplicate sending detection, out-of-office auto-filtering and a domain audit that checks SPF and DKIM. Both options cover the essentials, and our deliverability guide explains why each of those steps matters.

    To sum up this section, there is no clear deliverability winner in this Woodpecker vs Smartlead comparison. Woodpecker leads on included warmup, because warm-ups come with the plan and extra ones cost only $5 a month. Smartlead leads on infrastructure depth, with bounce auto-protection, dynamic ESP matching and SmartDelivery placement testing. If landing in the inbox is your main worry, each tool covers you. The straightforward advice is to warm up patiently, send only to verified addresses, and hold your volume steady.

    Woodpecker vs Smartlead finding leads: database size, credits and enrichment

    Next, finding leads is where Woodpecker pulls clearly ahead on paper, because it has a real built-in database and Smartlead’s self-serve plans do not. Woodpecker’s Lead Finder holds 1B+ B2B contacts. Every plan includes 100 free Lead Finder credits, with extra credits from $10 a month for 500. Verification is free and real-time through its native Bouncer integration, including catch-all verification. You can check every address before you send without paying per check.

    Lead Finder credits and free verification

    In fact, the verification is the fairest part of Woodpecker’s database offer. Unlimited email verification is included in the plan price, which means you never pay per check and you never have to choose between verifying a list and saving money. Lead Finder credits are the only metered part. 100 free credits a month covers a small list, while the $10 add-on for 500 credits covers a bigger one. Smartlead, by contrast, sells email verification credits as a paid add-on across all plans. Its pricing page does not list a free verification allowance. That is a real gap in this Woodpecker vs Smartlead comparison, because verification is the cheapest insurance against bounces.

    By contrast, Smartlead’s lead allowances are generous in a different way. Base includes 2,000 contacts and 2,000 verified prospect emails a month, Pro includes 30,000 of each, Unlimited Smart includes unlimited contacts with 50,000 verified emails. Unlimited Prime includes unlimited contacts with 170,000 verified emails. Smartlead also offers SmartProspect for finding ICP leads. Its managed SmartServices builds weekly lists from 12+ databases with 10+ intent signals. In short, Smartlead gives you plenty of contacts to send to, while Woodpecker gives you a database to find them in.

    Finding emails while you browse

    Similarly, both tools help you find emails outside the platform. Woodpecker integrates with Hunter for finding addresses. Its Lead Finder covers the same job inside the platform, with CSV import and export. Smartlead integrates with Clay for enrichment and offers webhooks and an API for piping data in and out. In short, Woodpecker wins on included database and free verification, while Smartlead wins on the size of its contact allowances at the higher plans.

    Treat accuracy claims from either vendor as marketing claims, not independent tests, until you see your own results. Woodpecker publishes what it learns from tens of millions of sent emails, including reply-rate data by list size, and Smartlead publishes customer stories with reply rates up to 14% and 48% in some campaigns. The free verification on the Woodpecker side is a real protection for your budget, whatever the accuracy claims say, because you only send to addresses you have already checked.

    Woodpecker vs Smartlead multichannel sequences: LinkedIn, calls and SMS

    First of all, multichannel is where Woodpecker earns its place. It is the clearest win in this Woodpecker vs Smartlead comparison. Woodpecker runs email, LinkedIn and calls in combined sequences, with condition-based branching, workflows, manual tasks for calls, SMS and LinkedIn, and calling through its Aircall integration. Its Multichannel plan puts email and LinkedIn in one campaign. Its LinkedIn plan covers up to 250 direct messages a day, 50 InMails a month, 30 connection requests a day and 500 profile visits a day.

    In practice, a Woodpecker sequence can run a whole play without leaving the platform. Start with a personalised first email, add a LinkedIn connection request two days later, follow up with a call if the prospect does not reply, and try another email if they still do not answer. The sequence runs the whole play for you, while you control the timing and order of every step. A/B testing with up to five versions lets you compare subject lines and email copy, and the AI interest level detection sorts replies so you can see who is warm. That blend of flexibility and measurement is exactly what a team needs to improve at outbound rather than merely sending more.

    Where Smartlead stays email-first

    By contrast, Smartlead is email-first by design. Its sequences cover email deeply, with conditional subsequences based on lead intent, spintax, AI reply sentiment categorisation and automated replies, yet it does not offer native LinkedIn automation, calls or SMS in its self-serve plans. Smartlead does offer SmartDialer for calls as an add-on, and CRM and call access appear in its plan comparison. The core product is a cold email engine, not a multichannel sales engagement platform. That is an honest limit, and it matters. If your reps work LinkedIn every day, Woodpecker covers that channel and Smartlead does not.

    Moreover, the two tools differ on how much of the job they automate. Woodpecker’s LinkedIn actions run in the cloud, so they happen even when your computer is off, and its manual tasks keep calls and SMS inside the sequence. Smartlead’s strength is the depth of its email automation, with dynamic ESP matching, bounce auto-protection and subsequences that react to how a lead behaves. In sum, Woodpecker covers multichannel well enough for most small teams, while Smartlead covers email deeply enough for teams that send at serious volume.

    Reply handling: out-of-office and interest levels

    Above all, the reply handling on both tools is worth a closer look. Woodpecker automatically filters out-of-office replies. You never waste sends on someone who is away, and its AI interest level detection sorts the rest by how warm they are. Smartlead sorts replies with AI sentiment categorisation instead, grouping responses into interested, not interested and similar buckets, which saves time when a campaign brings in hundreds of replies. Each approach keeps follow-ups courteous and well timed, and each one earns its place.

    To sum up this section, Woodpecker wins multichannel clearly. It runs email, LinkedIn and calls in one sequence, with cloud LinkedIn actions and an Aircall integration, while Smartlead stays email-first and sells calling as an add-on. If LinkedIn is your priority, this Woodpecker vs Smartlead comparison points to Woodpecker. If email volume is your priority, Smartlead’s depth is the stronger pick.

    Woodpecker vs Smartlead AI features: writing help against reply intelligence

    Next, AI is a real difference between the two tools, although neither one sells an AI SDR. Woodpecker offers an AI email writer that drafts personalised emails, spintax for variation, snippets for dynamic fields. AI interest level detection that reads replies and sorts them by warmth. Its AI helps you write better emails and understand the replies you get, which is exactly what a small team needs.

    For example, Woodpecker’s AI interest level detection can take on the triage half of your inbox. It reads each reply, works out whether the prospect is interested, and sorts the warm ones to the top, while your human reps handle the conversations that actually need a person. Woodpecker also offers AI-powered personalisation through snippets and conditions, so each email can carry a detail that fits its recipient. Used well, the AI saves hours every week. Used without review, it can produce messages that feel generic — the opposite of good outbound — so check its drafts and keep the tone close to how your team really talks.

    Smartlead AI: sentiment, subsequences and replies

    By contrast, Smartlead’s AI focuses on what happens after the send. AI reply sentiment categorisation sorts every response by intent, conditional subsequences react to that intent. Automated replies can answer the routine ones for you. Smartlead also offers AI-powered personalisation at scale, A/B testing across subject lines, angles and sequences, and placement-optimised copy through SmartDelivery. In short, Woodpecker’s AI helps you write the email, while Smartlead’s AI helps you run the campaign that follows it.

    Similarly, the AI limits show how each tool thinks about AI. Woodpecker includes its AI email writer and interest detection in the plan, with no separate AI credit system on its pricing page. Smartlead includes AI features across its plans, with AI and live data credit packs available when you need more. In short, both tools give you useful AI inside the subscription. Neither one charges a separate AI SDR price, because neither one sells an AI SDR. The right choice depends on whether your team needs more help writing emails or more help handling replies.

    Finally, one honest warning belongs in this Woodpecker vs Smartlead AI section. AI writing still needs a human eye on both tools. The strongest sequences still begin with a genuine reason to write to a real person, and the best results follow when a rep checks the AI’s drafts, verifies the personalisation, and edits each email before sending. Use the AI to draft, then edit every email yourself. That habit matters more than which AI you buy. That is what separates outreach that earns replies from outreach that reads like a robot wrote it.

    Woodpecker vs Smartlead inbox, CRM and integrations

    First of all, both tools collect every reply in one shared inbox. No one on your team must search five mailboxes to find who replied. Woodpecker’s centralised inbox brings every reply from every mailbox into one place, with out-of-office auto-filtering and AI interest level detection built in. Smartlead’s Master Inbox does the same job, with AI reply sentiment categorisation, an AI assistant, tagging, out-of-office handling and pipeline movement, all without leaving the inbox.

    The Smartlead Master Inbox in action

    Video: 7: How to Use the Master Inbox by Smartlead on YouTube. This video is the creator’s property, embedded via YouTube for education. OutreachCompare is not affiliated with Smartlead and does not claim ownership of this video.

    In practice, the CRM difference is small but real. Woodpecker is designed to sit alongside your CRM, syncing in both directions with HubSpot and Pipedrive, and connecting to Calendly for booking meetings straight from a sequence. Smartlead offers CRM access on its plans and integrates natively with HubSpot, Salesforce, Pipedrive and Zoho, plus Clay for enrichment. If you already run HubSpot or Salesforce, both tools keep the two systems honest. If you do not have a CRM yet, neither tool replaces one, so budget for a CRM separately.

    Integrations and security

    The integration lists are strong on each side. Woodpecker syncs natively with HubSpot and Pipedrive, plus Zapier, Google Sheets, Calendly, Hunter, Clay, and a modern developer stack with an API, webhooks, an MCP server and a CLI, plus Claude. Smartlead integrates natively with HubSpot, Salesforce, Pipedrive and Zoho, plus Zapier, Clay, webhooks and an API. It offers SmartSenders for buying domains and mailboxes inside the platform. In short, Woodpecker covers more developer tooling, while Smartlead covers more CRMs and adds its own mailbox shop.

    Security and compliance are strong on each platform, which counts when you hand a tool your prospect data and your sending domain. Woodpecker is GDPR and CCPA compliant, stores data under ISO certification, holds CASA tier 2 certification, and offers two-factor authentication. Smartlead serves more than 100,000 businesses including Fortune 500 teams, which sets a high bar for its own security practices. Each tool is a sound choice for a European team handling prospect data at scale. Our cold email legal checklist explains the consent and opt-out rules that differ by country.

    Woodpecker vs Smartlead agency features: clients, workspaces and white label

    Next, agencies deserve their own section, because the two tools take different approaches to client work. Woodpecker sells an Agency Panel add-on at $27 a month per active client, with white label at $5 a month per active client, on top of a custom Scale plan. The panel gives each client a separate prospects database, bulk campaign actions, bulk mailbox upload, all client stats in one place, an agency outreach calendar, a global blacklist, automated domain audits and centralised billing, with client view-only access and password-free mailbox connections.

    By contrast, Smartlead builds agency features into its plans. Client workspaces are available from Pro onwards, whitelabel costs $29 a month per client workspace. Unlimited Prime includes 3 clients and 3 SmartServers in the price. Smartlead also offers a dedicated manager and a private Slack channel on its higher plans, plus a managed SmartServices offer where its own team runs your outbound end to end. In practice, Smartlead’s agency offer is built in, while Woodpecker’s is an add-on. The maths decides which one is cheaper for your client count.

    What a small agency pays on each tool

    For example, a small agency with five clients would pay $135 a month for Woodpecker’s Agency Panel at $27 per client, plus $25 a month for white label, on top of the custom Scale plan price, which Woodpecker does not publish. The same agency on Smartlead Unlimited Prime would pay $379 a month, with 3 clients included and whitelabel at $29 a month for each extra client workspace, which adds $58 a month for the other two clients. A larger agency that needs white-label portals and dedicated servers may find Smartlead worth the fixed price, yet a small agency that just needs separate client panels will find Woodpecker’s per-client pricing easier to start with. In sum, Smartlead wins agency depth, while Woodpecker wins agency flexibility.

    Lastly, each tool helps agencies guard deliverability across clients, which is exactly where agency work tends to break down. Woodpecker gives every client a separate prospects database, automated domain audits and a global blacklist, with warmup included per plan. Smartlead gives agencies unlimited mailboxes, inbox rotation, warmup, dedicated SmartServers and the option to buy separate sending domains per client. Whatever you choose, give each client its own sending domain, warm every new domain patiently, and never share one mailbox between clients, because one client’s poor list can damage every other client’s deliverability.

    Woodpecker vs Smartlead feature matrix

    To start with, here is the sending and deliverability matrix. Here the two tools sit side by side on the features that decide whether your emails reach the inbox. A tick means the feature is stated on the provider’s official site. A dash means it is not confirmed there.

    Sending and deliverability matrix

    FeatureWoodpeckerSmartlead
    Unlimited connected mailboxes✓ No per-inbox fees✓ No extra cost, per pricing FAQ
    Warmup included in plan price✓ 2–30 by tier, extra $5/mo each— Premium Warmup Pool $59/mo on Base/Pro
    Premium warmup pool free—✓ Free from Unlimited Smart
    Inbox rotation✓✓
    Inbox placement testing✓ Deliverability Monitor✓ SmartDelivery from $49/mo
    Custom tracking domains✓✓ SmartSenders domains from $13/yr
    SPF, DKIM and DMARC checks✓ Domain audit✓
    Bounce protection✓ Bounce shield✓ Bounce auto-protection
    Adaptive sending✓—
    ESP matching✓✓ Dynamic ESP matching
    Free trial✓ 14 days, no card, all features✓ Free trial, no card (length not stated on page)
    Free plan——

    Last checked: 16 November 2026 on woodpecker.co/pricing and smartlead.ai/pricing. A tick means the feature is stated on the provider’s official site. A dash means it is not confirmed there. Features and pricing can change, so please check the provider’s site before you buy. We do not guess at features, prices or trials.

    Woodpecker vs Smartlead feature matrix: data, AI and agency

    Next, here is the second matrix, covering data, AI, multichannel steps and agency features. Read both matrices together: the first covers sending, and the second covers everything around it.

    FeatureWoodpeckerSmartlead
    Built-in B2B database✓ 1B+ contacts, 100 free credits/mo— SmartProspect lists, no headline database size
    Email verification included✓ Unlimited, free, catch-all included— Paid add-on, credits from $32
    Multichannel sequences✓ Email, LinkedIn, calls via Aircall— Email-first, SmartDialer add-on
    Automated LinkedIn outreach✓ Cloud actions, up to 250 DMs/day—
    Built-in dialler✓ Via Aircall integration✓ SmartDialer, credit-based
    AI email writer✓✓ AI personalisation at scale
    AI reply categorisation✓ Interest level detection✓ Sentiment categorisation
    Native CRM integrations✓ HubSpot, Pipedrive two-way✓ HubSpot, Salesforce, Pipedrive, Zoho
    API, webhooks, Clay✓ Plus MCP server and CLI✓
    Unlimited team members✓ Every plan— Flat per workspace, seats not listed
    White-label client portals✓ $5/mo per active client✓ $29/mo per client workspace
    Starting price$35/mo monthly$39/mo monthly

    Last checked: 16 November 2026 on woodpecker.co/pricing and smartlead.ai/pricing. A tick means the feature is stated on the provider’s official site. A dash means it is not confirmed there. Features and pricing can change, so please check the provider’s site before you buy. We do not guess at features, prices or trials.

    Woodpecker vs Smartlead pros and cons

    Of course, no tool is perfect, and this Woodpecker vs Smartlead comparison would not be honest without the downsides. Here is the fair picture for each tool, drawn from what each provider states on its own site and what its plans genuinely include.

    Woodpecker vs Smartlead: what we like about Woodpecker

    Simple usage pricing. You pay for the prospects you contact, from $35 a month for 500. A small list costs little and the bill follows your volume. Warmup included. Warm-ups come with the plan, from 2 at entry to 30 at 15,000 prospects, and extra ones cost only $5 a month each. Free unlimited verification. Every address is checked free, including catch-all domains, through the native Bouncer integration. Real lead database. The 1B+ contact database with 100 free credits a month means list building starts inside Woodpecker. Multichannel in one place. Email, LinkedIn and calls run in combined sequences, with cloud LinkedIn actions and an Aircall integration. Unlimited team members. Seats never add to the bill, so hiring does not raise your subscription.

    Strong deliverability tooling. Inbox rotation, adaptive sending, ESP matching, a deliverability monitor and a spam words checker all earn their place, rather than sitting there as decoration. Modern developer stack. An API, webhooks, MCP server, CLI and Claude integration suit teams that automate their stack.

    Woodpecker vs Smartlead: where Woodpecker falls short

    Volume gets expensive at scale. Contacting 15,000 prospects costs $262 a month, while Smartlead Unlimited Smart covers 150,000 sends for $174 a month, so heavy senders pay more here. Multichannel and LinkedIn prices are not on the static page. The pricing page does not show those plan prices in its static text. You have to check the site or the slider before you budget. No native CRM of its own. Woodpecker syncs with HubSpot and Pipedrive instead of replacing them, so teams without a CRM need a separate one. Lead Finder credits cap your prospecting. Only 100 credits a month are free. Heavy prospecting teams will need the $10 add-on for 500 credits, or a bigger tier. Scale plan is custom priced. Larger teams have to book a call for a quote instead of seeing a number.

    Woodpecker vs Smartlead: what we like about Smartlead

    Flat-rate scale. Unlimited Smart costs $174 a month for 150,000 sends. Prime costs $379 a month for 500,000 sends, so high-volume sending stays predictable. Mailboxes are unlimited on every plan. You can connect as many mailboxes as you need at no extra cost, which is the foundation of high-volume sending. Deep deliverability infrastructure. Dynamic ESP matching, bounce auto-protection, SmartDelivery placement testing and SmartServers cover the infrastructure properly. Strong agency features. Client workspaces from Pro, white-label portals, a dedicated manager and a private Slack channel suit agencies that manage many clients. Master Inbox with AI. Reply sentiment categorisation, an AI assistant and pipeline movement keep hundreds of replies manageable.

    Generous contact allowances. Pro includes 30,000 contacts and 30,000 verified emails a month, and Unlimited Prime includes unlimited contacts with 170,000 verified emails. Good integrations. Native sync covers HubSpot, Salesforce, Pipedrive and Zoho, and Clay, webhooks and an API cover the rest.

    Woodpecker vs Smartlead: where Smartlead falls short

    Warmup costs extra below Unlimited Smart. The premium Warmup Pool is a $59-a-month add-on on Base and Pro, so the honest entry price with warmup is $98 a month, not $39. Email-first only. Smartlead has no native LinkedIn automation, calls or SMS in its self-serve plans, while Woodpecker runs all three. Verification costs extra. Email verification is a paid add-on, while Woodpecker verifies every address free. Add-ons stack up. SmartDelivery from $49 a month, SmartServers at $39 a month per server and whitelabel at $29 a month per client can push the real monthly bill well past the headline price.

    Trial length is not stated on the pricing page. The FAQ confirms a free trial with no card, yet it does not say how many days you get, so check before you plan your test. Big platform, real learning curve. New users should allow time to learn the workspaces, the mailbox setup and the inbox before the platform starts to feel natural. No headline database size. Smartlead does not publish a database size on its pricing page, so list building relies on SmartProspect allowances and outside tools.

    Woodpecker vs Smartlead: who should pick which

    First of all, the decision is simpler than the feature lists suggest, because it turns on three questions. How many prospects do you contact each month, which channels do your reps use every day, and do you manage clients? Answer those three questions truthfully, and the right tool will choose itself.

    Woodpecker vs Smartlead decision guide: a simple single-envelope path against a busy multi-mailbox hub
    Woodpecker vs Smartlead comes down to three questions. How many prospects do you contact each month, which channels do your reps use every day, and do you manage clients? Answer those three honestly and the right tool reveals itself.

    Pick Woodpecker when you want simple, usage-priced sending

    Pick Woodpecker when you want prospecting, outreach and deliverability in one tool, with warmup and verification already included. Choose Woodpecker when your list is modest, because $35 a month for 500 contacted prospects is the lowest honest entry price in this Woodpecker vs Smartlead comparison once you count warmup. Small teams should pick Woodpecker because unlimited team members never add to the bill. LinkedIn-first teams should pick Woodpecker when they work LinkedIn every day, because cloud LinkedIn actions and Aircall calling are built in. A tight budget also points to Woodpecker, because the 14-day trial with all features and no card lets you test the whole platform properly.

    Pick Smartlead when you want scale and agency infrastructure

    Pick Smartlead when you send at high volume across many mailboxes, because Unlimited Smart covers 150,000 sends for $174 a month with the premium Warmup Pool free. Choose Smartlead when you manage clients, because client workspaces from Pro, white-label portals and a dedicated manager are built for agencies. High-volume teams should pick Smartlead when their list is bigger than their team, because unlimited mailboxes and inbox rotation carry the load. Smartlead also makes sense when you already pay for a warmup tool, a verification tool and a mailbox provider, because Smartlead may replace three subscriptions with one, which can make the headline price look much fairer once you add up what you stop paying for.

    Agencies that need dedicated servers should pick Smartlead when they want SmartServers and SmartDelivery placement testing under one roof. Pick Smartlead when you want the flat monthly price, because a fixed bill is easier to budget than a slider that moves with your list.

    Woodpecker vs Smartlead: the five-minute decision test

    In short, try this test before you buy either tool. Write down how many prospects you contact each month, which channels each person uses every day, and how many mailboxes you run. If the answer is under 2,000 prospects, mostly email with some LinkedIn, Woodpecker is the pick. A team that contacts more than 10,000 prospects a month, runs dozens of mailboxes, or manages clients should pick Smartlead. If you still cannot decide, open both trials on the same day, build an identical small sequence in each tool, and send it to a similar list. The tool that feels easier after a week of real use is the right one for your team, whatever this Woodpecker vs Smartlead comparison says.

    Switching later is always possible

    Remember too that switching later is always possible, and it is no disaster. Lists export as CSV, sequences can be rebuilt, and sending domains can move with you. Choosing the wrong tool costs a few weeks of learning, not a lost year. So choose the tool that matches how you sell today, test it with a live campaign, and switch later if your team outgrows it. That beats chasing the longest feature list every time.

    Woodpecker vs Smartlead verdict

    Our verdict — Best for simple, usage-priced sending: Woodpecker. Best for high-volume agency infrastructure: Smartlead.

    Woodpecker is the strongest pick when a small team, a founder or a small agency wants prospecting, sending, warmup and reply management in one platform, with a price that follows the number of prospects contacted. The 1B+ Lead Finder database, free unlimited verification, included warm-ups and multichannel sequences are a combination its rivals do not match at $35 a month. Smartlead is the strongest pick when a team sends at high volume across many mailboxes, or manages outreach for clients and needs white-label portals, dedicated servers and placement testing. Unlimited mailboxes, inbox rotation, the Master Inbox and flat-rate pricing earn the higher price for teams that use them daily. Begin with the free trial of the tool that suits your team, build a small verified list, and run a genuine test sequence before committing.

    We have not given either tool a numeric score yet, because scores only follow hands-on testing. Best-for labels reflect each tool’s stated focus.

    Visit Woodpecker →Check Smartlead Pricing →

    The longer version of the verdict

    Overall, that is the short version of this Woodpecker vs Smartlead comparison. The longer version is simple too. Woodpecker wins on simplicity and included warmup. It does not win every single category. Smartlead wins on high-volume infrastructure and agency features. Woodpecker wins on database value and free verification. Smartlead wins on mailbox scale and placement testing. Yet no rival covers as much of the outbound job in one usage-priced subscription as Woodpecker, and no rival in this Woodpecker vs Smartlead comparison offers infrastructure as deep as Smartlead’s at a flat monthly price. In the end, for most small teams, Woodpecker’s simplicity at $35 a month is worth more than a specialist edge in one area, while for teams that send at scale, Smartlead’s infrastructure is worth the extra money.

    Whichever tool you end up choosing, the setup advice stays the same. Begin with a dedicated sending domain, warm it for two to four weeks, verify each address before sending, and keep your first sequences brief, specific and honest. Read our sending-domain setup guide before your first campaign, and read our cold email legal checklist before you launch, since the rules change by country. The tool you pick matters less than the list you build and the offer you write, and both tools in this Woodpecker vs Smartlead comparison will serve you well if you set them up properly.

    Woodpecker vs Smartlead: frequently asked questions

    Which is cheaper, Woodpecker or Smartlead?

    It depends on your volume, because the two tools charge in different ways. Woodpecker is cheaper at low volume: contacting 500 prospects costs $35 a month, against $39 a month for Smartlead Base. Woodpecker includes warmup while Smartlead charges $59 a month extra for its premium Warmup Pool on Base and Pro. Smartlead is cheaper at high volume: Unlimited Smart costs $174 a month for 150,000 sends with the Warmup Pool free, against $262 a month for Woodpecker at 15,000 contacted prospects. Work out your real monthly total, warmup included, before you compare either headline price.

    Did Woodpecker change its pricing?

    Yes. Woodpecker now charges by contacted prospects on a slider, verified on its official pricing page on 16 November 2026: $35 a month for 500 contacted prospects, $67 for 2,000, $99 for 4,000, $159 for 8,000, $188 for 10,000 and $262 for 15,000, with annual billing saving 33%. Our earlier Woodpecker review listed $39 a month for 5,000 emails and $26 a month on annual billing, verified 30 October 2026. That pricing is now out of date. Use the figures in this Woodpecker vs Smartlead comparison instead.

    Does Smartlead include warmup on every plan?

    No, and this is a common misunderstanding. Smartlead’s premium Warmup Pool is a $59-a-month add-on on Base and Pro. It is free only from Unlimited Smart upwards. Earlier articles, including some of our own, described unlimited AI warmup as included on every Smartlead plan, and that is wrong. Budget $59 a month for warmup on Base or Pro, or step up to Unlimited Smart at $174 a month, where the premium pool is included. Woodpecker, by contrast, includes warm-ups in the plan price, from 2 at entry to 30 at 15,000 prospects.

    Which tool is better for LinkedIn outreach?

    Woodpecker is better for LinkedIn outreach, because it runs email and LinkedIn in one campaign, with cloud LinkedIn actions, up to 250 direct messages a day, 50 InMails a month, 30 connection requests a day and 500 profile visits a day. Smartlead is email-first and does not offer native LinkedIn automation in its self-serve plans, although it does offer SmartDialer for calls as an add-on. If LinkedIn is your main channel, Woodpecker wins this part of the Woodpecker vs Smartlead comparison clearly. If LinkedIn is not part of your motion, Smartlead’s email depth is the stronger pick.

    Which tool has the bigger lead database?

    Woodpecker’s database is the bigger one you can measure clearly. Lead Finder holds 1B+ B2B contacts, with 100 free credits a month included and extra credits from $10 a month for 500, plus free unlimited email verification. Smartlead does not publish a headline database size on its pricing page. Instead, it includes contact and verified-email allowances, from 2,000 contacts and 2,000 verified emails a month on Base to unlimited contacts and 170,000 verified emails a month on Unlimited Prime, plus SmartProspect for finding ICP leads. On included database value, Woodpecker wins in this Woodpecker vs Smartlead comparison.

    Can I try Woodpecker or Smartlead for free?

    Yes — each tool offers a free trial, and neither one has a free-forever plan. Woodpecker offers a 14-day free trial with all features included and no credit card required. Smartlead offers a free trial with no credit card required, according to its pricing page FAQ, which does not state a length on the page we fetched. Use the trial to run a live campaign to a genuine list — only real sending shows deliverability, reply handling and reporting as they truly behave. When the trial ends, you move to a paid plan on both tools.

    Keep reading — next in this series

    You have the full Woodpecker vs Smartlead picture now. Go deeper with the reviews and guides that support it:

    Best for simple sending: Woodpecker — from $35/mo · Best for high-volume infrastructure: Smartlead — from $39/mo Visit Woodpecker
  • Saleshandy vs Reply.io 2026

    Saleshandy vs Reply.io 2026

    One flat price for the whole outbound job, against per-user multichannel power with an AI SDR

    Saleshandy vs Reply is the comparison to read when you want one platform for prospecting, sending and replies, and you cannot decide between a flat-rate all-in-one and a per-user multichannel specialist. Saleshandy starts at $34 a month on annual billing and bundles a 852M+ contact database, multichannel sequences, warmup and a CRM with no per-seat billing. Reply.io starts at $59 a month and adds fully automated LinkedIn outreach, calls, SMS and WhatsApp, plus Jason, an AI SDR that prospects, writes, answers replies and books meetings from $500 a month. This Saleshandy vs Reply comparison checks pricing, deliverability, databases, multichannel steps, AI, inbox handling, integrations and agency features on both official sites, so you can pick by fit, not by hype.

    Visit Saleshandy →See Reply.io Plans →

    Prices checked 16 November 2026 on Saleshandy’s and Reply.io’s official pricing pages. Features and pricing can change, so please check the provider’s site before you buy.

    Quick Answer

    Saleshandy wins on value and simplicity. Starter costs $34 a month on annual billing, covers one seat with 2,000 active prospects and 6,000 emails a month, and includes the 852M+ Lead Finder database, unlimited mailboxes, unlimited warmup and unlimited clients, with no per-seat billing at any level. Reply.io wins on multichannel depth and AI. Multichannel costs $99 per user a month and bundles automated LinkedIn, calls, SMS and WhatsApp in one sequence, while Jason, the AI SDR, starts at $500 a month and can run prospecting, writing, replies and meeting booking for you. Pick Saleshandy when you want the whole outbound job in one flat-priced tool, or when your team is growing and per-user pricing would sting. Pick Reply.io when your reps live on LinkedIn and the phone every day, or when an AI SDR would free up more time than it costs.

    Above all, this Saleshandy vs Reply comparison is good news for buyers, because both tools are strong and the choice is genuinely about fit. Neither tool is a bad buy, and neither one wins every category. Saleshandy is the broader all-in-one at the lower price, while Reply.io is the deeper multichannel platform with the more powerful AI. Read on for the full Saleshandy vs Reply head-to-head, with pricing checked today, feature tables, real team costs, honest pros and cons, and a clear verdict.

    Saleshandy vs Reply at a glance

    First of all, it helps to see the two tools side by side before the detail begins. Saleshandy is an AI-powered multichannel outbound platform that has been building outreach tools since 2017, and it now serves more than 25,000 businesses, agencies and sales teams. Reply.io is an AI sales engagement platform that has been around for more than ten years and serves over 3,000 companies worldwide. Both tools find leads, send sequences, warm up mailboxes and collect replies in one inbox, so on the surface they look like twins.

    How the two tools charge differently

    In practice, the difference shows up in how they charge and how far they go on each channel. Saleshandy charges a flat monthly price per workspace, with seats included in the plan. Your bill stays the same when you hire your next rep. Reply.io charges per user on its Multichannel plan, so your bill grows with headcount. Every user gets fully automated LinkedIn, calls and SMS built in. For example, a five-person team pays $76 a month for Saleshandy Pro on annual billing, while the same five people on Reply.io Multichannel pay $445 a month on annual billing at the $89 rate we saw on 15 November, or $495 a month on monthly billing at the $99 rate shown today. That gap is the single biggest fact in this Saleshandy vs Reply comparison. Everything else in the article helps you judge whether Reply.io earns it.

    An assistant for your reps, against an AI SDR

    Similarly, the two tools differ on who does the work. Saleshandy gives you an AI Sequence Copilot that drafts sequences, AI Variants that write extra versions for testing, and AI enrichment that fills in prospect data, which means your team still runs the outreach. Reply.io gives you Jason, an AI SDR that can prospect, write, answer replies, handle objections and book meetings on its own, in autopilot or copilot mode. In short, Saleshandy is an assistant for your reps, while Jason aims to be an extra rep. Whether that extra rep is worth $500 a month is a question this Saleshandy vs Reply comparison answers in the AI section below.

    To sum up the shape of the choice, think of it this way. Saleshandy is the tool to pick when you want one subscription, one login and one flat price for prospecting, sending, warmup and reply management. Reply.io is the tool to pick when your sales motion runs across email, LinkedIn, calls and SMS every single day, and you want automation and AI to carry more of that motion for you. Both approaches work, and the rest of this Saleshandy vs Reply guide shows exactly where each one pulls ahead.

    Saleshandy vs Reply pricing in 2026

    To start with, here is the pricing head-to-head, checked on the official pricing pages on 16 November 2026. Saleshandy sells three plans, Starter, Pro and Scale, all flat-priced per workspace with seats included. Reply.io sells its platform in three main ways, Sales Outreach plans for human teams, AI SDR plans for Jason, and Agency plans for client work. Reply.io prices are starting prices, and they rise with active contacts, so treat the figures below as the floor, not the ceiling.

    Saleshandy vs Reply pricing models compared: one flat-rate card against one per-seat card
    Saleshandy vs Reply pricing starts from two different ideas. Saleshandy charges one flat monthly price per workspace, with seats included, while Reply.io charges per user on Multichannel, so a growing team pays more. The table below shows the full head-to-head.

    For clarity, one warning belongs right here, because Reply.io changed how its pricing page displays figures. The live page fetched on 16 November 2026 shows starting prices of $59 for Email Volume, $99 for Multichannel and $500 for AI SDR. The Agency card shows no price in the fetched text. The annual figures of $49 for Email Volume and $89 for Multichannel, the $800 monthly figure for Jason. The $166 Agency figure were all visible on the same page on 15 November 2026, and they are repeated in this Saleshandy vs Reply comparison with that date attached. Please confirm those four figures on Reply.io’s pricing page before you buy, because the page no longer shows them in the version we fetched today. Saleshandy’s figures, by contrast, were fully visible on its pricing page today, and they match the 15 November check exactly.

    Saleshandy vs Reply pricing table

    PlanPrice fromWhat you getBest forVisit
    Saleshandy — StarterBest for solo senders$34/mo annual ($408/year)
    $41/mo monthly
    1 seat, 2,000 active prospects, 6,000 emails/mo, 1,500 Lead Finder credits/moA solo founder or SDR testing outboundVisit Site →
    Saleshandy — ProBest for growing teams$76/mo annual ($912/year)
    $99/mo monthly
    10 seats, 30,000 active prospects, 100,000 emails/mo, 4,000 Lead Finder credits/moA team of two to ten peopleVisit Site →
    Saleshandy — ScaleBest for agencies & scale$149/mo annual ($1,788/year)
    $189/mo monthly
    Unlimited seats and active prospects, 200,000 emails/mo, 8,000 Lead Finder credits/moAgencies and larger teamsVisit Site →
    Reply.io — Email VolumeBest for email-only teamsFrom $59/mo
    $49/mo billed annually*
    1,000 active contacts, unlimited users, unlimited emails, unlimited mailboxes (fair use), 50 data credits/moEmail-only outbound at any team sizeVisit Site →
    Reply.io — MultichannelBest for SDR teamsFrom $99/user/mo
    $89/user/mo billed annually*
    Email, LinkedIn, calls, SMS and WhatsApp, unlimited active contacts on annual, 5 mailboxes/user monthlyReps who work every channel dailyVisit Site →
    Reply.io — AI SDR (Jason)Best for hands-off outboundFrom $500/mo annual
    $800/mo monthly*
    1,000 active contacts, 2 LinkedIn accounts, Jason prospects, writes, answers and books meetingsTeams with more prospects than repsVisit Site →
    Reply.io — AgencyBest for agenciesFrom $166/mo*Client workspaces, agency dashboard, unlimited clientsAgencies running client outreachVisit Site →

    What the pricing table leaves out

    * Reply.io annual figures ($49, $89), Jason monthly ($800) and Agency ($166) were visible on reply.io/pricing on 15 November 2026 but were not shown in the page fetched on 16 November 2026, which shows starting prices of $59, $99 and $500. Please confirm those figures on the site before you buy. Saleshandy prices last checked: 16 November 2026 on saleshandy.com/pricing. Features and pricing can change, so please check the provider’s site before you buy. We do not guess at features, prices or trials.

    Trials and add-ons

    In fact, the trial terms are part of the price, because they decide how long you get to test before you pay. Saleshandy offers a 7-day free trial with no credit card required. It gives you full access, including Lead Finder, the AI tools and sequences, plus 50 free Lead Finder credits. Reply.io offers a 14-day free trial covering the platform’s core features, which gives you two full weeks to build a sequence, test the database and run a real campaign. Seven days is short, and it is not long enough to test warmup properly, since warmup needs weeks, not days. Fourteen days is fairer. It is one of the clearest small wins for Reply.io in this Saleshandy vs Reply comparison.

    Moreover, neither tool offers a free plan that never expires. The trial is your only free look at either one. Once the trial ends, you move to a paid plan on both tools. That makes the trial period worth using properly. Connect a mailbox on day one, build a small list, and send a real test sequence to real prospects, because only a real campaign shows you deliverability, reply handling and reporting as they actually behave.

    Add-ons that change the real bill

    Finally, add-ons deserve a careful read on both sides, because they change the real monthly bill. Saleshandy sells Email Infrastructure separately, with domains at $14 a year and mailboxes from $2.99 a month on the annual fixed option. Its built-in Dialer for calls is a paid extra whose price is not stated on the pricing page, so check it before you budget for calling.

    Reply.io charges $69 a month per account for LinkedIn automation and $29 a month per account for calls and SMS on the Email Volume plan, $29 a month for each extra mailbox on Multichannel, from $20 a month for email validation, and from $39 a month for AI and live data credit packs. Reply.io also sells sending domains from $6 a year plus $5 per mailbox a month, or a pre-warmed domain from $25 a year plus $15 per mailbox a month with three pre-warmed mailboxes included. In sum, Saleshandy’s add-ons are cheaper and fewer, while Reply.io’s add-ons are the price of its multichannel depth.

    What a solo sender, a team of five and an agency actually pay

    Next, headline prices hide the real cost, so here is the arithmetic for three typical buyers. Every figure below is labelled so you can check it, and the Reply.io annual figures carry the same 15 November flag as the pricing table above. Saleshandy’s figures were all verified on its pricing page today, 16 November 2026.

    Saleshandy vs Reply cost table

    BuyerSaleshandyReply.ioThe gap
    Solo sender, 1 user$34/mo annual (Starter, $408/year)
    $41/mo monthly
    From $59/mo (Email Volume, 1,000 active contacts)
    $49/mo annual*
    Reply.io costs $25/mo more on annual billing, or $15/mo more than Saleshandy’s monthly price
    Solo sender who needs LinkedIn$34/mo annual (Starter)
    LinkedIn steps are tasks, not automated sends
    From $99/user/mo (Multichannel)
    $89/user/mo annual*
    Reply.io costs $65/mo more on annual billing, and it automates LinkedIn properly
    Team of 5, email only$76/mo annual (Pro, 10 seats included, $912/year)From $59/mo (Email Volume, unlimited users)
    $49/mo annual*
    Reply.io is cheaper here: $17/mo less on annual billing, with unlimited emails
    Team of 5, multichannel$76/mo annual (Pro)
    Multichannel steps included, LinkedIn task-based
    $445/mo annual (5 x $89*)
    $495/mo monthly (5 x $99)
    Saleshandy is $369/mo cheaper on annual billing, or $419/mo cheaper than Reply.io monthly
    Agency, many clients$149/mo annual (Scale, unlimited seats and clients, $1,788/year)From $166/mo* (Agency, unlimited clients)Saleshandy is $17/mo cheaper, before either side’s add-ons
    Adding an AI SDRNo AI SDR equivalent
    AI Copilot drafts sequences for your reps
    From $500/mo annual (Jason, 1,000 contacts)
    $800/mo monthly*
    Jason is a separate $6,000-a-year line item on annual billing

    * Reply.io annual figures ($49, $89), Jason monthly ($800) and Agency ($166) were visible on reply.io/pricing on 15 November 2026 but were not shown in the page fetched on 16 November 2026. Please confirm those figures on the site before you buy. Arithmetic: team-of-five Reply.io Multichannel is 5 users multiplied by the per-user rate; Saleshandy Pro covers 10 seats in one flat price. Last checked: 16 November 2026.

    The team-of-five gap

    Above all, the team-of-five row is where this Saleshandy vs Reply comparison turns into a real decision. A five-person team running multichannel outreach pays $76 a month with Saleshandy Pro, against $445 a month with Reply.io Multichannel on annual billing, which is a difference of $4,428 a year. That is not a rounding error, and it is the reason Saleshandy wins the value argument so clearly. Reply.io has to earn that extra money with better LinkedIn automation, better calling, and Jason. For some teams it does.

    By contrast, the email-only team-of-five row flips the other way, and it is worth noticing. Reply.io Email Volume costs from $59 a month for a whole team, because it charges by active contacts rather than by seat, with unlimited users and unlimited emails. Saleshandy Pro costs $76 a month for the same team. The difference is small, only $17 a month on annual billing, yet it shows that Reply.io is not expensive everywhere. Its pricing only gets steep when you add seats on Multichannel, or when you add Jason.

    In short, work out your real monthly total before you compare either headline price. Add the LinkedIn add-on, the calls add-on, the extra mailboxes, the validation and the data credits on the Reply.io side, and add the Email Infrastructure and Dialer costs on the Saleshandy side. Then compare the totals, not the starting prices. That habit will save you from the most common surprise in this Saleshandy vs Reply comparison, which is a bill that is much higher than the number on the pricing page.

    Saleshandy vs Reply deliverability and warmup: who keeps you out of spam

    First of all, deliverability is where cold email succeeds or fails, and both tools treat it as a core feature rather than an add-on. Saleshandy warms up unlimited connected mailboxes at no extra cost on every plan, with sender rotation, rotating IPs, domain health checks, DKIM and DMARC checks, and inbox placement testing through Inbox Radar. Reply.io offers warmup, inbox rotation, SPF, DKIM, DMARC and MX checks, custom tracking domains, a Google Postmaster integration and an email health check. On paper, the two lists look almost identical, so the differences sit in the details.

    Saleshandy vs Reply deliverability: warmup, inbox rotation and placement testing compared
    Saleshandy vs Reply deliverability comes down to warmup depth against infrastructure breadth. Saleshandy warms up unlimited mailboxes through TrulyInbox and tests placement with Inbox Radar, while Reply.io warms up through Mailtoaster.ai and sells ready-made domains and mailboxes. Both tools need two to four weeks of warmup before you send at volume.

    Warmup through TrulyInbox and Mailtoaster.ai

    For example, Saleshandy’s warmup runs through TrulyInbox, its sister warmup tool, which is a real dedicated system rather than a checkbox feature. You can fine-tune warmup volume, ramp-up speed and reply rates, and Sequence Score rates your sequence before you send it. You can fix risky copy early. Reply.io’s warmup runs through Mailtoaster.ai, and every extra mailbox you buy on Multichannel includes a free warmup seat there. In practice, both warmups do the same job. Neither one can warm a brand-new domain in a day, so plan for two to four weeks of warmup before you send at volume, whichever tool you pick.

    Similarly, both tools put sensible limits on unlimited mailboxes. Saleshandy connects as many sending mailboxes as you want with no per-inbox fees, although its Compare Plans section notes a daily warmup sending limit per plan and a sender rotation cap of 10 email accounts on Starter, 100 on Pro and 1,000 on Scale. Reply.io offers unlimited mailboxes on Email Volume under a fair usage policy, which ties the number of mailboxes to your active contacts and sending activity, and 5 mailboxes per user on Multichannel monthly billing. In short, unlimited means unlimited within fair use on both sides. Very high-volume senders should read the fair usage policy first.

    Ready-made sending infrastructure

    Moreover, Reply.io goes further on ready-made sending infrastructure, which matters if you are setting up cold email properly for the first time. You can buy a new domain from $6 a year plus $5 per mailbox a month, with SPF, DKIM and DMARC configured for you, or a pre-warmed domain from $25 a year plus $15 per mailbox a month, which arrives with three pre-warmed mailboxes and a faster start. Saleshandy’s Email Infrastructure add-on does the same job, with domains at $14 a year and mailboxes from $2.99 a month, pre-configured with SPF, DKIM and DMARC. Both options remove several fiddly steps, and our guide to setting up a sending domain explains why each of those steps matters.

    To sum up this section, there is no clear deliverability winner in this Saleshandy vs Reply comparison. Saleshandy leads on included warmup depth, with Sequence Score and Inbox Radar giving you a pre-send check that Reply.io does not match in the same way. Reply.io leads on infrastructure convenience, with pre-warmed domains and a Google Postmaster integration. If your main worry is landing in the inbox, either tool covers you. The honest advice is to warm up patiently, send to verified addresses only, and keep your volume steady.

    Saleshandy vs Reply finding leads: database size, credits and enrichment

    Next, finding leads is where Saleshandy pulls clearly ahead on paper, because its database is bigger, cheaper to use, and included in every plan. Lead Finder holds 852M+ verified contacts across 42M+ companies. You can search by job title, seniority, department, industry, company size, revenue, location, tech stack and hiring signals. Pro and Scale unlock 70+ people filters and 40+ company filters, while Starter has 40+ people filters and 25+ company filters. You can also describe your ideal customer in plain English and let AI Lead Search find matching leads for you.

    Lead Finder credits: one credit per verified email

    In fact, the credit system is the fairest part of Saleshandy’s database. One credit reveals a verified email, six credits reveal a phone number, and seven credits reveal both together. If the email cannot be verified, you pay nothing. The waterfall queries eight data providers one after another, Prospeo, RocketReach, Findymail, Enrich.so and Scalelist among them. Then checks the result with ZeroBounce or BounceBan for catch-all domains. Starter includes 1,500 credits a month, Pro includes 4,000. Scale includes 8,000, and on annual billing your full year of credits is deposited upfront. Lead Finder also shows only contacts you have not pulled before, so you never pay twice for the same lead.

    By contrast, Reply.io’s database is strong but smaller in the credits it includes. Reply Data is a built-in B2B database with live data and enrichment, and Reply.io’s own pages describe a live database of over 1 billion global contacts, including 220+ million in the United States, with buyer intent signals, technology filters and advanced filters. Each plan includes only 50 live data credits a month, with paid credit packs available when you need more, starting at $39 a month for AI and live data credits. That is a real gap in this Saleshandy vs Reply comparison, because 50 credits a month covers a small list, while Saleshandy Starter alone includes 1,500.

    Finding emails while you browse LinkedIn

    Similarly, both tools help you find emails while you browse LinkedIn. Reply.io offers Findy, a LinkedIn email finder, plus a Chrome extension and a Gmail extension. Reps can pull verified emails while they browse LinkedIn or Sales Navigator. Saleshandy has no equivalent LinkedIn finder, although its Lead Finder covers the same job inside the platform, with CSV import and export, saved filter sets, and one-click sending of found leads straight into a sequence. In short, Saleshandy wins on database size and included credits, while Reply.io wins on finding emails in the browser.

    Finally, treat the accuracy claims on both sides as vendor claims, not independent tests. Saleshandy reports that 92% of emails were verified on the first try in its own customer tests, and a side-by-side test against Apollo and ZoomInfo that showed 23% higher email accuracy. Reply.io does not publish a comparable accuracy figure on its pricing page. The $0-for-unverified rule on the Saleshandy side is a real protection for your budget, whatever the accuracy claims say, because you only pay when a verified result comes back.

    Saleshandy vs Reply multichannel sequences: LinkedIn, calls, SMS and WhatsApp

    First of all, multichannel is where Reply.io earns its higher price. It is the clearest win in this Saleshandy vs Reply comparison. Reply.io runs email, LinkedIn, calls, SMS and WhatsApp in a single sequence, with conditional steps, workflow automations with triggers. Manual tasks for anything that needs a human touch. LinkedIn actions include profile visits, connection requests, messages, InMails, attachments, voice messages, likes, follows and skill endorsements. Calls run through a built-in dialler with call resolution, transcripts and AI-generated personalised voice messages. SMS can be sent at scale from the same sequence.

    In practice, a Reply.io sequence can run a whole play without leaving the platform. Start with a personalised first email, add a LinkedIn connection request two days later, follow up with a call if the prospect does not reply, and try SMS or WhatsApp if they still do not answer. The sequence plays the whole hand for you, while you stay in charge of the timing and order of each step. A/B testing lets you compare subject lines and email copy, and template and sequence statistics show which version earned more replies. That mix of flexibility and measurement is precisely what a team needs when it wants to get better at outbound instead of simply sending more of it.

    Where Saleshandy holds back on LinkedIn

    By contrast, Saleshandy runs email, calls, LinkedIn and WhatsApp in one sequence too. Its LinkedIn steps are task-based, so LinkedIn actions are tasks for your team rather than fully automated sends. That is an honest limit, and it matters. If your reps work LinkedIn every day, task-based steps still work, because the sequence tells each rep what to do and when, yet they still have to do it by hand. Reply.io automates the LinkedIn steps, which saves real time at volume. Similarly, Saleshandy’s calling runs through a built-in Dialer that costs extra, while Reply.io includes calls and SMS in Multichannel and sells them as a $29 add-on on Email Volume.

    Moreover, WhatsApp is the one channel where the two tools are closer than they look. Saleshandy includes WhatsApp steps in its sequences, and Reply.io includes WhatsApp tasks too, so both tools cover the channel. Reply.io also adds Agentic Chat, a sales-trained AI chat that can talk to website visitors and turn them into booked meetings, which Saleshandy does not offer. In sum, Saleshandy covers multichannel well enough for most small teams, while Reply.io covers it deeply enough for teams that live on LinkedIn and the phone.

    Reply handling: out-of-office detection

    Video: Introducing Out-of-office reply detection | Saleshandy by Saleshandy on YouTube. This video is the creator’s property, embedded via YouTube for education. OutreachCompare is not affiliated with Saleshandy and does not claim ownership of this video.

    Above all, the out-of-office video above shows a smaller Saleshandy strength that is easy to miss. Saleshandy automatically detects out-of-office replies, pauses those prospects, and resumes them when they return. You never waste sends on someone who is away. Reply.io sorts replies with AI reply categorisation instead, grouping responses into interested, not interested or out of office, which saves time when a campaign brings in hundreds of replies. Both approaches keep your sequences polite and your follow-ups sensible, and both are worth having.

    To sum up this section, Reply.io wins multichannel clearly. It automates LinkedIn, includes calls and SMS, adds WhatsApp tasks and Agentic Chat, and keeps every channel in one sequence with conditional steps and triggers. Saleshandy is a genuine multichannel tool too, and its conditional subsequences, timezone sending, sender rotation and spintax are all solid, yet the task-based LinkedIn steps and the paid Dialer hold it back. If LinkedIn automation is your priority, this Saleshandy vs Reply comparison points to Reply.io.

    Saleshandy vs Reply AI features: Jason the AI SDR against the AI Sequence Copilot

    Next, AI is the second-biggest difference between the two tools, and it is the one that excites buyers most. Jason is Reply.io’s AI SDR, and it is the feature the company talks about most. Jason finds leads, drafts personalised sequences, replies to prospects, answers objections and books meetings, working in autopilot or copilot mode so your team keeps the level of control it wants. It also drafts AI icebreakers and personalised first-step emails, builds an AI-generated ideal customer profile. Sorts replies so your reps can spend their time on the conversations that are ready to move.

    For example, Jason can take on the whole first half of your outbound. It finds leads in the live database, researches them, writes the sequence, sends the first touch, answers common objections, and books the meeting, while your human reps handle the conversations that actually need a person. Reply.io also offers AI voice messages on LinkedIn, an AI email assistant that helps reps write better messages faster, and an AI sequence builder that suggests a structure based on a goal such as booking demos with early-stage SaaS founders. Used well, Jason saves hours every week. Used blindly, it can send messages that feel generic, which is the opposite of what good outbound should do, so review its drafts and keep the tone close to how your team actually talks.

    The AI Copilot: a helper, not a replacement

    By contrast, Saleshandy’s AI is a helper for your reps, not a replacement for them. The AI Sequence Copilot generates a full outreach sequence in seconds from your goals, offer and audience. AI Variants write multiple versions of each email, so you can A/B test what converts without writing every version yourself. AI enrichment refreshes prospect and company details for personalisation at scale, while AI variables drop that data into each email automatically. Saleshandy also connects to Claude, ChatGPT and Gemini through the Model Context Protocol, with CLI access for custom workflows, which is a modern touch that most rivals do not offer yet.

    Similarly, the AI credit limits show how each tool thinks about AI. Saleshandy includes AI credits on every plan, with 100 on Starter, 500 on Pro and 1,000 on Scale, and they power the AI Sequence Copilot and AI column enrichment. Reply.io includes AI features across its plans, with AI and live data credit packs starting at $39 a month when you need more. In short, Saleshandy gives you a useful AI assistant inside a flat-priced plan, while Reply.io sells you an AI colleague for $500 a month. The right choice depends on whether your team has more prospects than reps, because that is when Jason pays for itself.

    Jason in action

    Video: Jason AI SDR – Get Effective Outreach Ideas Built Into Sequences by Reply on YouTube. This video is the creator’s property, embedded via YouTube for education. OutreachCompare is not affiliated with Reply and does not claim ownership of this video.

    Finally, one honest warning belongs in this Saleshandy vs Reply AI section. AI writing still needs a human eye on both tools. The best sequences still start with a real reason to write to a real person, and the best results come when a rep reviews the AI’s drafts, checks the personalisation. Edits every email before it sends. Use the AI to draft, then edit every email yourself. That habit matters more than which AI you buy. It is the difference between outreach that earns replies and outreach that reads like a robot wrote it.

    Saleshandy vs Reply inbox, CRM and integrations

    First of all, both tools collect every reply in one shared inbox. Nobody on your team has to hunt through five mailboxes to find who answered. Saleshandy’s unified inbox brings every reply from every mailbox into one place, with a built-in CRM to track deals from first email to booked meeting, and a mobile app that extends the same workflow to your phone. Reply.io’s centralised inbox does the same job, with AI reply categorisation sorting responses into groups such as interested, not interested or out of office, plus reply, click and open tracking, email and sequence reporting, and team performance reports.

    In practice, the CRM difference is small but real. Saleshandy includes a built-in CRM that stores as many prospects as you like, organises them into lists, and tracks deals through your pipeline, which closes the loop between outreach and sales. Reply.io is designed to sit alongside your CRM rather than replace it, syncing contacts, accounts, calls, tasks and statuses in both directions. If you already run HubSpot or Salesforce, Reply.io’s two-way sync keeps both systems honest. If you do not have a CRM yet, Saleshandy’s built-in one means you do not need to buy one.

    Integrations and security

    Moreover, the integration lists are strong on both sides. Saleshandy syncs natively with Salesforce, HubSpot, Pipedrive and Zoho, plus Zapier for everything else, with a REST API, webhooks for real-time event notifications, and the MCP connector for AI assistants. Reply.io integrates natively with HubSpot, Salesforce, Pipedrive, Copper and Close, plus Zapier, Make and more than 100 other integrations, an API, webhooks, high-volume API access and an n8n node, plus a Gmail and Chrome extension and a meeting scheduler that books calls straight into the calendar. In short, Reply.io covers more tools, while Saleshandy covers the big four CRMs and adds the MCP connector that Reply.io does not list in the same way.

    Similarly, security and compliance are solid on both platforms, which matters when you trust a tool with your prospect data and your sending domain. Saleshandy is SOC 2 Type II certified, ISO 27001 certified and GDPR compliant, with two-factor authentication on every plan. Reply.io publishes a SOC 2 compliance report and offers live chat support, onboarding with a customer success manager on annual plans, and a video content library. Either tool is a safe choice for a European team handling prospect data at scale. Our cold email legal checklist covers the consent and opt-out rules that vary by country.

    Saleshandy vs Reply agency features: clients, workspaces and white label

    Next, agencies deserve their own section, because the two tools take opposite approaches to client work. Saleshandy includes unlimited clients on every plan, with separate teams and workspaces for each client, and no per-client fee. That is rare at this price, and it is one of the strongest reasons an agency would pick Saleshandy. The Scale plan adds 1:1 onboarding, priority support and a dedicated success manager, which is exactly what an agency needs when it runs outreach for many clients at once.

    By contrast, Reply.io sells agency features as a separate Agency plan, starting at $166 a month on the figure visible on 15 November 2026, with client workspaces, an agency dashboard and unlimited clients. Reply.io also builds custom solutions for teams above 20 people, with stronger API access, whitelabel options and tailored pricing. Larger buyers should speak to sales instead of guessing at a number. In practice, Reply.io’s agency offer is deeper, with a dedicated dashboard and whitelabel options, while Saleshandy’s offer is cheaper, because unlimited clients are included from Starter at $34 a month.

    What a small agency pays on each tool

    For example, a small agency with five clients and two staff would pay $34 a month on Saleshandy Starter, or $76 a month on Pro for ten seats. Every client would get a separate workspace. The same agency on Reply.io would pay from $166 a month on the Agency plan, before seats and add-ons. A larger agency that needs whitelabel portals and a dedicated agency dashboard may find Reply.io worth the extra money, yet a small agency that just needs separate workspaces will find Saleshandy hard to beat. In sum, Saleshandy wins agency value, while Reply.io wins agency depth.

    Finally, both tools help agencies protect deliverability across clients, which is where agency work usually breaks. Saleshandy gives every client unlimited connected mailboxes and unlimited warmup, with sender rotation across mailboxes. Reply.io gives agencies unlimited mailboxes under fair use, inbox rotation, warmup, and the option to buy separate sending domains per client. Either way, keep each client’s sending domain separate, warm up every new domain patiently, and never mix clients in one mailbox, because one client’s bad list can hurt every other client’s deliverability.

    Saleshandy vs Reply feature matrix

    To start with, here is the sending and deliverability matrix. You can see the two tools side by side on the features that decide whether your emails reach the inbox. A tick means the feature is stated on the provider’s official site. A dash means it is not confirmed there.

    Sending and deliverability matrix

    FeatureSaleshandyReply.io
    Unlimited connected mailboxes✓ No per-inbox fees✓ Fair use, Email Volume
    Warmup included✓ Unlimited, via TrulyInbox✓ Via Mailtoaster.ai
    Inbox rotation✓✓
    Inbox placement testing✓ Inbox Radar✓ Email health check
    Custom tracking domains✓✓
    SPF, DKIM and DMARC checks✓✓
    Google Postmaster integration—✓
    Sequence Score pre-send check✓—
    Ready-made sending domains for sale✓ $14/yr, mailboxes from $2.99/mo✓ From $6/yr + $5/mailbox/mo
    Pre-warmed domains for sale—✓ From $25/yr + $15/mailbox/mo
    Free trial✓ 7 days, no card✓ 14 days
    Free plan——

    Last checked: 16 November 2026 on saleshandy.com/pricing and reply.io/pricing. A tick means the feature is stated on the provider’s official site. A dash means it is not confirmed there. Features and pricing can change, so please check the provider’s site before you buy. We do not guess at features, prices or trials.

    Saleshandy vs Reply feature matrix: data, AI and agency

    Next, here is the second matrix, covering data, AI, multichannel steps and agency features. Read the two matrices together, because the first one covers sending and the second one covers the work around sending.

    FeatureSaleshandyReply.io
    Built-in B2B database✓ 852M+ contacts, 42M+ companies✓ Reply Data, 1B+ contacts claimed
    Included data credits✓ 1,500–8,000/mo by plan✓ 50/mo, packs from $39/mo
    Email verification included✓ One-time credits 500–5,000✓ Validation from $20/mo
    Multichannel sequences✓ Email, calls, LinkedIn tasks, WhatsApp✓ Email, LinkedIn, calls, SMS, WhatsApp
    Automated LinkedIn outreach— Task-based steps✓ Included on Multichannel
    Built-in dialler✓ Paid extra✓ Included on Multichannel
    AI SDR agent—✓ Jason, from $500/mo
    AI sequence writing✓ AI Sequence Copilot✓ AI sequence builder
    AI reply categorisation—✓
    Built-in CRM✓— Two-way CRM sync instead
    Native CRM integrations✓ Salesforce, HubSpot, Pipedrive, Zoho✓ HubSpot, Salesforce, Pipedrive, Copper, Close
    Unlimited clients for agencies✓ Every plan✓ Agency plan
    White-label client portals—✓ Custom solutions, 20+ teams
    Starting price$34/mo annualFrom $59/mo

    Last checked: 16 November 2026 on saleshandy.com/pricing and reply.io/pricing. Reply Data size of 1B+ contacts is Reply.io’s own claim on its blog and Jason pages. A tick means the feature is stated on the provider’s official site. A dash means it is not confirmed there. Features and pricing can change, so please check the provider’s site before you buy. We do not guess at features, prices or trials.

    Saleshandy vs Reply pros and cons

    Of course, no tool is perfect, and this Saleshandy vs Reply comparison would not be honest without the downsides. Here is the balanced picture for each tool, based on what each provider states on its own site and what its pricing and plans actually include.

    Saleshandy vs Reply: what we like about Saleshandy

    True all-in-one platform. Lead Finder, sequences, warmup, inbox and CRM live in one place, so you stop paying for four tools and stop copying data between them. Big verified database included. The 852M+ contacts across 42M+ companies, with $0 charged for unverified emails, is the best database deal in this Saleshandy vs Reply comparison. No per-seat billing. Seats come with the plan, with one on Starter, ten on Pro and unlimited on Scale. Your bill does not grow every time you hire. Unlimited mailboxes and warmup on every plan. No per-inbox fees protect deliverability as you scale. Multichannel sequences. Email, calls, LinkedIn and WhatsApp run in one sequence, with conditional follow-ups based on replies. Unlimited clients for agencies. Every plan includes unlimited clients, with separate teams and workspaces, which is rare at this price.

    Strong AI tools. The AI Sequence Copilot, AI Variants, enrichment tools and MCP connector all earn their place, rather than sitting there as decoration. Good ratings and compliance. The tool holds 4.6 out of 5 on G2 and 4.7 on Trustpilot, with SOC 2 Type II, ISO 27001 and GDPR compliance.

    Saleshandy vs Reply: where Saleshandy falls short

    Short 7-day trial. Seven days is enough to test the workflow, but not enough to test warmup properly, because warmup needs weeks, not days. Email Infrastructure and Dialer cost extra. Ready-made domains, mailboxes and calling are paid add-ons, so budget for them if you plan to scale fast. No free plan. When the trial ends, you move to a paid plan, and there is no free tier that never expires. Lead Finder credits cap your prospecting. Starter gives you 1,500 credits a month. Teams that prospect heavily will outgrow Starter and need Pro or Scale. LinkedIn steps are task-based. LinkedIn actions are tasks for your team, not fully automated sends, and pure LinkedIn automation tools go further. Advanced features need higher plans. Deeper Lead Finder filters, live chat, priority support and a dedicated success manager are all reserved for Pro or Scale.

    Saleshandy vs Reply: what we like about Reply.io

    True multichannel in one place. Email, LinkedIn, calls, SMS and WhatsApp all live inside one sequence, so reps stop switching between tools and every reply arrives in the same inbox. Jason, the AI SDR, is genuinely useful. It prospects, writes, answers and books meetings, which can save a busy team hours every week when a human reviews its work. Built-in B2B data. With Reply Data, live enrichment and the Findy LinkedIn extension, list building happens inside Reply.io rather than inside a separate subscription. Strong deliverability tooling. Warmup, inbox rotation, unlimited mailboxes under fair use, custom tracking domains and domain purchase cover the infrastructure properly. Unlimited users and emails on Email Volume. A growing team pays nothing per seat on the entry plan, and monthly sends carry no cap.

    Good integrations. Native sync covers HubSpot, Salesforce, Pipedrive, Copper and Close, and Zapier, Make, an API, webhooks and an n8n node cover the rest. Longer 14-day free trial. Fourteen days is enough to run a real campaign and judge the platform on evidence rather than on a demo.

    Saleshandy vs Reply: where Reply.io falls short

    Per-user pricing adds up fast. Multichannel at $99 per user a month means five seats cost about $495 a month before add-ons, which is far more than Saleshandy for a similar team. Jason is expensive. The AI SDR starts at $500 a month on annual billing. The headline feature is a serious purchase, not a casual upgrade. Add-ons stack up. On Email Volume, LinkedIn at $69 and calls and SMS at $29 per account, together with data credits, validation and extra mailboxes, can push the real monthly bill well past the headline price.

    Only 50 data credits a month are included. Heavy prospecting teams will need paid credit packs from $39 a month, while Saleshandy includes thousands of credits. Big platform, real learning curve. New users should allow time to learn the sequence builder, the database and the inbox before the platform starts to feel natural. No WhatsApp or AI SDR on the cheaper plans. The complete multichannel and AI experience sits on the higher plans. The entry price does not buy the full product. Fair usage limits on unlimited mailboxes. On Email Volume, the unlimited mailboxes are linked to your active contacts and sending activity. Very high-volume senders should read the fair usage policy first.

    Saleshandy vs Reply: who should pick which

    First of all, the decision is simpler than the feature lists suggest, because it turns on three questions. How many people send, which channels do they use every day, and do you want an AI SDR or an AI assistant? Answer those three questions honestly, and the right tool picks itself.

    Saleshandy vs Reply decision guide: a simple path against a busy multichannel path
    Saleshandy vs Reply comes down to three questions. How many people send, which channels do they use every day, and do you want an AI SDR or an AI assistant? Answer those three honestly, and the right tool picks itself.

    Pick Saleshandy when you want flat-priced all-in-one value

    Pick Saleshandy when you want prospecting, outreach and deliverability in one tool, with no per-seat billing. Choose Saleshandy when your team is growing, because Pro covers ten seats for $76 a month on annual billing. Scale covers unlimited seats for $149 a month. Agencies should pick Saleshandy because every plan includes unlimited clients with separate workspaces. High-volume prospecting also favours Saleshandy, because 1,500 to 8,000 Lead Finder credits a month, with $0 for unverified emails, beats 50 data credits a month by a wide margin. Email-first teams should pick Saleshandy when they mainly send email, with LinkedIn and WhatsApp as supporting channels rather than the main event. A tight budget also points to Saleshandy, because $34 a month is the lowest starting price in this Saleshandy vs Reply comparison. The 7-day trial lets you test the whole platform with no card.

    Pick Reply.io when you want multichannel depth and an AI SDR

    Pick Reply.io when your reps live on LinkedIn and the phone every day, because automated LinkedIn, calls and SMS in one sequence are worth paying for. Choose Reply.io when you want Jason, the AI SDR, to prospect, write, answer replies and book meetings while your reps close. Small teams with huge lists should pick Reply.io, because Jason covers more ground than a small team can. Reply.io also makes sense when you already pay for a data provider, a LinkedIn automation tool and a dialler, because Reply.io may replace three subscriptions with one, which can make the headline price look much fairer once you add up what you stop paying for.

    Agencies that need a dedicated dashboard should pick Reply.io when they want whitelabel options and are ready to pay for them. Pick Reply.io when you want the longer trial, because fourteen days gives you a fairer test than seven.

    Saleshandy vs Reply: the five-minute decision test

    In short, try this test before you buy either tool. Write down how many people will send, which channels each person uses every day, and how many new prospects you need each month. If the answer is one to ten people, mostly email, with a big list to find, Saleshandy is the pick. A small team that works LinkedIn, calls and SMS all day, with more prospects than reps, should pick Reply.io. If you are still torn, start both trials on the same day, build the same small sequence in each tool, and send it to the same kind of list. The tool that feels easier after a week of real use is the right one for your team, whatever this Saleshandy vs Reply comparison says.

    Switching later is always possible

    Moreover, remember that switching later is possible, and it is not a disaster. Your lists export as CSV, your sequences can be rebuilt, and your sending domains can move. The cost of picking the wrong tool is a few weeks of learning, not a lost year. So pick the tool that fits how you sell today, test it with a real campaign, and change later if your team outgrows it. That is a healthier way to buy software than chasing the longest feature list.

    Saleshandy vs Reply verdict

    Our verdict — Best for all-in-one value: Saleshandy. Best for multichannel and AI SDR: Reply.io.

    Saleshandy is the strongest pick when a small team, an agency or a founder wants prospecting, sending, warmup and reply management in one platform, without per-seat billing. The 852M+ verified Lead Finder database, multichannel sequences, unlimited mailboxes and unlimited clients are a combination its rivals do not match at $34 a month. Reply.io is the strongest pick when a sales team works email, LinkedIn, calls, SMS and WhatsApp every day, and wants an AI SDR to carry the first half of outbound for it. Jason, automated LinkedIn and the deeper calling features earn the higher price for teams that use them daily. Start on the free trial of the tool that fits your team, build a small verified list, and send a real test sequence before you commit. We have not scored either tool yet, because scores come only after hands-on testing. Best-for labels reflect each tool’s stated focus.

    Visit Saleshandy →Check Reply.io Pricing →

    The longer version of the verdict

    Overall, that is the short version of this Saleshandy vs Reply comparison. The longer version is simple too. Saleshandy wins on breadth and value. It does not win every single category. Reply.io wins on multichannel depth and AI. Saleshandy wins on database size and included credits. Reply.io wins on LinkedIn automation and calling. Yet no rival covers as much of the outbound job in one flat-priced subscription as Saleshandy, and no rival in this Saleshandy vs Reply comparison offers an AI SDR as capable as Jason. In the end, for most small teams, Saleshandy’s breadth at $34 a month is worth more than a specialist edge in one area, while for teams that live on LinkedIn and the phone, Reply.io’s depth is worth the extra money.

    Finally, whichever tool you pick, the setup advice is the same. Start with a separate sending domain, warm up for two to four weeks, verify every address before you send, and keep your first sequences short, specific and honest. Read our guide to setting up a sending domain before your first campaign, and read our cold email legal checklist before you launch, because the rules vary by country. The tool you pick matters less than the list you build and the offer you write, and both tools in this Saleshandy vs Reply comparison will serve you well if you set them up properly.

    Saleshandy vs Reply: frequently asked questions

    Which is cheaper, Saleshandy or Reply.io?

    Saleshandy is cheaper for most buyers. Saleshandy Starter costs $34 a month on annual billing, while Reply.io Email Volume starts at $59 a month. Multichannel starts at $99 per user a month. A five-person multichannel team pays $76 a month on Saleshandy Pro, against $445 a month on Reply.io Multichannel at the annual rate of $89 per user seen on 15 November 2026. The one exception is an email-only team of five, where Reply.io Email Volume at from $59 a month is cheaper than Saleshandy Pro at $76 a month, because Reply.io charges Email Volume by active contacts rather than by seat.

    Is Saleshandy better than Reply.io for agencies?

    It depends on the size of the agency. Saleshandy is better for small agencies, because every plan includes unlimited clients with separate teams and workspaces, from $34 a month. Scale adds a dedicated success manager at $149 a month. Reply.io is better for larger agencies that need a dedicated agency dashboard and whitelabel options, which come with its Agency plan from $166 a month on the figure visible on 15 November 2026, and custom solutions for teams of more than 20 people. Our guide to the best cold email tools for agencies compares both tools with more agency specialists.

    Does Reply.io have an AI SDR, and does Saleshandy?

    Reply.io has Jason, an AI SDR that prospects, writes personalised sequences, answers replies, handles objections and books meetings, in autopilot or copilot mode, from $500 a month on annual billing. Saleshandy has no AI SDR equivalent. Instead, it offers the AI Sequence Copilot, which drafts sequences for your reps, AI Variants for testing, and AI enrichment, with AI credits included on every plan. If you want an AI colleague that runs outbound for you, Reply.io is the pick in this Saleshandy vs Reply comparison. If you want an AI assistant that helps your reps, Saleshandy covers you.

    Which tool is better for LinkedIn outreach?

    Reply.io is better for LinkedIn outreach, because it automates LinkedIn fully on its Multichannel plan, with connection requests, messages, InMails, voice messages, likes, follows and endorsements built into the sequence. Saleshandy includes LinkedIn steps in its sequences, but they are task-based, so your team does them by hand. If LinkedIn is your main channel, Reply.io wins this part of the Saleshandy vs Reply comparison clearly. If LinkedIn is a supporting channel, Saleshandy’s task-based steps are enough.

    Which tool has the bigger lead database?

    Saleshandy’s database is the bigger one you can measure clearly. Lead Finder holds 852M+ verified contacts across 42M+ companies, with 1,500 to 8,000 credits a month included by plan, and $0 charged for unverified emails. Reply.io’s Reply Data is a built-in B2B database that Reply.io describes as a live database of over 1 billion global contacts, with only 50 live data credits a month included, and paid credit packs from $39 a month. On included credits, Saleshandy wins by a wide margin in this Saleshandy vs Reply comparison.

    Can I try Saleshandy or Reply.io for free?

    Yes, both tools offer a free trial and neither offers a free plan. Saleshandy offers a 7-day free trial with full access and no credit card required, including 50 free Lead Finder credits. Reply.io offers a 14-day free trial covering the platform’s core features. Use the trial to run a real campaign to a real list, because only a real campaign shows you deliverability, reply handling and reporting as they actually behave. When the trial ends, you move to a paid plan on both tools.

    Keep reading — next in this series

    You have the full Saleshandy vs Reply picture now. Go deeper with the reviews and guides that support it:

    Best for value: Saleshandy — from $34/mo · Best for multichannel + AI SDR: Reply.io — from $59/mo Visit Saleshandy
  • ZeroBounce vs NeverBounce 2026

    ZeroBounce vs NeverBounce 2026

    A full deliverability suite against a focused verification specialist — and a clear winner for each job

    ZeroBounce vs NeverBounce is the most useful head-to-head in email verification, because the two tools answer the same question in opposite ways. ZeroBounce bundles verification with scoring, an email finder, warmup, inbox placement tests, blacklist monitoring and DMARC checks, from $39 for a one-off pack or $99 a month for the ONE subscription. NeverBounce does one job, verification, and does it fast and cheaply, from $8 per 1,000 credits or $49 a month on its Growth plan. This ZeroBounce vs NeverBounce comparison checks pricing, accuracy, verification types, speed, bulk handling, real-time checks, scoring, integrations and data handling on both official sites, so you can pick with confidence.

    Visit ZeroBounce →See NeverBounce Plans →

    Prices checked 16 November 2026 on ZeroBounce’s and NeverBounce’s official pricing pages. Features and pricing can change, so please check the provider’s site before you buy.

    Quick Answer

    ZeroBounce wins on breadth. Its ONE subscription at $99 a month bundles 10,000 verification credits with scoring, an email finder, warmup, inbox placement tests, blacklist monitoring and DMARC checks, plus a 100-credit free plan every month. NeverBounce wins on price and speed. Pay as you go starts at $8 per 1,000 credits, Growth costs $49 a month, and the official site says 10,000 emails can be cleaned in as little as 3 minutes. ZeroBounce leads on detail, returning more than 30 statuses and sub-statuses per address, while NeverBounce leads on simplicity, with five clear statuses and a hybrid check that resolves more catch-all domains outright.

    Accuracy claims are close on paper, with ZeroBounce guaranteeing 99.6% and NeverBounce claiming 99.9%, yet independent tests disagree by thirty points depending on how unknown results are counted. Credit expiry is the quiet difference: ZeroBounce credits never expire while a ONE subscription is active, while NeverBounce pay-as-you-go credits expire 12 months after purchase. Bouncer is the cost benchmark in this ZeroBounce vs NeverBounce comparison, at $8 for 1,000 checks and $400 for 100,000, with credits that never expire.

    Why this ZeroBounce vs NeverBounce comparison settles the choice

    Every cold email campaign stands or falls on the quality of its list, and the two best-known verifiers both promise the same thing: fewer bounces, a safer sender reputation, and more of your emails reaching real inboxes. ZeroBounce and NeverBounce have cleaned lists for years, they both publish accuracy figures above 99%, and they both charge by the credit. That shared promise is exactly why the decision feels stuck.

    Look closer, and the two tools stop looking alike. ZeroBounce has grown into a deliverability suite, with scoring, finding, warmup and monitoring beside verification. NeverBounce has stayed a specialist, with one job, a fast engine and a low price. One of them charges $39 before you can verify a single address, and the other starts at $8. One of them answers a catch-all with a score, and the other answers it with a second, deeper check. Each difference points at a different kind of buyer.

    This ZeroBounce vs NeverBounce comparison takes those differences in turn. Pricing leads, because $39 against $8 is the first number every buyer sees. Cost per volume comes next, because the cheapest tool at 1,000 checks is not the cheapest at 100,000. Accuracy follows, with vendor claims kept firmly apart from independent benchmarks. Then come the checks themselves, bulk and real-time handling, scoring and monitoring, integrations and data handling, a feature matrix and the honest pros and cons. By the end, the right verifier, and the right way to buy it, should be clear.

    ZeroBounce and NeverBounce in plain English: a deliverability suite against a verification specialist

    ZeroBounce is an email verification and deliverability platform used by more than 650,000 clients, according to its own site. You upload a list or connect the API, and it returns a status for every address, from valid and invalid to catch-all, disposable, abuse and spam trap, with more than 30 statuses and sub-statuses in total. Beside verification sit AI scoring, an email finder, domain search, warmup, inbox placement tests, blacklist monitoring and DMARC monitoring, all bundled into the ONE subscription. It suits a team that wants the whole deliverability toolkit under one login. Verification starts with a free plan of 100 credits a month, pay as you go from $39 for 2,000 credits, or ONE from $99 a month.

    NeverBounce is a verification-only service, now owned by ZoomInfo, which acquired it in 2019. You bring a list, it tells you which addresses are safe to send to, and that is the whole product. Verification runs through a hybrid check that combines accept-all detection with real-time mailbox checks, returning five statuses: valid, invalid, disposable, catch-all and unknown, with role addresses flagged separately. Nothing here finds addresses, enriches contacts or sends campaigns. It fits a team that already owns its list and wants it cleaned quickly and cheaply. Verification starts at $8 per 1,000 pay-as-you-go credits, or $49 a month on Growth.

    Two tools, one job, different shapes in this ZeroBounce vs NeverBounce comparison

    Both tools cover the same core job at heart. You begin with a list of addresses, some of which are dead, risky or fake. You then run the list through the verifier, which checks syntax, domain, mail server and mailbox in turn. Next you download the results, keep the valid addresses, and drop or quarantine the rest. To finish, you send to the clean list and watch the bounce rate fall. Because the loop matches on both tools, the decision rests on what happens around it: price, speed, detail and the extras.

    What ZeroBounce adds on top of verification in this ZeroBounce vs NeverBounce comparison

    Above all, ZeroBounce turns from a verifier into a deliverability platform through the ONE bundle. AI scoring grades every address from 0 to 10 on its likelihood to engage, activity data shows whether a mailbox has been active in the past 30 to 365 days, and the email finder locates addresses from a name and domain. Warmup keeps new senders healthy, inbox placement tests show where mail actually lands, blacklist monitors scan every 8 hours, and a DMARC monitor watches authentication. A team that buys those tools separately elsewhere can replace several subscriptions with one.

    Moreover, ZeroBounce adds verification depth that NeverBounce does not match on paper. Its results carry sub-statuses that name the exact reason an address failed, such as mailbox not found, mailbox quota exceeded, global suppression or mail server did not respond. That granularity lets a team build suppression rules per failure type instead of one blunt valid-or-invalid split. Our best email verification tools compared guide sets both tools against four more rivals.

    What NeverBounce adds on top of verification in this ZeroBounce vs NeverBounce comparison

    NeverBounce, meanwhile, turns from a verifier into an always-on cleaning service through Growth and Sync. The Growth plan re-verifies CRM and email platform lists automatically on a daily, weekly or monthly schedule, charging only for new, unique emails, so duplicates are free. AI scoring ranks leads by likelihood to convert, and 200 AI-picked leads a month arrive matched to your best customers. A team that verifies the same lists every month can set it once and forget it.

    Similarly, NeverBounce adds speed and human review where it counts. The official features page says 10,000 emails can be cleaned in as little as 3 minutes, and independent reviews report a real-time API response around 15 milliseconds, fast enough for a signup form to check an address while the visitor is still typing. When a list returns many unknowns, the NeverBounce team reviews it personally, which is a human touch neither rival advertises. The free Instant Bounce Analysis tells you whether a list needs cleaning at all before you pay for a full run.

    The one-sentence difference in this ZeroBounce vs NeverBounce comparison

    ZeroBounce is the deliverability suite: verification plus scoring, finding, warmup and monitoring, with the deepest result detail in the category, priced from $39 a pack or $99 a month. NeverBounce is the verification specialist: one job, five clear statuses, the fastest bulk cleaning in this ZeroBounce vs NeverBounce comparison, priced from $8 per 1,000 credits or $49 a month. A team that wants everything in one place will notice the difference in week one. A team that wants a clean list for the least money will notice it on the first invoice.

    Neither tool finds email addresses for you, except that ZeroBounce bundles an email finder inside ONE while NeverBounce finds none at all, so a team that still needs to build its list should read our guide to building a cold email list first. For a team that already owns its list, though, this pair stays the most useful match-up in verification.

    Pricing head-to-head in this ZeroBounce vs NeverBounce comparison

    Pricing is where this ZeroBounce vs NeverBounce comparison first gets interesting, because the two price lists work in different shapes. ZeroBounce sells a minimum pack of 2,000 credits for $39, then steps the per-credit price down as the pack grows, and sells a subscription that bundles the deliverability suite on top. NeverBounce sells credits from 1,000 at a time for $8, steps the price down with volume too, and sells a subscription that automates the cleaning instead of adding tools. A team that cleans one list a quarter and a team that cleans every week will read the same two price lists and reach opposite conclusions.

    All prices below come from the official pricing pages, read today, 16 November 2026. Where the live page shows only a headline rate and the volume ladder sits behind a slider, this ZeroBounce vs NeverBounce comparison says so plainly and labels the ladder figures as corroborated by independent checks of the same official page in October and November 2026. Where a price is not shown on the official page, the article says so instead of guessing.

    ZeroBounce vs NeverBounce comparison: two bar charts side by side, one bar growing taller with volume beside coin stacks, the other a flat monthly subscription card with a calendar icon, plus a small clock showing credits expiring
    Pricing in this ZeroBounce vs NeverBounce comparison: ZeroBounce sells minimum packs of 2,000 credits and a $99-a-month suite, while NeverBounce sells credits from 1,000 at a time and a $49-a-month subscription.

    ZeroBounce plans in this ZeroBounce vs NeverBounce comparison: Freemium, pay as you go and ONE

    PlanPrice*What you getBest forVisit
    ZeroBounce — FreemiumBest for testing$0 a month
    100 credits a month, refilled
    100 validation credits
    1 inbox test, 1 server test, 1 blacklist monitor, 10 Email Finder
    Trying accuracy on a sampleVisit Site →
    ZeroBounce — Pay as you goBest for one-off cleansFrom $39
    2,000 credits, minimum purchase
    1 credit per address
    Unknown results free, duplicates free
    Cleaning a list now and thenSee Pay As You Go →
    ZeroBounce — ONEBest for regular senders$99 a month
    $79 billed yearly, from 10,000 credits
    10,000 credits a month
    Scoring, Finder, warmup, placement tests, DMARC
    Monthly verification plus monitoringExplore ONE →

    * Last checked: 16 November 2026 on ZeroBounce’s pricing page. The page shows the $39 minimum pack, the $99 ONE entry point and the 100-credit free plan; the volume ladder and higher ONE tiers below are corroborated by independent checks of the same official page in October 2026, flagged as such. Features and pricing can change, so please check the provider’s site before you buy. We do not guess at features, prices or trials.

    Reading ZeroBounce’s pay-as-you-go ladder in this ZeroBounce vs NeverBounce comparison

    ZeroBounce’s pay-as-you-go ladder steps the per-credit price down as the pack grows, and the steps are worth knowing before you buy the minimum pack. The figures below were corroborated by independent checks of the same official page in October 2026, because the live page today shows the $39 minimum and asks you to enter a volume rather than printing the full ladder. The 10,000-credit pack costs $129, which works out at about $0.0129 per credit. Fifty thousand credits cost $499, and 100,000 cost $649, which works out at about $0.0065 per credit. One million credits cost $3,199, which works out at about $0.0032 per credit.

    ONE subscribers get 15% off additional pay-as-you-go credits, and unused ONE credits roll over while the subscription stays active. The ONE tiers above the entry point were corroborated the same way: 50,000 credits a month costs $379, and 100,000 credits a month costs $449. A 1,000,000-credit ONE tier at $2,499 a month was corroborated by a single independent November 2026 check of the same page, so treat that figure as indicative and confirm it at checkout. Annual billing saves 20% on ONE, taking the entry tier from $99 to $79 a month.

    Credit expiry is the detail most buyers overlook, and ZeroBounce states it plainly in its own FAQ. Credits never expire while a ONE subscription is active. Without a subscription, expiry rules may apply depending on when the account was created, and independent checks report that accounts created after 1 June 2026 see purchased credits expire two years after the most recent purchase. Either way, a team that buys a large pack and cleans slowly should check the expiry rule for its own account before paying.

    NeverBounce plans in this ZeroBounce vs NeverBounce comparison: pay as you go, Growth and Enterprise

    PlanPrice*What you getBest forVisit
    NeverBounce — Pay as you goBest for one-off cleans$8 per 1,000 credits
    Minimum purchase 1,000 credits
    1 credit per email
    Typo fixes, company name append, up to 10 lists at once
    Cleaning a list now and thenVisit Site →
    NeverBounce — GrowthBest for regular senders$49 a month
    Credit allowance not stated on the page
    Auto-sync with your CRM
    AI scoring, 200 AI-picked leads a month, duplicates free
    Teams verifying every monthSee Growth →
    NeverBounce — EnterpriseBest for large teamsCustom
    Typically 250,000+ emails a month
    Unlimited usage
    Dedicated manager, advanced security, custom rules
    Large teams with complex stacksGet a Quote →

    * Last checked: 16 November 2026 on NeverBounce’s pricing page. The page shows $8 per 1,000 credits and $49 a month for Growth, but states no credit allowance for Growth; the allowance and the volume tiers below are corroborated by independent checks of the same official page in October and November 2026, flagged as such. Features and pricing can change, so please check the provider’s site before you buy. We do not guess at features, prices or trials.

    Reading NeverBounce’s volume tiers in this ZeroBounce vs NeverBounce comparison

    NeverBounce’s volume tiers sit behind a slider on the pricing page, and several independent checks of that slider in October and November 2026 agree on the same ladder. Pay as you go costs $40 for 5,000 credits, $50 for 10,000, $125 for 25,000, $250 for 50,000, $400 for 100,000, $750 for 250,000, $1,500 for 500,000 and $2,500 for 1,000,000, with $4,000 buying 2,000,000. The per-credit price therefore falls from $0.008 at the entry tier to $0.002 at 2,000,000. The live page today shows only the $8 per 1,000 headline rate, so confirm the tier for your volume at checkout.

    Growth follows the same pattern. Independent checks report $49 a month for up to 10,000 emails, $99 for up to 50,000, $159 for up to 100,000, $249 for up to 250,000, $499 for up to 500,000 and $999 for up to 1,000,000. The page itself states no allowance at all, which is why this ZeroBounce vs NeverBounce comparison flags those figures as corroborated rather than directly observed. Growth credits replenish each billing period, only new, unique emails are charged, and duplicates are free.

    One rule makes NeverBounce’s pay-as-you-go credits different from ZeroBounce’s. NeverBounce credits expire 12 months after purchase, stated plainly on its own pricing page. A team that buys a large block at the cheaper rate only saves money if it uses the credits inside the year. Growth subscription credits work differently, covering a monthly volume instead, and do not survive cancellation.

    Trying before you buy in this ZeroBounce vs NeverBounce comparison: 100 free credits against a free first list

    Both tools let you test before you pay, and the offers suit different buyers. ZeroBounce gives every free account 100 validation credits a month, refilled monthly, with a business or premium domain at signup, plus one inbox test, one server test, one blacklist monitor and 10 Email Finder searches. A team can run a 100-address sample through the full pipeline every month without paying.

    NeverBounce takes a different approach. The pricing page says you can verify your first list without a credit card, and the features page adds free test credits and a free list analysis, though the page states no number of free credits. The free Instant Bounce Analysis reports whether a list is safe to send or needs cleaning, at any size, before you commit to a full verification. If a fixed free allowance matters most, ZeroBounce’s 100 monthly credits are the clearer offer.

    Cost at 1,000, 10,000, 100,000 and 1,000,000 verifications

    Headline prices mislead in this category, because a credit is not always a verification, and the cheapest route changes with volume. ZeroBounce never charges for unknown results or duplicates, so one credit buys one decided address. NeverBounce charges one credit per email, with duplicates free on Growth. Bouncer, the cost benchmark in this ZeroBounce vs NeverBounce comparison, charges one credit per check, never charges for duplicates or unknowns, and its credits never expire. The table below works out the arithmetic for you, using the cheapest verified route on each tool.

    The cheapest route at each volume in this ZeroBounce vs NeverBounce comparison

    VerificationsZeroBounce, cheapest routeNeverBounce, cheapest routeBouncer, benchmarkCheapest pick
    1,000$39
    Pay as you go, minimum 2,000-credit pack
    $8
    Pay as you go, 1,000 credits
    $8
    Pay as you go, 1,000 credits
    NeverBounce or Bouncer, at $8
    10,000$99 a month
    ONE, 10,000 credits; pay as you go $129
    $49 a month
    Growth, up to 10,000 a month*
    $60
    Pay as you go, 10,000 credits
    NeverBounce, at $49 a month
    100,000$449 a month
    ONE, 100,000 credits; pay as you go $649
    $159 a month
    Growth, up to 100,000 a month*
    $400
    Pay as you go, 100,000 credits
    NeverBounce, at $159 a month
    1,000,000$2,499 a month
    ONE, 1,000,000 credits†; pay as you go $3,199
    $999 a month
    Growth, up to 1,000,000 a month*
    $2,000
    Pay as you go, 1,000,000 credits
    NeverBounce, at $999 a month

    * NeverBounce Growth allowances are corroborated by independent checks of the same official page in October and November 2026; the live page today states no allowance. † The ZeroBounce ONE 1,000,000-credit tier at $2,499 a month was corroborated by a single independent November 2026 check, so confirm it at checkout. Bouncer figures are from our best email verification tools compared guide, verified 16 November 2026. Arithmetic is shown plainly so you can check it. Last checked: 16 November 2026. Features and pricing can change, so please check the provider’s site before you buy.

    What the cost table means in this ZeroBounce vs NeverBounce comparison

    NeverBounce wins this table outright, and the gap grows as you scale. One thousand checks tie Bouncer at $8, while ZeroBounce costs $39, because the minimum pack is 2,000 credits and you pay for the pack, not the checks you use. Ten thousand checks cost $49 a month on NeverBounce Growth, against ZeroBounce ONE at $99 and Bouncer at $60. The 100,000 mark costs $159 a month on NeverBounce Growth, against ZeroBounce ONE at $449 and Bouncer at $400. One million checks cost $999 a month on NeverBounce Growth, against ZeroBounce ONE at $2,499 and Bouncer at $2,000.

    Pay as you go alone tells a closer story. At 100,000 checks NeverBounce pay as you go costs $400, exactly tying Bouncer at $400, while ZeroBounce pay as you go costs $649. At 1,000,000 checks Bouncer pay as you go costs $2,000, beating NeverBounce at $2,500 and ZeroBounce at $3,199. A team that buys credits once and draws on them slowly should weigh Bouncer’s never-expiring credits against NeverBounce’s 12-month expiry before choosing the pay-as-you-go route.

    Cost per 1,000 verifications in this ZeroBounce vs NeverBounce comparison

    RouteCost per 1,000 verificationsHow it is worked out
    ZeroBounce pay as you go, 10,000$12.90$129 ÷ 10
    ZeroBounce ONE, 10,000 a month$9.90$99 ÷ 10
    ZeroBounce ONE, 100,000 a month$4.49$449 ÷ 100
    NeverBounce pay as you go, 10,000$5.00$50 ÷ 10
    NeverBounce Growth, 10,000 a month$4.90$49 ÷ 10
    NeverBounce Growth, 100,000 a month$1.59$159 ÷ 100
    Bouncer pay as you go, 100,000$4.00$400 ÷ 100

    Arithmetic, labelled plainly: each figure divides the pack or monthly price by the number of thousands of verifications it covers. NeverBounce Growth allowances are corroborated by independent checks, flagged above. Last checked: 16 November 2026.

    When ZeroBounce is still worth the higher price in this ZeroBounce vs NeverBounce comparison

    ZeroBounce costs more per check at every volume in the table, so the honest question is what the extra money buys. The ONE subscription at $99 a month adds scoring, an email finder, warmup, inbox placement tests, blacklist monitoring and DMARC checks that NeverBounce does not offer at any price. A team that would buy even one of those tools separately, such as a $25-a-month deliverability kit, closes most of the gap at once.

    In contrast, a team that only needs verification should not pay for a suite it will never open. NeverBounce Growth at $49 a month for up to 10,000 emails covers the core job for half the price of ZeroBounce ONE, and its pay-as-you-go rate at 10,000 checks is $50 against ZeroBounce’s $129. Run your own monthly volume through both price lists before signing, and count the add-ons you would genuinely use.

    Accuracy: what 99.6% and 99.9% actually mean

    Accuracy is the number every verifier leads with, and it is also the number you should trust least at face value. ZeroBounce guarantees 99.6% accurate results on its own site. NeverBounce claims 99.9% accuracy, the highest headline figure in the category. Bouncer claims 99.5%. Three tools, three figures within half a point of each other, and no neutral audit behind any of them. The honest reading starts by asking what each figure actually measures.

    ZeroBounce’s guarantee carries a footnote that matters. The 99.6% figure applies with Verify+, its free and optional second pass that sends an email to check for bounces, aimed at Yahoo, AOL and catch-all addresses. The same page says opting out may reduce accuracy to 96% for certain providers, such as Yahoo. That is refreshingly honest: the headline figure depends on a step you must leave switched on, and the fallback figure is 96%, not 99.6%.

    NeverBounce’s 99.9% claim rests on a different foundation. Its hybrid verification combines accept-all detection with real-time mailbox checks, and independent reviews report that it processes more than 10 billion verifications since 2015, learning from each one. NeverBounce also offers a money-back guarantee on verified emails that bounce, reported by independent reviews, which is a stronger promise than a bare percentage. Even so, 99.9% is a vendor claim, not an audited result, and it should be read the same way as every other vendor claim in this category.

    What independent benchmarks actually found in this ZeroBounce vs NeverBounce comparison

    Independent tests disagree with each other almost as much as they disagree with the vendors, and the reason is methodology. One 30-day test by La Growth Machine ran 127,000 verification checks across B2B prospect lists and reported NeverBounce at 99.9% and ZeroBounce at 99.0% on known-valid and known-invalid addresses. A stricter benchmark by Hunter, which penalises tools for returning unknown on catch-all domains, measured NeverBounce at 63.17% and ZeroBounce at 60.7%. The gap between 99% and 63% is not a contradiction: it reflects whether unknown results count as correct.

    Smaller head-to-head tests tell the same story in miniature. A 563-email test run through both tools found ZeroBounce approved 453 addresses, of which 2 later bounced, while NeverBounce approved 392, of which none bounced. NeverBounce was the more conservative tool, rejecting 61 addresses that ZeroBounce passed. A 10-email test by Snov.io, deliberately weighted with 7 risky or invalid addresses, found both tools caught the bad ones, with each misreading one disposable address in a different way.

    Vendor-run benchmarks deserve the same scepticism as vendor claims. A July 2026 benchmark published on ZeroBounce’s own comparison pages measured ZeroBounce at 98.0% and Bouncer at 84.41%, while independent 2026 tests of NeverBounce on mixed B2B lists reported figures closer to 93% to 95%, against its 99.9% claim. Every one of those numbers comes from a party with an interest in the result. That is the point: treat any accuracy number as a starting point, then verify a sample of your own list.

    How to test accuracy on your own list in this ZeroBounce vs NeverBounce comparison

    The only accuracy test that matters is the one you run yourself, and both tools make it cheap. Take 100 addresses you already know the answer for: 50 valid contacts who reply to your emails, 25 dead addresses that bounced last quarter, and 25 risky ones, such as role addresses and catch-alls. Run the same 100 through both tools on their free allowances, ZeroBounce’s 100 monthly credits cover the sample exactly, and count the hits yourself.

    Watch three things in the results. First, how many known-valid addresses each tool wrongly rejects, because false rejections cost you real prospects. Second, how many known-dead addresses each tool wrongly passes, because false passes cost you bounces. Third, how many addresses come back unknown, because an unknown is a decision you still have to make yourself. The tool with the fewest unknowns on your list, not the highest headline percentage, is the tool that saves you the most work.

    Verification types: what each tool actually checks

    Verification is a stack of checks, not a single test, and the two tools stack them differently. ZeroBounce runs more than a dozen steps per address, including syntax, typo correction, domain and MX checks, SMTP mailbox confirmation, spam trap detection, abuse detection, disposable detection, catch-all identification, toxic domain checks, role-based detection and anti-greylisting. NeverBounce runs a 20-plus-step process, according to independent reviews, covering syntax, domain, MX, SMTP, disposable providers, catch-all domains and role accounts, with its hybrid accept-all detection as the centrepiece.

    Both tools agree on the basics, and both are right. Syntax catches malformed addresses before any server is contacted. Domain and MX checks confirm the domain exists and accepts mail. SMTP checks ask the mail server whether the specific mailbox exists, without sending an email. Disposable detection weeds out temporary addresses that self-destruct. Catch-all detection flags domains that accept every address, where no verifier can confirm a single mailbox by SMTP alone.

    ZeroBounce vs NeverBounce comparison: an envelope travelling through three checkpoint gates, syntax, server and shield checks, emerging as a green-ticked valid envelope, with grey risky envelopes filtered out below
    Verification in this ZeroBounce vs NeverBounce comparison: both tools check syntax, domain, mail server and mailbox in turn, then sort addresses into valid, invalid, risky and unknown.

    Syntax, domain, MX and SMTP in this ZeroBounce vs NeverBounce comparison

    Syntax, domain, MX and SMTP checks sit at the bottom of both stacks, and neither tool skips them. ZeroBounce lists MX record detection and SMTP provider information among its 18 validation tools, with typo correction that fixes addresses like gmai to gmail. NeverBounce lists the same checks, adds automatic typo fixes, and appends the company name from each email address, which is a small enrichment neither rival matches at this price.

    Speed differs at this layer. ZeroBounce validates a single address in about 3 seconds and cleans 100,000 addresses in 45 minutes, according to its own site. NeverBounce cleans 10,000 emails in as little as 3 minutes, according to its own features page, and independent reviews report a real-time API response around 15 milliseconds. For a signup form that must answer while the visitor types, NeverBounce’s real-time speed is the stronger claim. For a weekly bulk clean, both are fast enough that the difference disappears.

    Video: Getting Started with ZeroBounce – A Beginner’s Guide by ZeroBounce on YouTube. This video is the creator’s property, embedded via YouTube for education. OutreachCompare is not affiliated with ZeroBounce and does not claim ownership of this video.

    Catch-all, disposable and role-based addresses in this ZeroBounce vs NeverBounce comparison

    Catch-all domains are the hardest problem in verification, because the mail server accepts every address at the domain, so no SMTP check can confirm a single mailbox. About one in three B2B domains runs a catch-all configuration, according to independent research, which makes this the check that separates good verifiers from great ones. ZeroBounce identifies catch-all domains and lets you score them with AI afterwards, returning a 0-to-10 score for each one. Since July 2026, its standard validation also returns valid or invalid for many catch-alls on Microsoft 365, Google Workspace and secure gateway domains, according to independent checks.

    NeverBounce takes the opposite approach to the same problem. Its hybrid verification combines accept-all detection with real-time checks to resolve more catch-all addresses outright, and the addresses it cannot resolve come back as catch-all or unknown rather than a guess. Its own reviews note that it flags role addresses separately, so you can decide on sales@ or info@ explicitly instead of having them folded into a generic risky bucket. ZeroBounce also flags role-based addresses, with sub-statuses that name the role.

    Disposable and abuse detection splits the tools more clearly. ZeroBounce detects disposable addresses, spam traps, abuse accounts with a history of marking mail as spam, and toxic domains known for abuse and bot-created emails. NeverBounce detects disposable providers and flags role accounts, but independent comparisons note it has no dedicated spam trap detection status, unlike ZeroBounce. A list built from scraped or purchased sources, where traps and abuse accounts hide, is safer through ZeroBounce.

    Scoring catch-alls: AI scores against a second pass in this ZeroBounce vs NeverBounce comparison

    When standard validation cannot settle a catch-all, the two tools offer different second steps. ZeroBounce offers AI scoring, which grades each catch-all from 0 to 10 on its likelihood to engage, plus Verify+, a free optional pass that sends an email to the address and watches for a bounce, which ZeroBounce says can take up to 12 hours and runs when a list holds at least 10 catch-alls. Scoring costs one extra credit per address, while Verify+ is free.

    NeverBounce offers no scoring pass of its own for catch-alls beyond its hybrid check, yet its Growth plan adds AI scoring that ranks leads by likelihood to convert, which is a different job: prioritising good addresses rather than rescuing uncertain ones. A team with many catch-alls should test both tools on the same catch-all sample, because the tool that resolves more of them outright saves the cost of a second pass entirely.

    Fitting bulk, API and real-time into your workflow

    Bulk cleaning, real-time checks and API access are three different jobs, and the two tools price and package them differently. The weekly scrub works like this: upload a file, wait, download the results. Real-time verification is the signup-form guard: check each address as it is entered, before it reaches your list. API access is the developer route: call verification from your own app, CRM or form. Both tools do all three, yet each one is stronger in a different corner.

    ZeroBounce accepts CSV, TXT, XLS and XLSX uploads, processes 100,000 addresses in 45 minutes, and offers a real-time API with separate US and EU endpoints, plus multiple API keys per account. Its bulk validator handles large files, and faster file processing is a named ONE benefit. NeverBounce cleans up to 10 lists at once on pay as you go, promises 10,000 emails in as little as 3 minutes, and offers a real-time API plus a JavaScript widget that drops verification into any web form.

    Bulk list cleaning in this ZeroBounce vs NeverBounce comparison: 45 minutes against 3 minutes

    Bulk speed favours NeverBounce on the published figures. Ten thousand emails in as little as 3 minutes is roughly five times faster than ZeroBounce’s pace of 100,000 in 45 minutes, which works out at about 10,000 in 4 to 5 minutes, so the gap is smaller than the headlines suggest. At 100,000 addresses, ZeroBounce’s 45 minutes is a lunch break, and NeverBounce’s reported pace would finish in about half an hour. Either way, a weekly clean fits inside a working day on both tools.

    Bulk handling differs in the details. ZeroBounce returns results split into one file per status, with a one-time encryption key for the download, and never charges for unknown results or duplicates. NeverBounce cleans up to 10 lists at once, lets team accounts share credits and stored lists, and has its team personally review lists with many unknowns. A team that cleans many small lists in parallel will feel at home on NeverBounce, while a team that cleans one huge list will feel at home on either.

    Real-time verification in this ZeroBounce vs NeverBounce comparison: API endpoints against a form widget

    Real-time verification is the clearest split between the two workflows. ZeroBounce’s real-time API connects to signup forms, lead pages and data collection points, with US and EU endpoints, premium rate limits on ONE, and validation in about 3 seconds per address. It suits a developer who wants verification inside an existing signup flow, with data residency a named consideration.

    NeverBounce’s real-time offer is broader for non-developers. Its JavaScript widget drops into any web form without code, its API answers in around 15 milliseconds according to independent reviews, and its newer GTM Guard gives AI agents clean inputs and instructions, a feature aimed at teams wiring verification into automated workflows. A marketing team with no developer to hand will get NeverBounce’s widget live faster than ZeroBounce’s API.

    Recurring cleaning in this ZeroBounce vs NeverBounce comparison: Sync against manual uploads

    Recurring cleaning is where NeverBounce pulls ahead on workflow. Growth’s auto-sync connects to your CRM and email platforms, re-verifies lists daily, weekly or monthly, and charges only for new, unique emails, so a list that barely changes costs almost nothing to keep clean. Unlimited parallel list cleaning runs on Growth, and bad emails are flagged before they reach the CRM or workflows.

    ZeroBounce offers no equivalent auto-sync in its ONE bundle, so a team that wants recurring cleaning must upload fresh files or build it through the API. That gap matters most to a team whose list changes daily, such as a SaaS signup flow or a CRM fed by forms. A team that cleans a static prospect list once a quarter will never notice it. Our deliverability guide explains where verification sits inside a healthy sending setup.

    Scoring, monitoring and deliverability add-ons

    Scoring and monitoring are where ZeroBounce earns its higher price, because NeverBounce barely plays in this corner. ZeroBounce’s AI scoring grades every verified address from 0 to 10 on its likelihood to engage, activity data shows whether a mailbox has been active in the past 30, 60, 90, 180 or 365 days, and the ONE bundle adds warmup with 250 seeds, 100 inbox placement tests, 10 blacklist monitors scanned every 8 hours and 1 DMARC-monitored domain. A team that buys verification to protect deliverability, rather than just to cut bounces, gets a monitoring suite for the same subscription.

    NeverBounce answers with a narrower set. Growth adds AI scoring that ranks leads by likelihood to convert, 200 AI-picked leads a month matched to your best customers, and GTM Guard for AI-agent workflows. It offers no warmup, no inbox placement tests, no blacklist monitoring and no DMARC monitoring. A team that wants those checks must buy them elsewhere, and the cost of a second tool should sit in the budget from day one.

    ZeroBounce ONE extras in this ZeroBounce vs NeverBounce comparison: warmup, placement and DMARC

    Warmup is the most useful ONE extra for a cold email sender. ZeroBounce ONE includes 250 warmup seeds, which keep new sending domains healthy before real volume begins. Inbox placement tests show whether mail lands in the inbox, the promotions tab or spam, across real providers. Blacklist monitors scan every 8 hours and warn you before a listing costs you a campaign. DMARC monitoring watches authentication on one domain. Together they cover the four checks a deliverability-conscious sender runs every week.

    ZeroBounce also sells a standalone Deliverability Kit for teams that want monitoring without verification credits, at $25, $125 and $250 a month, according to our best email verification tools compared guide, verified 16 November 2026. The kit tests inbox placement, blocklists and authentication. A team that already verifies elsewhere but wants monitoring can buy the kit alone, though the ONE bundle is the better value when verification is needed too.

    NeverBounce Growth extras in this ZeroBounce vs NeverBounce comparison: AI leads and GTM Guard

    NeverBounce’s extras aim at a different buyer: the team that already has a CRM and wants it kept clean. AI scoring ranks every verified lead by likelihood to convert, so sales can call the best leads first. Two hundred AI-picked leads a month arrive matched to your best customers, which is a small lead-generation bonus inside a verification subscription. GTM Guard gives AI agents clean inputs and instructions, so automated workflows stop polluting the CRM with bad addresses.

    The contrast is instructive. ZeroBounce’s extras protect the sender: warmup, placement, blacklists and DMARC. NeverBounce’s extras protect the pipeline: scoring, AI-picked leads and clean CRM sync. A cold email team that sends its own campaigns will use ZeroBounce’s extras every week. A sales team that feeds a CRM will use NeverBounce’s extras every day.

    Email finding in this ZeroBounce vs NeverBounce comparison: bundled against absent

    Email finding is the one extra that only ZeroBounce offers at all. ONE includes Email Finder searches and Domain Search, which locate addresses from a name and domain, at 20 credits per successful query. The free plan includes 10 Email Finder searches a month. A team that still needs to find some addresses, not just verify the ones it has, can do both jobs in one subscription.

    NeverBounce finds no addresses, enriches no contacts and sends no campaigns, by design. It is a verification-only service, and its own comparisons say so plainly. A team that needs finding must buy a finder beside it, such as Hunter or Snov.io, covered in our Hunter vs Snov.io comparison and our Apollo vs Snov.io comparison. That second subscription is the real cost of NeverBounce for a team without a list.

    Integrations, data handling and GDPR

    Integrations decide whether verification fits your stack or becomes a weekly chore, and both tools connect widely. ZeroBounce integrates with the platforms its customers use most, with bulk import and export back to each platform, plus a real-time API for forms and signup flows. NeverBounce lists more than 80 integrations, including Zapier, n8n, HubSpot, Mailchimp, Salesforce, Marketo and Eloqua, with a JavaScript widget for forms and auto-sync on Growth. Either tool slots into a HubSpot or Mailchimp stack without fuss.

    Video: How to Validate Emails in Airtable Table by NeverBounce – Airtable NeverBounce Integration by Pabbly on YouTube. This video is the creator’s property, embedded via YouTube for education. OutreachCompare is not affiliated with Pabbly and does not claim ownership of this video.

    Integrations in this ZeroBounce vs NeverBounce comparison: exports against auto-sync

    ZeroBounce’s integration model is upload, verify and export back. You import a list from your platform, verify it, and export the clean list back, with the API covering real-time checks at the point of entry. Multiple API keys let different apps verify independently. That model suits a team that cleans lists in batches and controls the flow itself.

    NeverBounce’s integration model is set-and-forget. Growth’s auto-sync connects to the CRM once, re-verifies on a schedule, and charges only for new, unique emails. Zapier and n8n connect it to almost anything else, and the form widget verifies addresses at entry without code. A team that wants verification to happen by itself, rather than as a weekly task, will prefer NeverBounce’s model.

    Data handling in this ZeroBounce vs NeverBounce comparison: 30 days against ZoomInfo ownership

    Data handling deserves a paragraph of its own, because a verifier holds your most sensitive asset: your contact list. ZeroBounce states that uploaded data is erased 30 days after upload, or sooner if you delete it, and that payment information is encrypted. It lists GDPR, CCPA and PCI compliance, HIPAA readiness with a business associate agreement available, ISO 27001 certification and SOC 2 Type 2 compliance. That is the strongest compliance list in this ZeroBounce vs NeverBounce comparison, and it suits healthcare and European teams.

    NeverBounce is owned by ZoomInfo, which brings enterprise security controls and a dedicated account manager on its Enterprise plan, plus advanced security and compliance for large teams. Its own site does not publish a data-retention figure as prominently as ZeroBounce’s 30-day erasure, so a team with strict retention rules should ask for the retention and processing terms in writing before uploading a sensitive list. Either way, never upload a list you would not trust the vendor to hold.

    Support in this ZeroBounce vs NeverBounce comparison: 24/7 against business hours

    Support follows the same pattern as the rest of the comparison. ZeroBounce offers 24/7 customer support by chat, phone and email on every account, with VIP 24/7 support on ONE. NeverBounce offers email, phone and live chat from 9am to 6pm Eastern, with a help desk available around the clock for common questions, and a dedicated account manager and onboarding on Enterprise.

    When you need a human at midnight, the plan you pay for matters more than the logo on it. A solo user on the cheapest tier should expect ticket or chat help, while a large team on a top tier can expect a named contact of its own. ZeroBounce’s 24/7 support on every plan is the friendlier offer for a small team working odd hours.

    Feature matrix: ZeroBounce vs NeverBounce side by side

    This ZeroBounce vs NeverBounce comparison puts every claim in one place. Each row in the matrix below was verified against both official sites today, 16 November 2026. A tick means the provider states the feature on its own site, with any plan limits noted beside it. A dash means we could not confirm the feature, or the provider confirms it is absent. Judge the matrix against your own priorities, because no single tool takes every row.

    Pricing, credits and buying in this ZeroBounce vs NeverBounce comparison

    FeatureZeroBounceNeverBounce
    Entry price, pay as you go$39 for 2,000 credits
    Minimum purchase
    $8 for 1,000 credits
    Minimum purchase
    Entry price, subscription$99 a month
    ONE, 10,000 credits
    $49 a month
    Growth, allowance not stated
    Free plan✓
    100 credits a month, refilled
    —
    Free first list, no card; no monthly allowance
    Free list analysis✓
    Free email verifier, single addresses
    ✓
    Instant Bounce Analysis, any size
    Credits per verification1 credit
    Unknowns and duplicates free
    1 credit
    Duplicates free on Growth
    Credit expiry, pay as you goNever, while ONE is active
    Otherwise rules may apply by account age
    12 months
    Stated on the pricing page
    Credit rollover, subscription✓
    ONE credits roll over while subscribed
    —
    Growth credits replenish monthly
    Volume discount, pay as you go✓
    $0.0195 down to $0.0032 per credit*
    ✓
    $0.008 down to $0.002 per credit*
    Enterprise plan✓
    Contact us, above 1,000,000 credits
    ✓
    Custom, typically 250,000+ a month
    Annual billing discount✓
    20% off ONE, $99 to $79
    —
    Not stated on the pricing page

    * Volume ladders are corroborated by independent checks of the same official pages in October and November 2026; the live pages today show only the headline rates. Last checked: 16 November 2026 on ZeroBounce’s pricing page and NeverBounce’s pricing page. Features and pricing can change, so please check the provider’s site before you buy.

    Verification checks in this ZeroBounce vs NeverBounce comparison

    FeatureZeroBounceNeverBounce
    Accuracy claim99.6% guaranteed
    With Verify+; 96% without, for some providers
    99.9% claimed
    Hybrid verification, vendor claim
    Syntax and typo checks✓
    Typo correction included
    ✓
    Automatic typo fixes
    Domain and MX checks✓
    MX record detection
    ✓
    Domain and MX checks
    SMTP mailbox check✓
    SMTP provider information
    ✓
    Real-time mailbox checks
    Catch-all detection✓
    Flagged, then scored or Verify+
    ✓
    Hybrid accept-all detection
    Disposable detection✓
    Disposable email check
    ✓
    Disposable providers flagged
    Spam trap detection✓
    Dedicated spam trap detection
    —
    No dedicated spam trap status
    Abuse and toxic domains✓
    Abuse and toxic domain checks
    —
    Not listed as a dedicated check
    Role-based addresses✓
    Role-based detection, with sub-statuses
    ✓
    Role addresses flagged separately
    Result detail30+ statuses and sub-statuses5 statuses
    Valid, invalid, disposable, catch-all, unknown

    Bulk, real-time and extras in this ZeroBounce vs NeverBounce comparison

    FeatureZeroBounceNeverBounce
    Bulk list cleaning✓
    100,000 in 45 minutes
    ✓
    10,000 in as little as 3 minutes
    Real-time API✓
    US and EU endpoints, ~3 seconds
    ✓
    API plus form widget, ~15 ms reported
    Automatic recurring cleaning—
    Manual uploads or API only
    ✓
    Growth auto-sync, daily, weekly or monthly
    AI scoring✓
    0 to 10 engagement score, 1 extra credit
    ✓
    AI conversion scoring on Growth
    Activity data✓
    Active in past 30 to 365 days
    —
    Not listed
    Email finder✓
    20 credits per successful query
    —
    Verification only, no finder
    Warmup✓
    250 warmup seeds in ONE
    —
    Not offered
    Inbox placement tests✓
    100 tests in ONE
    —
    Not offered
    Blacklist and DMARC monitoring✓
    10 monitors, 1 DMARC domain in ONE
    —
    Not offered
    Integrations✓
    Major platforms, API, multiple keys
    ✓
    80+ integrations, Zapier, n8n

    Last checked: 16 November 2026 on ZeroBounce’s validation page, ZeroBounce’s pricing page, NeverBounce’s features page and NeverBounce’s pricing page. Features and pricing can change, so please check the provider’s site before you buy. We do not guess at features, prices or trials.

    What the matrix means for your shortlist in this ZeroBounce vs NeverBounce comparison

    Read the matrix with your own priorities in mind. ZeroBounce wins the breadth, detail and compliance rows outright, because a deliverability suite, 30-plus statuses, spam trap and abuse detection, warmup, placement tests and a 30-day data-erasure promise have no NeverBounce equivalent. NeverBounce wins the price, speed and automation rows outright, because $8 per 1,000 credits, 10,000 emails in as little as 3 minutes and automatic CRM re-verification have no ZeroBounce equivalent.

    The matrix also shows why the entry price can mislead a hurried buyer. ZeroBounce at $39 looks dearer than NeverBounce at $8, yet the $39 pack buys 2,000 credits plus a free monthly allowance and a suite behind it, while the $8 buys 1,000 credits and nothing else. NeverBounce Growth at $49 looks cheaper than ZeroBounce ONE at $99, yet ONE bundles monitoring tools that would cost $25 a month or more as a standalone kit. The fair comparison is the full monthly cost of the setup you would actually run, add-ons and second tools included.

    Pros and cons: the honest case for each tool

    Every tool has trade-offs, and an honest ZeroBounce vs NeverBounce comparison names them plainly. The strengths below show why each tool keeps winning customers. The weaknesses explain why some teams still pick the rival.

    ZeroBounce strengths in this ZeroBounce vs NeverBounce comparison

    Most importantly, breadth tops the list. ONE bundles verification, scoring, an email finder, warmup, inbox placement tests, blacklist monitoring and DMARC checks for $99 a month, which replaces several subscriptions at once. The result detail is the second strength: more than 30 statuses and sub-statuses name the exact reason each address failed, so suppression rules can be precise instead of blunt.

    Next, the free plan is the third strength. One hundred validation credits a month, refilled, with an inbox test, a server test, a blacklist monitor and 10 finder searches, lets a team test accuracy on a real sample without paying. Compliance is the fourth: GDPR, CCPA, PCI, HIPAA readiness, ISO 27001 and SOC 2 Type 2, with uploaded data erased after 30 days. Support is the fifth: 24/7 help on every plan, VIP on ONE.

    ZeroBounce weaknesses in this ZeroBounce vs NeverBounce comparison

    Nevertheless, price is the clearest weakness. The minimum pack costs $39 for 2,000 credits, which makes 1,000 checks cost $39 against NeverBounce’s $8, and ONE at $99 a month costs twice Growth’s $49. A team that only needs verification pays for a suite it may never open. Bulk speed is another watch point: 100,000 addresses in 45 minutes is fast, yet NeverBounce’s published pace is faster still.

    No automatic recurring cleaning is another gap. ZeroBounce offers no equivalent of NeverBounce’s Growth auto-sync, so a team whose list changes daily must upload fresh files or build the schedule through the API. The accuracy guarantee also carries a condition: 99.6% applies with Verify+ switched on, and opting out may reduce accuracy to 96% for some providers, such as Yahoo.

    NeverBounce strengths in this ZeroBounce vs NeverBounce comparison

    Price tops the list for NeverBounce. Pay as you go starts at $8 per 1,000 credits, Growth costs $49 a month, and the cost per 1,000 verifications falls to $1.59 at 100,000 a month on Growth, the cheapest subscription rate in this ZeroBounce vs NeverBounce comparison. Speed is the second strength: 10,000 emails in as little as 3 minutes, with a real-time API reported at around 15 milliseconds.

    Automation is the third strength. Growth’s auto-sync re-verifies CRM lists daily, weekly or monthly, charging only for new, unique emails, so a changing list stays clean without a weekly upload. Simplicity is the fourth: five clear statuses, a free first list with no card, and a free bounce analysis that tells you whether a list needs cleaning at all. Human review of lists with many unknowns is the fifth, a touch no rival advertises.

    NeverBounce weaknesses in this ZeroBounce vs NeverBounce comparison

    Narrow scope is still the clearest weakness. NeverBounce verifies lists and nothing else: no email finder, no scoring of catch-alls, no warmup, no inbox placement tests, no blacklist or DMARC monitoring. A team that wants those tools must buy them elsewhere, and the second subscription can erase the price advantage. Credit expiry is another watch point: pay-as-you-go credits expire 12 months after purchase, so a large block only saves money if it is used inside the year.

    The Growth allowance is another gap, though a smaller one. The pricing page states no credit allowance for Growth, so the up-to-10,000 figure in this ZeroBounce vs NeverBounce comparison rests on independent checks of the same page, not on the page itself, and a buyer should confirm it at checkout. Support hours are narrower too: live chat and phone run 9am to 6pm Eastern, against ZeroBounce’s 24/7 support.

    Who should pick which: a short decision guide

    A decision guide is only useful when it names real buyers, so this ZeroBounce vs NeverBounce comparison ends the debate with five of them. Spot the buyer who sounds most like you, and your answer is waiting there. When two buyers both sound like you, start with the cheaper free offer and let a month of real verification settle it.

    ZeroBounce vs NeverBounce comparison: a person at a crossroads, one path lined with envelopes and a deliverability shield, the other with a fast stopwatch and a single envelope
    The decision in this ZeroBounce vs NeverBounce comparison: one path for a full deliverability suite, and one path for fast, cheap verification alone.

    Pick ZeroBounce when deliverability comes first

    Choose ZeroBounce when your team sends cold email every week and wants verification plus monitoring under one login. The ONE plan at $99 a month covers 10,000 credits with scoring, an email finder, warmup, inbox placement tests, blacklist monitoring and DMARC checks. Open the free plan, run 100 addresses through it, and check the sub-statuses before you scale.

    ZeroBounce also fits a team with strict data rules. GDPR, CCPA, PCI, HIPAA readiness, ISO 27001 and SOC 2 Type 2, with uploaded data erased after 30 days, is the strongest compliance list in this ZeroBounce vs NeverBounce comparison. A healthcare team, a European team, or any team whose legal department reads vendor terms will feel at home here.

    Pick NeverBounce when price and speed come first

    Choose NeverBounce when your team already owns its list and wants it cleaned quickly and cheaply. Pay as you go at $8 per 1,000 credits covers a one-off clean, while Growth at $49 a month keeps a changing CRM list clean automatically, charging only for new, unique emails. Verify your first list free, with no card, and let the free bounce analysis tell you whether a full clean is even needed.

    NeverBounce also fits a team that verifies at the point of entry. Its JavaScript widget drops into any web form without code, its real-time API answers in around 15 milliseconds according to independent reviews, and GTM Guard keeps AI-agent workflows fed with clean addresses. A SaaS signup flow or a form-heavy CRM will feel at home here.

    Three questions that settle this ZeroBounce vs NeverBounce comparison

    Run through three checks. Do you need monitoring, scoring and warmup beside verification, or is a clean list the whole job? Do you clean a static list once a quarter, or does your CRM change every day and need auto-sync? Would you rather pay $39 for a 2,000-credit pack with a suite behind it, or $8 for 1,000 credits and nothing else?

    When breadth and compliance matter, pick ZeroBounce. If price, speed and automation matter, pick NeverBounce. For a team that verifies 10,000 addresses a month and nothing else, pick NeverBounce Growth at $49, because it costs half of ZeroBounce ONE at $99. If two answers pull opposite ways, start with the tool that fixes your biggest pain today, since switching verifiers now is easier than switching after a year of lists.

    Frequently asked questions in this ZeroBounce vs NeverBounce comparison

    Which is cheaper, ZeroBounce or NeverBounce?

    NeverBounce, at every volume in this ZeroBounce vs NeverBounce comparison. A one-off clean of 1,000 addresses costs $8 on NeverBounce pay as you go against $39 on ZeroBounce pay as you go, because ZeroBounce’s minimum pack is 2,000 credits. At 10,000 checks a month, NeverBounce Growth costs $49 against ZeroBounce ONE at $99. At 100,000 checks a month, NeverBounce Growth costs $159 against ZeroBounce ONE at $449. All figures were checked on 16 November 2026, with NeverBounce Growth allowances corroborated by independent checks of the same official page.

    Which is more accurate, ZeroBounce or NeverBounce?

    On vendor claims, NeverBounce, at 99.9% against ZeroBounce’s 99.6% guaranteed. On independent tests, the answer depends on the test. A 30-day test by La Growth Machine reported NeverBounce at 99.9% and ZeroBounce at 99.0%, while a stricter Hunter benchmark that penalises unknown results measured NeverBounce at 63.17% and ZeroBounce at 60.7%. No neutral audit exists, so test both tools on 100 addresses you already know the answer for, using ZeroBounce’s 100 free monthly credits and NeverBounce’s free first list.

    Do ZeroBounce credits expire?

    Not while a ONE subscription is active: ZeroBounce states that credits never expire during an active subscription, and unused ONE credits roll over while subscribed. Without a subscription, expiry rules may apply depending on when the account was created, and independent checks report that accounts created after 1 June 2026 see purchased credits expire two years after the most recent purchase. NeverBounce pay-as-you-go credits expire 12 months after purchase, stated on its own pricing page.

    Does NeverBounce have a free plan?

    No monthly free plan, unlike ZeroBounce’s 100 free credits a month. NeverBounce lets you verify your first list without a credit card, offers free test credits, the number is not stated on the page, and gives every account a free Instant Bounce Analysis at any size, which reports whether a list is safe to send or needs cleaning. If a fixed monthly allowance matters most, ZeroBounce’s free plan is the clearer offer.

    Which handles catch-all emails better, ZeroBounce or NeverBounce?

    Both handle them, in different ways. ZeroBounce flags catch-all domains, scores them with AI from 0 to 10, and offers Verify+, a free optional pass that sends an email to check for a bounce, which can take up to 12 hours. NeverBounce resolves more catch-alls outright through its hybrid accept-all detection, and the ones it cannot resolve come back as catch-all or unknown rather than a guess. Test both tools on the same catch-all sample from your own list, because the tool that resolves more of yours outright saves a second pass.

    Should I buy ZeroBounce or NeverBounce for a team of five?

    It depends on what the five people do. A team of five that sends cold email every week should pick ZeroBounce ONE at $99 a month, because the warmup, placement tests and monitoring protect every campaign the team sends. A team of five that feeds a CRM and wants it kept clean should pick NeverBounce Growth at $49 a month, because auto-sync, AI scoring and 200 AI-picked leads a month serve the whole team for half the price. Read our best email verification tools compared guide to see both tools against four more rivals, including Bouncer at $8 for 1,000 checks.

    The verdict in this ZeroBounce vs NeverBounce comparison

    Verdict: ZeroBounce for a deliverability suite, NeverBounce for fast, cheap verification

    ZeroBounce is the pick when deliverability matters most. ONE costs $99 a month for 10,000 credits, with scoring, an email finder, warmup, inbox placement tests, blacklist monitoring and DMARC checks, plus a 100-credit free plan and 24/7 support. NeverBounce is the pick when price and speed matter most. Pay as you go starts at $8 per 1,000 credits, Growth costs $49 a month, and 10,000 emails can be cleaned in as little as 3 minutes, with automatic CRM re-verification on Growth.

    In sum, choose for the list you own today, not the suite you hope to use next year. Senders who email every week should start on ZeroBounce’s free plan, because 100 credits a month and the full sub-status detail cost nothing to test. Owners of an existing list who want it clean for the least money should start on NeverBounce’s free first list, because $8 per 1,000 credits and $49-a-month Growth are the cheapest verified rates in this ZeroBounce vs NeverBounce comparison. Verifying 100,000 addresses a month calls for comparing NeverBounce Growth at $159 against Bouncer at $400, because both beat ZeroBounce ONE at $449 on price alone.

    We have not run hands-on deliverability or accuracy tests on ZeroBounce or NeverBounce, so this ZeroBounce vs NeverBounce comparison gives no numeric score. The verdict rests on verified pricing, verified feature lists and documented accuracy claims, all checked today, 16 November 2026. Try ZeroBounce free with 100 credits a month, or verify your first list free on NeverBounce, and let a month of real verification confirm the choice.

    Visit ZeroBounce →Check NeverBounce →

    Keep reading

    ZeroBounce vs NeverBounceZeroBounce ONE from $99/mo · NeverBounce from $8 per 1,000 Visit ZeroBounce →
  • Instantly vs Lemlist 2026

    Instantly vs Lemlist 2026

    A flat-fee email engine against a per-user multichannel studio — and a clear winner for each job

    Instantly vs Lemlist is the classic volume-versus-versatility contest in cold outreach. Instantly brings unlimited mailboxes, unlimited warmup, a 450M+ lead database and AI agents, priced flat from $47 a month. Lemlist brings a 650M+ database, automated LinkedIn steps, calls, WhatsApp and SMS inside one sequence, priced flat at $69 a workspace for email or $109 a user for multichannel. This Instantly vs Lemlist comparison checks pricing, database depth, deliverability, warmup, multichannel steps, AI features, inbox management and CRM on both official sites, so you can pick with confidence.

    Visit Instantly →See Lemlist Plans →

    Prices checked 16 November 2026 on Instantly’s and Lemlist’s official pricing pages. Features and pricing can change, so please check the provider’s site before you buy.

    Quick Answer

    Instantly wins on email volume and flat pricing. Growth costs $47 a month flat, with unlimited email accounts, unlimited warmup and 5,000 emails a month, while Hypergrowth lifts that to 125,000 emails for $107. Lemlist wins on multichannel outreach. Its Multichannel plan runs email, LinkedIn, calls and SMS inside one sequence for $109 a user a month, and its Email plan covers unlimited users for $69 flat. Instantly leads on email scale, with a flat bill that never grows when you add mailboxes. Lemlist leads on channel range, because Instantly sends email only and Lemlist adds LinkedIn, calls, WhatsApp and SMS.

    Database depth is close, with Lemlist at 650M+ contacts against Instantly at 450M+ leads, and both offer waterfall enrichment. Warmup is generous on both tools, with Instantly warming unlimited inboxes across a 4.2M+ account pool and Lemlist including lemwarm on every plan. Trials differ sharply: Lemlist offers a 14-day trial with 200 free credits, while Instantly shows no trial on its pricing page.

    Why this Instantly vs Lemlist comparison settles the choice

    Picking between two capable tools is harder than picking between a strong tool and a weak one. In fact, Instantly and Lemlist both find contacts, enrich them, send sequences and track replies. Both have earned large, loyal customer bases. Instantly cites a 4.8 out of 5 rating from more than 3,800 reviews on G2, on its own comparison pages. Lemlist shows a 4.6 out of 5 rating from more than 2,240 reviews on G2, on its own pricing page. That shared quality is exactly why the decision feels stuck.

    The picture gets sharper once you lay the two price lists and feature lists side by side. Instantly bills one flat monthly fee, counts emails by the month, and spends its strength on volume, deliverability and AI agents. Lemlist bills flat for email-only teams and per user for multichannel teams, counts data in credits, and spends its strength on personalisation and channel range. Each of those differences points at a different kind of buyer.

    This Instantly vs Lemlist comparison takes those differences in turn. Pricing leads, because Instantly’s flat $47 and Lemlist’s per-user $109 give the same team two very different monthly totals. Cost per 1,000 emails comes next, because Instantly’s price falls fast as volume rises. Database depth, warmup, multichannel steps, AI features, inbox management, a feature matrix and the honest pros and cons follow. By the end, the right tool, and the right plan inside it, should be clear.

    Instantly and Lemlist in plain English: a flat email engine against a multichannel studio

    Instantly is a high-volume cold email platform built around unlimited mailboxes and deliverability. You connect as many email accounts as you like, warm them all without paying per inbox, and send up to 5,000 emails a month on Growth, 125,000 on Hypergrowth or 500,000 on Light Speed. SuperSearch, its 450M+ lead database, sits beside the sequencer, with waterfall enrichment, AI sequence writing and an AI reply agent that answers leads for you. It suits senders and agencies who measure success in emails delivered per dollar. Growth starts at $47 a month, or $37.60 on annual billing.

    Lemlist is a multichannel cold outreach and lead generation suite built around personalisation. You find contacts in a 650M+ database, enrich them through a waterfall of more than 14 providers, and run them through sequences that mix email, LinkedIn visits, invites, chat and voice notes, calls, WhatsApp and SMS, with conditions that branch on what each lead does. Its lemAgent drafts and launches campaigns, while lemwarm keeps every sender warm. It fits SDR teams and founders who want every touchpoint in one sequence. The Email plan starts at $69 a month flat per workspace, or $55 on annual billing.

    Both tools cover the same outbound loop at heart. You begin by finding prospects in the built-in data or importing a list of your own. You then verify and enrich those contacts. Next you enrol them in a sequence and watch the replies land in one shared inbox. To finish, you sync the activity back to your CRM. Because the loop matches on both tools, the decision rests on where each one is strongest inside it.

    What Instantly adds on top of email in this Instantly vs Lemlist comparison

    Above all, Instantly turns from a sequencer into a sending machine through its unlimited mailboxes and warmup. Every connected inbox warms without a per-inbox fee, inbox rotation spreads each campaign across your senders, custom tracking domains keep your links clean, and inbox placement tests show where your mail actually lands. Higher plans add the SISR system, which assigns dedicated server and IP blocks, and a private deliverability network on Enterprise.

    Moreover, Instantly adds AI that runs the campaign while you sleep. AI Copilot drafts full sequences and proposes prospect lists, the AI Reply Agent answers leads in minutes with human approval where you want it, and the AI Sales Agent handles outreach end to end. SuperSearch adds 450M+ leads with 13 filters, lookalike audiences and enrichment from five or more providers. Our Instantly review covers the platform in full depth.

    What Lemlist adds on top of email in this Instantly vs Lemlist comparison

    Lemlist, meanwhile, turns from a sequencer into a multichannel studio through its channel range. LinkedIn profile visits, connection requests, messages, chat and voice notes run inside the same sequence as the emails, with in-app calling through Aircall and Ringover, plus SMS and WhatsApp steps. Conditions branch the sequence on opens, clicks and invite acceptances, so each lead follows the path its own behaviour earns.

    Moreover, Lemlist adds personalisation that Instantly does not match. Dynamic images and videos, personalised landing pages, AI icebreakers and spintax make each email feel written for one person, while intent signal agents watch for buying triggers and agentic enrichment fills the gaps in each record. The Chrome extension finds emails while you browse, and the API, MCP and CLI let developers drive Lemlist from their own tools. Our Lemlist review covers the platform in full depth.

    The one-sentence difference in this Instantly vs Lemlist comparison

    Instantly is the flat-fee email engine: unlimited mailboxes, unlimited warmup and up to 500,000 emails a month for one flat price, with AI agents doing the sending and the replying. Lemlist is the per-user multichannel studio: email, LinkedIn, calls, WhatsApp and SMS in one branching sequence, priced flat for email-only teams and per user once LinkedIn joins the flow. A sender who counts emails will notice the difference in week one. A rep who counts touchpoints will notice it on the first campaign.

    Neither tool is made for permission-based newsletters, so a team that mostly emails its own subscribers should look at the marketing platforms in our best cold email software guide instead. For B2B prospecting and outbound, though, this pair stays one of the most useful match-ups around.

    Pricing head-to-head in this Instantly vs Lemlist comparison

    Pricing is where this Instantly vs Lemlist comparison first gets interesting, because the two price lists work in opposite ways. Instantly bills one flat monthly fee, so the bill holds steady whether you connect one mailbox or fifty. Lemlist bills one flat monthly fee for email-only teams, then switches to per-user pricing the moment multichannel steps join the sequence. A lone founder and a five-person SDR team will read the same two price lists and reach opposite conclusions.

    Every figure below is taken from the official pricing pages, checked today, 16 November 2026. For example, Instantly figures are in US dollars per month, with monthly billing first and annual billing second. Lemlist figures follow the same order, with the Email plan priced per workspace and the Multichannel plan priced per user. Where a price is not shown on the official page, this Instantly vs Lemlist comparison says so plainly instead of guessing.

    Instantly vs Lemlist comparison: a single flat price tag with unlimited inbox icons behind it on one side, and a row of five user seats each with its own price tag on the other, with a balance scale above
    Pricing in this Instantly vs Lemlist comparison: Instantly charges one flat monthly fee, while Lemlist charges flat for email-only teams and per user for multichannel teams.

    Instantly plans in this Instantly vs Lemlist comparison: Growth, Hypergrowth and Light Speed

    PlanPrice*What you getBest forVisit
    Instantly — GrowthBest for solo senders$47 a month
    $37.60 billed yearly
    5,000 emails a month
    1,000 uploaded contacts, unlimited accounts, unlimited warmup
    Founders starting cold emailVisit Site →
    Instantly — HypergrowthBest for growing teams$107 a month
    $85.58 billed yearly
    125,000 emails a month
    25,000 uploaded contacts, premium support, built-in CRM
    Teams sending real volumeSee Hypergrowth →
    Instantly — Light SpeedBest for high volume$358 a month
    $286.30 billed yearly
    500,000 emails a month
    100,000 uploaded contacts, SISR system
    Agencies and heavy sendersView Light Speed →
    Instantly — EnterpriseBest for large sendersCustom
    Price on application
    500,000+ emails a month
    100,000+ contacts, private deliverability network
    Large teams needing dedicated infrastructureGet a Quote →

    * Last checked: 16 November 2026 on Instantly’s pricing page. Hypergrowth shows 125,000 emails a month on both its plan card and the page’s own comparison table today; an earlier check had flagged a lower figure in the table, and the two now agree. No free trial is shown on the pricing page, so this Instantly vs Lemlist comparison claims none for Instantly. Features and pricing can change, so please check the provider’s site before you buy. We do not guess at features, prices or trials.

    Reading Instantly’s bundles and credits in this Instantly vs Lemlist comparison

    Instantly’s pricing page now leads with bundles that pair an outreach plan with a SuperSearch credit plan. Starter costs $94 a month, or $85 on annual billing, and pairs Growth outreach with Growth credits. Scale costs $194 a month, or $175 on annual billing, and pairs Hypergrowth outreach with Supersonic credits. Agency costs $555 a month, or $500 on annual billing, and pairs Light Speed outreach with Hyper credits. Annual billing saves 10% on every bundle.

    The bundle arithmetic is worth checking before you buy the bundle. Starter at $94 equals Growth outreach at $47 plus Growth credits at $47, so the bundle saves nothing against buying the two parts separately. Scale at $194 sits $10 below Hypergrowth at $107 plus Supersonic credits at $97, which come to $204, so the bundle saves $10 a month. Agency at $555 equals Light Speed at $358 plus Hyper credits from $197, so that bundle saves nothing either. Buy the bundle for the single bill, not for a discount that is not there.

    SuperSearch credits are sold separately too, for teams that want the database without the bundle. Growth credits cost $47 a month, or $37.60 on annual billing, for 1,500 to 2,000 credits a month. Supersonic credits cost $97 a month, or $87.30 on annual billing, for 5,000 to 7,500 credits. Hyper credits start at $197 a month, or $177.30 on annual billing, for 10,000 to 200,000 credits. Enterprise credits start above 200,000 a month at a custom price. A credit buys a lead search or an enrichment, and the database holds 450M+ B2B leads.

    Lemlist plans in this Instantly vs Lemlist comparison: Email, Multichannel and Enterprise

    PlanPrice*What you getBest forVisit
    Lemlist — EmailBest for email-only teams$69 a month, flat
    $55 billed yearly, per workspace
    Unlimited users and senders
    650M+ database, lemAgent, lemwarm, CRM integrations
    Teams sending email onlyVisit Site →
    Lemlist — MultichannelBest for SDR teams$109 a user a month
    $87 billed yearly, per user
    Unlimited emails and messages
    5 senders per user, LinkedIn, SMS, dialer
    Reps working every channelSee Multichannel →
    Lemlist — EnterpriseBest for large teamsCustom
    Price on application
    5+ senders per user
    Use from your CRM, SSO and SAML, dedicated manager
    Large teams needing controlGet a Quote →

    * Last checked: 16 November 2026 on Lemlist’s pricing page. The Email plan is priced flat per workspace, not per user, while the Multichannel plan is priced per user. The 14-day trial covers Multichannel features except in-app calls, with 200 free credits. Features and pricing can change, so please check the provider’s site before you buy. We do not guess at features, prices or trials.

    Reading Lemlist’s add-ons and trial in this Instantly vs Lemlist comparison

    Lemlist’s add-ons sit beside the plans, and they are priced plainly on the same page. Lead data enrichment costs $20 a month, or $16 on annual billing. Buying intent signals cost $29 a month, or $21 on annual billing. Credits are Lemlist’s currency for finding contact details, enriching leads and receiving buying signals, and you pay only for successful results. Unused credits roll over for as long as the subscription stays active.

    One rule makes Lemlist’s trial the friendlier of the two. The 14-day free trial opens the Multichannel plan’s features, except in-app calls, and adds 200 free credits to find emails and phone numbers, explore buying signals and try lemAgent with your own data. Instantly shows no trial on its pricing page, so a buyer who wants to test before paying can try Lemlist free and must buy Instantly to test it. That gap matters most to a first-time buyer with no budget yet.

    The Email plan’s volume rule deserves a careful read. Lemlist’s pricing page says the Email plan lets you choose your monthly email volume and send safely at scale, with unlimited users, senders and campaigns, yet the fetched page states no fixed monthly email cap for that plan. The Multichannel plan lists unlimited emails and messages a month. Because no cap is published for the Email plan, this Instantly vs Lemlist comparison states no per-email cost for Lemlist and says to confirm the volume at signup.

    Cost at one user, a team of five and agency scale in this Instantly vs Lemlist comparison

    SetupInstantly, monthly billingLemlist, monthly billingCheaper pick
    One user, email only$47 a month
    Growth, 5,000 emails
    $69 a month, flat
    Email plan, unlimited users
    Instantly, by $22 a month
    One user, annual billing, email only$37.60 a month
    Growth, billed yearly
    $55 a month, flat
    Email plan, billed yearly
    Instantly, by $17.40 a month
    One user, multichannel$47 a month
    Growth, email only; no LinkedIn automation
    $109 a user a month
    Multichannel, LinkedIn, SMS, calls
    Not like for like, see the note below
    Team of five, email only$47 a month, flat
    Growth, unlimited accounts
    $69 a month, flat
    Email plan, unlimited users
    Instantly, by $22 a month
    Team of five, multichannel$47 a month
    Growth, email only; LinkedIn needs a second tool
    $545 a month
    5 × $109, Multichannel
    Not like for like, see the note below
    Agency scale$358 a month
    Light Speed, 500,000 emails
    Custom
    Enterprise, price on application
    Instantly, on published price

    Arithmetic is shown plainly so you can check it: 5 × $109 = $545 a month, and 5 × $87 = $435 a month on annual billing. Instantly charges one flat fee on every outreach plan, while Lemlist charges flat for email-only teams and per user for multichannel teams. Last checked: 16 November 2026. Features and pricing can change, so please check the provider’s site before you buy.

    What the multichannel rows mean in this Instantly vs Lemlist comparison

    Take the multichannel rows first, because they are the ones buyers misread. Instantly at $47 does not buy LinkedIn automation, calls or SMS at any price, because Instantly sends email only. Lemlist at $109 a user buys all of those channels inside one sequence. Comparing $47 with $109 as if both bought the same thing would flatter Instantly unfairly. The honest read is that Lemlist costs $62 more a month for one user, and $498 more for a team of five, and in return it replaces the LinkedIn tool, the dialer and the SMS tool you would otherwise buy beside Instantly.

    In contrast, the email-only rows are a straight fight, and Instantly wins them all. One user pays $47 on Instantly Growth or $69 on Lemlist Email, on monthly billing, so Instantly wins by $22. A team of five pays $47 on Instantly Growth or $69 on Lemlist Email, because both plans are flat, so Instantly still wins by $22. Annual billing keeps the same gap: $37.60 against $55, so Instantly wins by $17.40. The only setup where Lemlist’s flat Email plan beats Instantly on price is none at all, because Instantly’s flat fee sits lower at every team size for email only.

    Annual billing in this Instantly vs Lemlist comparison: the gap stays, the winner stays

    Annual billing narrows every gap in the same way, yet it never changes the winner. Instantly falls from $47 to $37.60 on Growth, from $107 to $85.58 on Hypergrowth and from $358 to $286.30 on Light Speed. Lemlist falls from $69 to $55 on Email and from $109 to $87 a user on Multichannel. On annual billing, a five-person multichannel team pays $37.60 a month on Instantly Growth, for email only, against $435 a month on Lemlist Multichannel, for every channel. The $397 gap buys LinkedIn, calls and SMS for five people, which is a fair price for a team that uses them daily.

    Trying before you buy in this Instantly vs Lemlist comparison: no trial against 14 days

    The trial gap is the friendliest difference of all, because only one tool lets you test before you pay. Lemlist offers a 14-day free trial with Multichannel features, except in-app calls, and 200 free credits to find emails and phone numbers, explore buying signals and try lemAgent. Instantly shows no trial on its pricing page, so the only way to test it is to pay for the first month.

    In sum, a buyer with no budget yet should start on Lemlist’s trial, because two weeks of real sending and 200 free credits cost nothing. A buyer who already knows cold email works should weigh Instantly’s $47 first month against the value of unlimited warmup and unlimited mailboxes from day one. Either way, set a reminder before the Lemlist trial ends, because the account moves to a paid plan when it ends.

    Cost per 1,000 emails: where volume makes Instantly cheaper still

    Cost per 1,000 emails is the fairest way to compare a volume-priced tool with a flat-priced one, because the headline price hides what each email actually costs. Instantly prices by monthly email volume, so the cost of each thousand emails falls fast as you climb the plans. Lemlist prices by workspace or by user, with no published monthly email cap on the Email plan and unlimited emails and messages on Multichannel, so no equivalent per-email figure exists for Lemlist. The table below therefore shows Instantly’s own volume economics, labelled plainly, and states where Lemlist cannot be priced the same way.

    Instantly’s cost per 1,000 emails in this Instantly vs Lemlist comparison

    Instantly planMonthly priceEmails a monthCost per 1,000 emails
    Growth, monthly billing$475,000$9.40
    Growth, annual billing$37.605,000$7.52
    Hypergrowth, monthly billing$107125,000$0.86
    Hypergrowth, annual billing$85.58125,000$0.68
    Light Speed, monthly billing$358500,000$0.72
    Light Speed, annual billing$286.30500,000$0.57

    Arithmetic, labelled plainly: $47 ÷ 5 = $9.40 per 1,000 emails, $107 ÷ 125 = $0.86, and $358 ÷ 500 = $0.72. Annual figures divide the same way: $37.60 ÷ 5 = $7.52, $85.58 ÷ 125 = $0.68, and $286.30 ÷ 500 = $0.57. Lemlist publishes no monthly email cap for its Email plan, so no per-1,000 figure can be worked out for Lemlist from the official page — confirm the volume at signup. Last checked: 16 November 2026.

    Why volume economics favour Instantly at scale in this Instantly vs Lemlist comparison

    Growth at $9.40 per 1,000 emails is the expensive end of Instantly, and it still beats most per-seat tools for a solo sender. Hypergrowth at $0.86 per 1,000 emails is where the maths changes completely: the plan costs little more than twice the Growth plan and sends twenty-five times the emails. Light Speed at $0.72 per 1,000 emails is cheaper again per email, though the $358 monthly bill only earns its keep when the team genuinely sends hundreds of thousands of emails a month.

    For example, a team sending 100,000 emails a month needs Hypergrowth at $107, because Growth caps at 5,000. A team sending 10,000 emails a month needs Hypergrowth too, for the same reason, and pays $107 for the privilege of sending 10,000. That jump is the honest cost of Instantly’s volume ladder: the plans climb in big steps, and a team between steps pays for the next rung up. A team sending 6,000 emails a month pays $107, not $47, because Growth stops at 5,000.

    Where Lemlist’s flat Email plan changes the maths in this Instantly vs Lemlist comparison

    Lemlist’s Email plan answers that ladder with a flat $69 a month for the whole workspace, with the monthly email volume chosen at signup. A team that sends 6,000 emails a month pays $69 on Lemlist Email against $107 on Instantly Hypergrowth, so Lemlist wins that middle volume. A team that sends 100,000 emails a month pays $69 on Lemlist Email, if the chosen volume covers it, against $107 on Instantly Hypergrowth, so Lemlist may win there too — yet the volume must be confirmed at signup, because the pricing page states no cap in the fetched text.

    In fact, the volume question decides the whole purchase for many teams, so the details matter more than the headline. A team that sends 5,000 emails a month pays $47 on Instantly against $69 on Lemlist, so Instantly wins. At 6,000 emails a month, the bill flips: $107 on Instantly against $69 on Lemlist, so Lemlist wins. At 125,000 emails a month, the same $107 against $69 applies, if the volume is covered, so Lemlist may win on price while Instantly wins on deliverability tooling. Run your own monthly volume through both price lists before signing.

    Database size and coverage: 450M+ leads against 650M+ contacts

    Database depth is the closest call in this Instantly vs Lemlist comparison, and Lemlist wins it on published size. Lemlist publishes a database of 650M+ contacts across 65M+ companies, on its own blog, with waterfall enrichment across more than 14 providers. Instantly publishes a database of 450M+ B2B leads, on its own pricing page, with waterfall work email enrichment from five or more providers. Both databases are large enough for most teams, and the 200M gap matters less than coverage in your own market.

    Nevertheless, size alone does not win deals, though. A database earns its price only when it holds the exact people you sell to, with details that are still correct when you use them. Instantly’s database fits teams that prospect in broad markets and want list building inside the same login. Lemlist’s database suits teams that already know their list and want each record found, verified and enriched as they go. Our best B2B data providers guide sets both tools against the dedicated data specialists.

    Instantly data in this Instantly vs Lemlist comparison: 450M+ leads with lookalikes

    In particular, Instantly treats data as a credit-priced module beside the sequencer. Its SuperSearch database holds 450M+ B2B leads, searchable through 13 filters including keywords and lookalikes, with waterfall work email enrichment from five or more providers. The Instantly Web Researcher Agent digs deeper on each prospect, full profile enrichment adds company description and headcount, and job posting, news, technology and funding enrichment adds the timing signals that tell you when to reach out.

    What is more, Instantly prices that data in credits, so the database bill scales with use. Growth credits cost $47 a month for 1,500 to 2,000 credits, Supersonic credits cost $97 for 5,000 to 7,500, and Hyper credits start at $197 for 10,000 to 200,000. A team that finds a few hundred leads a month pays little, while a team that finds tens of thousands pays for the volume it uses. Export to major CRMs and outreach providers carries the list wherever it needs to go.

    Lemlist data in this Instantly vs Lemlist comparison: 650M+ contacts with 14+ providers

    Lemlist, by contrast, treats data as part of the workspace, not a separate module. Its database holds 650M+ contacts across 65M+ companies, with firmographic and intent filters, an email finder and verifier, a phone finder, and waterfall enrichment across more than 14 providers. Lemlist charges credits only for successful results, and unused credits roll over for as long as the subscription stays active, so a team never pays for a lead it did not find.

    Similarly, Lemlist pairs that database with AI that fills the gaps itself. AI Agentic Enrichment finds missing details from public sources, Intent Signal Agents watch for buying triggers, and the enrichment add-on at $20 a month and the intent signals add-on at $29 a month open deeper data on demand. The Chrome extension finds emails while you browse LinkedIn or a company website, for credits, and the lead list exports to CSV or syncs to your CRM.

    Coverage: test both tools on your own market in this Instantly vs Lemlist comparison

    One honest warning applies to both tools here. No vendor publishes an independent coverage audit, so every coverage claim should be treated as a vendor claim. The honest test is your own list, so take 100 real prospects from your market, run them through both tools, and count the hits. Coverage that looks deep across the United States can turn thin inside a narrow market.

    In fact, list quality drives reply rates more than any clever subject line ever will. Five hundred verified ideal customers beat ten thousand careless contacts, every single time. A tool that helps you build a careful list is worth its fee, while one that leaves list building to you means paying for data on top. Bear that in mind through the rest of this Instantly vs Lemlist comparison.

    Deliverability and warmup: a 4.2M+ warmup pool against lemwarm

    Deliverability decides whether any of this matters, because an email that lands in spam earns no replies. Warm-up runs through Instantly’s unlimited automated warmup across a pool of more than 4.2 million accounts, and through Lemlist’s lemwarm, which is included on every plan. Both tools warm every connected inbox, yet they price that warmth very differently.

    For example, warmup works the same way on both tools. New mailboxes exchange mail with a network of real inboxes, so providers learn to trust the new domain before real sending starts. Opens, replies and spam-folder checks build sender reputation step by step. Warmup backs a healthy setup, yet it cannot save a purchased list, a misleading subject line or a domain with no authentication. Set up a separate sending domain, add its SPF, DKIM and DMARC records, and let warmup run for two to four weeks before real volume begins. Our sending-domain guide explains each record in turn.

    Instantly vs Lemlist comparison: a row of email inboxes gradually lighting up from grey to bright teal as a warmup gauge rises, with a shield checkmark protecting an envelope
    Warmup in this Instantly vs Lemlist comparison: Instantly warms unlimited inboxes across a 4.2M+ account pool, while Lemlist includes lemwarm on every plan.

    Instantly warmup in this Instantly vs Lemlist comparison: unlimited, across 4.2M+ accounts

    For instance, Instantly’s warmup is unlimited on every outreach plan, with no per-inbox fee and no cap on the number of mailboxes warmed. The warmup pool holds more than 4.2 million accounts, so each new inbox exchanges mail with a large, varied network. Inbox rotation spreads each campaign across your connected senders instead of pounding one address, custom tracking domains keep your links clean, and inbox placement tests show where your mail actually lands before you scale.

    On top of that, Instantly adds deliverability protections that Lemlist does not match on breadth. Reputation protection and bounce detection catch bad addresses before they cost you the inbox, A/B testing finds the version that lands best, and the SISR system on Light Speed assigns dedicated server and IP blocks, swapping flagged IPs at once. Enterprise adds a private deliverability network, with a dedicated account manager and a shared Slack channel beside it.

    Lemlist warmup in this Instantly vs Lemlist comparison: lemwarm on every plan

    Lemlist’s warmup is simpler and included everywhere. Lemwarm and built-in deliverability protections sit on every plan, including the $69 Email plan, according to Lemlist’s own pricing FAQ, so a team never pays extra to warm its senders. The deliverability hub watches sender reputation, pre-send checks catch setup mistakes before they cost you the inbox, inbox rotation spreads each campaign across your senders, and timezone sending lands each email in the lead’s working hours.

    In addition, Lemlist adds deliverability habits that Instantly does not list in the same depth. Lemwarm ramps each new mailbox slowly over weeks before real volume begins, and the pricing FAQ is explicit that warmup and deliverability protection are included at any scale. A team that warms a handful of mailboxes and wants warmup beside sequences in one login will find lemwarm covers the job without a second purchase.

    Which warmup setup wins in this Instantly vs Lemlist comparison

    For a team that warms dozens of mailboxes and wants placement data, premium infrastructure and per-provider checks, Instantly wins on depth, with unlimited warmup, inbox placement tests, SISR on Light Speed and a private network on Enterprise. For a team that warms a few mailboxes and wants warmup included without thinking about it, Lemlist wins on simplicity, with lemwarm on every plan and no per-inbox fee either.

    Both tools agree on the basics, and both are right. Warm new domains for two to four weeks, start at low volume, and lift the daily send limit a little at a time. Our best email deliverability tools guide covers the dedicated deliverability suites if a specialist tool tempts you instead.

    Multichannel outreach: LinkedIn, calls and SMS against email only

    Multichannel steps are the clearest difference in this Instantly vs Lemlist comparison, because only one tool offers them. Lemlist runs email, LinkedIn, calls, WhatsApp and SMS inside one sequence, with conditions that branch on what each lead does. Instantly sends email only, with no LinkedIn automation, no dialer and no SMS steps, and it says so plainly by what its pricing page lists. A team that lives on LinkedIn and a team that lives in the inbox will draw opposite conclusions from the same two tools.

    In contrast, that difference decides the whole purchase for many teams, so the extras matter more than the sequence builder. A rep who works LinkedIn all morning needs those touches logged inside the sequence, next to the emails. A rep who works the inbox all morning needs unlimited mailboxes and warmup beside the sequences. Both buyers have a point, so take the tool that fits the way you really sell.

    Video: Exclusive Multichannel Sales Prospecting Secrets by lemlist on YouTube. This video is the creator’s property, embedded via YouTube for education. OutreachCompare is not affiliated with lemlist and does not claim ownership of this video.

    Lemlist channels in this Instantly vs Lemlist comparison: email, LinkedIn, calls, WhatsApp, SMS

    Specifically, Lemlist’s sequences mix every channel in one flow. Email steps run beside LinkedIn profile visits, connection requests, messages, chat and voice notes, with in-app calling through Aircall and Ringover, plus SMS automation and WhatsApp as an add-on. The unified inbox gathers every reply from every channel in one place, and conditions branch the sequence on opens, clicks, invite acceptances and replies, so each lead follows the path its own behaviour earns.

    Lemlist’s own blog puts numbers on that mix, from its internal data. Adding LinkedIn to an email-only sequence multiplies replies by 2.6 in France, by 3 in the rest of the world and by 3.9 in the United States. Adding a call step lifts the interested-lead rate from 2.04% with email and LinkedIn alone to 9.53% in France. Positive repliers in email, LinkedIn and call sequences needed 3.6 touches on average, against 5.8 in email-only sequences. Those figures come from Lemlist’s own data, not an independent audit, so treat them as a vendor claim to test on your own list.

    Instantly channels in this Instantly vs Lemlist comparison: email only, done at scale

    Instantly, meanwhile, does one channel and does it at a scale Lemlist does not match. Advanced sequences run with A/B testing, advanced scheduling, behaviour-based subsequences that react to opens and replies, spintax and dynamic variables, across unlimited mailboxes with inbox rotation. The Unibox gathers every reply in one master inbox, and the built-in CRM on Hypergrowth and above tracks each lead from first email to closed deal.

    The honest price of Instantly’s focus is a second tool for every other channel. A team that wants LinkedIn steps must buy a LinkedIn automation tool beside Instantly, and a team that wants calls must buy a dialer. That second bill is the real cost of the $47 Growth plan for a multichannel team, and it should sit in the budget from day one, not arrive as a surprise after signing. Our best cold email tools for LinkedIn-first outreach guide ranks the tools that automate LinkedIn properly.

    Where the channels differ in this Instantly vs Lemlist comparison

    All in all, the channel lists look different on paper, and three extras separate them. Lemlist automates LinkedIn inside sequences, while Instantly offers no LinkedIn automation at all, so a team that prospects on LinkedIn needs a second tool beside Instantly, or the time to do the touches by hand. Lemlist adds in-app calling and SMS, while Instantly lists calling and SMS only inside its optional CRM tier, so a team that calls needs to check which tier carries them.

    The third difference is the inbox. Both tools gather replies in one place: Instantly’s Unibox and Lemlist’s unified inbox. Instantly adds its AI Reply Agent, which answers leads in minutes, while Lemlist adds its own reply handling with conditions that route each lead by behaviour. Test each inbox on a week of real replies before committing to one tool.

    AI features: Copilot and Reply Agent against lemAgent

    AI features are where both tools have moved fastest, and this Instantly vs Lemlist comparison finds real capability on both sides. Instantly builds AI agents that run the campaign: Copilot drafts sequences and lists, the Reply Agent answers leads, and the Sales Agent handles outreach end to end. Lemlist builds AI agents that personalise the campaign: lemAgent drafts and launches, AI icebreakers write first lines, and agentic enrichment fills each record. Each approach fits a different kind of team.

    Video: Never reply to emails again (let this AI AGENT do it for you) by Instantly on YouTube. This video is the creator’s property, embedded via YouTube for education. OutreachCompare is not affiliated with Instantly and does not claim ownership of this video.

    Instantly AI in this Instantly vs Lemlist comparison: agents that send and reply

    Specifically, Instantly’s AI starts with Copilot, which drafts full sequences, proposes ideal-customer filters and turns them into targeted lists from SuperSearch. The AI Email Writer Agent writes the emails themselves, with access to five major large language models, including OpenAI and Anthropic, and the option to use your own API key. More than 100 community AI templates give a new team a running start.

    Moreover, Instantly’s AI does not stop at writing. The AI Reply Agent answers leads in under five minutes, in autopilot or human-in-the-loop modes, with Slack approvals and reply labels, while the AI Sales Agent handles outreach end to end, from list to reply. Each handled reply consumes credits, so a team should check the credit cost before letting the agent answer every inbox. The Web Researcher Agent digs into each prospect’s news, funding and technology before the first email goes out.

    Lemlist AI in this Instantly vs Lemlist comparison: agents that personalise and enrich

    Lemlist, meanwhile, aims its AI at the message itself. LemAgent drafts and launches campaigns from a prompt, AI icebreakers write a personal first line for each lead, and spintax varies the wording so no two emails read alike. Personalised images and videos, with dynamic text and landing pages, make each email feel built for one person, and the trial lets you try lemAgent with your own data before paying.

    In addition, Lemlist adds AI that watches and fills. AI Agentic Enrichment finds missing details from public sources, Intent Signal Agents watch for buying triggers such as funding rounds and job changes, and the signal, enrichment and messaging AI agents sit on every plan, including the $69 Email plan. A team that sells to senior buyers, where a generic first line earns a delete, will feel that personalisation in the first week.

    Which AI setup wins in this Instantly vs Lemlist comparison

    For a team that wants the campaign run for them, Instantly wins on automation, with agents that write, send, answer and research without a human in the loop. For a team that wants each message to feel hand-written, Lemlist wins on personalisation, with icebreakers, dynamic images and videos, and enrichment agents that fill each record before the first line is written.

    Both tools agree on one thing, and both are right. AI writes a good first draft, yet a human should read the first fifty emails before they go out, because a wrong merge tag or a stale fact costs more replies than any AI saves. Our best cold email tools for high-volume sending guide shows where AI volume meets deliverability in practice.

    Inbox management, CRM, ease of use and support

    Both tools are built for people who prospect every day, yet each one feels different from the first login. Instantly is the narrower of the two to learn, because the sequencer, the warmup, the database and the Unibox follow one simple loop, while Lemlist is the broader of the two to learn, because the channels, the conditions and the AI agents all live in one account. Either account can go from signup to a live campaign within a single working day.

    In fact, a newcomer can use either tool, yet reading our beginners guide to cold email first and spending a week learning the dashboard makes the first month much easier. Instantly rewards a team that wants volume without fuss. Lemlist rewards a team that wants every channel in one sequence.

    Unibox against the unified inbox in this Instantly vs Lemlist comparison

    Instantly’s Unibox is a master inbox that gathers replies from every connected mailbox in one place, with the AI Reply Agent beside it to answer leads in minutes and the built-in CRM tracking each lead from first email to closed deal. Hypergrowth and above carry that CRM integration, with pipeline, calling and SMS inside the optional CRM tier. A team that answers fast will feel at home here, because the reply, the agent and the deal live in one screen.

    Lemlist’s unified inbox gathers replies from email, LinkedIn, calls, WhatsApp and SMS in one place, with conditions that route each lead by behaviour and a Chrome extension that works from Gmail and LinkedIn. Enterprise adds the option to use Lemlist from inside your CRM, so a rep never leaves the system where the deals live. A team that answers across five channels will feel at home here, because every reply lands in the same inbox.

    Onboarding in this Instantly vs Lemlist comparison: pay first against a 14-day trial

    Instantly onboards by paid plan, because no trial is shown on its pricing page. A new account starts on Growth at $47 a month, connects its mailboxes, warms them with unlimited warmup, and launches its first campaign the same day, with chat support beside it and premium live support from Hypergrowth. A buyer who wants a guided start should check what onboarding the paid plan includes before the first invoice.

    In contrast, Lemlist onboards by trial, with 14 days of Multichannel features, except in-app calls, and 200 free credits to find emails and phone numbers, explore buying signals and try lemAgent. The trial needs no card to start, according to Lemlist’s own pricing FAQ, and the account moves to a paid plan only when the trial ends. A buyer who wants to prove the value before paying should start here.

    Support in this Instantly vs Lemlist comparison: chat against a dedicated manager

    Support follows the same pattern as the rest of the comparison. Instantly includes chat support on Growth and premium live support on Hypergrowth and above, with a dedicated account manager and a shared Slack channel on Enterprise. Lemlist includes a dedicated account manager and priority support on Enterprise, with custom terms and advanced login security beside them.

    In addition, both tools run sizeable help centres and knowledge bases, and each answers support tickets from paying customers. When you need a human at midnight, the tier you pay for counts for more than the brand name. A lone user on the cheapest tier should expect ticket or chat help, while a large team on a top tier can expect a named contact.

    Integrations in this Instantly vs Lemlist comparison: exports against native CRM sync

    Finally, each tool syncs with the big CRMs, and each offers a way to connect other apps. Instantly exports lists to major CRMs and outreach providers, with API and webhooks on its plans, so a team can push data wherever it needs to go. Lemlist adds native HubSpot and Salesforce sync, plus Zapier, with its API, MCP and CLI letting developers drive Lemlist from Claude, ChatGPT or the command line.

    HubSpot or Salesforce users will slot either tool into the stack without fuss. Teams that live in Clay or Zapier will get more from Lemlist’s native sync and MCP access. Teams that push lists into a separate CRM will find Instantly’s exports cover the job. Check the integration your CRM needs before you sign, because a missing sync costs more than any monthly saving.

    Feature matrix: Instantly vs Lemlist side by side

    This Instantly vs Lemlist comparison puts every claim in one place. Every row in the matrix below was checked against both official sites today, 16 November 2026. A tick means the provider states the feature on its own site, with any plan limits noted beside it. A dash means we could not confirm the feature, or the provider confirms it is absent. Read the matrix with your own priorities in mind, because no single tool wins every row.

    Pricing, data and buying in this Instantly vs Lemlist comparison

    FeatureInstantlyLemlist
    Entry price, monthly$47 a month, flat
    Growth, 5,000 emails
    $69 a month, flat
    Email plan, per workspace
    Entry price, annual$37.60 a month
    Billed yearly
    $55 a month
    Billed yearly
    Pricing modelFlat monthly fee
    Every outreach plan
    Flat for email, per user for multichannel
    Multichannel $109 a user
    Monthly email volume, entry plan5,000 emails
    Growth; 125,000 on Hypergrowth
    Volume chosen at signup
    No cap published; unlimited on Multichannel
    Searchable contact database✓
    450M+ B2B leads, 13 filters
    ✓
    650M+ contacts, 65M+ companies
    Database size published✓
    450M+ B2B leads
    ✓
    650M+ contacts, 65M+ companies
    Waterfall enrichment✓
    5+ providers, credit-priced
    ✓
    14+ providers, add-on $20 a month
    Buying-intent signals✓
    Job, news, technology, funding enrichment
    ✓
    Intent Signal Agents, add-on $29 a month
    Free plan—
    No free plan listed
    —
    No free plan, trial only
    Free trial—
    No trial shown on the pricing page
    ✓
    14 days, 200 free credits

    Last checked: 16 November 2026 on Instantly’s pricing page and Lemlist’s pricing page. Instantly’s Hypergrowth plan shows 125,000 emails a month on both its plan card and the page’s comparison table. Features and pricing can change, so please check the provider’s site before you buy.

    Finding, enrichment and AI in this Instantly vs Lemlist comparison

    FeatureInstantlyLemlist
    Email finding✓
    SuperSearch, credit-priced
    ✓
    Email finder, credits for successful results
    Phone numbers✓
    Full profile enrichment
    ✓
    Phone finder, credits for successful results
    Lookalike audiences✓
    Listed among the 13 filters
    —
    Not listed on the pricing page
    Credit rollover—
    Not listed on the pricing page
    ✓
    Unused credits roll over while subscribed
    AI sequence writer✓
    AI Copilot, AI Email Writer Agent
    ✓
    lemAgent, AI icebreakers
    AI reply handling✓
    AI Reply Agent, under five minutes
    —
    Conditions route replies; no reply agent named
    AI research agent✓
    Web Researcher Agent, 5 LLMs
    ✓
    AI Agentic Enrichment, Intent Signal Agents
    Personalised images and videos—
    Not listed on the pricing page
    ✓
    Dynamic images, videos, landing pages
    Chrome extension—
    Not listed on the pricing page
    ✓
    Find emails while browsing
    API, MCP and CLI access✓
    API and webhooks
    ✓
    API, MCP and CLI

    Channels, warmup and CRM in this Instantly vs Lemlist comparison

    FeatureInstantlyLemlist
    Email sequences✓
    Advanced sequences, A/B testing, subsequences
    ✓
    Sequences with conditions, A/B testing
    LinkedIn steps in sequences—
    Email only; no LinkedIn automation
    ✓
    Visits, invites, chat, voice notes
    Calling steps in sequences—
    Calling only inside the optional CRM tier
    ✓
    Built-in dialer, Aircall and Ringover
    WhatsApp and SMS steps—
    SMS only inside the optional CRM tier
    ✓
    SMS included; WhatsApp as an add-on
    Built-in CRM✓
    Built-in CRM from Hypergrowth, pipeline, calling, SMS
    ✓
    Use from your CRM on Enterprise
    Automated warmup✓
    Unlimited, 4.2M+ account pool
    ✓
    lemwarm, included on every plan
    Inbox rotation✓
    Every plan
    ✓
    Every plan
    Inbox placement tests✓
    Listed on the pricing page
    —
    Pre-send checks listed; no placement tests named
    Unified reply inbox✓
    Unibox master inbox
    ✓
    Unified inbox, all channels
    CRM sync (Salesforce, HubSpot)✓
    Export to major CRMs
    ✓
    Native HubSpot, Salesforce, Zapier sync

    Last checked: 16 November 2026 on Instantly’s pricing page and Lemlist’s pricing page. Features and pricing can change, so please check the provider’s site before you buy. We do not guess at features, prices or trials.

    What the matrix means for your shortlist in this Instantly vs Lemlist comparison

    Read the matrix with your own priorities in mind. Instantly wins the flat pricing, email volume, warmup depth and AI automation rows outright, because a $47 flat fee, 500,000 emails a month, unlimited warmup and agents that send and reply have no Lemlist equivalent. Lemlist wins the channel range, personalisation, trial and credit rollover rows outright, because automated LinkedIn, calls, SMS, dynamic images and videos, a 14-day trial and rollover credits have no Instantly equivalent.

    In addition, the matrix shows why the entry price can mislead. Instantly at $47 a month looks cheaper than Lemlist Email at $69, yet Lemlist covers unlimited users and a 650M+ database for that $69, while Instantly caps Growth at 5,000 emails and 1,000 uploaded contacts. Lemlist Multichannel at $109 a user looks dearer than Instantly Growth at $47, yet it covers LinkedIn, calls and SMS that Instantly does not offer at any price. The honest comparison is the full monthly cost of the setup you would really run, add-ons and second tools included.

    Pros and cons: the honest case for each tool

    Every tool has trade-offs, and an honest Instantly vs Lemlist comparison names them plainly. In fact, the strengths below show why each tool keeps winning customers. The weaknesses explain why some teams still pick the rival.

    Instantly strengths in this Instantly vs Lemlist comparison

    Most importantly, flat pricing tops the list. One $47-a-month fee covers unlimited email accounts, unlimited warmup and 5,000 emails, and the bill never grows when you add mailboxes or teammates. The volume ladder is the second strength: Hypergrowth sends 125,000 emails for $107 and Light Speed sends 500,000 for $358, so the cost per 1,000 emails falls to $0.86 and then $0.72 on monthly billing.

    Next, warmup depth is the third strength. Unlimited warmup across a pool of more than 4.2 million accounts, inbox rotation, custom tracking domains, inbox placement tests and the SISR system on Light Speed give a high-volume sender the deliverability tooling to match the volume. AI agents that write, send, answer and research complete a platform that covers the whole email loop from one login.

    Instantly weaknesses in this Instantly vs Lemlist comparison

    Nevertheless, email-only sending is the clearest weakness. Instantly offers no LinkedIn automation, no dialer and no SMS steps, so a multichannel team must buy a second tool beside it, and the real monthly cost rises above the $47 headline. A team that prospects on LinkedIn should price that second tool before signing.

    No trial is another watch point. Instantly shows no free trial on its pricing page, so a buyer cannot test the platform before paying for the first month. The Growth plan also caps at 5,000 emails and 1,000 uploaded contacts, so a team sending 6,000 emails a month pays $107 for Hypergrowth instead. Credits buy the database separately, so a team that finds many leads pays for SuperSearch on top of the outreach plan.

    Lemlist strengths in this Instantly vs Lemlist comparison

    Channel range tops the list for Lemlist. One sequence mixes email, LinkedIn visits, invites, chat and voice notes, calls, WhatsApp and SMS, with conditions that branch on what each lead does, which is rare among sequencers. The personalisation is the second strength: dynamic images and videos, personalised landing pages, AI icebreakers and spintax make each email feel written for one person.

    The trial is the third strength. A 14-day free trial with Multichannel features, except in-app calls, and 200 free credits lets a buyer prove the value with a real campaign before paying. Credits are charged only for successful results, unused credits roll over while the subscription stays active, and lemwarm sits on every plan, so a team never pays extra to warm its senders.

    Lemlist weaknesses in this Instantly vs Lemlist comparison

    Per-user multichannel pricing is still the clearest weakness. Multichannel costs $109 a user a month, so five reps cost $545 a month against Instantly’s $47 flat for email, and the gap grows with each new hire. A team that only sends email should stay on the $69 flat Email plan and never pay the per-user price.

    The volume question is another watch point. Lemlist’s pricing page states no fixed monthly email cap for the Email plan, so a high-volume team must confirm its volume at signup instead of reading a number off the page. The enrichment add-on at $20 a month and the intent signals add-on at $29 a month sit on top of the plan price, and WhatsApp is an add-on too, so the real monthly cost can rise above the $69 headline.

    Who should pick which: a short decision guide

    A decision guide is only useful when it names real buyers, so this Instantly vs Lemlist comparison ends the debate with five of them. Find the buyer who sounds most like you, and the answer follows. When two buyers both sound like you, start with the cheaper trial and let a month of real outreach settle it.

    Instantly vs Lemlist comparison: a salesperson at a fork in the road, one path lined with envelopes for high-volume email sending, the other with LinkedIn, phone and chat icons for multichannel outreach
    The decision in this Instantly vs Lemlist comparison: a fork in the road, with one path for high-volume email at a flat price and one path for multichannel outreach with LinkedIn.

    Pick Instantly when email volume comes first

    Choose Instantly when your team sends email at volume and wants the bill to stay flat. The Growth plan at $47 a month covers unlimited mailboxes, unlimited warmup and 5,000 emails, while Hypergrowth at $107 covers 125,000 emails with a built-in CRM. Open Growth, connect your mailboxes, warm them all without a per-inbox fee, and launch your first sequence before you scale.

    Indeed, Instantly also fits an agency that sends for many clients. Unlimited mailboxes mean each client gets its own senders without a new subscription, and the Light Speed plan at $358 covers 500,000 emails a month with the SISR system behind them. An agency that counts emails per dollar will feel at home here.

    Pick Lemlist when multichannel comes first

    Choose Lemlist when your team works every channel and wants each touch in one sequence. The Multichannel plan at $109 a user a month covers email, LinkedIn, calls and SMS, with 5 senders per user and unlimited emails and messages. Open the 14-day trial, build a list of fifty to two hundred verified prospects, and launch your first multichannel campaign before you scale.

    Lemlist also fits a team that sells to senior buyers. Dynamic images and videos, personalised landing pages and AI icebreakers make each email feel hand-written, while intent signal agents flag the accounts that are ready to buy right now. A team that wins on relevance rather than volume will be right at home here.

    Three questions that settle this Instantly vs Lemlist comparison

    Run through three checks. Do you send email at volume, or do your prospects answer on LinkedIn first? Would you rather pay one flat fee for unlimited mailboxes, or pay per user for every channel in one sequence? Does your team need a 14-day trial to prove the value, or is a $47 first month a fair price for unlimited warmup?

    When email volume and flat pricing matter, pick Instantly. If multichannel steps and personalisation matter, pick Lemlist. For a team of five sending email only, pick Instantly, because $47 a month covers the whole team against Lemlist’s $69. If two answers pull opposite ways, start with the tool that fixes your biggest pain today, since switching sequencers now is easier than switching after a year of campaigns.

    Frequently asked questions in this Instantly vs Lemlist comparison

    Which is cheaper, Instantly or Lemlist?

    It depends on your team size and your channels. A solo sender pays $47 a month on Instantly Growth or $69 a month on Lemlist Email, on monthly billing, so Instantly is cheaper for email only. A five-person team pays $47 a month on Instantly Growth, because the plan is flat, while Lemlist Email costs $69, because that plan is flat too, so Instantly is still cheaper there. A five-person multichannel team pays $47 on Instantly, for email only, against $545 on Lemlist Multichannel, for every channel, so the comparison is not like for like. All figures were checked on 16 November 2026.

    Does Instantly automate LinkedIn outreach?

    No. Instantly sends email only, with no LinkedIn automation, no dialer and no SMS steps on its outreach plans. LinkedIn steps, calls and SMS need a second tool beside Instantly, or the optional CRM tier that carries calling and SMS. Lemlist automates LinkedIn visits, invites, chat and voice notes inside its sequences, on the Multichannel plan at $109 a user a month. If LinkedIn is the heart of your outbound, Lemlist is the stronger pick.

    Which has the bigger database, Instantly or Lemlist?

    Lemlist, by a clear margin on published figures. Lemlist publishes a database of 650M+ contacts across 65M+ companies, with waterfall enrichment across more than 14 providers. Instantly publishes a database of 450M+ B2B leads, with waterfall enrichment from five or more providers. Test both tools on 100 prospects from your own market before you judge coverage, because size alone does not prove the database holds your buyers.

    Does Instantly have a free trial?

    No trial is shown on Instantly’s pricing page, checked today, 16 November 2026, so this Instantly vs Lemlist comparison claims none for Instantly. Lemlist offers a 14-day free trial with Multichannel features, except in-app calls, and 200 free credits to find emails and phone numbers, explore buying signals and try lemAgent. If a free trial matters most, Lemlist is the better offer.

    Should I buy Instantly or Lemlist for a team of five?

    Instantly is the stronger pick for email-only teams, because Growth at $47 a month flat covers unlimited mailboxes and 5,000 emails for the whole team, against $69 flat on Lemlist Email. Lemlist is the stronger pick for multichannel teams, because Multichannel at $109 a user covers LinkedIn, calls and SMS for five people at $545 a month, while Instantly offers no LinkedIn automation at any price. Read our best cold email tools for startups guide to see the full ranking.

    Which is better for high-volume sending, Instantly or Lemlist?

    Instantly, by a clear margin on published volume. Growth caps at 5,000 emails a month, Hypergrowth at 125,000 and Light Speed at 500,000, with the cost per 1,000 emails falling to $0.86 and then $0.72 on monthly billing. Lemlist’s pricing page states no fixed monthly email cap for the Email plan and lists unlimited emails and messages on Multichannel, so no per-email figure can be worked out for Lemlist from the official page. Read our best cold email tools for high-volume sending guide for the full ranking.

    The verdict in this Instantly vs Lemlist comparison

    Verdict: Instantly for high-volume email at a flat price, Lemlist for multichannel outreach with LinkedIn

    Instantly is the pick when email volume and flat pricing matter most. Growth costs $47 a month flat, with unlimited email accounts, unlimited warmup and 5,000 emails, while Hypergrowth lifts that to 125,000 emails for $107 and Light Speed to 500,000 for $358. Lemlist is the pick when multichannel outreach matters most. Its Multichannel plan runs email, LinkedIn, calls, WhatsApp and SMS inside one branching sequence for $109 a user a month, with a 14-day trial and 200 free credits to prove it first.

    In sum, choose for the team you employ today, not the one you hope to hire next year. A solo sender who counts emails should start on Instantly Growth, because $47 a month covers unlimited mailboxes and unlimited warmup from day one. A team of five working every channel should start on Lemlist’s 14-day trial, because two weeks of multichannel sending and 200 free credits cost nothing. A team that sends email only should start on Instantly, because $47 flat beats $69 flat at every team size. Whichever you pick, set up a separate sending domain, warm it for two to four weeks, and trial it on 25 prospects before you scale.

    We have not run hands-on deliverability or reply-rate tests on Instantly or Lemlist, so this Instantly vs Lemlist comparison gives no numeric score. The verdict rests on verified pricing, verified database and warmup claims and documented channel lists, all checked today, 16 November 2026. Try Lemlist free for 14 days, or start Instantly Growth at $47 a month, and let a month of real outreach confirm the choice.

    Visit Instantly →Check Lemlist →

    Keep reading

    Instantly vs LemlistInstantly from $47/mo flat · Lemlist from $69/mo flat Visit Instantly →
  • SendGrid vs Mailchimp 2026

    SendGrid vs Mailchimp 2026

    An email API that delivers your app’s mail against a marketing platform that grows your audience — and a clear winner for each job

    SendGrid vs Mailchimp is the most useful comparison in email, because the two tools answer different questions. SendGrid is an email API and SMTP relay, built so your app can send password resets, receipts and alerts at scale, with Marketing Campaigns as a second product for newsletters. Mailchimp is a marketing platform, built so a small business can grow an audience, design campaigns and run automated journeys, with transactional mail as a paid add-on. This SendGrid vs Mailchimp comparison checks pricing, the API against the platform, transactional against bulk mail, automation, templates, deliverability, compliance and support on both official sites, so you can pick with confidence.

    Visit SendGrid →Check Mailchimp →

    Prices checked 16 November 2026 on Twilio SendGrid’s and Mailchimp’s official pricing pages. Features and pricing can change, so please check the provider’s site before you buy.

    Quick Answer

    Choose SendGrid when your app sends the email. Its Email API starts with a 60-day free trial at 100 emails a day, and Essentials costs from $19.95 a month for 50,000 emails, with a 99.99% uptime SLA and a median delivery speed of 1.9 seconds across 205 billion emails a month. Choose Mailchimp when your marketing team sends the email. Its Free plan covers 250 contacts and 500 sends a month, Essentials starts at $13 a month for 500 contacts, and the drag-and-drop builder with Customer Journeys needs no developer at all.

    SendGrid leads on transactional sending, with a mature API, SMTP relay, real-time validation and dedicated IPs with automated warm-up on Pro. Mailchimp leads on marketing, with audiences, landing pages, predictive segments and multivariate testing that SendGrid’s Marketing Campaigns does not match. SendGrid leads on scale pricing, at $19.95 a month for 50,000 emails against Mailchimp’s contact-based bill, which reaches $75 a month on Essentials at 5,000 contacts. Mailchimp leads on the free start, because its Free plan stays free, while SendGrid’s free trial ends after 60 days.

    Contents

    Why this SendGrid vs Mailchimp comparison settles the choice

    Two famous names can hide two different products, and that is exactly what happens here. In fact, SendGrid and Mailchimp both send email, both offer a free start, and both appear on every best-email-tool list. A buyer who compares only the starting prices will miss the real difference, because SendGrid prices by the email and Mailchimp prices by the contact. A buyer who compares only the feature lists will miss it too, because SendGrid’s strongest features serve developers, while Mailchimp’s strongest features serve marketers.

    The picture gets sharper once you sort your email by job. App mail, such as sign-up confirmations, password resets, order receipts and alerts, needs an API that answers in milliseconds and never loses a message. Marketing mail, such as newsletters, welcome series, abandoned-cart reminders and promotions, needs an audience, a builder and journeys that run while you sleep. Most businesses send both kinds, which is why so many run both tools side by side.

    This SendGrid vs Mailchimp comparison takes those jobs in turn. Pricing leads, because the volume bill and the contact bill give the same business two very different monthly totals. Cost at scale comes next, because the gap widens as the list grows. The API against the platform, automation, templates, deliverability, a feature matrix and the honest pros and cons follow. By the end, you should know which tool fits your sending, and which plan inside it to start on.

    SendGrid and Mailchimp in plain English: an email API against a marketing platform

    SendGrid, now Twilio SendGrid, is a cloud email delivery engine. Moreover, your app calls its Email API or connects through SMTP relay. SendGrid delivers the message, tracks opens, clicks, bounces and blocks, and reports on every send. It moves more than 205 billion emails a month, with a claimed 99% deliverability rate and a 99.99% uptime SLA. Marketing Campaigns sits beside the API as a second product, with a visual builder, segmentation, A/B testing and automation, priced separately by contacts and sends.

    Mailchimp, owned by Intuit, is an opt-in email marketing and automation platform. Similarly, you collect subscribers who ask to hear from you, organise them into audiences, design campaigns in a drag-and-drop builder, and send them through automated Customer Journeys. Landing pages, signup forms, social ads, postcards and SMS all live in one account, with more than 300 integrations. Transactional mail runs through Mandrill, a paid add-on, because the core product is marketing email.

    Both tools cover the same everyday need at heart. In fact, you begin with people who expect your email, you design something worth opening, you send it. You learn from the opens, clicks and sales that follow. Because the loop matches on both tools, the decision rests on who sends the email and how it gets triggered. A developer who wires email into code will feel at home on SendGrid. A marketer who builds campaigns by hand will feel at home on Mailchimp.

    What SendGrid adds on top of sending in this SendGrid vs Mailchimp comparison

    Above all, SendGrid turns from a sender into infrastructure through its API. In addition, comprehensive client libraries, an SMTP relay, interactive API docs, event webhooks and inbound parse webhooks let a developer wire email into any app in an afternoon. Real-time email validation checks addresses before they bounce, Deliverability Insights shows reputation and delivery data. Suppression management keeps complainers and bouncers out of future sends.

    Moreover, SendGrid adds the scale features that high-volume senders actually pay for. Pro includes a dedicated IP with automated warm-up, subuser management, single sign-on, 2,500 free email validations a month, 60 email testing credits a month and seven days of searchable email activity. Premier adds 5,000 validations, custom volume and expert program management. Our SendGrid review covers the platform in full depth.

    What Mailchimp adds on top of sending in this SendGrid vs Mailchimp comparison

    Mailchimp, meanwhile, turns from a sender into a marketing platform through its audience tools. For example, audiences, tags and segments organise contacts by behaviour, signup forms and landing pages grow the list, and the reporting dashboard ties each send back to opens, clicks and sales. Intuit Assist, the generative AI helper, drafts subject lines and content, while Send Time Optimization picks the hour each contact is most likely to open.

    In addition, Mailchimp adds the channels that a small business outgrows email with. SMS runs as an add-on on paid plans, social ads and postcards reach people beyond the inbox. A built-in CRM keeps customer notes beside the campaigns. Standard opens up to 200 automation flows, predictive segmentation and generative AI, while Premium drops the seat and audience limits entirely. Our Mailchimp review covers the platform in full depth.

    The one-sentence difference in this SendGrid vs Mailchimp comparison

    SendGrid is the delivery engine: your app triggers the email through an API. SendGrid delivers it fast, tracks it and protects your sender reputation at scale. Mailchimp is the marketing platform: your team grows an audience, designs campaigns and runs journeys that nurture subscribers toward a sale. A developer who needs receipts delivered will notice the difference in week one. A marketer who needs a welcome series running will notice it on the first campaign.

    Neither tool is made for cold outreach, so a team that mostly emails strangers should look at the prospecting tools in our best cold email software guide instead. For opt-in marketing and transactional mail, though, this pair stays one of the most useful match-ups around.

    The opt-in warning first: neither tool is for cold email

    Read this section before you compare a single price, because it decides whether either tool will work for you at all. SendGrid and Mailchimp are built for opt-in marketing and transactional email, not cold outreach. Both tools expect every recipient to have asked for your mail, or to have a live relationship with your business, such as an account, an order or a support ticket. Purchased lists, scraped addresses and mail to people who never opted in break that deal.

    Mailchimp states the rule plainly, and its enforcement is strict. As a result, its own help pages describe an opt-in only service, and accounts that mail purchased lists or non-opted-in contacts risk suspension. The pattern is always the same: complaints and bounces spike, because strangers mark unexpected mail as spam, deliverability then falls, because mailbox providers notice the complaints, and Mailchimp pauses sending while it reviews the account. A suspended account loses its audiences, its journeys and its history. A new account does not fix a banned practice.

    How either tool reacts to a cold list in this SendGrid vs Mailchimp comparison

    SendGrid enforces the same idea from the infrastructure side. However, its acceptable-use rules and suppression handling protect the shared IPs that every Essentials customer sends from. One bad sender can hurt the neighbours. A new account that blasts a cold list will see bounces, blocks and spam complaints rise. The account can be restricted or closed. The free trial, at 100 emails a day for 60 days, is designed for testing real app mail, not for working through a bought list.

    In short, if your plan is cold email, stop here and read our ESPs for cold email guide first. Bulk ESPs are built for transactional and opt-in mail, not cold outreach, and that guide explains why, with the tools that actually fit cold sending. If your recipients opted in, or your app sends mail they expect, both SendGrid and Mailchimp will serve you well, and the rest of this SendGrid vs Mailchimp comparison will help you choose between them.

    Pricing head-to-head in this SendGrid vs Mailchimp comparison

    Pricing is where this SendGrid vs Mailchimp comparison first gets interesting, because the two price lists work in opposite ways. SendGrid bills by email volume on the Email API, so the bill climbs with every thousand messages your app sends. Mailchimp bills by contacts stored, so the bill climbs with every hundred subscribers you add, even before you send a single campaign. A small app with a big list and a big app with a small list will read the same two price lists and reach opposite conclusions.

    Every figure below comes from the official pricing pages, checked today, 16 November 2026. SendGrid sells two products on two bills, so the Email API and Marketing Campaigns each get their own table. Mailchimp sells one product on four plans, so its table covers Free, Essentials, Standard and Premium. Where a price is not shown on the official page, this SendGrid vs Mailchimp comparison says so plainly instead of guessing.

    SendGrid vs Mailchimp comparison: two contrasting pricing visuals side by side, a tall stack of envelopes counted by volume beside a stepped pyramid of contact cards with a price tag
    Pricing in this SendGrid vs Mailchimp comparison: SendGrid prices by email volume, while Mailchimp prices by contacts stored.

    SendGrid Email API plans: free trial, Essentials, Pro and Premier, from $19.95 a month

    PlanPrice*What you getBest forVisit
    SendGrid — Free trialBest for testing the API$0 for 60 days
    100 emails a day, no card
    100 emails a day
    Analytics, template editor, 3-day activity
    Developers testing real app mailTry Free →
    SendGrid — EssentialsBest for steady app mailFrom $19.95 a month
    50,000 emails; $34.95 for 100,000
    50,000 to 100,000 emails a month
    Shared IPs, 2 event webhooks, 3-day activity
    Apps sending 50,000 to 100,000 a monthVisit Site →
    SendGrid — ProBest for production sendingFrom $89.95 a month
    100,000 emails, up to 2.5M
    1 dedicated IP, automated warm-up
    SSO, subusers, 2,500 validations, 7-day activity
    Apps needing their own sending IPSee Pro →
    SendGrid — PremierBest for very high volumeCustom pricing
    5M+ emails a month
    Custom volume, 5,000 validations
    Expert program management, 7-day activity
    Enterprises sending millions a monthGet a Quote →

    * Last checked: 16 November 2026 on Twilio SendGrid’s Email API pricing page. The page confirms the free trial at $0 for 60 days and 100 emails a day with no credit card, Essentials from $19.95 a month, Pro from $89.95 a month and Premier on custom pricing. Taxes and overage fees may apply. Features and pricing can change, so please check the provider’s site before you buy. We do not guess at features, prices or trials.

    Reading the Email API volume steps in this SendGrid vs Mailchimp comparison

    Volume steps are where SendGrid’s real monthly cost takes shape. Essentials at $19.95 a month covers 50,000 emails, which works out at about $0.40 per 1,000 emails. $34.95 covers 100,000, which works out at about $0.35 per 1,000. Pro at $89.95 a month covers 100,000 emails with a dedicated IP, which works out at about $0.90 per 1,000. Pro costs more than double Essentials for the same volume, because the dedicated IP, validation and testing credits ride along.

    One rule makes the free trial genuinely useful: it runs $0 for 60 days at 100 emails a day, with no credit card. It includes analytics, deliverability optimisation and the dynamic template editor, so a developer can test the real platform before paying anything. The catch is that the trial ends after 60 days. There is no permanent free plan on the Email API, so a hobby project that never upgrades will stop sending. Send past your plan’s limit and overage charges may apply on the next invoice.

    SendGrid Marketing Campaigns plans: free trial, Basic, Advanced and Custom, from $15 a month

    PlanPrice*What you getBest forVisit
    Marketing Campaigns — Free trialBest for testing campaigns$0 for 60 days
    100 contacts, 100 emails a day
    100 contacts, 100 emails a day
    Design editor, segmentation, A/B testing
    Marketers testing the builderTry Free →
    Marketing Campaigns — BasicBest for simple newslettersFrom $15 a month
    5,000 contacts, 15,000 emails
    Design and code editors, segmentation
    5 signup forms, 10 testing credits, ticket support
    Small lists sending regular newslettersVisit Site →
    Marketing Campaigns — AdvancedBest for automated campaignsFrom $60 a month
    10,000 contacts, 50,000 emails
    Automation, dedicated IP access
    15 signup forms, 60 testing credits, 1,000 teammates
    Marketers running journeys at scaleSee Advanced →
    Marketing Campaigns — CustomBest for very large listsCustom pricing
    500,000+ contacts
    Custom contacts and sends
    Automation, dedicated IP access, expert services
    Enterprises with huge audiencesGet a Quote →

    * Last checked: 16 November 2026 on Twilio SendGrid’s Marketing Campaigns pricing page. The page confirms the free trial at $0 for 60 days, Basic from $15 a month, Advanced from $60 a month and Custom on custom pricing. The page’s own FAQ still describes a free Marketing Campaigns plan at 2,000 contacts and 6,000 emails a month, so we report it as written, with a caution to confirm it at signup, since SendGrid’s free plans have changed before. Marketing Campaigns and the Email API are bought separately, and their sends are counted separately. Features and pricing can change, so please check the provider’s site before you buy.

    Reading the two-bill trap in this SendGrid vs Mailchimp comparison

    Two bills are where SendGrid’s real monthly cost takes shape. A business that needs both app mail and newsletters pays for the Email API and for Marketing Campaigns, because the two products are bought separately and their sends are counted separately. Essentials at $19.95 plus Marketing Campaigns Basic at $15 comes to $34.95 a month before either product scales, which is more than Mailchimp Essentials at $13 for a 500-contact list.

    In contrast, a business that needs only one half of SendGrid pays only for that half. Furthermore, an app with no newsletter never buys Marketing Campaigns, and a newsletter with no app mail never buys the Email API. The plan comparison holds the full Automation builder for Advanced at $60, while Basic at $15 covers the design editor, segmentation, A/B testing and signup forms. SendGrid’s own FAQ describes automation in the free Marketing Campaigns plan too. Confirm which automations your plan includes before you buy.

    Mailchimp plans: Free, Essentials, Standard and Premium, from $13 a month

    PlanPrice*What you getBest forVisit
    Mailchimp — FreeBest for starting out$0
    250 contacts, 500 sends a month
    250 contacts, 500 sends a month
    1 seat, 1 audience, 250 sends a day cap
    Beginners growing a first listStart Free →
    Mailchimp — EssentialsBest for small businessesFrom $13 a month
    500 contacts, 10× sends
    5,000 sends a month at 500 contacts
    3 seats, 3 audiences, A/B testing, scheduling
    Small businesses sending regularlyVisit Site →
    Mailchimp — StandardBest for growing marketersFrom $20 a month
    500 contacts, 12× sends
    6,000 sends a month at 500 contacts
    5 seats, 5 audiences, 200 flows, predictive segments
    Marketers running real automationSee Standard →
    Mailchimp — PremiumBest for large teamsFrom $350 a month
    10,000 contacts, 15× sends
    150,000 sends a month at 10,000 contacts
    Unlimited seats and audiences, phone support
    Large teams needing phone supportView Premium →

    * Last checked: 16 November 2026 on Mailchimp’s pricing page. The page renders dollar figures in JavaScript, so the dollar figures above rest on three independent November 2026 checks of that page, all in agreement: Free $0, Essentials from $13, Standard from $20 and Premium from $350 a month. The contact limits, send multiples (10×, 12×, 15×), seats, audiences and trial terms (14-day Standard and Essentials trial, 1-month Premium trial) were read directly from the official page today. Features and pricing can change, so please check the provider’s site before you buy. We do not guess at features, prices or trials.

    Reading Mailchimp’s contact bill in this SendGrid vs Mailchimp comparison

    Contact tiers are where Mailchimp’s real monthly cost takes shape. Meanwhile, the bill rises with the list, not with the sends. A list that grows from 500 to 5,000 contacts moves Essentials from $13 to $75 a month and Standard from $20 to $100, even if the sending stays the same. At 10,000 contacts, Essentials costs $110, Standard costs $135 and Premium costs $350. At 25,000 contacts, Essentials costs $270 and Standard costs $310.

    One rule makes Mailchimp’s bill easy to misread: Mailchimp counts unsubscribed contacts toward your bill unless you archive them, so a list of 10,000 names with 3,000 inactive ones still bills at the 10,000-contact tier. Archive the contacts who never open before the list grows, or the bill will grow with them. Mailchimp also bills overages automatically when a list or send limit is passed, and may move the account to a higher contact tier during a trial when that tier would cost less.

    In sum, Mailchimp’s free plan is the friendliest free start in this SendGrid vs Mailchimp comparison, because it stays free with no time limit, at 250 contacts and 500 sends a month. The trade is real, though: the free plan keeps Mailchimp branding in the footer, offers email support for the first 30 days only, and includes no automation flows or scheduled sends. A business that outgrows 250 contacts should expect the $13 Essentials step, and the $20 Standard step soon after, because the full automation lives on Standard.

    What each tool costs at 500, 5,000 and 10,000 contacts — and at 10,000, 100,000 and 1,000,000 emails

    Cost at scale is the fairest way to compare a volume bill against a contact bill, because the headline prices hide what each setup actually costs. SendGrid prices by email volume and Mailchimp prices by contacts, so the two models are not directly comparable. This SendGrid vs Mailchimp comparison says so plainly. The tables below work out the cheapest monthly bill that covers each size, on monthly billing, with the arithmetic shown so you can check it.

    For example, the contact table compares Mailchimp against SendGrid Marketing Campaigns, because both products price by contacts stored. The email table compares SendGrid’s Email API against the Mailchimp plan whose send allowance covers the volume, because that is the only honest way to put a volume number beside a contact number. Every figure is arithmetic from the plan prices checked today, 16 November 2026.

    Cost by contacts in this SendGrid vs Mailchimp comparison

    ContactsMailchimp EssentialsMailchimp StandardSendGrid Marketing CampaignsCheaper pick
    500 contacts$13 a month
    5,000 sends included
    $20 a month
    6,000 sends included
    From $15 a month
    Basic, 5,000 contacts, 15,000 sends
    Mailchimp Essentials, by $2
    5,000 contacts$75 a month
    50,000 sends included
    $100 a month
    60,000 sends included
    From $15 a month
    Basic 5K, 15,000 sends
    SendGrid Basic, by $60
    10,000 contacts$110 a month
    100,000 sends included
    $135 a month
    120,000 sends included
    From $60 a month
    Advanced 10K, 50,000 sends
    SendGrid Advanced, by $50

    Arithmetic, labelled plainly: Mailchimp sends are the contact count times the plan multiple — 500 × 10 = 5,000, 5,000 × 10 = 50,000 and 10,000 × 10 = 100,000 on Essentials; 500 × 12 = 6,000, 5,000 × 12 = 60,000 and 10,000 × 12 = 120,000 on Standard. SendGrid Marketing Campaigns Basic at $15 covers 5,000 contacts and 15,000 emails, and Advanced at $60 covers 10,000 contacts and 50,000 emails, so the SendGrid figures at 5,000 and 10,000 contacts buy far fewer sends than the Mailchimp figures at the same size. Last checked: 16 November 2026. Features and pricing can change, so please check the provider’s site before you buy.

    Cost by emails sent in this SendGrid vs Mailchimp comparison

    Emails a monthSendGrid Email APIMailchimp plan that covers itCheaper pick
    10,000 emails$19.95 a month
    Essentials, 50,000 allowance
    Essentials, 1,000-contact tier
    10,000 sends at 10×; price: check the site
    SendGrid, on a verified price
    100,000 emails$34.95 a month
    Essentials, 100,000 allowance
    $110 a month
    Essentials, 10,000 contacts, 100,000 sends
    SendGrid, by about $75
    1,000,000 emailsPro, check the site
    From $89.95 at 100,000, rises with volume
    Premium, check the site
    10,000 contacts include 150,000 sends only
    No verified winner at this volume

    Arithmetic, labelled plainly: 100,000 emails need a 10,000-contact Mailchimp Essentials tier, because 10,000 × 10 = 100,000 sends. SendGrid Essentials at $34.95 covers exactly 100,000 emails, so the gap is $110 − $34.95 = about $75. At 1,000,000 emails, neither official page prints the exact price on the plan cards, so this SendGrid vs Mailchimp comparison says check the site instead of guessing. Last checked: 16 November 2026. Features and pricing can change, so please check the provider’s site before you buy.

    What the price gap means in practice in this SendGrid vs Mailchimp comparison

    Take a small list of 500 contacts, where Mailchimp Essentials at $13 a month beats SendGrid Marketing Campaigns Basic from $15 by $2, yet SendGrid’s $15 buys 15,000 sends against Mailchimp’s 5,000. The $2 gap is real, yet each tool spends it on a different strength: Mailchimp buys the friendlier builder and journeys, while SendGrid buys three times the sends. A business that mails twice a week will feel the send allowance more than the $2.

    In contrast, a list of 5,000 contacts flips the maths hard in one direction. Mailchimp Essentials costs $75 a month for 50,000 sends, while SendGrid Marketing Campaigns Basic costs from $15 for 15,000 sends. SendGrid wins the bill by $60, yet it buys a third of the sends, so a business that mails its whole list weekly would blow past 15,000 sends in the first week and pay overages. The honest comparison is the bill for the sends you actually run, not the bill for the contacts you store.

    At 100,000 emails a month, the volume model wins outright. SendGrid Essentials at $34.95 covers the whole volume, while Mailchimp needs a 10,000-contact Essentials tier at $110 for the same 100,000 sends. That is a gap of about $75 a month, or about $900 a year, for the same number of emails. A business that sends high volume to a modest list should price the volume model first, because the contact model charges for the list whether it mails or not.

    Trying before you buy in this SendGrid vs Mailchimp comparison: a 60-day trial against a free plan

    The trial gap is the friendliest difference of all, because both tools let you test before you pay, in different ways. SendGrid offers a 60-day free trial on both products, at 100 emails a day with no credit card, which is generous for testing and useless for a live list, because it ends. Mailchimp offers a Free plan that stays free with no time limit, at 250 contacts and 500 sends a month, plus a 14-day trial of Standard or Essentials and a 1-month trial of Premium.

    No paid plan on either tool lacks a trial or a free tier, so testing costs nothing on both. If a free plan with no deadline matters most, Mailchimp’s is the better offer. If sixty days of full-feature testing matters most, SendGrid answers the question at once. Either way, set a reminder before the trial ends, because SendGrid’s trial stops sending when it ends. Mailchimp’s Standard trial moves to a paid plan when it ends.

    Email API against marketing platform: the core difference

    The core difference in this SendGrid vs Mailchimp comparison is who the product is built for. SendGrid is built for developers, so its first screen is code, its first feature is an API. Its first promise is delivery speed. Mailchimp is built for marketers, so its first screen is an audience, its first feature is a builder. Its first promise is a campaign that looks good and sends itself. A team that buys the wrong half will fight the tool every week.

    For example, the difference shows up in the first hour. A developer on SendGrid grabs an API key, drops the client library into the app, and sends a password reset in an afternoon. A marketer on Mailchimp imports a list, picks a template, writes a newsletter, and schedules it for Tuesday morning. Both jobs take an afternoon, yet neither person could do the other’s job in the same tool without a fight.

    SendGrid vs Mailchimp comparison: a developer workspace with a laptop showing code and an API plug sending envelopes beside a marketer workspace with a newsletter builder and an automation journey flowchart
    The core difference in this SendGrid vs Mailchimp comparison: SendGrid is built for developers who send through an API, while Mailchimp is built for marketers who build campaigns by hand.

    SendGrid’s Email API in this SendGrid vs Mailchimp comparison: code first, delivery always

    Specifically, SendGrid’s Email API is built for the emails your app sends. Consequently, comprehensive client libraries cover the common languages, the SMTP relay takes mail from any system that speaks SMTP. Interactive API docs let a developer test a call in the browser. Event webhooks report opens, clicks, bounces, blocks and spam reports back to the app in real time, while inbound parse webhooks turn replies into data the app can act on.

    Moreover, SendGrid’s API treats scale as a feature, not a limit. The platform moves more than 205 billion emails a month, with a 99.99% uptime SLA and a median delivery speed of 1.9 seconds, so a password reset lands before the user gives up and requests another. Dynamic templates carry Handlebars variables, so one template serves every user with their own name, order and link. A developer who needs receipts, alerts and confirmations delivered will find no marketing platform that matches it.

    Mailchimp’s platform in this SendGrid vs Mailchimp comparison: audiences first, campaigns always

    Mailchimp, by contrast, treats the audience as the product, with sending built on top. In contrast, audiences hold contacts with tags, segments and notes, signup forms and landing pages grow the list, and the reporting dashboard ties each send back to opens, clicks and sales. More than 300 integrations connect CRMs, social platforms, survey tools and payment providers. The audience stays in sync with the rest of the business.

    Similarly, Mailchimp pairs that audience with the channels a small business grows into. SMS runs as an add-on on paid plans, social ads and postcards reach people beyond the inbox. A built-in CRM keeps customer notes beside the campaigns. A marketer who needs a newsletter, a welcome series and a landing page in one login will feel at home, because the list, the builder and the journeys live together.

    Transactional against bulk in this SendGrid vs Mailchimp comparison

    All in all, the transactional split is the sharpest line in this SendGrid vs Mailchimp comparison. SendGrid’s Email API is transactional mail by design: one message, triggered by one event, delivered in about two seconds. Mailchimp’s core product is bulk marketing mail: one campaign, sent to thousands of subscribers at once, with timing tuned per contact. Each tool can stretch into the other’s job, yet neither stretch is free.

    Finally, the stretch costs real money on both sides. SendGrid’s Marketing Campaigns is a second subscription, so bulk mail on SendGrid means a second bill. Mailchimp’s transactional mail runs through Mandrill, a paid add-on, so app mail on Mailchimp means a second bill too. Many businesses run both tools for exactly this reason: SendGrid for the app mail, Mailchimp for the marketing mail, each doing the job it was built for. Our Mailgun vs SendGrid vs Postmark comparison sets SendGrid against the other transactional specialists.

    Automation and journeys: event triggers against Customer Journeys

    Automation is the feature that makes this SendGrid vs Mailchimp comparison unlike a simple price contest. SendGrid automates from events: an app event fires, the API sends a message, and the journey follows the data. Mailchimp automates from the audience: a contact signs up, clicks or buys, and the Customer Journey builder walks them through a visual flow. Both are genuinely useful, yet they start from opposite ends.

    That split settles the whole purchase for many teams. A developer who wants a password reset to trigger a follow-up needs an API that fires on the event. A marketer who wants a new subscriber to receive a welcome series needs a builder that fires on the signup. Each buyer has a point, so choose the automation that matches how your emails actually start.

    Video: How to Set Up Automations in Mailchimp | Mailchimp Tutorial 2026 by HowToHarbor on YouTube. This video is the creator’s property, embedded via YouTube for education. OutreachCompare is not affiliated with HowToHarbor and does not claim ownership of this video.

    SendGrid automation in this SendGrid vs Mailchimp comparison: triggers, segments and schedules

    Specifically, SendGrid’s automation lives in two places. Firstly, the Email API lets an app trigger any message from any event, with dynamic templates personalising each send. A developer can build any journey in code, with no limits beyond the plan’s volume. Marketing Campaigns adds a visual Automation builder on Advanced, with list-membership triggers, wait steps and branching, plus send scheduling and A/B testing on every plan.

    Moreover, SendGrid’s automation suits a team that already thinks in events. A signup triggers a welcome email, a purchase triggers a receipt and a follow-up, and a password reset triggers a confirmation, all from the same API key. The trade is that the marketer must ask a developer to change the journey, because the logic lives in code, not in a canvas. A team with a developer on staff will never notice the trade. A team without one will feel it every week.

    Mailchimp automation in this SendGrid vs Mailchimp comparison: Customer Journeys with branches

    Mailchimp, meanwhile, automates through Customer Journeys, a visual builder where a marketer drags triggers, waits, emails and conditional splits onto a canvas. A contact who signs up gets a welcome series, a contact who clicks gets a follow-up, and a contact who abandons a cart gets a reminder, all without writing code. Pre-built journeys cover welcome, abandoned cart, re-engagement and post-purchase flows. A small business can switch one on in an afternoon.

    In addition, Mailchimp gates the depth of automation by plan, so the price decides how far a journey can go. Essentials allows up to 4 flow steps, which covers a simple welcome email, while Standard unlocks up to 200 flows with predictive segmentation and generative AI. Premium adds enhanced automation flows, multivariate testing and a dedicated onboarding specialist. A business that outgrows a four-step flow should expect the $20 Standard step, because that is where the full builder lives.

    Where automation differs in this SendGrid vs Mailchimp comparison

    One honest warning applies to both tools here, and it matters more than any feature list. Automation only works on contacts who opted in, because a journey that fires on a purchased list will burn the sender reputation that both tools protect. A welcome series sent to strangers will spike complaints. The account review that follows will pause the very journeys you built. Build the list first, with double opt-in on the signup forms, and the automation will earn its keep.

    Similarly, the two builders differ in who can change them. Mailchimp’s canvas lets a marketer edit a journey at 9am and see it live by 10am, with no developer in the loop. SendGrid’s API lets a developer version the journey in code, test it, and deploy it like any other feature, with no marketer in the loop. A team that changes journeys weekly should pick the canvas. A team that changes them with each release should pick the code.

    Templates and builder: dynamic templates against a drag-and-drop studio

    Templates and builders decide how good your emails look, and how fast a new campaign goes out. SendGrid gives a developer dynamic templates with Handlebars variables, a design editor and a code editor, plus email testing credits that preview rendering across clients. Mailchimp gives a marketer a drag-and-drop studio with hundreds of pre-built templates, a content studio, branded templates and custom-coded templates on Standard and Premium. Both produce good-looking mail, yet they serve different hands.

    In fact, the builder gap is the widest design gap in this SendGrid vs Mailchimp comparison, so the details matter more than the headline. A developer who builds one template for a million users needs variables, versioning and testing. A marketer who builds a fresh newsletter every week needs drag-and-drop blocks, images and a preview that looks right on a phone. Each buyer has a point, so pick the builder that matches who actually writes your emails.

    SendGrid templates in this SendGrid vs Mailchimp comparison: dynamic, tested, code-friendly

    Specifically, SendGrid’s templates are built for scale. Dynamic templates carry Handlebars variables, so one template serves every user with their own name, order number and link. The design editor and code editor sit side by side. A developer can hand-code a template and a marketer can tweak it visually. Email testing credits preview the render across clients: 3 credits on the free trial, 10 on Basic, and 60 on Advanced and Pro, with more available to buy.

    Moreover, SendGrid’s testing is the deeper of the two on the transactional side. Pro includes 60 testing credits a month, and extra credits run from $18 a month for 30 to $800 a month for 2,000. A team that sends receipts and alerts to millions of inboxes should test every template change before it ships, because a broken receipt costs more than a broken newsletter.

    Mailchimp templates in this SendGrid vs Mailchimp comparison: hundreds of designs, branded and custom

    Mailchimp, by contrast, treats templates as a marketing asset, not a developer asset. Hundreds of pre-built templates cover newsletters, promotions, announcements and events, while the content studio stores images, files and brand assets in one place. Branded templates arrive on Standard, custom-coded templates can be created and sent on Standard and Premium. The new builder supports AI-written subject lines and content through Intuit Assist.

    In addition, Mailchimp adds the design extras that a small business actually uses. Secondly, landing pages use the same builder as the emails, signup forms match the brand, and social ads reuse the same creative. A marketer who designs a campaign on Monday can reuse the same look on a landing page on Tuesday, with no developer in the loop. That reuse is the reason many small businesses pick Mailchimp even when the per-email price is higher.

    Where the builders differ in this SendGrid vs Mailchimp comparison

    All in all, the builder lists look the same on paper, yet three extras separate them. Mailchimp offers hundreds of templates against SendGrid’s smaller set. A marketer who wants a fresh design every week will find more choice on Mailchimp. SendGrid offers Handlebars variables and API-driven sends. A developer who wants one template for a million users will find more power on SendGrid.

    Finally, the third difference is testing. SendGrid sells email testing credits by the pack, with 60 a month on Pro and Advanced. A team can preview every template across clients before it ships. Mailchimp tests through A/B and multivariate testing on Standard and Premium. A marketer can learn which subject line wins, yet the render preview is lighter than SendGrid’s. A team that obsesses over rendering should test both builders on the same template before committing.

    Deliverability: 205 billion emails a month against send-time optimisation

    Deliverability decides whether any of this matters, because an email that lands in spam earns no opens. SendGrid claims a 99% deliverability rate across a platform that moves more than 205 billion emails a month, with a 99.99% uptime SLA and a median delivery speed of 1.9 seconds. Mailchimp publishes no headline deliverability figure, and instead leans on authentication, Send Time Optimization and list hygiene to earn the inbox. That split is the whole story of this SendGrid vs Mailchimp comparison in one paragraph, and it decides the purchase for anyone who sends at scale.

    For example, the two approaches suit different senders. A high-volume app that sends millions of receipts needs the infrastructure, the dedicated IPs and the reputation data that SendGrid publishes. A small business that sends a weekly newsletter to a few thousand subscribers needs the timing, the engagement data and the list care that Mailchimp builds in. Both approaches work, yet they work for different reasons.

    Video: SendGrid Emails Going to Spam? How to Fix It (sendgrid.net) by Unspam Email on YouTube. This video is the creator’s property, embedded via YouTube for education. OutreachCompare is not affiliated with Unspam Email and does not claim ownership of this video.

    SendGrid deliverability in this SendGrid vs Mailchimp comparison: scale, IPs and Insights

    In particular, SendGrid treats deliverability as infrastructure. Finally, dedicated IPs arrive on Pro and Premier, with automated warm-up that raises volume gradually over days and weeks. A new IP builds reputation safely instead of blasting a full list on day one. Deliverability Insights shows reputation and delivery data, ISP feedback loops report complaints. Suppression management keeps bouncers and complainers out of future sends.

    What is more, SendGrid’s scale is the point. A platform that moves 205 billion emails a month has seen every spam filter, every blocklist and every ISP quirk, and its 99% deliverability claim, its 99.5% average delivery rate and its 91.3% inbox placement figure for Shopify’s merchants all rest on that volume. Those are vendor figures, so treat them as a claim about the platform, not a promise about your own sends. Your own authentication, list and content decide your own inbox rate.

    Mailchimp deliverability in this SendGrid vs Mailchimp comparison: timing, authentication and list care

    Mailchimp, by contrast, treats deliverability as list care. In sum, domain authentication proves your emails come from you, Send Time Optimization picks the hour each contact is most likely to open. Engagement data shows which contacts still open and which have gone quiet. Archive the quiet ones, and the open rate rises, because mailbox providers judge a sender by how its audience reacts.

    Similarly, Mailchimp pairs that care with the rules that protect it. Double opt-in on signup forms filters out typos, bots and low-intent signups before they pollute the list, and the account review that follows a complaint spike protects the shared sending reputation for every other customer. A business that grows its list slowly, mails only to people who asked. Archives the inactive will rarely see a deliverability problem on Mailchimp.

    Authentication and warm-up in this SendGrid vs Mailchimp comparison

    One honest warning applies to both tools here. Specifically, no deliverability feature can save a sender that skips authentication. Set up SPF, DKIM and DMARC on your own domain before you send at volume, because mailbox providers distrust mail from an unauthenticated domain. Google requires DMARC past 5,000 emails a day to Gmail. Our sending-domain guide explains each record in turn.

    In fact, warm-up works the same way on both tools, even though the names differ. A new dedicated IP on SendGrid warms gradually, and a new Mailchimp list warms gradually too, because mailbox providers distrust sudden volume from an unknown sender. Start small, lift the daily volume a little at a time, and let the reputation build over two to four weeks before real volume begins. Our deliverability guide covers the full setup if a specialist read tempts you instead.

    Ease of use, integrations and support

    Both tools are built for people who send email every day, yet each one feels different from the first login. SendGrid is the broader of the two to learn, because the API, the webhooks, the templates and the Marketing Campaigns product all live in one account, while the free trial gives you sixty days to learn them. Mailchimp is the friendlier of the two to learn, because the audience, the builder and the journeys follow one simple loop, while the free plan gives you time to learn it. Either account can go from signup to a live send within a single working day.

    A newcomer can learn either tool, yet reading our beginners guide to cold email first and spending a week exploring the dashboard makes the first month much easier. SendGrid rewards a team that wants the API to do the heavy lifting. Mailchimp rewards a team that wants one friendly login for the whole marketing loop.

    Onboarding in this SendGrid vs Mailchimp comparison: a 60-day trial against a free plan

    SendGrid onboards by trial with no card. The 60-day free trial covers 100 emails a day on the Email API and 100 contacts on Marketing Campaigns, with analytics, deliverability optimisation and the template editor included. A developer can test the real platform before paying anything. When the trial ends, sending stops until a paid plan starts, so set a reminder before day sixty.

    In contrast, Mailchimp onboards by free plan with no deadline. The Free plan covers 250 contacts and 500 sends a month, with email support for the first 30 days, and the 14-day trial of Standard or Essentials opens the paid features on top. A 1-month trial of Premium is available for qualified new customers through sales. When the Standard trial ends, the account moves to a paid plan, so set a reminder to check your list size before your first big campaign.

    Support in this SendGrid vs Mailchimp comparison: tickets and phone on the top tiers

    Support follows the same pattern as the rest of the comparison. SendGrid includes ticket support on Marketing Campaigns Basic, ticket, chat and phone on Advanced, and guaranteed response times on Advanced, with personalised support available to buy on the Email API and expert program management on Premier. Mailchimp includes email support for the first 30 days on Free, 24/7 email and chat on Essentials and Standard, and phone and priority support on Premium, with a dedicated onboarding specialist and four onboarding sessions.

    Both tools also run sizeable help centres and knowledge bases, and each answers support tickets from paying customers. When you need a human at midnight, the tier you pay for matters more than the brand name. A solo user on the cheapest tier should expect ticket or chat help, while a large team on a top tier can expect a named contact to call.

    Integrations in this SendGrid vs Mailchimp comparison: APIs and webhooks against 300+ apps

    Finally, each tool connects to the wider stack, in its own way. SendGrid adds comprehensive client libraries, an SMTP relay, event webhooks, inbound parse webhooks, a Segment connector and a subuser API, which suits a team whose app sits at the centre of its operation. Mailchimp adds more than 300 integrations across CRMs, social platforms, survey tools and payment providers, plus SMS as an add-on, which suits a team whose marketing stack sits at the centre instead.

    HubSpot and Salesforce users will slot either tool into the stack without fuss. Shopify users will get more from Mailchimp, because its ecommerce journeys, abandoned-cart flows and sales reporting are built for stores. Developers who live in code will get more from SendGrid, because its client libraries and webhooks are built for apps. Pick the integration list that matches the tools you already pay for.

    Feature matrix: SendGrid vs Mailchimp side by side

    This SendGrid vs Mailchimp comparison puts every claim in one place. Every row in the matrix below was verified against both official sites today, 16 November 2026. A tick means the provider states the feature on its own site, with any plan limits noted beside it. A dash means we could not confirm the feature, or the provider confirms it is absent. Read the matrix against your own priorities, because no single tool wins every row.

    Pricing, volume and buying in this SendGrid vs Mailchimp comparison

    FeatureSendGridMailchimp
    Entry price, monthly$19.95 a month
    Email API Essentials, 50,000 emails
    $13 a month
    Essentials, 500 contacts
    Marketing entry price$15 a month
    Marketing Campaigns Basic
    $13 a month
    Essentials, same product
    Pricing modelBy email volume
    Email API; by contacts on Campaigns
    By contacts stored
    Every plan
    Monthly sends, entry plan50,000 emails
    Essentials, Email API
    5,000 sends
    Essentials, 500 contacts at 10×
    Free plan, no deadline—
    60-day trial only, then it ends
    ✓
    Free, $0, 250 contacts, stays free
    Free trial✓
    60 days, 100 emails a day, no card
    ✓
    14 days Standard and Essentials, 1 month Premium
    Free marketing plan described✓
    FAQ describes 2,000 contacts, 6,000 emails
    ✓
    Free plan, 250 contacts, 500 sends
    Overage charges✓
    Per-email overages, next invoice
    ✓
    Automatic billing past limits
    Pay as you go—
    Monthly plans only, as listed
    ✓
    Pay As You Go credits, infrequent senders
    Nonprofit discount—
    Not listed on the pricing page
    ✓
    15% off for nonprofits and charities

    Last checked: 16 November 2026 on Twilio SendGrid’s Email API pricing page, Twilio SendGrid’s Marketing Campaigns pricing page and Mailchimp’s pricing page. Mailchimp’s dollar figures rest on three independent November 2026 checks of that page, all in agreement, because the page renders dollars in JavaScript. Features and pricing can change, so please check the provider’s site before you buy. We do not guess at features, prices or trials.

    Sending, API and automation in this SendGrid vs Mailchimp comparison

    FeatureSendGridMailchimp
    Email API✓
    Core product, client libraries, SMTP relay
    ✓
    Transactional API listed, Mandrill add-on
    Transactional email✓
    Core product, median delivery 1.9 seconds
    ✓
    Through Mandrill, a paid add-on
    Bulk marketing email✓
    Marketing Campaigns, separate bill
    ✓
    Core product, every plan
    Drag-and-drop builder✓
    Design editor on Campaigns
    ✓
    Drag-and-drop studio, hundreds of templates
    Dynamic templates✓
    Handlebars variables, editor and testing
    ✓
    Custom-coded templates, Standard and Premium
    Automation builder✓
    Advanced on Campaigns, API triggers
    ✓
    Customer Journeys, up to 200 flows on Standard
    Automation on the entry paid plan—
    Full Automation held for Advanced
    ✓
    Essentials, up to 4 flow steps
    Send Time Optimization✓
    Listed on the Email API page
    ✓
    Listed on the pricing page
    A/B testing✓
    Campaigns and Email API testing credits
    ✓
    A/B testing, multivariate on Premium
    Landing pages—
    Not listed on SendGrid
    ✓
    Unlimited landing pages, every plan

    Deliverability, compliance and support in this SendGrid vs Mailchimp comparison

    FeatureSendGridMailchimp
    Deliverability claim published✓
    99% deliverability, 99.99% uptime SLA
    —
    No headline figure published
    Emails sent a month, published✓
    205 billion and counting
    —
    No headline volume published
    Dedicated IP✓
    Pro and Premier, automated warm-up
    ✓
    High tiers, dedicated IPs listed
    Email validation✓
    2,500 free a month on Pro, 5,000 on Premier
    —
    No validation API listed
    Searchable activity history✓
    3 days Essentials, 7 days Pro
    ✓
    Reporting dashboard, custom reports Standard
    SOC 2 and GDPR✓
    SOC 2 Type II, GDPR, EU data residency
    ✓
    GDPR compliance, Enterprise SSO on Premium
    Single sign-on✓
    Pro and Premier
    ✓
    Enterprise SSO, Premium
    Phone support✓
    Marketing Campaigns Advanced, guaranteed times
    ✓
    Premium, phone and priority support
    Integrations✓
    Client libraries, webhooks, Segment connector
    ✓
    300+ integrations listed
    SMS sending—
    Email only, as listed
    ✓
    SMS add-on on paid plans

    Last checked: 16 November 2026 on Twilio SendGrid’s Email API pricing page, Twilio SendGrid’s Marketing Campaigns pricing page and Mailchimp’s pricing page. Features and pricing can change, so please check the provider’s site before you buy. We do not guess at features, prices or trials.

    What the matrix means for your shortlist in this SendGrid vs Mailchimp comparison

    Read the matrix with your own priorities in mind. SendGrid wins the transactional, API, volume-pricing and deliverability-claim rows outright, because a mature Email API, $19.95 for 50,000 emails and a published 99% deliverability claim have no Mailchimp equivalent. Mailchimp wins the marketing, builder, landing-page and free-plan rows outright, because Customer Journeys, hundreds of templates, unlimited landing pages and a free plan that stays free have no SendGrid equivalent. Automation and testing are a split: both tools automate and test, while SendGrid adds API triggers and Mailchimp adds the visual canvas.

    The matrix also shows why the entry price can mislead. Mailchimp at $13 a month looks cheaper than SendGrid Essentials at $19.95, yet SendGrid covers 50,000 emails a month against Mailchimp’s 5,000 sends at 500 contacts. SendGrid Marketing Campaigns at $15 a month looks close to Mailchimp Essentials at $13, yet SendGrid covers 15,000 sends against Mailchimp’s 5,000 at the same list size. The honest comparison is the full monthly cost of the sends you would really run, add-ons included.

    Pros and cons: the honest case for each tool

    Every tool has trade-offs, and an honest SendGrid vs Mailchimp comparison names them plainly. The strengths below show why each tool keeps winning customers. The weaknesses explain why some teams still pick the rival.

    SendGrid strengths in this SendGrid vs Mailchimp comparison

    Most importantly, the API tops the list. A mature Email API with client libraries, SMTP relay, event webhooks and inbound parsing delivers app mail in about two seconds, across 205 billion emails a month, with a 99.99% uptime SLA. The volume price is the second strength: $19.95 a month for 50,000 emails, or about $0.40 per 1,000, undercuts every contact-priced rival at volume.

    Next, the dedicated IP is the third strength. Pro at $89.95 a month includes a dedicated IP with automated warm-up, subuser management, single sign-on and 2,500 free validations. A sender that needs its own reputation can buy it in one plan. Real-time validation, Deliverability Insights and suppression management complete a platform that gives a sender the full picture.

    SendGrid weaknesses in this SendGrid vs Mailchimp comparison

    Nevertheless, the two-bill setup is the clearest weakness. A business that needs both app mail and newsletters pays for the Email API and for Marketing Campaigns, because the two products are bought separately and their sends are counted separately. A business that needs only newsletters will find Mailchimp’s single bill simpler and cheaper at a small list size.

    The missing marketing depth is another watch point. SendGrid lists no landing page builder, no SMS, no postcards and no built-in CRM. A small business that wants those channels needs a second tool beside it. The free trial ends after 60 days, with no permanent free plan. The activity history is short: three days on Essentials and seven days on Pro, with longer history sold separately.

    Mailchimp strengths in this SendGrid vs Mailchimp comparison

    Friendliness tops the list for Mailchimp. A drag-and-drop builder with hundreds of templates, Customer Journeys on a visual canvas, landing pages, signup forms and Intuit Assist need no developer at all. A small business can send a good-looking campaign in an afternoon. The free plan is the second strength: $0 with 250 contacts and 500 sends a month. No deadline, so a beginner can learn the platform before paying anything.

    The audience tools are the third strength. Tags, segments, predictive segmentation, Send Time Optimization and multivariate testing turn a list into a marketing asset, while more than 300 integrations, SMS, social ads and postcards carry the audience beyond the inbox. Standard at $20 a month unlocks up to 200 flows, which is generous for the price.

    Mailchimp weaknesses in this SendGrid vs Mailchimp comparison

    Contact pricing is still the clearest weakness. The bill rises with the list, not with the sends. A list that grows from 500 to 5,000 contacts moves Essentials from $13 to $75 a month, even if the sending stays the same. A business that mails rarely will pay for contacts it barely emails, and unsubscribed contacts still count toward the bill unless they are archived.

    The missing transactional core is another watch point. Mailchimp sends app mail through Mandrill, a paid add-on. A developer who needs fast password resets and receipts will pay extra for a job SendGrid does natively. The Premium jump is steep too: Standard at $135 a month for 10,000 contacts rises to $350 on Premium. A team should only pay it when the phone support, the unlimited seats and the advanced testing genuinely earn their keep.

    Who should pick which: a short decision guide

    A decision guide is only useful when it names real buyers. This SendGrid vs Mailchimp comparison ends the debate with five of them. Spot the buyer who looks most like you, and your answer is waiting in that paragraph. When two buyers both sound like you, start with the cheaper trial and let a month of real sending settle it.

    SendGrid vs Mailchimp comparison: a fork in the road with two signposts, one path leading to a server rack with envelopes and a code window, the other to a friendly storefront with a newsletter and a megaphone
    The decision in this SendGrid vs Mailchimp comparison: a fork in the road, with one path for an email API with a code window and one path for a marketing platform with a newsletter.

    Pick SendGrid when the app sends the email

    Choose SendGrid when your app sends the email. The Email API starts with a 60-day free trial at 100 emails a day. Essentials costs from $19.95 a month for 50,000 emails, with a 99.99% uptime SLA and a median delivery speed of 1.9 seconds. Open the free trial, send a password reset and a receipt through the API, and watch the event webhooks report back before you scale.

    Indeed, SendGrid also fits a team that sends high volume to a modest list. Essentials at $34.95 a month covers 100,000 emails, while Mailchimp needs a 10,000-contact Essentials tier at $110 for the same 100,000 sends. A business that sends a million emails a month should price the volume model first, because the contact model charges for the list whether it mails or not.

    Pick Mailchimp when the marketing team sends the email

    Choose Mailchimp when your marketing team sends the email. The Free plan covers 250 contacts and 500 sends a month with no deadline, Essentials starts at $13 a month for 500 contacts, and the drag-and-drop builder with Customer Journeys needs no developer at all. Open the free plan, build a landing page, and send your first newsletter before you scale.

    Mailchimp also fits a small business that wants every channel in one login. Audiences, landing pages, SMS, social ads and postcards live beside the campaigns, with more than 300 integrations. A shop can run a welcome series, an abandoned-cart flow and a promotion without a second subscription. A team that lives in the builder will be right at home here.

    Three questions that settle this SendGrid vs Mailchimp comparison

    Run through three checks. Does your app trigger the email, or does your marketing team design it? Would you rather pay by the email, or by the contact? Do you need landing pages, SMS and journeys in one login, or do you need an API, webhooks and dedicated IPs in one login?

    When app mail and volume matter, pick SendGrid. If marketing, builder and journeys matter, pick Mailchimp. For a business that needs both, run both: SendGrid for the app mail, Mailchimp for the marketing mail, each doing the job it was built for. If two answers pull opposite ways, start with the tool that fixes your biggest pain today, since switching email tools now is easier than switching after a year of campaigns.

    Frequently asked questions in this SendGrid vs Mailchimp comparison

    Which is cheaper, SendGrid or Mailchimp?

    It depends on whether you count contacts or emails. A 500-contact list costs $13 a month on Mailchimp Essentials, against $15 on SendGrid Marketing Campaigns Basic. Mailchimp is cheaper there by $2. A 5,000-contact list costs $75 a month on Mailchimp Essentials, against $15 on SendGrid Marketing Campaigns Basic. SendGrid is cheaper there by $60, though it buys 15,000 sends against Mailchimp’s 50,000. At 100,000 emails a month, SendGrid Essentials costs $34.95, while Mailchimp needs a 10,000-contact Essentials tier at $110. All figures were checked on 16 November 2026.

    Is SendGrid or Mailchimp better for transactional email?

    SendGrid, by a clear margin. Its Email API is built for transactional mail, with client libraries, SMTP relay, event webhooks, real-time validation and a median delivery speed of 1.9 seconds, from $19.95 a month for 50,000 emails. Mailchimp sends transactional mail through Mandrill, a paid add-on, because its core product is marketing email. If your app sends password resets, receipts and alerts, SendGrid is the stronger pick.

    Can I use SendGrid or Mailchimp for cold email?

    No. Both tools are built for opt-in marketing and transactional email, not cold outreach. Mailchimp is opt-in only. Accounts that mail purchased lists or non-opted-in contacts risk suspension, with sending paused while the account is reviewed. SendGrid’s acceptable-use rules protect its shared IPs the same way, and an account that blasts a cold list can be restricted or closed. Read our ESPs for cold email guide for the tools that fit cold sending.

    Does SendGrid have a free plan?

    SendGrid has a 60-day free trial, not a permanent free plan. The trial runs $0 for 60 days at 100 emails a day on the Email API, with no credit card. The same trial covers Marketing Campaigns at 100 contacts and 100 emails a day. SendGrid’s own FAQ still describes a free Marketing Campaigns plan at 2,000 contacts and 6,000 emails a month, so confirm it at signup, since SendGrid’s free plans have changed before. Mailchimp’s Free plan stays free with no deadline, at 250 contacts and 500 sends a month.

    Which has better automation, SendGrid or Mailchimp?

    Mailchimp, for marketers, and SendGrid, for developers. Mailchimp’s Customer Journeys give a marketer a visual canvas with triggers, waits and conditional splits, with up to 200 flows on Standard. SendGrid’s automation runs through API triggers and the Marketing Campaigns Automation builder on Advanced, which suits a team that already thinks in app events. A team without a developer will get more from Mailchimp’s canvas.

    Should I use both SendGrid and Mailchimp?

    Many businesses do, and it is often the right answer. SendGrid handles the app mail: password resets, receipts, alerts and order confirmations, delivered fast through the API. Mailchimp handles the marketing mail: newsletters, welcome series, abandoned-cart flows and promotions, built by hand in the drag-and-drop studio. The two tools do not compete for the same job, so running both costs two bills yet removes the compromise. Our Brevo vs Mailchimp comparison covers the other popular marketing pairing.

    The verdict in this SendGrid vs Mailchimp comparison

    Verdict: SendGrid for transactional email by API, Mailchimp for opt-in marketing campaigns

    SendGrid is the pick when your app sends the email. A mature Email API, SMTP relay, event webhooks and real-time validation deliver app mail in about two seconds, across 205 billion emails a month, with Essentials from $19.95 a month for 50,000 emails and a 60-day free trial at 100 emails a day. Mailchimp is the pick when your marketing team sends the email. Audiences, a drag-and-drop builder, Customer Journeys, landing pages and predictive segments come in one friendly platform from $13 a month, with a Free plan that stays free at 250 contacts.

    In sum, choose for the job your email actually does today, not the job you hope it does next year. A developer who needs receipts delivered should start on SendGrid’s free trial, because 100 emails a day for 60 days costs nothing. A small business that needs a newsletter and a welcome series should start on Mailchimp’s free plan, because 250 contacts and 500 sends a month cost nothing either. A business that needs both should run both, with SendGrid for the app mail and Mailchimp for the marketing mail. Whichever you pick, authenticate your domain, warm up gradually, and trial it on real recipients before you scale.

    We have not run hands-on deliverability or reply-rate tests on SendGrid or Mailchimp, so this SendGrid vs Mailchimp comparison gives no numeric score. The verdict rests on verified pricing, verified API and automation claims and documented deliverability figures, all checked today, 16 November 2026. Try SendGrid free for 60 days, or start Mailchimp’s free plan, and let a month of real sending confirm the choice.

    Visit SendGrid →Check Mailchimp →

    Keep reading

    SendGrid vs MailchimpSendGrid from $19.95/mo · Mailchimp from $13/mo Visit SendGrid →

OutreachCompare

Compare B2B email outreach tools — cold email, deliverability, data and verification, tested and ranked for startups, agencies and enterprises.

Compare B2B email outreach tools — cold email, deliverability, data and verification, tested and ranked for startups, agencies and enterprises.

© 2026 OutreachCompare. All rights reserved.

Designed with WordPress