Author: OutreachCompare Team

  • SendGrid vs Mailchimp 2026

    SendGrid vs Mailchimp 2026

    An email API that delivers your app’s mail against a marketing platform that grows your audience — and a clear winner for each job

    SendGrid vs Mailchimp is the most useful comparison in email, because the two tools answer different questions. SendGrid is an email API and SMTP relay, built so your app can send password resets, receipts and alerts at scale, with Marketing Campaigns as a second product for newsletters. Mailchimp is a marketing platform, built so a small business can grow an audience, design campaigns and run automated journeys, with transactional mail as a paid add-on. This SendGrid vs Mailchimp comparison checks pricing, the API against the platform, transactional against bulk mail, automation, templates, deliverability, compliance and support on both official sites, so you can pick with confidence.

    Visit SendGrid →Check Mailchimp →

    Prices checked 16 November 2026 on Twilio SendGrid’s and Mailchimp’s official pricing pages. Features and pricing can change, so please check the provider’s site before you buy.

    Quick Answer

    Choose SendGrid when your app sends the email. Its Email API starts with a 60-day free trial at 100 emails a day, and Essentials costs from $19.95 a month for 50,000 emails, with a 99.99% uptime SLA and a median delivery speed of 1.9 seconds across 205 billion emails a month. Choose Mailchimp when your marketing team sends the email. Its Free plan covers 250 contacts and 500 sends a month, Essentials starts at $13 a month for 500 contacts, and the drag-and-drop builder with Customer Journeys needs no developer at all.

    SendGrid leads on transactional sending, with a mature API, SMTP relay, real-time validation and dedicated IPs with automated warm-up on Pro. Mailchimp leads on marketing, with audiences, landing pages, predictive segments and multivariate testing that SendGrid’s Marketing Campaigns does not match. SendGrid leads on scale pricing, at $19.95 a month for 50,000 emails against Mailchimp’s contact-based bill, which reaches $75 a month on Essentials at 5,000 contacts. Mailchimp leads on the free start, because its Free plan stays free, while SendGrid’s free trial ends after 60 days.

    Contents

    Why this SendGrid vs Mailchimp comparison settles the choice

    Two famous names can hide two different products, and that is exactly what happens here. In fact, SendGrid and Mailchimp both send email, both offer a free start, and both appear on every best-email-tool list. A buyer who compares only the starting prices will miss the real difference, because SendGrid prices by the email and Mailchimp prices by the contact. A buyer who compares only the feature lists will miss it too, because SendGrid’s strongest features serve developers, while Mailchimp’s strongest features serve marketers.

    The picture gets sharper once you sort your email by job. App mail, such as sign-up confirmations, password resets, order receipts and alerts, needs an API that answers in milliseconds and never loses a message. Marketing mail, such as newsletters, welcome series, abandoned-cart reminders and promotions, needs an audience, a builder and journeys that run while you sleep. Most businesses send both kinds, which is why so many run both tools side by side.

    This SendGrid vs Mailchimp comparison takes those jobs in turn. Pricing leads, because the volume bill and the contact bill give the same business two very different monthly totals. Cost at scale comes next, because the gap widens as the list grows. The API against the platform, automation, templates, deliverability, a feature matrix and the honest pros and cons follow. By the end, you should know which tool fits your sending, and which plan inside it to start on.

    SendGrid and Mailchimp in plain English: an email API against a marketing platform

    SendGrid, now Twilio SendGrid, is a cloud email delivery engine. Moreover, your app calls its Email API or connects through SMTP relay. SendGrid delivers the message, tracks opens, clicks, bounces and blocks, and reports on every send. It moves more than 205 billion emails a month, with a claimed 99% deliverability rate and a 99.99% uptime SLA. Marketing Campaigns sits beside the API as a second product, with a visual builder, segmentation, A/B testing and automation, priced separately by contacts and sends.

    Mailchimp, owned by Intuit, is an opt-in email marketing and automation platform. Similarly, you collect subscribers who ask to hear from you, organise them into audiences, design campaigns in a drag-and-drop builder, and send them through automated Customer Journeys. Landing pages, signup forms, social ads, postcards and SMS all live in one account, with more than 300 integrations. Transactional mail runs through Mandrill, a paid add-on, because the core product is marketing email.

    Both tools cover the same everyday need at heart. In fact, you begin with people who expect your email, you design something worth opening, you send it. You learn from the opens, clicks and sales that follow. Because the loop matches on both tools, the decision rests on who sends the email and how it gets triggered. A developer who wires email into code will feel at home on SendGrid. A marketer who builds campaigns by hand will feel at home on Mailchimp.

    What SendGrid adds on top of sending in this SendGrid vs Mailchimp comparison

    Above all, SendGrid turns from a sender into infrastructure through its API. In addition, comprehensive client libraries, an SMTP relay, interactive API docs, event webhooks and inbound parse webhooks let a developer wire email into any app in an afternoon. Real-time email validation checks addresses before they bounce, Deliverability Insights shows reputation and delivery data. Suppression management keeps complainers and bouncers out of future sends.

    Moreover, SendGrid adds the scale features that high-volume senders actually pay for. Pro includes a dedicated IP with automated warm-up, subuser management, single sign-on, 2,500 free email validations a month, 60 email testing credits a month and seven days of searchable email activity. Premier adds 5,000 validations, custom volume and expert program management. Our SendGrid review covers the platform in full depth.

    What Mailchimp adds on top of sending in this SendGrid vs Mailchimp comparison

    Mailchimp, meanwhile, turns from a sender into a marketing platform through its audience tools. For example, audiences, tags and segments organise contacts by behaviour, signup forms and landing pages grow the list, and the reporting dashboard ties each send back to opens, clicks and sales. Intuit Assist, the generative AI helper, drafts subject lines and content, while Send Time Optimization picks the hour each contact is most likely to open.

    In addition, Mailchimp adds the channels that a small business outgrows email with. SMS runs as an add-on on paid plans, social ads and postcards reach people beyond the inbox. A built-in CRM keeps customer notes beside the campaigns. Standard opens up to 200 automation flows, predictive segmentation and generative AI, while Premium drops the seat and audience limits entirely. Our Mailchimp review covers the platform in full depth.

    The one-sentence difference in this SendGrid vs Mailchimp comparison

    SendGrid is the delivery engine: your app triggers the email through an API. SendGrid delivers it fast, tracks it and protects your sender reputation at scale. Mailchimp is the marketing platform: your team grows an audience, designs campaigns and runs journeys that nurture subscribers toward a sale. A developer who needs receipts delivered will notice the difference in week one. A marketer who needs a welcome series running will notice it on the first campaign.

    Neither tool is made for cold outreach, so a team that mostly emails strangers should look at the prospecting tools in our best cold email software guide instead. For opt-in marketing and transactional mail, though, this pair stays one of the most useful match-ups around.

    The opt-in warning first: neither tool is for cold email

    Read this section before you compare a single price, because it decides whether either tool will work for you at all. SendGrid and Mailchimp are built for opt-in marketing and transactional email, not cold outreach. Both tools expect every recipient to have asked for your mail, or to have a live relationship with your business, such as an account, an order or a support ticket. Purchased lists, scraped addresses and mail to people who never opted in break that deal.

    Mailchimp states the rule plainly, and its enforcement is strict. As a result, its own help pages describe an opt-in only service, and accounts that mail purchased lists or non-opted-in contacts risk suspension. The pattern is always the same: complaints and bounces spike, because strangers mark unexpected mail as spam, deliverability then falls, because mailbox providers notice the complaints, and Mailchimp pauses sending while it reviews the account. A suspended account loses its audiences, its journeys and its history. A new account does not fix a banned practice.

    How either tool reacts to a cold list in this SendGrid vs Mailchimp comparison

    SendGrid enforces the same idea from the infrastructure side. However, its acceptable-use rules and suppression handling protect the shared IPs that every Essentials customer sends from. One bad sender can hurt the neighbours. A new account that blasts a cold list will see bounces, blocks and spam complaints rise. The account can be restricted or closed. The free trial, at 100 emails a day for 60 days, is designed for testing real app mail, not for working through a bought list.

    In short, if your plan is cold email, stop here and read our ESPs for cold email guide first. Bulk ESPs are built for transactional and opt-in mail, not cold outreach, and that guide explains why, with the tools that actually fit cold sending. If your recipients opted in, or your app sends mail they expect, both SendGrid and Mailchimp will serve you well, and the rest of this SendGrid vs Mailchimp comparison will help you choose between them.

    Pricing head-to-head in this SendGrid vs Mailchimp comparison

    Pricing is where this SendGrid vs Mailchimp comparison first gets interesting, because the two price lists work in opposite ways. SendGrid bills by email volume on the Email API, so the bill climbs with every thousand messages your app sends. Mailchimp bills by contacts stored, so the bill climbs with every hundred subscribers you add, even before you send a single campaign. A small app with a big list and a big app with a small list will read the same two price lists and reach opposite conclusions.

    Every figure below comes from the official pricing pages, checked today, 16 November 2026. SendGrid sells two products on two bills, so the Email API and Marketing Campaigns each get their own table. Mailchimp sells one product on four plans, so its table covers Free, Essentials, Standard and Premium. Where a price is not shown on the official page, this SendGrid vs Mailchimp comparison says so plainly instead of guessing.
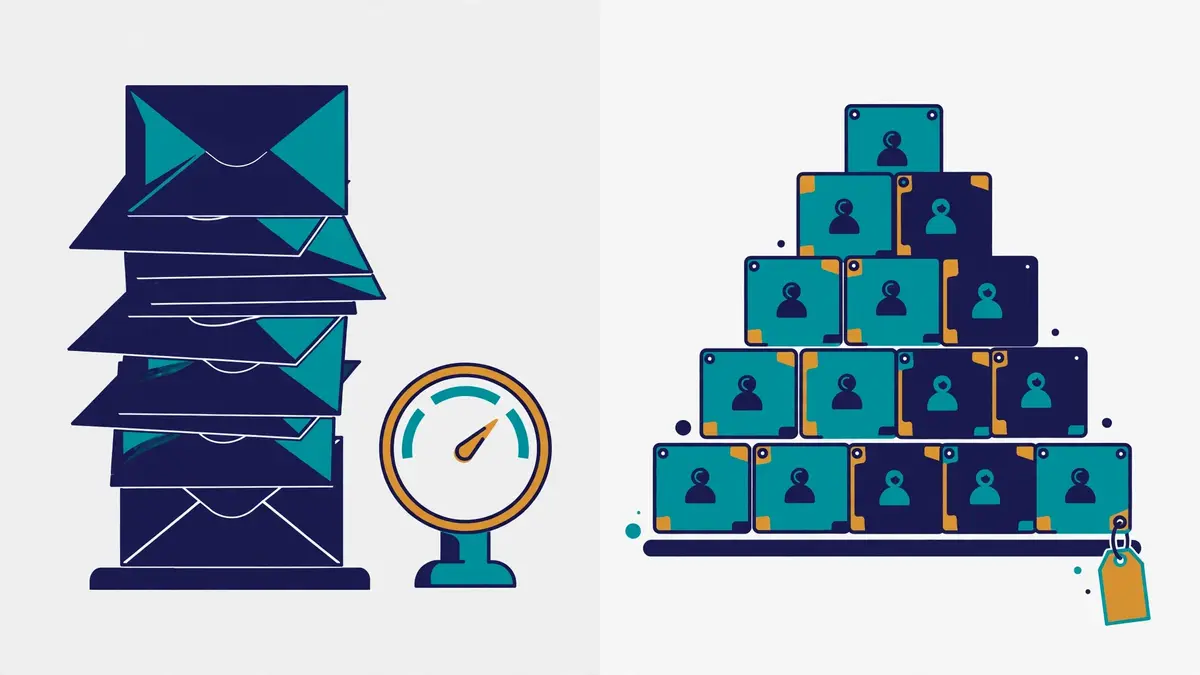
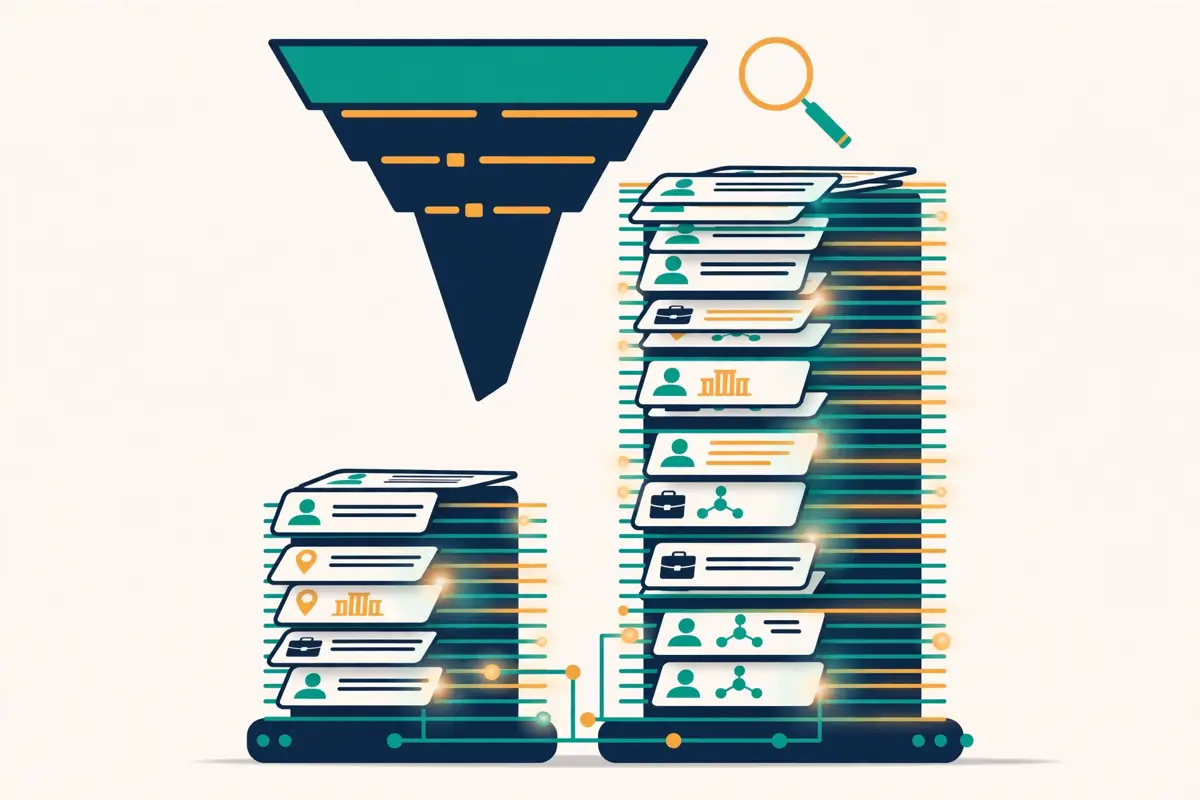
    SendGrid vs Mailchimp comparison: two contrasting pricing visuals side by side, a tall stack of envelopes counted by volume beside a stepped pyramid of contact cards with a price tag
    Pricing in this SendGrid vs Mailchimp comparison: SendGrid prices by email volume, while Mailchimp prices by contacts stored.

    SendGrid Email API plans: free trial, Essentials, Pro and Premier, from $19.95 a month

    PlanPrice*What you getBest forVisit
    SendGrid — Free trialBest for testing the API$0 for 60 days
    100 emails a day, no card
    100 emails a day
    Analytics, template editor, 3-day activity
    Developers testing real app mailTry Free →
    SendGrid — EssentialsBest for steady app mailFrom $19.95 a month
    50,000 emails; $34.95 for 100,000
    50,000 to 100,000 emails a month
    Shared IPs, 2 event webhooks, 3-day activity
    Apps sending 50,000 to 100,000 a monthVisit Site →
    SendGrid — ProBest for production sendingFrom $89.95 a month
    100,000 emails, up to 2.5M
    1 dedicated IP, automated warm-up
    SSO, subusers, 2,500 validations, 7-day activity
    Apps needing their own sending IPSee Pro →
    SendGrid — PremierBest for very high volumeCustom pricing
    5M+ emails a month
    Custom volume, 5,000 validations
    Expert program management, 7-day activity
    Enterprises sending millions a monthGet a Quote →

    * Last checked: 16 November 2026 on Twilio SendGrid’s Email API pricing page. The page confirms the free trial at $0 for 60 days and 100 emails a day with no credit card, Essentials from $19.95 a month, Pro from $89.95 a month and Premier on custom pricing. Taxes and overage fees may apply. Features and pricing can change, so please check the provider’s site before you buy. We do not guess at features, prices or trials.

    Reading the Email API volume steps in this SendGrid vs Mailchimp comparison

    Volume steps are where SendGrid’s real monthly cost takes shape. Essentials at $19.95 a month covers 50,000 emails, which works out at about $0.40 per 1,000 emails. $34.95 covers 100,000, which works out at about $0.35 per 1,000. Pro at $89.95 a month covers 100,000 emails with a dedicated IP, which works out at about $0.90 per 1,000. Pro costs more than double Essentials for the same volume, because the dedicated IP, validation and testing credits ride along.

    One rule makes the free trial genuinely useful: it runs $0 for 60 days at 100 emails a day, with no credit card. It includes analytics, deliverability optimisation and the dynamic template editor, so a developer can test the real platform before paying anything. The catch is that the trial ends after 60 days. There is no permanent free plan on the Email API, so a hobby project that never upgrades will stop sending. Send past your plan’s limit and overage charges may apply on the next invoice.

    SendGrid Marketing Campaigns plans: free trial, Basic, Advanced and Custom, from $15 a month

    PlanPrice*What you getBest forVisit
    Marketing Campaigns — Free trialBest for testing campaigns$0 for 60 days
    100 contacts, 100 emails a day
    100 contacts, 100 emails a day
    Design editor, segmentation, A/B testing
    Marketers testing the builderTry Free →
    Marketing Campaigns — BasicBest for simple newslettersFrom $15 a month
    5,000 contacts, 15,000 emails
    Design and code editors, segmentation
    5 signup forms, 10 testing credits, ticket support
    Small lists sending regular newslettersVisit Site →
    Marketing Campaigns — AdvancedBest for automated campaignsFrom $60 a month
    10,000 contacts, 50,000 emails
    Automation, dedicated IP access
    15 signup forms, 60 testing credits, 1,000 teammates
    Marketers running journeys at scaleSee Advanced →
    Marketing Campaigns — CustomBest for very large listsCustom pricing
    500,000+ contacts
    Custom contacts and sends
    Automation, dedicated IP access, expert services
    Enterprises with huge audiencesGet a Quote →

    * Last checked: 16 November 2026 on Twilio SendGrid’s Marketing Campaigns pricing page. The page confirms the free trial at $0 for 60 days, Basic from $15 a month, Advanced from $60 a month and Custom on custom pricing. The page’s own FAQ still describes a free Marketing Campaigns plan at 2,000 contacts and 6,000 emails a month, so we report it as written, with a caution to confirm it at signup, since SendGrid’s free plans have changed before. Marketing Campaigns and the Email API are bought separately, and their sends are counted separately. Features and pricing can change, so please check the provider’s site before you buy.

    Reading the two-bill trap in this SendGrid vs Mailchimp comparison

    Two bills are where SendGrid’s real monthly cost takes shape. A business that needs both app mail and newsletters pays for the Email API and for Marketing Campaigns, because the two products are bought separately and their sends are counted separately. Essentials at $19.95 plus Marketing Campaigns Basic at $15 comes to $34.95 a month before either product scales, which is more than Mailchimp Essentials at $13 for a 500-contact list.

    In contrast, a business that needs only one half of SendGrid pays only for that half. Furthermore, an app with no newsletter never buys Marketing Campaigns, and a newsletter with no app mail never buys the Email API. The plan comparison holds the full Automation builder for Advanced at $60, while Basic at $15 covers the design editor, segmentation, A/B testing and signup forms. SendGrid’s own FAQ describes automation in the free Marketing Campaigns plan too. Confirm which automations your plan includes before you buy.

    Mailchimp plans: Free, Essentials, Standard and Premium, from $13 a month

    PlanPrice*What you getBest forVisit
    Mailchimp — FreeBest for starting out$0
    250 contacts, 500 sends a month
    250 contacts, 500 sends a month
    1 seat, 1 audience, 250 sends a day cap
    Beginners growing a first listStart Free →
    Mailchimp — EssentialsBest for small businessesFrom $13 a month
    500 contacts, 10× sends
    5,000 sends a month at 500 contacts
    3 seats, 3 audiences, A/B testing, scheduling
    Small businesses sending regularlyVisit Site →
    Mailchimp — StandardBest for growing marketersFrom $20 a month
    500 contacts, 12× sends
    6,000 sends a month at 500 contacts
    5 seats, 5 audiences, 200 flows, predictive segments
    Marketers running real automationSee Standard →
    Mailchimp — PremiumBest for large teamsFrom $350 a month
    10,000 contacts, 15× sends
    150,000 sends a month at 10,000 contacts
    Unlimited seats and audiences, phone support
    Large teams needing phone supportView Premium →

    * Last checked: 16 November 2026 on Mailchimp’s pricing page. The page renders dollar figures in JavaScript, so the dollar figures above rest on three independent November 2026 checks of that page, all in agreement: Free $0, Essentials from $13, Standard from $20 and Premium from $350 a month. The contact limits, send multiples (10×, 12×, 15×), seats, audiences and trial terms (14-day Standard and Essentials trial, 1-month Premium trial) were read directly from the official page today. Features and pricing can change, so please check the provider’s site before you buy. We do not guess at features, prices or trials.

    Reading Mailchimp’s contact bill in this SendGrid vs Mailchimp comparison

    Contact tiers are where Mailchimp’s real monthly cost takes shape. Meanwhile, the bill rises with the list, not with the sends. A list that grows from 500 to 5,000 contacts moves Essentials from $13 to $75 a month and Standard from $20 to $100, even if the sending stays the same. At 10,000 contacts, Essentials costs $110, Standard costs $135 and Premium costs $350. At 25,000 contacts, Essentials costs $270 and Standard costs $310.

    One rule makes Mailchimp’s bill easy to misread: Mailchimp counts unsubscribed contacts toward your bill unless you archive them, so a list of 10,000 names with 3,000 inactive ones still bills at the 10,000-contact tier. Archive the contacts who never open before the list grows, or the bill will grow with them. Mailchimp also bills overages automatically when a list or send limit is passed, and may move the account to a higher contact tier during a trial when that tier would cost less.

    In sum, Mailchimp’s free plan is the friendliest free start in this SendGrid vs Mailchimp comparison, because it stays free with no time limit, at 250 contacts and 500 sends a month. The trade is real, though: the free plan keeps Mailchimp branding in the footer, offers email support for the first 30 days only, and includes no automation flows or scheduled sends. A business that outgrows 250 contacts should expect the $13 Essentials step, and the $20 Standard step soon after, because the full automation lives on Standard.

    What each tool costs at 500, 5,000 and 10,000 contacts — and at 10,000, 100,000 and 1,000,000 emails

    Cost at scale is the fairest way to compare a volume bill against a contact bill, because the headline prices hide what each setup actually costs. SendGrid prices by email volume and Mailchimp prices by contacts, so the two models are not directly comparable. This SendGrid vs Mailchimp comparison says so plainly. The tables below work out the cheapest monthly bill that covers each size, on monthly billing, with the arithmetic shown so you can check it.

    For example, the contact table compares Mailchimp against SendGrid Marketing Campaigns, because both products price by contacts stored. The email table compares SendGrid’s Email API against the Mailchimp plan whose send allowance covers the volume, because that is the only honest way to put a volume number beside a contact number. Every figure is arithmetic from the plan prices checked today, 16 November 2026.

    Cost by contacts in this SendGrid vs Mailchimp comparison

    ContactsMailchimp EssentialsMailchimp StandardSendGrid Marketing CampaignsCheaper pick
    500 contacts$13 a month
    5,000 sends included
    $20 a month
    6,000 sends included
    From $15 a month
    Basic, 5,000 contacts, 15,000 sends
    Mailchimp Essentials, by $2
    5,000 contacts$75 a month
    50,000 sends included
    $100 a month
    60,000 sends included
    From $15 a month
    Basic 5K, 15,000 sends
    SendGrid Basic, by $60
    10,000 contacts$110 a month
    100,000 sends included
    $135 a month
    120,000 sends included
    From $60 a month
    Advanced 10K, 50,000 sends
    SendGrid Advanced, by $50

    Arithmetic, labelled plainly: Mailchimp sends are the contact count times the plan multiple — 500 × 10 = 5,000, 5,000 × 10 = 50,000 and 10,000 × 10 = 100,000 on Essentials; 500 × 12 = 6,000, 5,000 × 12 = 60,000 and 10,000 × 12 = 120,000 on Standard. SendGrid Marketing Campaigns Basic at $15 covers 5,000 contacts and 15,000 emails, and Advanced at $60 covers 10,000 contacts and 50,000 emails, so the SendGrid figures at 5,000 and 10,000 contacts buy far fewer sends than the Mailchimp figures at the same size. Last checked: 16 November 2026. Features and pricing can change, so please check the provider’s site before you buy.

    Cost by emails sent in this SendGrid vs Mailchimp comparison

    Emails a monthSendGrid Email APIMailchimp plan that covers itCheaper pick
    10,000 emails$19.95 a month
    Essentials, 50,000 allowance
    Essentials, 1,000-contact tier
    10,000 sends at 10×; price: check the site
    SendGrid, on a verified price
    100,000 emails$34.95 a month
    Essentials, 100,000 allowance
    $110 a month
    Essentials, 10,000 contacts, 100,000 sends
    SendGrid, by about $75
    1,000,000 emailsPro, check the site
    From $89.95 at 100,000, rises with volume
    Premium, check the site
    10,000 contacts include 150,000 sends only
    No verified winner at this volume

    Arithmetic, labelled plainly: 100,000 emails need a 10,000-contact Mailchimp Essentials tier, because 10,000 × 10 = 100,000 sends. SendGrid Essentials at $34.95 covers exactly 100,000 emails, so the gap is $110 − $34.95 = about $75. At 1,000,000 emails, neither official page prints the exact price on the plan cards, so this SendGrid vs Mailchimp comparison says check the site instead of guessing. Last checked: 16 November 2026. Features and pricing can change, so please check the provider’s site before you buy.

    What the price gap means in practice in this SendGrid vs Mailchimp comparison

    Take a small list of 500 contacts, where Mailchimp Essentials at $13 a month beats SendGrid Marketing Campaigns Basic from $15 by $2, yet SendGrid’s $15 buys 15,000 sends against Mailchimp’s 5,000. The $2 gap is real, yet each tool spends it on a different strength: Mailchimp buys the friendlier builder and journeys, while SendGrid buys three times the sends. A business that mails twice a week will feel the send allowance more than the $2.

    In contrast, a list of 5,000 contacts flips the maths hard in one direction. Mailchimp Essentials costs $75 a month for 50,000 sends, while SendGrid Marketing Campaigns Basic costs from $15 for 15,000 sends. SendGrid wins the bill by $60, yet it buys a third of the sends, so a business that mails its whole list weekly would blow past 15,000 sends in the first week and pay overages. The honest comparison is the bill for the sends you actually run, not the bill for the contacts you store.

    At 100,000 emails a month, the volume model wins outright. SendGrid Essentials at $34.95 covers the whole volume, while Mailchimp needs a 10,000-contact Essentials tier at $110 for the same 100,000 sends. That is a gap of about $75 a month, or about $900 a year, for the same number of emails. A business that sends high volume to a modest list should price the volume model first, because the contact model charges for the list whether it mails or not.

    Trying before you buy in this SendGrid vs Mailchimp comparison: a 60-day trial against a free plan

    The trial gap is the friendliest difference of all, because both tools let you test before you pay, in different ways. SendGrid offers a 60-day free trial on both products, at 100 emails a day with no credit card, which is generous for testing and useless for a live list, because it ends. Mailchimp offers a Free plan that stays free with no time limit, at 250 contacts and 500 sends a month, plus a 14-day trial of Standard or Essentials and a 1-month trial of Premium.

    No paid plan on either tool lacks a trial or a free tier, so testing costs nothing on both. If a free plan with no deadline matters most, Mailchimp’s is the better offer. If sixty days of full-feature testing matters most, SendGrid answers the question at once. Either way, set a reminder before the trial ends, because SendGrid’s trial stops sending when it ends. Mailchimp’s Standard trial moves to a paid plan when it ends.

    Email API against marketing platform: the core difference

    The core difference in this SendGrid vs Mailchimp comparison is who the product is built for. SendGrid is built for developers, so its first screen is code, its first feature is an API. Its first promise is delivery speed. Mailchimp is built for marketers, so its first screen is an audience, its first feature is a builder. Its first promise is a campaign that looks good and sends itself. A team that buys the wrong half will fight the tool every week.

    For example, the difference shows up in the first hour. A developer on SendGrid grabs an API key, drops the client library into the app, and sends a password reset in an afternoon. A marketer on Mailchimp imports a list, picks a template, writes a newsletter, and schedules it for Tuesday morning. Both jobs take an afternoon, yet neither person could do the other’s job in the same tool without a fight.
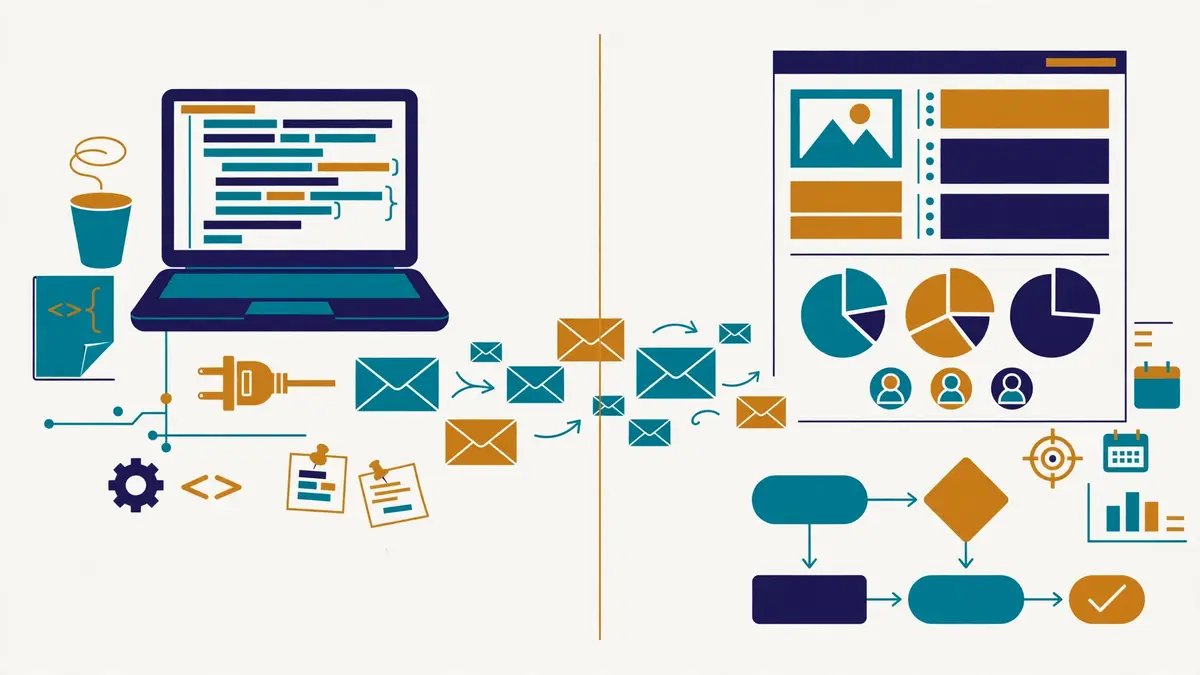
    SendGrid vs Mailchimp comparison: a developer workspace with a laptop showing code and an API plug sending envelopes beside a marketer workspace with a newsletter builder and an automation journey flowchart
    The core difference in this SendGrid vs Mailchimp comparison: SendGrid is built for developers who send through an API, while Mailchimp is built for marketers who build campaigns by hand.

    SendGrid’s Email API in this SendGrid vs Mailchimp comparison: code first, delivery always

    Specifically, SendGrid’s Email API is built for the emails your app sends. Consequently, comprehensive client libraries cover the common languages, the SMTP relay takes mail from any system that speaks SMTP. Interactive API docs let a developer test a call in the browser. Event webhooks report opens, clicks, bounces, blocks and spam reports back to the app in real time, while inbound parse webhooks turn replies into data the app can act on.

    Moreover, SendGrid’s API treats scale as a feature, not a limit. The platform moves more than 205 billion emails a month, with a 99.99% uptime SLA and a median delivery speed of 1.9 seconds, so a password reset lands before the user gives up and requests another. Dynamic templates carry Handlebars variables, so one template serves every user with their own name, order and link. A developer who needs receipts, alerts and confirmations delivered will find no marketing platform that matches it.

    Mailchimp’s platform in this SendGrid vs Mailchimp comparison: audiences first, campaigns always

    Mailchimp, by contrast, treats the audience as the product, with sending built on top. In contrast, audiences hold contacts with tags, segments and notes, signup forms and landing pages grow the list, and the reporting dashboard ties each send back to opens, clicks and sales. More than 300 integrations connect CRMs, social platforms, survey tools and payment providers. The audience stays in sync with the rest of the business.

    Similarly, Mailchimp pairs that audience with the channels a small business grows into. SMS runs as an add-on on paid plans, social ads and postcards reach people beyond the inbox. A built-in CRM keeps customer notes beside the campaigns. A marketer who needs a newsletter, a welcome series and a landing page in one login will feel at home, because the list, the builder and the journeys live together.

    Transactional against bulk in this SendGrid vs Mailchimp comparison

    All in all, the transactional split is the sharpest line in this SendGrid vs Mailchimp comparison. SendGrid’s Email API is transactional mail by design: one message, triggered by one event, delivered in about two seconds. Mailchimp’s core product is bulk marketing mail: one campaign, sent to thousands of subscribers at once, with timing tuned per contact. Each tool can stretch into the other’s job, yet neither stretch is free.

    Finally, the stretch costs real money on both sides. SendGrid’s Marketing Campaigns is a second subscription, so bulk mail on SendGrid means a second bill. Mailchimp’s transactional mail runs through Mandrill, a paid add-on, so app mail on Mailchimp means a second bill too. Many businesses run both tools for exactly this reason: SendGrid for the app mail, Mailchimp for the marketing mail, each doing the job it was built for. Our Mailgun vs SendGrid vs Postmark comparison sets SendGrid against the other transactional specialists.

    Automation and journeys: event triggers against Customer Journeys

    Automation is the feature that makes this SendGrid vs Mailchimp comparison unlike a simple price contest. SendGrid automates from events: an app event fires, the API sends a message, and the journey follows the data. Mailchimp automates from the audience: a contact signs up, clicks or buys, and the Customer Journey builder walks them through a visual flow. Both are genuinely useful, yet they start from opposite ends.

    That split settles the whole purchase for many teams. A developer who wants a password reset to trigger a follow-up needs an API that fires on the event. A marketer who wants a new subscriber to receive a welcome series needs a builder that fires on the signup. Each buyer has a point, so choose the automation that matches how your emails actually start.

    Video: How to Set Up Automations in Mailchimp | Mailchimp Tutorial 2026 by HowToHarbor on YouTube. This video is the creator’s property, embedded via YouTube for education. OutreachCompare is not affiliated with HowToHarbor and does not claim ownership of this video.

    SendGrid automation in this SendGrid vs Mailchimp comparison: triggers, segments and schedules

    Specifically, SendGrid’s automation lives in two places. Firstly, the Email API lets an app trigger any message from any event, with dynamic templates personalising each send. A developer can build any journey in code, with no limits beyond the plan’s volume. Marketing Campaigns adds a visual Automation builder on Advanced, with list-membership triggers, wait steps and branching, plus send scheduling and A/B testing on every plan.

    Moreover, SendGrid’s automation suits a team that already thinks in events. A signup triggers a welcome email, a purchase triggers a receipt and a follow-up, and a password reset triggers a confirmation, all from the same API key. The trade is that the marketer must ask a developer to change the journey, because the logic lives in code, not in a canvas. A team with a developer on staff will never notice the trade. A team without one will feel it every week.

    Mailchimp automation in this SendGrid vs Mailchimp comparison: Customer Journeys with branches

    Mailchimp, meanwhile, automates through Customer Journeys, a visual builder where a marketer drags triggers, waits, emails and conditional splits onto a canvas. A contact who signs up gets a welcome series, a contact who clicks gets a follow-up, and a contact who abandons a cart gets a reminder, all without writing code. Pre-built journeys cover welcome, abandoned cart, re-engagement and post-purchase flows. A small business can switch one on in an afternoon.

    In addition, Mailchimp gates the depth of automation by plan, so the price decides how far a journey can go. Essentials allows up to 4 flow steps, which covers a simple welcome email, while Standard unlocks up to 200 flows with predictive segmentation and generative AI. Premium adds enhanced automation flows, multivariate testing and a dedicated onboarding specialist. A business that outgrows a four-step flow should expect the $20 Standard step, because that is where the full builder lives.

    Where automation differs in this SendGrid vs Mailchimp comparison

    One honest warning applies to both tools here, and it matters more than any feature list. Automation only works on contacts who opted in, because a journey that fires on a purchased list will burn the sender reputation that both tools protect. A welcome series sent to strangers will spike complaints. The account review that follows will pause the very journeys you built. Build the list first, with double opt-in on the signup forms, and the automation will earn its keep.

    Similarly, the two builders differ in who can change them. Mailchimp’s canvas lets a marketer edit a journey at 9am and see it live by 10am, with no developer in the loop. SendGrid’s API lets a developer version the journey in code, test it, and deploy it like any other feature, with no marketer in the loop. A team that changes journeys weekly should pick the canvas. A team that changes them with each release should pick the code.

    Templates and builder: dynamic templates against a drag-and-drop studio

    Templates and builders decide how good your emails look, and how fast a new campaign goes out. SendGrid gives a developer dynamic templates with Handlebars variables, a design editor and a code editor, plus email testing credits that preview rendering across clients. Mailchimp gives a marketer a drag-and-drop studio with hundreds of pre-built templates, a content studio, branded templates and custom-coded templates on Standard and Premium. Both produce good-looking mail, yet they serve different hands.

    In fact, the builder gap is the widest design gap in this SendGrid vs Mailchimp comparison, so the details matter more than the headline. A developer who builds one template for a million users needs variables, versioning and testing. A marketer who builds a fresh newsletter every week needs drag-and-drop blocks, images and a preview that looks right on a phone. Each buyer has a point, so pick the builder that matches who actually writes your emails.

    SendGrid templates in this SendGrid vs Mailchimp comparison: dynamic, tested, code-friendly

    Specifically, SendGrid’s templates are built for scale. Dynamic templates carry Handlebars variables, so one template serves every user with their own name, order number and link. The design editor and code editor sit side by side. A developer can hand-code a template and a marketer can tweak it visually. Email testing credits preview the render across clients: 3 credits on the free trial, 10 on Basic, and 60 on Advanced and Pro, with more available to buy.

    Moreover, SendGrid’s testing is the deeper of the two on the transactional side. Pro includes 60 testing credits a month, and extra credits run from $18 a month for 30 to $800 a month for 2,000. A team that sends receipts and alerts to millions of inboxes should test every template change before it ships, because a broken receipt costs more than a broken newsletter.

    Mailchimp templates in this SendGrid vs Mailchimp comparison: hundreds of designs, branded and custom

    Mailchimp, by contrast, treats templates as a marketing asset, not a developer asset. Hundreds of pre-built templates cover newsletters, promotions, announcements and events, while the content studio stores images, files and brand assets in one place. Branded templates arrive on Standard, custom-coded templates can be created and sent on Standard and Premium. The new builder supports AI-written subject lines and content through Intuit Assist.

    In addition, Mailchimp adds the design extras that a small business actually uses. Secondly, landing pages use the same builder as the emails, signup forms match the brand, and social ads reuse the same creative. A marketer who designs a campaign on Monday can reuse the same look on a landing page on Tuesday, with no developer in the loop. That reuse is the reason many small businesses pick Mailchimp even when the per-email price is higher.

    Where the builders differ in this SendGrid vs Mailchimp comparison

    All in all, the builder lists look the same on paper, yet three extras separate them. Mailchimp offers hundreds of templates against SendGrid’s smaller set. A marketer who wants a fresh design every week will find more choice on Mailchimp. SendGrid offers Handlebars variables and API-driven sends. A developer who wants one template for a million users will find more power on SendGrid.

    Finally, the third difference is testing. SendGrid sells email testing credits by the pack, with 60 a month on Pro and Advanced. A team can preview every template across clients before it ships. Mailchimp tests through A/B and multivariate testing on Standard and Premium. A marketer can learn which subject line wins, yet the render preview is lighter than SendGrid’s. A team that obsesses over rendering should test both builders on the same template before committing.

    Deliverability: 205 billion emails a month against send-time optimisation

    Deliverability decides whether any of this matters, because an email that lands in spam earns no opens. SendGrid claims a 99% deliverability rate across a platform that moves more than 205 billion emails a month, with a 99.99% uptime SLA and a median delivery speed of 1.9 seconds. Mailchimp publishes no headline deliverability figure, and instead leans on authentication, Send Time Optimization and list hygiene to earn the inbox. That split is the whole story of this SendGrid vs Mailchimp comparison in one paragraph, and it decides the purchase for anyone who sends at scale.

    For example, the two approaches suit different senders. A high-volume app that sends millions of receipts needs the infrastructure, the dedicated IPs and the reputation data that SendGrid publishes. A small business that sends a weekly newsletter to a few thousand subscribers needs the timing, the engagement data and the list care that Mailchimp builds in. Both approaches work, yet they work for different reasons.

    Video: SendGrid Emails Going to Spam? How to Fix It (sendgrid.net) by Unspam Email on YouTube. This video is the creator’s property, embedded via YouTube for education. OutreachCompare is not affiliated with Unspam Email and does not claim ownership of this video.

    SendGrid deliverability in this SendGrid vs Mailchimp comparison: scale, IPs and Insights

    In particular, SendGrid treats deliverability as infrastructure. Finally, dedicated IPs arrive on Pro and Premier, with automated warm-up that raises volume gradually over days and weeks. A new IP builds reputation safely instead of blasting a full list on day one. Deliverability Insights shows reputation and delivery data, ISP feedback loops report complaints. Suppression management keeps bouncers and complainers out of future sends.

    What is more, SendGrid’s scale is the point. A platform that moves 205 billion emails a month has seen every spam filter, every blocklist and every ISP quirk, and its 99% deliverability claim, its 99.5% average delivery rate and its 91.3% inbox placement figure for Shopify’s merchants all rest on that volume. Those are vendor figures, so treat them as a claim about the platform, not a promise about your own sends. Your own authentication, list and content decide your own inbox rate.

    Mailchimp deliverability in this SendGrid vs Mailchimp comparison: timing, authentication and list care

    Mailchimp, by contrast, treats deliverability as list care. In sum, domain authentication proves your emails come from you, Send Time Optimization picks the hour each contact is most likely to open. Engagement data shows which contacts still open and which have gone quiet. Archive the quiet ones, and the open rate rises, because mailbox providers judge a sender by how its audience reacts.

    Similarly, Mailchimp pairs that care with the rules that protect it. Double opt-in on signup forms filters out typos, bots and low-intent signups before they pollute the list, and the account review that follows a complaint spike protects the shared sending reputation for every other customer. A business that grows its list slowly, mails only to people who asked. Archives the inactive will rarely see a deliverability problem on Mailchimp.

    Authentication and warm-up in this SendGrid vs Mailchimp comparison

    One honest warning applies to both tools here. Specifically, no deliverability feature can save a sender that skips authentication. Set up SPF, DKIM and DMARC on your own domain before you send at volume, because mailbox providers distrust mail from an unauthenticated domain. Google requires DMARC past 5,000 emails a day to Gmail. Our sending-domain guide explains each record in turn.

    In fact, warm-up works the same way on both tools, even though the names differ. A new dedicated IP on SendGrid warms gradually, and a new Mailchimp list warms gradually too, because mailbox providers distrust sudden volume from an unknown sender. Start small, lift the daily volume a little at a time, and let the reputation build over two to four weeks before real volume begins. Our deliverability guide covers the full setup if a specialist read tempts you instead.

    Ease of use, integrations and support

    Both tools are built for people who send email every day, yet each one feels different from the first login. SendGrid is the broader of the two to learn, because the API, the webhooks, the templates and the Marketing Campaigns product all live in one account, while the free trial gives you sixty days to learn them. Mailchimp is the friendlier of the two to learn, because the audience, the builder and the journeys follow one simple loop, while the free plan gives you time to learn it. Either account can go from signup to a live send within a single working day.

    A newcomer can learn either tool, yet reading our beginners guide to cold email first and spending a week exploring the dashboard makes the first month much easier. SendGrid rewards a team that wants the API to do the heavy lifting. Mailchimp rewards a team that wants one friendly login for the whole marketing loop.

    Onboarding in this SendGrid vs Mailchimp comparison: a 60-day trial against a free plan

    SendGrid onboards by trial with no card. The 60-day free trial covers 100 emails a day on the Email API and 100 contacts on Marketing Campaigns, with analytics, deliverability optimisation and the template editor included. A developer can test the real platform before paying anything. When the trial ends, sending stops until a paid plan starts, so set a reminder before day sixty.

    In contrast, Mailchimp onboards by free plan with no deadline. The Free plan covers 250 contacts and 500 sends a month, with email support for the first 30 days, and the 14-day trial of Standard or Essentials opens the paid features on top. A 1-month trial of Premium is available for qualified new customers through sales. When the Standard trial ends, the account moves to a paid plan, so set a reminder to check your list size before your first big campaign.

    Support in this SendGrid vs Mailchimp comparison: tickets and phone on the top tiers

    Support follows the same pattern as the rest of the comparison. SendGrid includes ticket support on Marketing Campaigns Basic, ticket, chat and phone on Advanced, and guaranteed response times on Advanced, with personalised support available to buy on the Email API and expert program management on Premier. Mailchimp includes email support for the first 30 days on Free, 24/7 email and chat on Essentials and Standard, and phone and priority support on Premium, with a dedicated onboarding specialist and four onboarding sessions.

    Both tools also run sizeable help centres and knowledge bases, and each answers support tickets from paying customers. When you need a human at midnight, the tier you pay for matters more than the brand name. A solo user on the cheapest tier should expect ticket or chat help, while a large team on a top tier can expect a named contact to call.

    Integrations in this SendGrid vs Mailchimp comparison: APIs and webhooks against 300+ apps

    Finally, each tool connects to the wider stack, in its own way. SendGrid adds comprehensive client libraries, an SMTP relay, event webhooks, inbound parse webhooks, a Segment connector and a subuser API, which suits a team whose app sits at the centre of its operation. Mailchimp adds more than 300 integrations across CRMs, social platforms, survey tools and payment providers, plus SMS as an add-on, which suits a team whose marketing stack sits at the centre instead.

    HubSpot and Salesforce users will slot either tool into the stack without fuss. Shopify users will get more from Mailchimp, because its ecommerce journeys, abandoned-cart flows and sales reporting are built for stores. Developers who live in code will get more from SendGrid, because its client libraries and webhooks are built for apps. Pick the integration list that matches the tools you already pay for.

    Feature matrix: SendGrid vs Mailchimp side by side

    This SendGrid vs Mailchimp comparison puts every claim in one place. Every row in the matrix below was verified against both official sites today, 16 November 2026. A tick means the provider states the feature on its own site, with any plan limits noted beside it. A dash means we could not confirm the feature, or the provider confirms it is absent. Read the matrix against your own priorities, because no single tool wins every row.

    Pricing, volume and buying in this SendGrid vs Mailchimp comparison

    FeatureSendGridMailchimp
    Entry price, monthly$19.95 a month
    Email API Essentials, 50,000 emails
    $13 a month
    Essentials, 500 contacts
    Marketing entry price$15 a month
    Marketing Campaigns Basic
    $13 a month
    Essentials, same product
    Pricing modelBy email volume
    Email API; by contacts on Campaigns
    By contacts stored
    Every plan
    Monthly sends, entry plan50,000 emails
    Essentials, Email API
    5,000 sends
    Essentials, 500 contacts at 10×
    Free plan, no deadline—
    60-day trial only, then it ends
    ✓
    Free, $0, 250 contacts, stays free
    Free trial✓
    60 days, 100 emails a day, no card
    ✓
    14 days Standard and Essentials, 1 month Premium
    Free marketing plan described✓
    FAQ describes 2,000 contacts, 6,000 emails
    ✓
    Free plan, 250 contacts, 500 sends
    Overage charges✓
    Per-email overages, next invoice
    ✓
    Automatic billing past limits
    Pay as you go—
    Monthly plans only, as listed
    ✓
    Pay As You Go credits, infrequent senders
    Nonprofit discount—
    Not listed on the pricing page
    ✓
    15% off for nonprofits and charities

    Last checked: 16 November 2026 on Twilio SendGrid’s Email API pricing page, Twilio SendGrid’s Marketing Campaigns pricing page and Mailchimp’s pricing page. Mailchimp’s dollar figures rest on three independent November 2026 checks of that page, all in agreement, because the page renders dollars in JavaScript. Features and pricing can change, so please check the provider’s site before you buy. We do not guess at features, prices or trials.

    Sending, API and automation in this SendGrid vs Mailchimp comparison

    FeatureSendGridMailchimp
    Email API✓
    Core product, client libraries, SMTP relay
    ✓
    Transactional API listed, Mandrill add-on
    Transactional email✓
    Core product, median delivery 1.9 seconds
    ✓
    Through Mandrill, a paid add-on
    Bulk marketing email✓
    Marketing Campaigns, separate bill
    ✓
    Core product, every plan
    Drag-and-drop builder✓
    Design editor on Campaigns
    ✓
    Drag-and-drop studio, hundreds of templates
    Dynamic templates✓
    Handlebars variables, editor and testing
    ✓
    Custom-coded templates, Standard and Premium
    Automation builder✓
    Advanced on Campaigns, API triggers
    ✓
    Customer Journeys, up to 200 flows on Standard
    Automation on the entry paid plan—
    Full Automation held for Advanced
    ✓
    Essentials, up to 4 flow steps
    Send Time Optimization✓
    Listed on the Email API page
    ✓
    Listed on the pricing page
    A/B testing✓
    Campaigns and Email API testing credits
    ✓
    A/B testing, multivariate on Premium
    Landing pages—
    Not listed on SendGrid
    ✓
    Unlimited landing pages, every plan

    Deliverability, compliance and support in this SendGrid vs Mailchimp comparison

    FeatureSendGridMailchimp
    Deliverability claim published✓
    99% deliverability, 99.99% uptime SLA
    —
    No headline figure published
    Emails sent a month, published✓
    205 billion and counting
    —
    No headline volume published
    Dedicated IP✓
    Pro and Premier, automated warm-up
    ✓
    High tiers, dedicated IPs listed
    Email validation✓
    2,500 free a month on Pro, 5,000 on Premier
    —
    No validation API listed
    Searchable activity history✓
    3 days Essentials, 7 days Pro
    ✓
    Reporting dashboard, custom reports Standard
    SOC 2 and GDPR✓
    SOC 2 Type II, GDPR, EU data residency
    ✓
    GDPR compliance, Enterprise SSO on Premium
    Single sign-on✓
    Pro and Premier
    ✓
    Enterprise SSO, Premium
    Phone support✓
    Marketing Campaigns Advanced, guaranteed times
    ✓
    Premium, phone and priority support
    Integrations✓
    Client libraries, webhooks, Segment connector
    ✓
    300+ integrations listed
    SMS sending—
    Email only, as listed
    ✓
    SMS add-on on paid plans

    Last checked: 16 November 2026 on Twilio SendGrid’s Email API pricing page, Twilio SendGrid’s Marketing Campaigns pricing page and Mailchimp’s pricing page. Features and pricing can change, so please check the provider’s site before you buy. We do not guess at features, prices or trials.

    What the matrix means for your shortlist in this SendGrid vs Mailchimp comparison

    Read the matrix with your own priorities in mind. SendGrid wins the transactional, API, volume-pricing and deliverability-claim rows outright, because a mature Email API, $19.95 for 50,000 emails and a published 99% deliverability claim have no Mailchimp equivalent. Mailchimp wins the marketing, builder, landing-page and free-plan rows outright, because Customer Journeys, hundreds of templates, unlimited landing pages and a free plan that stays free have no SendGrid equivalent. Automation and testing are a split: both tools automate and test, while SendGrid adds API triggers and Mailchimp adds the visual canvas.

    The matrix also shows why the entry price can mislead. Mailchimp at $13 a month looks cheaper than SendGrid Essentials at $19.95, yet SendGrid covers 50,000 emails a month against Mailchimp’s 5,000 sends at 500 contacts. SendGrid Marketing Campaigns at $15 a month looks close to Mailchimp Essentials at $13, yet SendGrid covers 15,000 sends against Mailchimp’s 5,000 at the same list size. The honest comparison is the full monthly cost of the sends you would really run, add-ons included.

    Pros and cons: the honest case for each tool

    Every tool has trade-offs, and an honest SendGrid vs Mailchimp comparison names them plainly. The strengths below show why each tool keeps winning customers. The weaknesses explain why some teams still pick the rival.

    SendGrid strengths in this SendGrid vs Mailchimp comparison

    Most importantly, the API tops the list. A mature Email API with client libraries, SMTP relay, event webhooks and inbound parsing delivers app mail in about two seconds, across 205 billion emails a month, with a 99.99% uptime SLA. The volume price is the second strength: $19.95 a month for 50,000 emails, or about $0.40 per 1,000, undercuts every contact-priced rival at volume.

    Next, the dedicated IP is the third strength. Pro at $89.95 a month includes a dedicated IP with automated warm-up, subuser management, single sign-on and 2,500 free validations. A sender that needs its own reputation can buy it in one plan. Real-time validation, Deliverability Insights and suppression management complete a platform that gives a sender the full picture.

    SendGrid weaknesses in this SendGrid vs Mailchimp comparison

    Nevertheless, the two-bill setup is the clearest weakness. A business that needs both app mail and newsletters pays for the Email API and for Marketing Campaigns, because the two products are bought separately and their sends are counted separately. A business that needs only newsletters will find Mailchimp’s single bill simpler and cheaper at a small list size.

    The missing marketing depth is another watch point. SendGrid lists no landing page builder, no SMS, no postcards and no built-in CRM. A small business that wants those channels needs a second tool beside it. The free trial ends after 60 days, with no permanent free plan. The activity history is short: three days on Essentials and seven days on Pro, with longer history sold separately.

    Mailchimp strengths in this SendGrid vs Mailchimp comparison

    Friendliness tops the list for Mailchimp. A drag-and-drop builder with hundreds of templates, Customer Journeys on a visual canvas, landing pages, signup forms and Intuit Assist need no developer at all. A small business can send a good-looking campaign in an afternoon. The free plan is the second strength: $0 with 250 contacts and 500 sends a month. No deadline, so a beginner can learn the platform before paying anything.

    The audience tools are the third strength. Tags, segments, predictive segmentation, Send Time Optimization and multivariate testing turn a list into a marketing asset, while more than 300 integrations, SMS, social ads and postcards carry the audience beyond the inbox. Standard at $20 a month unlocks up to 200 flows, which is generous for the price.

    Mailchimp weaknesses in this SendGrid vs Mailchimp comparison

    Contact pricing is still the clearest weakness. The bill rises with the list, not with the sends. A list that grows from 500 to 5,000 contacts moves Essentials from $13 to $75 a month, even if the sending stays the same. A business that mails rarely will pay for contacts it barely emails, and unsubscribed contacts still count toward the bill unless they are archived.

    The missing transactional core is another watch point. Mailchimp sends app mail through Mandrill, a paid add-on. A developer who needs fast password resets and receipts will pay extra for a job SendGrid does natively. The Premium jump is steep too: Standard at $135 a month for 10,000 contacts rises to $350 on Premium. A team should only pay it when the phone support, the unlimited seats and the advanced testing genuinely earn their keep.

    Who should pick which: a short decision guide

    A decision guide is only useful when it names real buyers. This SendGrid vs Mailchimp comparison ends the debate with five of them. Spot the buyer who looks most like you, and your answer is waiting in that paragraph. When two buyers both sound like you, start with the cheaper trial and let a month of real sending settle it.

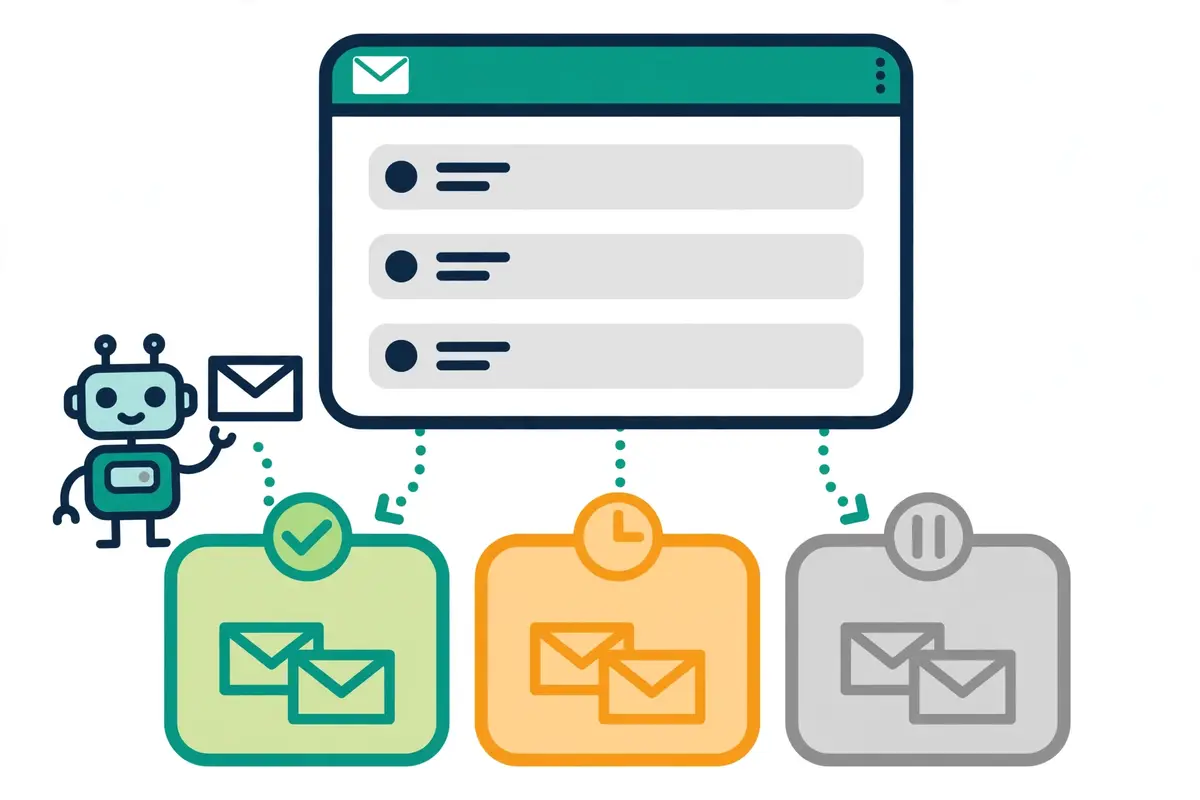
    SendGrid vs Mailchimp comparison: a fork in the road with two signposts, one path leading to a server rack with envelopes and a code window, the other to a friendly storefront with a newsletter and a megaphone
    The decision in this SendGrid vs Mailchimp comparison: a fork in the road, with one path for an email API with a code window and one path for a marketing platform with a newsletter.

    Pick SendGrid when the app sends the email

    Choose SendGrid when your app sends the email. The Email API starts with a 60-day free trial at 100 emails a day. Essentials costs from $19.95 a month for 50,000 emails, with a 99.99% uptime SLA and a median delivery speed of 1.9 seconds. Open the free trial, send a password reset and a receipt through the API, and watch the event webhooks report back before you scale.

    Indeed, SendGrid also fits a team that sends high volume to a modest list. Essentials at $34.95 a month covers 100,000 emails, while Mailchimp needs a 10,000-contact Essentials tier at $110 for the same 100,000 sends. A business that sends a million emails a month should price the volume model first, because the contact model charges for the list whether it mails or not.

    Pick Mailchimp when the marketing team sends the email

    Choose Mailchimp when your marketing team sends the email. The Free plan covers 250 contacts and 500 sends a month with no deadline, Essentials starts at $13 a month for 500 contacts, and the drag-and-drop builder with Customer Journeys needs no developer at all. Open the free plan, build a landing page, and send your first newsletter before you scale.

    Mailchimp also fits a small business that wants every channel in one login. Audiences, landing pages, SMS, social ads and postcards live beside the campaigns, with more than 300 integrations. A shop can run a welcome series, an abandoned-cart flow and a promotion without a second subscription. A team that lives in the builder will be right at home here.

    Three questions that settle this SendGrid vs Mailchimp comparison

    Run through three checks. Does your app trigger the email, or does your marketing team design it? Would you rather pay by the email, or by the contact? Do you need landing pages, SMS and journeys in one login, or do you need an API, webhooks and dedicated IPs in one login?

    When app mail and volume matter, pick SendGrid. If marketing, builder and journeys matter, pick Mailchimp. For a business that needs both, run both: SendGrid for the app mail, Mailchimp for the marketing mail, each doing the job it was built for. If two answers pull opposite ways, start with the tool that fixes your biggest pain today, since switching email tools now is easier than switching after a year of campaigns.

    Frequently asked questions in this SendGrid vs Mailchimp comparison

    Which is cheaper, SendGrid or Mailchimp?

    It depends on whether you count contacts or emails. A 500-contact list costs $13 a month on Mailchimp Essentials, against $15 on SendGrid Marketing Campaigns Basic. Mailchimp is cheaper there by $2. A 5,000-contact list costs $75 a month on Mailchimp Essentials, against $15 on SendGrid Marketing Campaigns Basic. SendGrid is cheaper there by $60, though it buys 15,000 sends against Mailchimp’s 50,000. At 100,000 emails a month, SendGrid Essentials costs $34.95, while Mailchimp needs a 10,000-contact Essentials tier at $110. All figures were checked on 16 November 2026.

    Is SendGrid or Mailchimp better for transactional email?

    SendGrid, by a clear margin. Its Email API is built for transactional mail, with client libraries, SMTP relay, event webhooks, real-time validation and a median delivery speed of 1.9 seconds, from $19.95 a month for 50,000 emails. Mailchimp sends transactional mail through Mandrill, a paid add-on, because its core product is marketing email. If your app sends password resets, receipts and alerts, SendGrid is the stronger pick.

    Can I use SendGrid or Mailchimp for cold email?

    No. Both tools are built for opt-in marketing and transactional email, not cold outreach. Mailchimp is opt-in only. Accounts that mail purchased lists or non-opted-in contacts risk suspension, with sending paused while the account is reviewed. SendGrid’s acceptable-use rules protect its shared IPs the same way, and an account that blasts a cold list can be restricted or closed. Read our ESPs for cold email guide for the tools that fit cold sending.

    Does SendGrid have a free plan?

    SendGrid has a 60-day free trial, not a permanent free plan. The trial runs $0 for 60 days at 100 emails a day on the Email API, with no credit card. The same trial covers Marketing Campaigns at 100 contacts and 100 emails a day. SendGrid’s own FAQ still describes a free Marketing Campaigns plan at 2,000 contacts and 6,000 emails a month, so confirm it at signup, since SendGrid’s free plans have changed before. Mailchimp’s Free plan stays free with no deadline, at 250 contacts and 500 sends a month.

    Which has better automation, SendGrid or Mailchimp?

    Mailchimp, for marketers, and SendGrid, for developers. Mailchimp’s Customer Journeys give a marketer a visual canvas with triggers, waits and conditional splits, with up to 200 flows on Standard. SendGrid’s automation runs through API triggers and the Marketing Campaigns Automation builder on Advanced, which suits a team that already thinks in app events. A team without a developer will get more from Mailchimp’s canvas.

    Should I use both SendGrid and Mailchimp?

    Many businesses do, and it is often the right answer. SendGrid handles the app mail: password resets, receipts, alerts and order confirmations, delivered fast through the API. Mailchimp handles the marketing mail: newsletters, welcome series, abandoned-cart flows and promotions, built by hand in the drag-and-drop studio. The two tools do not compete for the same job, so running both costs two bills yet removes the compromise. Our Brevo vs Mailchimp comparison covers the other popular marketing pairing.

    The verdict in this SendGrid vs Mailchimp comparison

    Verdict: SendGrid for transactional email by API, Mailchimp for opt-in marketing campaigns

    SendGrid is the pick when your app sends the email. A mature Email API, SMTP relay, event webhooks and real-time validation deliver app mail in about two seconds, across 205 billion emails a month, with Essentials from $19.95 a month for 50,000 emails and a 60-day free trial at 100 emails a day. Mailchimp is the pick when your marketing team sends the email. Audiences, a drag-and-drop builder, Customer Journeys, landing pages and predictive segments come in one friendly platform from $13 a month, with a Free plan that stays free at 250 contacts.

    In sum, choose for the job your email actually does today, not the job you hope it does next year. A developer who needs receipts delivered should start on SendGrid’s free trial, because 100 emails a day for 60 days costs nothing. A small business that needs a newsletter and a welcome series should start on Mailchimp’s free plan, because 250 contacts and 500 sends a month cost nothing either. A business that needs both should run both, with SendGrid for the app mail and Mailchimp for the marketing mail. Whichever you pick, authenticate your domain, warm up gradually, and trial it on real recipients before you scale.

    We have not run hands-on deliverability or reply-rate tests on SendGrid or Mailchimp, so this SendGrid vs Mailchimp comparison gives no numeric score. The verdict rests on verified pricing, verified API and automation claims and documented deliverability figures, all checked today, 16 November 2026. Try SendGrid free for 60 days, or start Mailchimp’s free plan, and let a month of real sending confirm the choice.

    Visit SendGrid →Check Mailchimp →

    Keep reading

    SendGrid vs MailchimpSendGrid from $19.95/mo · Mailchimp from $13/mo Visit SendGrid →
  • Apollo vs Snov.io 2026

    Apollo vs Snov.io 2026

    A 240M+ contact database with a dialer against a flat-rate finder, verifier and sequencer — and a clear winner for each job

    Apollo vs Snov.io is the classic data-versus-bundle contest in cold outreach. Apollo brings a 240M+ contact database, buying-intent and job-change signals, waterfall enrichment and automated email sequences. It adds a built-in cloud dialer and AI writing, priced per seat from $49 a month. Snov.io brings an email finder, a 7-tier verifier, drip campaigns and LinkedIn automation. Warm-up and a built-in CRM come in one flat monthly fee from $39 a month, with unlimited team seats on every plan. This Apollo vs Snov.io comparison checks pricing, database depth, finding, verification, enrichment, sequencing, deliverability and support on both official sites, so you can pick with confidence.

    Visit Apollo →Check Snov.io →

    Prices checked 16 November 2026 on Apollo’s and Snov.io’s official pricing pages. Features and pricing can change, so please check the provider’s site before you buy.

    Quick Answer

    Choose Apollo when finding the right people matters more than the sending itself. Its 240M+ contact database, firmographic, technographic and buying-intent filters, waterfall enrichment and signal-based prospecting find buyers other tools miss. Basic starts at $49 a seat a month on annual billing, and the free plan stays free. Choose Snov.io when you want one flat bill for the whole outreach loop. Its email finder, 7-tier verifier, drip campaigns, LinkedIn automation, warm-up and CRM come in a single subscription from $39 a month. Unlimited team seats mean a growing team never pays per rep.

    Apollo leads on database depth, with 240M+ contacts and intent signals against Snov.io’s unlisted database size. Snov.io leads on entry price and team pricing, at $39 a month flat against Apollo’s $49 a seat, and it stays flat as the team grows. Apollo leads on calling, with a built-in cloud dialer in every seat, while Snov.io has no dialer. Snov.io leads on LinkedIn, because its LinkedIn automation runs inside sequences, while Apollo’s LinkedIn steps are manual tasks a person completes by hand.

    Contents

    Why this Apollo vs Snov.io comparison settles the choice

    Picking between two capable tools is harder than picking between a strong tool and a weak one. In fact, Apollo and Snov.io both find contacts, verify them, send sequences and track replies. Both have earned large, loyal customer bases. Apollo holds a 4.7 out of 5 rating from more than 9,690 reviews on G2, according to its own pricing page. It serves more than 600,000 companies. Snov.io holds a 4.5 out of 5 rating from around 499 reviews on G2, according to an October 2026 review. Trustpilot rates it higher, at 4.7 out of 5 from about 1,482 reviews. That shared quality is exactly why the decision feels stuck.

    The picture gets sharper once you lay the two price lists and feature lists side by side. Apollo bills per seat, counts everything in credits, and spends its strength on the database, the signals and the dialer. Snov.io bills one flat monthly fee and counts finding and verification in the same credit pool. It spends its strength on the bundle: finder, verifier, drip campaigns, LinkedIn automation, warm-up and CRM in one login. Each of those differences points at a different kind of buyer.

    This Apollo vs Snov.io comparison takes those differences in turn. Pricing leads, because Apollo’s per-seat billing and Snov.io’s flat fee give the same team two very different monthly totals. Cost per find comes next, because both tools charge credits for every email they reveal, yet the credit rules are not the same. Database depth, finding, verification, enrichment, sequencing, warmup, a feature matrix and the honest pros and cons follow. By the end, the right tool, and the right plan inside it, should be clear.

    Apollo and Snov.io in plain English: a database with a sequencer against an all-in-one bundle

    Apollo is a B2B contact intelligence database with a multichannel sales engagement platform built on top. You search 240M+ contacts and 30M+ accounts with firmographic, technographic and buying-intent filters. You enrich the records through a waterfall, then run automated email sequences. Call from the built-in cloud dialer, and track deals in the same account. It suits SDR teams and founders who prospect in broad markets and want the data to do the heavy lifting. The free plan costs $0, and Basic starts at $49 a seat a month on annual billing.

    Snov.io is an all-in-one sales engagement platform that rolls prospecting, email finding, verification, cold email sequences, LinkedIn automation and a lightweight CRM into one tool. You find emails with the Email Finder extension and verify them with the 7-tier verifier. After that, enrol the contacts in drip campaigns and warm your mailboxes. Finally, manage deals in the built-in CRM, all from one login. It fits small teams and founders who want one flat bill for the whole outreach loop. The free trial gives 50 credits and never expires, and Starter starts at $39 a month.

    Both tools cover the same outbound loop at heart. You begin by finding prospects in the built-in data or importing a list of your own. You then verify and enrich those contacts. Next you enrol them in a sequence and watch the replies land in one shared inbox. To finish, you sync the activity back to your CRM. Because the loop matches on both tools, the decision rests on where each one is strongest inside it.

    What Apollo adds on top of email in this Apollo vs Snov.io comparison

    Above all, Apollo turns from a sequencer into a prospecting engine through its database and its signals. Buying-intent topics, job changes, funding rounds and hiring triggers flag the accounts that are ready to buy right now. A rep calls the warmest list first instead of working down an alphabetical one. Waterfall enrichment checks providers in turn until it finds a working address. The Chrome extension reveals emails and phone numbers while you browse LinkedIn, Gmail or a company website.

    Moreover, Apollo adds calling that Snov.io does not match. A built-in cloud dialer sits in every seat, with call recording and AI insights on Professional, so a rep can call, email and track from one screen. Automated email warmup, inbox rotation, built-in verification, AI writing, A/B testing, deal tracking and two-way HubSpot and Salesforce sync complete the platform. Our Apollo review covers the platform in full depth.

    What Snov.io adds on top of email in this Apollo vs Snov.io comparison

    Snov.io, meanwhile, turns from a sequencer into a flat-rate bundle through its breadth. The Email Finder and LinkedIn Prospect Finder extensions pull verified emails from websites and LinkedIn profiles. The 7-tier verifier cleans the list, drip campaigns run email and LinkedIn steps together, and warm-up runs on up to three mailboxes on Starter and unlimited mailboxes on Pro. The built-in CRM tracks deals without a second subscription. New extras on the pricing page include Jevu AI notetaker minutes, an AI Assistant, MCP access for Claude and ChatGPT, and a Clay integration.

    Moreover, Snov.io adds team pricing that Apollo does not match. Unlimited team seats sit on every plan, including Starter. A team of ten pays the same $39 a month as a solo founder, and credits and recipients are shared across the team. A team that grows from one rep to eight never sees the bill multiply. Our Snov.io review covers the platform in full depth.
    The one-sentence difference in this Apollo vs Snov.io comparison

    Apollo is the prospecting engine: a 240M+ database with intent signals, waterfall enrichment and a built-in dialer, priced per seat, with LinkedIn steps left as manual tasks. Snov.io is the flat-rate bundle: finder, verifier, drip campaigns, LinkedIn automation, warm-up and CRM in one subscription, priced flat, with unlimited seats. A rep who lives in the database will notice the difference in week one. A founder who watches the monthly bill will notice it on the first invoice.

    Neither tool is made for permission-based newsletters, so a team that mostly emails its own subscribers should look at the marketing platforms in our best cold email software guide instead. For B2B prospecting and outbound, though, this pair stays one of the most useful match-ups around.

    Pricing head-to-head in this Apollo vs Snov.io comparison

    Pricing is where this Apollo vs Snov.io comparison first gets interesting, because the two price lists work in opposite ways. Apollo bills per seat, so the bill climbs with every new rep. Every email reveal, phone number and enrichment costs credits from a pooled allowance. Snov.io bills one flat monthly fee, so the bill holds steady whether one person or ten people send from the account. Finding and verification draw from the same credit pool. A lone founder and a five-person team will read the same two price lists and reach opposite conclusions.

    Every figure below is taken from the official pricing pages, checked today, 16 November 2026. For example, Apollo figures are in US dollars per seat, with annual billing first and monthly billing second, because the annual figure is the headline on its pricing page. Snov.io figures are in US dollars per month, with monthly billing first and annual billing second. Where a price is not shown on the official page, this Apollo vs Snov.io comparison says so plainly instead of guessing.

    Apollo vs Snov.io comparison: two coin stacks of different heights beside a calculator and a small bar chart, one tall stack for per-seat pricing and one short flat stack for a flat monthly fee
    Pricing in this Apollo vs Snov.io comparison: Apollo charges per seat, so the bill grows with the team, while Snov.io charges one flat monthly fee with unlimited seats.

    Apollo plans: Free, Basic, Professional and Organization, from $49 a seat a month

    PlanPrice*What you getBest forVisit
    Apollo — FreeBest for trying Apollo$0
    Free plan, stays free
    75 credits a seat a month
    900 a year, sequences included, Gmail only
    Founders testing the databaseVisit Site →
    Apollo — BasicBest for solo sellers$49 a seat a month
    $65 billed monthly
    2,500 credits a seat a month
    30,000 a year upfront, 1 mailbox a seat
    Individual sellers doing regular outboundSee Plans →
    Apollo — ProfessionalBest for full-time reps$79 a seat a month
    $99 billed monthly
    4,000 credits a seat a month
    48,000 a year upfront, unlimited sends, dialer
    Reps who need AI, recording and more creditsView Pro →
    Apollo — OrganizationBest for larger teams$119 a seat a month
    Annual only, minimum 3 seats
    6,000 credits a seat a month
    72,000 a year upfront, SSO, own LLM key
    Teams needing custom volumes and securityGet a Quote →

    * Last checked: 16 November 2026 on Apollo’s pricing page. Apollo’s own page renders plan prices in JavaScript, so the dollar figures above are cross-checked against three independent readings of the same live page dated October 2026, all of which agree: Free $0, Basic $49 annual / $65 monthly, Professional $79 / $99, Organization $119 annual only with a 3-seat minimum. Apollo’s pricing FAQ confirms credits are pooled across the team, granted upfront, and expire at the end of each billing cycle with no rollover. Features and pricing can change, so please check the provider’s site before you buy. We do not guess at features, prices or trials.

    Reading Apollo’s credit rules in this Apollo vs Snov.io comparison

    Credits are where Apollo’s real monthly cost takes shape. An email reveal costs 1 credit and a phone number costs 8, according to independent readings of Apollo’s pricing page. Enrichment costs 1 to 8 credits, and a minute on the US dialer costs 2. Add-on credits cost $0.025 each up to 1,000 a month, falling to $0.015 at 250,000, in recurring packs. Credits are pooled across the whole team and granted upfront at the start of each billing cycle, so the full allowance is available from day one.

    One rule makes Apollo’s free plan genuinely useful: it stays free with no time limit, with 75 credits a seat a month, sequences included, and a 14-day trial of Basic or Professional on top. A founder can run real campaigns before paying anything. The catch is that all seats on one account must sit on the same plan. A team cannot mix Basic seats with Professional seats, and unused credits expire at the end of each cycle, including bought add-on credits.

    New sending infrastructure is sold inside Apollo too, which saves a separate purchase. Credits also pay for email warmup, domains and mailboxes, and AI-researched data, according to Apollo’s pricing FAQ, so warmup and data draw from the same pool as finding. A team that warms many mailboxes and enriches heavily should watch the pool closely, because every job spends the same currency.

    Snov.io plans: free trial, Starter, Pro and Custom Ultra, from $39 a month

    PlanPrice*What you getBest forVisit
    Snov.io — Free trialBest for trying Snov.io$0
    50 credits, never expires
    50 credits, 100 recipients
    First 20 database prospects only
    Founders testing the finderTry Free →
    Snov.io — StarterBest for small teams$39 a month
    $29.25 billed yearly
    1,000 credits, 5,000 recipients
    Unlimited team seats, 3 warm-ups
    Small teams starting outreachVisit Site →
    Snov.io — Pro SBest for growing teams$99 a month
    $74.25 billed yearly
    5,000 credits, 25,000 recipients
    Unlimited team seats, unlimited warm-ups
    Teams finding thousands of leadsSee Pro S →
    Snov.io — Pro MBest for heavier volume$189 a month
    $141.75 billed yearly
    20,000 credits, 100,000 recipients
    Unlimited team seats, unlimited warm-ups
    Teams with large monthly listsView Pro M →
    Snov.io — Pro L / UltraBest for high volume$369 / $738 a month
    $276.75 / $553.50 billed yearly
    50,000 / 100,000 credits
    Unlimited team seats, unlimited warm-ups
    Agencies and heavy prospectorsView Pro L →

    * Last checked: 16 November 2026 on Snov.io’s pricing page. The page shows Starter at $29.25 a month billed yearly and Pro S at $74.25 billed yearly, with annual billing saving 25%, so the monthly figures of $39 and $99 follow from the same page. Custom Ultra is custom-priced, from 200,000 credits and 400,000 recipients, with unused-credit rollover listed only on that plan. Features and pricing can change, so please check the provider’s site before you buy. We do not guess at features, prices or trials.

    Reading Snov.io’s credit rules in this Apollo vs Snov.io comparison

    Add-ons are where Snov.io’s real monthly bill takes shape. LinkedIn automation is not included in any plan price. It costs $69 a month per slot, so a team that wants LinkedIn inside its sequences pays $69 on top of the $39 Starter plan for each LinkedIn account it connects. Enrichment runs on tokens, not credits: Starter includes 75 enrichment tokens a month and Pro S includes 150, with each enrichment operation costing a varying number of tokens.

    One rule makes Snov.io’s Starter plan genuinely useful: it includes unlimited team seats, unlimited senders, unlimited follow-ups, unlimited campaigns and unlimited monthly emails, so the whole team shares one $39-a-month bill. The catch is that credits are one shared pool across the Email Finder, the Email Verifier and the API. Every search or verification costs one credit each, so finding a contact and then verifying it spends two credits.

    Cost at one user, a team of five and agency scale in this Apollo vs Snov.io comparison

    SetupApollo, monthly billingSnov.io, monthly billingCheaper pick
    One user, entry plan$65 a month
    Basic, 2,500 credits a month
    $39 a month
    Starter, 1,000 credits a month
    Snov.io, by $26 a month
    One user, annual billing$49 a month
    Basic, 30,000 credits a year
    $29.25 a month
    Starter, 1,000 credits a month
    Snov.io, by about $20 a month
    Team of five, entry plan$325 a month
    5 × $65, Basic monthly
    $39 a month
    Starter, unlimited seats
    Snov.io, by $286 a month
    Team of five, mid plan$495 a month
    5 × $99, Professional monthly
    $99 a month
    Pro S, unlimited seats
    Snov.io, by $396 a month
    Agency scale$357 a month
    Organization floor, 3 × $119 annual
    $369 a month
    Pro L monthly, unlimited seats
    Apollo on the floor price, barely

    Arithmetic is shown plainly so you can check it: 5 × $65 = $325, 5 × $99 = $495 and 3 × $119 = $357. Apollo charges per seat on every paid plan, while Snov.io charges one flat fee with unlimited team seats on every plan. Last checked: 16 November 2026. Features and pricing can change, so please check the provider’s site before you buy.

    What the price gap means in practice in this Apollo vs Snov.io comparison

    Take a solo sender, who pays $65 a month on Apollo Basic or $39 a month on Snov.io Starter, on monthly billing. Apollo gives that sender 2,500 credits a month, a 240M+ database, intent signals and a dialer in return. Snov.io gives that sender 1,000 credits, a finder, a 7-tier verifier, drip campaigns, warm-up on three mailboxes and a CRM. The $26 gap is real, yet each tool spends it on a different strength.

    In contrast, a five-person team flips the maths hard in one direction and never flips it back. Five people on entry plans cost $325 a month on Apollo Basic and $39 a month on Snov.io Starter. Snov.io never charges per seat, so it wins the team bill by $286. Five people on mid plans cost $495 a month on Apollo Professional and $99 a month on Snov.io Pro S, so Snov.io wins again by $396. Any team planning to hire should run the per-seat sums before signing, because the gap grows with each new rep.

    Annual billing narrows every gap in the same way, yet it never closes the team gap. Apollo falls from $65 to $49 on Basic and from $99 to $79 per seat on Professional. Snov.io falls from $39 to $29.25 on Starter and from $99 to $74.25 on Pro S. On annual billing, a five-person team on entry plans pays $245 a month on Apollo and $29.25 on Snov.io, so Snov.io still wins by more than $215. The only setup where Apollo’s floor price edges ahead is agency scale, where Organization’s three-seat floor of $357 a month sits just under Snov.io Pro L at $369, before either tool’s add-ons.

    Trying before you buy in this Apollo vs Snov.io comparison: a free plan against a free trial

    The trial gap is the friendliest difference of all, because both tools let you test before you pay, in different ways. Apollo offers a free plan that stays free with no time limit. It includes 75 credits a seat a month and sequences, plus a 14-day trial of Basic or Professional. Snov.io offers a free trial of 50 credits and 100 recipients that never expires, according to its own pricing page. You can find and verify fifty contacts without a card.

    In sum, no paid plan exists on either tool without a trial or a free tier, so the test is genuinely free on both. If a free plan with sequences matters most, Apollo’s is the better offer. If fifty free credits with no expiry matters most, Snov.io answers the question at once. Either way, set a reminder before the trial ends on Apollo’s paid trial, because the account moves to a paid plan when it ends.

    Cost per find at 1,000, 5,000 and 10,000 finds

    Cost per find is the fairest way to compare two credit-based tools, because the headline price hides what each email actually costs. Both tools charge credits for every email they reveal, yet the credit rules are not the same. Apollo charges 1 credit per email reveal and 8 per phone number, with the reveal including built-in verification. Snov.io charges 1 credit per email search and 1 credit per verification from the same shared pool, so finding a contact and then verifying it spends two credits.

    For example, the table below works out the cheapest monthly bill that covers each volume, on monthly billing first, with annual billing noted beside it. Every figure is arithmetic from the plan prices checked today, 16 November 2026, and the arithmetic is shown so you can check it. A find means one email revealed for a prospect. A verified find means one email revealed and verified.

    Raw finds in this Apollo vs Snov.io comparison

    VolumeApollo, cheapest monthly billSnov.io, cheapest monthly billCheaper pick
    1,000 finds
    Raw emails revealed
    $65 a month
    Basic monthly, 2,500 credits
    $39 a month
    Starter, 1,000 credits
    Snov.io, by $26
    5,000 finds
    Raw emails revealed
    $124 a month
    Pro monthly $99 + 1,000 top-up credits
    $99 a month
    Pro S, 5,000 credits
    Snov.io, by $25
    10,000 finds
    Raw emails revealed
    About $197 a month
    Pro annual $79 + about $118 top-up
    $189 a month
    Pro M, 20,000 credits
    Snov.io, by about $8

    Verified finds in this Apollo vs Snov.io comparison

    VolumeApollo, cheapest monthly billSnov.io, cheapest monthly billCheaper pick
    1,000 verified finds
    Revealed and verified
    $65 a month
    Basic monthly, 1 credit each
    $99 a month
    Pro S, 2,000 credits at 2 each
    Apollo, by $34
    5,000 verified finds
    Revealed and verified
    $124 a month
    Pro monthly $99 + 1,000 top-up credits
    $189 a month
    Pro M, 10,000 credits at 2 each
    Apollo, by $65
    10,000 verified finds
    Revealed and verified
    About $197 a month
    Pro annual $79 + about $118 top-up
    $369 a month
    Pro L, 20,000 credits at 2 each
    Apollo, by about $172

    Arithmetic, labelled plainly: Apollo top-up credits cost $0.025 each up to 1,000 a month, falling to $0.02 up to 5,000 and $0.018 at 10,000. So 1,000 top-up credits cost $25 and 6,000 cost about $118 (5,000 × $0.02 + 1,000 × $0.018). Those top-up tier rates rest on independent readings of Apollo’s pricing page dated October 2026, because Apollo’s own page renders prices in JavaScript — please confirm them on the site. Snov.io charges 1 credit per search and 1 per verification from one shared pool, so a verified find costs 2 credits there. On annual billing, Apollo Pro falls to $79, so 5,000 finds cost about $104 a month ($79 + $25). Last checked: 16 November 2026. Features and pricing can change, so please check the provider’s site before you buy.

    Why verified finds flip the winner in this Apollo vs Snov.io comparison

    Raw finds favour Snov.io at every volume, because its flat plans hand out more credits per dollar. Verified finds favour Apollo at every volume, because its 1-credit reveal includes built-in verification while Snov.io charges a second credit to verify what it just found. That split is the whole story of this Apollo vs Snov.io comparison in one table, and it decides the purchase for anyone who sends to the list they build.

    In fact, Snov.io’s own pricing page describes its Email Finder results as pre-verified leads, so a team that trusts the finder’s built-in check may never spend the second credit. A team that re-verifies every address before sending, which is the safer habit, should budget two credits per contact on Snov.io and one on Apollo. Run both tools on the same 100 prospects, count the bounces, and let your own list settle the argument.

    Phone numbers widen the gap further in Apollo’s favour at low volume and narrow it at high volume. A phone number costs 8 credits on Apollo, so Basic’s 2,500 monthly credits buy about 312 phone numbers. Snov.io sells phone numbers through enrichment tokens at a varying cost. The pricing page does not fix that cost in advance. A team that mostly needs phone numbers should price that job separately on both tools before signing.

    Database size and coverage: 240M+ contacts against an unlisted database

    Database depth is the clearest difference in this Apollo vs Snov.io comparison, and Apollo wins it on breadth. Apollo publishes a database of 240M+ contacts and 30M+ accounts on its own homepage, with 65+ prospecting filters, firmographic, technographic and buying-intent filters, and signal-based prospecting on top. Snov.io publishes no headline database size at all, describing instead a full prospect and company database, reverified monthly, with a variety of filters from skills to revenue.

    Nevertheless, size alone does not win deals, though. A database earns its price only when it holds the exact people you sell to, with details that are still correct when you use them. Apollo’s database fits teams that prospect in broad markets and want list building inside the same login. Snov.io’s database suits teams that already know their list and want each record found and verified as they go. Our best B2B data providers guide sets both tools against the dedicated data specialists.

    Apollo vs Snov.io comparison: a tall stack of glowing contact cards rising like a skyscraper next to a much smaller stack, with a search filter funnel above them
    Database depth in this Apollo vs Snov.io comparison: Apollo publishes 240M+ contacts and 30M+ accounts, while Snov.io publishes no headline database size.

    Apollo data in this Apollo vs Snov.io comparison: 240M+ contacts with signals

    In particular, Apollo treats data as the product, with the sequencer built on top. Its 240M+ contacts and 30M+ accounts cover leads with firmographic, technographic and intent filters, so you can find contacts matching your ideal customer profile without buying a separate data tool. Buying-intent topics, job changes, funding rounds and hiring triggers flag the accounts that are ready to buy right now. The record selection limit rises with the plan: 1,000 on Basic, 2,500 on Professional and 10,000 on Organization.

    What is more, Apollo pairs that database with AI that narrows the list for you. Agentic Loops on Professional automate prospecting workflows, AI lead scoring ranks the list, and AI research runs cost 1 credit each. A team that prospects inside Apollo every day will feel at home, because the list, the enrichment, the sequence and the dialer live in one login.

    Video: Apollo.io Search Filters Explained: Find the Right Companies & Contacts by NimbleGTM on YouTube. This video is the creator’s property, embedded via YouTube for education. OutreachCompare is not affiliated with NimbleGTM and does not claim ownership of this video.

    Snov.io data in this Apollo vs Snov.io comparison: a full database, reverified monthly

    Snov.io, by contrast, treats data as part of the bundle, not a headline number. Its pricing page describes access to the full prospect and company database, reverified monthly, with bulk prospect search and bulk company search, domain search, email search and LinkedIn search. The free trial shows only the first 20 prospects. A team should test the database on its own niche before paying. Coverage that looks deep across the United States can turn thin inside a narrow market.

    Similarly, Snov.io pairs that database with a finder that works where you already browse. The Email Finder extension finds verified emails on any website, the LinkedIn Prospect Finder extension collects LinkedIn profiles with contacts and full profile information, and the Email Tracker extension syncs prospects from Gmail. A team that finds leads while browsing will feel at home, because the finder lives in the browser, not only in the dashboard.

    Coverage: test both tools on your own market in this Apollo vs Snov.io comparison

    One honest warning applies to both tools here. No vendor publishes an independent coverage audit, so every coverage claim should be treated as a vendor claim. The honest test is your own list, so take 100 real prospects from your market, run them through both tools, and count the hits. Coverage that looks deep across North America can turn thin inside a narrow niche or a smaller country.

    In fact, list quality drives reply rates more than any clever subject line ever will. Five hundred verified ideal customers beat ten thousand careless contacts, every single time. A tool that helps you build a careful list is worth its fee, while one that leaves list building to you means paying for data on top. Bear that in mind through the rest of this Apollo vs Snov.io comparison.

    Email finding and verification: credits against credits, with different rules

    Finding and verification is the closest call in this Apollo vs Snov.io comparison, because both tools charge credits for every email they reveal, yet the rules around those credits are not the same. Apollo charges 1 credit per email reveal, with built-in verification included, and the credits are pooled across the team. Snov.io charges 1 credit per email search and 1 credit per verification from one shared pool, so the same contact can cost twice.

    In fact, that difference decides the whole purchase for many teams, so the details matter more than the headline. A team that finds a thousand emails a month and sends to them all needs to know whether the second credit applies. A team that verifies an old list in bulk needs to know the file limit. Each buyer has a point, so pick the tool that matches how you actually work.

    Apollo finding in this Apollo vs Snov.io comparison: 1 credit, verification included

    Specifically, Apollo’s finding is simple to budget. An email reveal costs 1 credit, a phone number costs 8, and the built-in verification sits inside the reveal, so the credit you spend is the credit the verified address costs. Waterfall enrichment checks providers in turn until it finds a working address, at 1 to 8 credits per enrichment. The Chrome extension reveals emails and phone numbers while you browse LinkedIn, Gmail or a company website, for credits.

    Moreover, Apollo’s credit pool is shared across the whole team, with per-user credit caps available in the team settings. An admin can stop one rep from spending the month’s pool in a day. Credits are granted upfront at the start of each billing cycle and expire at the end of it, with no rollover, including bought add-on credits. A team that plans its monthly finding volume in advance will never be surprised by the pool running dry.

    Snov.io finding in this Apollo vs Snov.io comparison: finder, verifier and bulk checks

    Snov.io’s finding is broader in tools and stricter in credits. The Email Finder finds verified emails by a lead’s name and company, Domain Search uncovers employees from just a company name or domain, and LinkedIn Search collects LinkedIn profiles with contacts and full profile information. Bulk search saves verified leads in bulk from any finder tool, and data export runs to CSV, XLS or Google Sheets.

    Snov.io’s verification is the deeper of the two. Its 7-tier email verification claims 98%+ accuracy on its own pricing page. It offers bulk verification of up to 100,000 emails per file. Greylisting bypass and bounce risk detection come with it, plus a choice of verification provider in Enrichment: Snov.io, Bouncer or MillionVerifier. Re-verification is built in too, so a list older than 30 days can be checked again before the next campaign.

    Where finding differs in this Apollo vs Snov.io comparison

    All in all, the finding lists look the same on paper, yet three extras separate them. Apollo includes verification inside the 1-credit reveal, while Snov.io charges a second credit for a separate verification, so Apollo wins the verified-find maths at every volume. Snov.io verifies in bulk up to 100,000 emails per file and lets you pick the verification provider, while Apollo’s pricing page lists no bulk file limit, so Snov.io wins the list-cleaning job.

    Finally, the third difference is the phone. Apollo charges a flat 8 credits per phone number, which is easy to budget, while Snov.io finds phone numbers through enrichment tokens at a varying token cost, which is harder to budget in advance. A team that mostly needs phone numbers should test both tools on the same 100 prospects and compare the hit rate and the cost before committing.

    Enrichment and accuracy: waterfall data against a plain-English caveat

    Enrichment is the feature that makes this Apollo vs Snov.io comparison unlike a simple price contest. Apollo enriches through a waterfall that checks providers in turn until it finds a working address, with AI research on top. Snov.io enriches through tokens that buy phone numbers, emails, LinkedIn profiles, company insights and AI-found data points, with a Clay integration for teams that enrich in Clay. Both are genuinely useful, yet they work in different ways.

    In fact, that split decides the whole purchase for many teams. A rep who wants the platform to fill the gaps itself needs a waterfall that runs without thinking. A rep who already enriches in Clay needs the integration to carry the data back and forth. Each buyer has a point, so choose the enrichment that matches how you actually work.

    Video: Build Your Dream Outreach Stack: Snov.io + Clay by Snovio on YouTube. This video is the creator’s property, embedded via YouTube for education. OutreachCompare is not affiliated with Snovio and does not claim ownership of this video.

    Apollo enrichment in this Apollo vs Snov.io comparison: waterfall and AI research

    Specifically, Apollo’s enrichment is built for scale. Waterfall enrichment checks providers in turn until it finds a working address. CSV, CRM and API enrichment keep existing records fresh, and AI research runs cost 1 credit each. Advanced filters, CRM enrichment and sequences sit on Basic, while Agentic Loops, AI lead scoring and automation sit on Professional. A team that enriches thousands of records a month will feel the waterfall’s value in the first week.

    Moreover, Apollo adds buying-intent enrichment that Snov.io does not match. Intent topics, job changes and hiring signals enrich the record with timing, not just contact details, so the rep knows not only who to call but when to call them. That timing is the difference between a cold call and a warm one, and it is the reason many teams pay Apollo’s per-seat price.

    Snov.io enrichment in this Apollo vs Snov.io comparison: tokens, AI and Clay

    Snov.io, meanwhile, enriches through a token system that buys exactly what you ask for. Enrichment tokens pay for phone numbers, missing emails and re-verification. They also buy LinkedIn profile pulls with 16 extra data points and company insights such as funding, size and location. AI finds any data point from publicly available data. Starter includes 75 tokens a month and Pro S includes 150, with each operation costing a varying number of tokens.

    In addition, Snov.io adds a Clay integration, an AI Assistant that finds leads and answers questions in conversation, and MCP access that lets Claude and ChatGPT work inside the Snov.io account. The AI Writer generates personalised subject lines, emails, ice-breakers, LinkedIn messages, intros and follow-ups. A team that already runs Clay will find the integration the most useful enrichment feature on either tool.

    Accuracy: the plain-English caveat in this Apollo vs Snov.io comparison

    One honest warning applies to both tools here, and it matters more than any feature list. Snov.io claims 98%+ accuracy for its 7-tier verification on its own pricing page. Apollo publishes no headline accuracy figure. Independent benchmarks tell a different story. Anymail Finder’s September 2025 benchmark put Snov.io at 20.1% verified across 5,000 searches. Tomba’s February 2026 benchmark put Hunter at 37.6% and Skrapp at 42.8%.

    Those benchmarks are vendor-run and directional, not an independent audit, and no neutral audit exists for either tool. Treat every accuracy claim, vendor or benchmark, as a claim to test, not a fact to trust. The honest test is your own list: take 100 real prospects from your market, run them through both tools, and count the bounces. A tool that finds 90 good emails out of 100 beats a tool that finds 60, whatever the marketing page says.

    Sequencing, LinkedIn and the dialer: email-first against multichannel

    Sequencing is where this Apollo vs Snov.io comparison turns on one clear difference. Apollo runs automated email sequences and a built-in dialer, with LinkedIn steps left as manual tasks a person completes by hand. Snov.io runs multichannel drip campaigns that mix email and LinkedIn steps in one sequence, with LinkedIn automation as a $69-a-month add-on per slot. A team that lives on LinkedIn and a team that lives on the phone will draw opposite conclusions from the same two tools.

    In contrast, that difference decides the whole purchase for many teams, so the extras matter more than the sequence builder. A rep who works LinkedIn all morning needs those touches logged inside the sequence, next to the emails. A rep who works the phone all morning needs the dialler built into the same tool that sends the sequences. Both buyers have a point, so take the tool that fits the way you really sell.

    Apollo sequences in this Apollo vs Snov.io comparison: email, dialer and manual LinkedIn

    Specifically, Apollo’s sequences are built for email first. Automated email sequences run with A/B testing, AI writing, dynamic variables and conditional logic, and the built-in cloud dialer sits beside them, with call recording and AI insights on Professional. Deal tracking, reporting and a unified inbox complete the workflow, and the free plan includes sequences, so a founder can test the whole loop before paying.

    Apollo’s LinkedIn steps, however, are tasks, not automation. Its own help centre is explicit: Apollo does not automatically complete LinkedIn tasks for you. A sequence can include a connection request, a profile view, a post interaction or a message, yet a person must open the task, copy the message, visit the profile and send it by hand. A sequence with two LinkedIn steps for 83 new people a week means about 166 manual tasks a week, so a team should budget the time before relying on LinkedIn inside Apollo.

    Snov.io sequences in this Apollo vs Snov.io comparison: multichannel drip campaigns

    Snov.io’s sequences are built for email and LinkedIn together. Drip campaigns run email steps and LinkedIn actions in one sequence, with unlimited follow-ups, unlimited campaigns, dynamic personalisation and spintax, A/B testing, reply sentiment analysis, engagement notifications and drill-down analytics. The Unibox gathers replies from every channel in one inbox, and booking detection with Calendly flags the moment a prospect books.

    Snov.io’s LinkedIn automation costs $69 a month per slot on top of the plan, and the slots are not included in any plan price. That add-on is the honest price of multichannel on Snov.io: Starter at $39 plus one LinkedIn slot at $69 comes to $108 a month for email and LinkedIn together, against Apollo Basic at $65 with LinkedIn done by hand. A team that wants LinkedIn automated should budget the slot from day one, not discover it after signing.

    Where the channels differ in this Apollo vs Snov.io comparison

    All in all, the channel lists look different on paper, and three extras separate them. Apollo includes a built-in cloud dialer in every seat, with call recording on Professional, while Snov.io has no dialer at all, so a team that calls needs a second tool beside Snov.io. Snov.io automates LinkedIn inside sequences, while Apollo leaves every LinkedIn step as a manual task, so a team that prospects on LinkedIn needs a second tool beside Apollo, or the time to do the tasks by hand.

    The third difference is the inbox. Both tools gather replies in one place: Apollo’s unified inbox and Snov.io’s Unibox. Snov.io adds reply sentiment analysis, which sorts the inbox by how the prospect feels, and booking detection with Calendly, which flags the meeting the moment it is booked. Apollo adds deal tracking and pipeline tools, which carry the reply into a deal without leaving the platform. Test each inbox on a week of real replies before committing to one tool.

    Deliverability and warmup: built-in warmup against three warm-up slots

    Deliverability decides whether any of this matters, because an email that lands in spam earns no replies. Warm-up runs through Apollo’s built-in automated warmup, paid for in credits, and through Snov.io’s warm-up product, with three mailboxes warmed at once on Starter and unlimited mailboxes on Pro. That matters for teams connecting many inboxes at once.

    For example, warmup works the same way on both tools. New mailboxes exchange mail with a network of real inboxes, so providers learn to trust the new domain before real sending starts. Opens, replies and spam-folder checks build sender reputation step by step. Warmup backs a healthy setup, yet it cannot save a purchased list, a misleading subject line or a domain with no authentication. Set up a separate sending domain, add its SPF, DKIM and DMARC records, and let warmup run for two to four weeks before real volume begins. Our sending-domain guide explains each record in turn.

    Apollo warmup in this Apollo vs Snov.io comparison: automated warmup in credits

    For instance, Apollo’s warmup is built into the platform and paid for in credits, like everything else on Apollo. Automated email warmup runs beside inbox rotation, and the pricing FAQ lists warmup, domains and mailboxes among the activities credits pay for. A team that warms many mailboxes should watch the pool, because warmup spends the same credits as finding and enrichment.

    On top of that, Apollo adds deliverability protections that Snov.io does not match on breadth. Inbox rotation spreads each campaign across your connected senders instead of pounding one address, built-in verification keeps bad addresses out of the list, and email health checks catch setup mistakes before they cost you the inbox. Apollo’s own warmup guidance recommends at least two weeks of warmup before sending, starting at 50 emails a day per mailbox.

    Snov.io warmup in this Apollo vs Snov.io comparison: slots, pools and placement checks

    Snov.io’s warmup is a fuller product in its own right, with limits that rise by plan. Starter warms 3 mailboxes at once at 50 warm-up messages per account per day, Pro S warms unlimited mailboxes at 100 a day, Pro M at 200, Pro L at 500 and Ultra at 1,000. Premium pool warm-up uses business domains only, specific domain warm-up focuses on underperforming providers, and GPT-4o mini writes unique warm-up dialogues.

    In addition, Snov.io adds deliverability checks that Apollo does not list in the same depth. Deliverability and placement checks, a spam word checker, a custom tracking domain, a DNS record checker, a sender reputation check and a blacklist checker all sit on the pricing page, beside a high bounce rate safeguard, provider matching and mailbox rotation. Together they form the deeper deliverability suite in this Apollo vs Snov.io comparison.

    Which warmup setup wins in this Apollo vs Snov.io comparison

    For a team that warms a few mailboxes and wants warmup beside sequences in one login, Apollo wins on convenience, with automated warmup, rotation and verification in the same seat. For a team that warms many mailboxes and wants placement data, premium pools and per-provider warm-up, Snov.io wins on depth, with unlimited warm-ups from Pro S and a full deliverability checklist on every plan.

    Both tools agree on the basics, and both are right. Warm new domains for two to four weeks, start at low volume, and lift the daily send limit a little at a time. Our best email deliverability tools guide covers the dedicated deliverability suites if a specialist tool tempts you instead.

    Ease of use, integrations and support

    Both tools are built for people who prospect every day, yet each one feels different from the first login. Apollo is the broader of the two to learn, because the database, the signals, the sequences, the dialer and the deal tracking all live in one account, while the free plan gives you time to learn them. Snov.io is the friendlier of the two to learn, because the finder, the verifier, the drip campaigns and the CRM follow one simple loop, while the free trial gives you time to learn it. Either account can go from signup to a live campaign within a single working day.

    In fact, a newcomer can use either tool, yet reading our beginners guide to cold email first and spending a week learning the dashboard makes the first month much easier. Apollo rewards a team that wants the data to do the heavy lifting. Snov.io rewards a team that wants one flat bill for the whole loop.

    Onboarding in this Apollo vs Snov.io comparison: a free plan against a 50-credit trial

    Apollo onboards by free plan with sequences included. The free plan stays free with no time limit, with 75 credits a seat a month, and the 14-day trial of Basic or Professional opens most features of the paid plan, according to Apollo’s own pricing FAQ. Annual plans include onboarding with a customer success manager, according to the pricing page, which suits a team that wants a guided start.

    In contrast, Snov.io onboards by trial with credits. The free trial gives 50 credits and 100 recipients and never expires, according to its own pricing page, and every paid plan adds a personal implementation manager and prioritised 24-hour support. When the Apollo paid trial ends, the account moves to a paid plan, so set a reminder to check your sending volume before your first big campaign.

    Support in this Apollo vs Snov.io comparison: managers on the top tiers

    Support follows the same pattern as the rest of the comparison. Apollo includes a dedicated support team on its paid plans, with SSO and dedicated support on Organization and Custom, plus a large knowledge base and help centre. Snov.io includes prioritised 24-hour support and a personal implementation manager on every paid plan, with top priority support and unlimited implementation manager services on Custom Ultra.

    In addition, both tools run sizeable help centres and knowledge bases, and each answers support tickets from paying customers. When you need a human at midnight, the tier you pay for counts for more than the brand name. A lone user on the cheapest tier should expect ticket or chat help, while a large team on a top tier can expect a named contact.

    Integrations in this Apollo vs Snov.io comparison: two-way CRM sync on both tools

    Finally, each tool syncs with HubSpot and Salesforce, and each offers a way to connect other apps. Apollo adds native two-way HubSpot and Salesforce sync, plus Outreach, SalesLoft, Marketo, SendGrid and LinkedIn integrations, with API access on Custom plans, according to its own pricing FAQ. That depth suits a team whose CRM sits at the centre of its sales operation.

    Snov.io adds two-way HubSpot and Pipedrive integrations, plus Zapier, Make, Calendly, n8n, an API and webhooks, and a Clay integration for enrichment workflows. Apollo answers with Pipedrive through its wider integration list and a Chrome extension that works from Gmail, LinkedIn and company websites. HubSpot or Salesforce users will slot either tool into the stack without fuss. Clay users will get more from Snov.io. Outreach or SalesLoft users will find Apollo’s the stronger offer.

    Feature matrix: Apollo vs Snov.io side by side

    This Apollo vs Snov.io comparison puts every claim in one place. Every row in the matrix below was checked against both official sites today, 16 November 2026. A tick means the provider states the feature on its own site, with any plan limits noted beside it. A dash means we could not confirm the feature, or the provider confirms it is absent. Read the matrix with your own priorities in mind, because no single tool wins every row.

    Pricing, data and buying in this Apollo vs Snov.io comparison

    FeatureApolloSnov.io
    Entry price, monthly$65 a seat a month
    Basic, monthly billing
    $39 a month
    Starter, flat, unlimited seats
    Entry price, annual$49 a seat a month
    Billed yearly
    $29.25 a month
    Billed yearly
    Pricing modelPer seat
    Every paid plan
    Flat monthly fee
    Unlimited team seats
    Monthly email volume, entry plan250 emails a day
    Basic, 1 mailbox a seat
    Unlimited monthly emails
    Starter, unlimited senders
    Searchable contact database✓
    240M+ contacts, 30M+ accounts
    ✓
    Full database, reverified monthly
    Database size published✓
    240M+ contacts, 30M+ accounts
    —
    No headline size published
    Verified prospect emails included✓
    1 credit per reveal, verification included
    ✓
    1 credit per search, 1 per verification
    Free email validation✓
    Built-in verification
    ✓
    7-tier verifier, 98%+ claimed
    Free plan✓
    Free plan, $0, stays free
    —
    Free trial only, 50 credits
    Free trial✓
    14 days, Basic or Professional
    ✓
    50 credits, 100 recipients, never expires

    Last checked: 16 November 2026 on Apollo’s pricing page and Snov.io’s pricing page. Apollo’s dollar figures are cross-checked against three independent readings of the same live page dated October 2026, because Apollo’s own page renders prices in JavaScript — please confirm them on the site. Features and pricing can change, so please check the provider’s site before you buy.

    Finding, enrichment and accuracy in this Apollo vs Snov.io comparison

    FeatureApolloSnov.io
    Email finding✓
    1 credit per reveal
    ✓
    1 credit per search
    Phone numbers✓
    8 credits each
    ✓
    Enrichment tokens, varying cost
    Waterfall enrichment✓
    1 to 8 credits per enrichment
    —
    Token enrichment, no waterfall named
    Buying-intent signals✓
    Intent topics, job changes, hiring
    —
    Not listed on the pricing page
    Bulk verification✓
    Built-in verification
    ✓
    Up to 100,000 per file
    Choose verification provider—
    Not listed
    ✓
    Snov.io, Bouncer or MillionVerifier
    Clay integration—
    Not listed
    ✓
    Listed on the pricing page
    AI Assistant / MCP access—
    Not listed
    ✓
    AI Assistant, MCP for Claude and ChatGPT
    Chrome extension✓
    LinkedIn, Gmail, company websites
    ✓
    Email Finder, LinkedIn Prospect Finder
    Credit rollover—
    No rollover, confirmed in the FAQ
    ✓
    Custom Ultra only

    Channels, warmup and CRM in this Apollo vs Snov.io comparison

    FeatureApolloSnov.io
    Email sequences✓
    Automated, A/B testing, AI writing
    ✓
    Drip campaigns, A/B testing, Email AI
    LinkedIn steps in sequences✓
    Manual tasks only, done by hand
    ✓
    Automated, $69 a month per slot
    Calling steps in sequences✓
    Built-in cloud dialer, every seat
    —
    No dialer listed
    Built-in CRM✓
    Deal tracking, pipeline tools
    ✓
    Sales CRM, tasks, deal tracking
    Automated warmup✓
    Built-in, paid in credits
    ✓
    3 warm-ups Starter, unlimited Pro
    Inbox rotation✓
    Every plan
    ✓
    Mailbox rotation, every plan
    Unified reply inbox✓
    Unified inbox
    ✓
    Unibox, reply sentiment analysis
    CRM sync (Salesforce, HubSpot)✓
    Two-way HubSpot and Salesforce
    ✓
    Two-way HubSpot and Pipedrive
    API access✓
    API on Custom plans
    ✓
    API and webhooks, every paid plan
    AI notetaker minutes—
    Not listed
    ✓
    Jevu, 6,000 minutes on Starter

    Last checked: 16 November 2026 on Apollo’s pricing page and Snov.io’s pricing page. Features and pricing can change, so please check the provider’s site before you buy. We do not guess at features, prices or trials.

    What the matrix means for your shortlist in this Apollo vs Snov.io comparison

    Read the matrix with your own priorities in mind. Apollo wins the database, signals, dialer and verified-find rows outright, because a 240M+ database, buying-intent signals, a built-in dialer and 1-credit verified reveals have no Snov.io equivalent. Snov.io wins the team pricing, LinkedIn automation, bulk verification and warm-up depth rows outright, because unlimited seats, automated LinkedIn, 100,000-per-file verification and unlimited warm-ups have no Apollo equivalent. Finding and sequencing are a split: both tools find and send, while Apollo adds the dialer and Snov.io adds the LinkedIn automation.

    In addition, the matrix shows why the entry price can mislead. Snov.io at $39 a month looks cheaper than Apollo Basic at $65, yet Apollo covers 2,500 credits a month against Snov.io’s 1,000, with verification included in every reveal. Apollo at $49 a seat on annual billing looks close to Snov.io Starter at $29.25, yet Snov.io covers the whole team for that $29.25, while Apollo charges $49 for each seat. The honest comparison is the full monthly cost of the setup you would really run, add-ons included.

    Pros and cons: the honest case for each tool

    Every tool has trade-offs, and an honest Apollo vs Snov.io comparison names them plainly. In fact, the strengths below show why each tool keeps winning customers. The weaknesses explain why some teams still pick the rival.

    Apollo strengths in this Apollo vs Snov.io comparison

    Most importantly, the database tops the list. A 240M+ contact database with 30M+ accounts, 65+ filters, buying-intent topics, job changes and hiring signals finds buyers other tools miss, and waterfall enrichment fills the gaps without a second subscription. The free plan is the second strength: $0 with sequences included and 75 credits a seat a month, so a founder can run real campaigns before paying anything.

    Next, the dialer is the third strength. A built-in cloud dialer in every seat, with call recording and AI insights on Professional, puts calling beside email in one screen. Two-way HubSpot and Salesforce sync, deal tracking, A/B testing and AI writing complete a platform that covers the whole outbound loop from one login.

    Apollo weaknesses in this Apollo vs Snov.io comparison

    Nevertheless, per-seat pricing is the clearest weakness. Basic at $65 per seat a month means five seats cost $325 a month before add-ons, which is far more than Snov.io Starter at $39 flat for the whole team. A fast-growing team that only sends email should run the per-seat sums first.

    Manual LinkedIn is another watch point. Every LinkedIn step in an Apollo sequence is a task a person completes by hand, so a team that prospects on LinkedIn must budget the time or buy a second tool. Credits expire at the end of each cycle with no rollover, including bought add-on credits, and all seats on one account must sit on the same plan, so a team cannot mix Basic seats with Professional seats.

    Snov.io strengths in this Apollo vs Snov.io comparison

    Flat team pricing tops the list for Snov.io. One $39-a-month bill covers unlimited team seats, unlimited senders, unlimited follow-ups, unlimited campaigns and unlimited monthly emails, which is rare among sequencers. The bundle is the second strength: finder, 7-tier verifier, drip campaigns, LinkedIn automation, warm-up and CRM in one subscription, with new extras such as Jevu notetaker minutes, an AI Assistant, MCP access and a Clay integration.

    The verification depth is the third strength. A 7-tier verifier with bulk checks of up to 100,000 emails per file, a choice of verification provider, greylisting bypass and re-verification keeps the list clean before every campaign. The 14-day trial with 50 credits that never expires makes it easy to prove the value with a real campaign before paying.

    Snov.io weaknesses in this Apollo vs Snov.io comparison

    Shared credits are still the clearest weakness. Finding a contact costs 1 credit and verifying it costs another from the same pool, so a fully verified list costs twice the credits a raw list costs, and the 1,000-credit Starter pool runs dry fast at volume. A team that verifies everything should budget two credits per contact.

    The missing dialer is another watch point. Snov.io lists no calling feature, so a team that calls needs a second tool beside it. LinkedIn automation costs $69 a month per slot on top of the plan, the database has no published headline size, and unused-credit rollover is listed only on Custom Ultra, so a team should check the credit rules before signing.

    Who should pick which: a short decision guide

    A decision guide is only useful when it names real buyers, so this Apollo vs Snov.io comparison ends the debate with five of them. Find the buyer who sounds most like you, and the answer follows. When two buyers both sound like you, start with the cheaper trial and let a month of real outreach settle it.

    Apollo vs Snov.io comparison: a buyer with a small compass at a fork in the road, one signpost pointing toward a large database tower, the other toward an envelope with a checkmark and a warm inbox
    The decision in this Apollo vs Snov.io comparison: a fork in the road, with one path for a 240M+ database with a dialer and one path for a flat-rate bundle with unlimited seats.

    Pick Apollo when the database comes first

    Choose Apollo when your team prospects in broad markets and wants the data to do the heavy lifting. The 240M+ database, intent signals, waterfall enrichment and built-in dialer find buyers other tools miss, with Basic from $49 a seat a month on annual billing and a free plan that stays free. Open the free plan, build a list of fifty to two hundred verified prospects, and launch your first sequence before you scale.

    Indeed, Apollo also fits a team that calls as much as it emails. The built-in cloud dialer sits in every seat, with call recording on Professional, so a rep can call, email and track from one screen. A team that books meetings by phone will feel at home here.

    Pick Snov.io when one flat bill comes first

    Choose Snov.io when your team wants one flat bill for the whole outreach loop. The Starter plan at $39 a month covers a team of any size with unlimited seats, while Pro S at $99 a month adds 5,000 credits and unlimited warm-ups. Open the free trial, build a list of fifty to two hundred verified prospects, and launch your first drip campaign before you scale.

    Snov.io also fits a team that prospects on LinkedIn. The LinkedIn automation add-on at $69 a month per slot runs LinkedIn steps inside the same drip campaign as the emails, with the Unibox gathering every reply in one place. A team that lives on LinkedIn will be right at home here.

    Three questions that settle this Apollo vs Snov.io comparison

    Run through three checks. Do you need a 240M+ database with intent signals, or a flat-rate bundle with unlimited seats? Would you rather pay per seat for a dialer and a database, or pay a flat fee for finder, verifier and warm-up in one login? Do your prospects answer a well-timed call first, or a LinkedIn message first?

    When database depth and calling matter, pick Apollo. If flat team pricing and LinkedIn automation matter, pick Snov.io. For a team of five or more, pick Snov.io, because $39 a month covers the whole team against Apollo’s $325. If two answers pull opposite ways, start with the tool that fixes your biggest pain today, since switching sequencers now is easier than switching after a year of campaigns.

    Frequently asked questions in this Apollo vs Snov.io comparison

    Which is cheaper, Apollo or Snov.io?

    It depends on your team size and your volume. A solo sender pays $65 a month on Apollo Basic or $39 a month on Snov.io Starter, on monthly billing, so Snov.io is cheaper for one person. A five-person team pays $325 a month on Apollo Basic, because Apollo charges per seat, while Snov.io Starter costs $39, because the plan is flat with unlimited seats, so Snov.io is far cheaper there. A five-person team on mid plans pays $495 a month on Apollo Professional and $99 on Snov.io Pro S. All figures were checked on 16 November 2026.

    Which has the bigger database, Apollo or Snov.io?

    Apollo, by a clear margin on published figures. Apollo publishes a database of 240M+ contacts and 30M+ accounts on its own homepage, with 65+ prospecting filters and buying-intent signals. Snov.io publishes no headline database size, describing instead a full prospect and company database, reverified monthly. Test both tools on 100 prospects from your own market before you judge coverage, because size alone does not prove the database holds your buyers.

    Does Apollo automate LinkedIn outreach?

    No. LinkedIn steps in an Apollo sequence are tasks a person completes by hand, and Apollo’s own help centre says it does not automatically complete LinkedIn tasks for you. A rep gets a reminder, opens the task, copies the message, visits the profile and sends it by hand. Snov.io automates LinkedIn steps inside drip campaigns, with LinkedIn automation as a $69-a-month add-on per slot. If LinkedIn is the heart of your outbound, Snov.io is the stronger pick.

    Is Snov.io or Apollo better for email verification?

    It depends on how you verify. Snov.io’s 7-tier verifier claims 98%+ accuracy on its own pricing page, verifies up to 100,000 emails per file in bulk, and lets you pick the verification provider, yet each verification costs a credit from the same pool as finding. Apollo’s built-in verification sits inside the 1-credit email reveal, so a verified find costs one credit instead of two. Read our best email verification tools compared guide if you have not settled on a first tool yet.

    Does Apollo or Snov.io have a free plan?

    Apollo has a free plan that stays free with no time limit, with 75 credits a seat a month and sequences included, plus a 14-day trial of Basic or Professional. Snov.io has no free plan, only a free trial of 50 credits and 100 recipients that never expires, according to its own pricing page. If a free plan matters most, Apollo is the better offer.

    Should I buy Apollo or Snov.io for a team of five?

    Snov.io is the stronger team pick by a clear margin. Its Starter plan at $39 a month covers unlimited team seats, so five people share one bill, while Apollo Basic at $65 per seat a month costs $325 for the same five people. Apollo is still the stronger pick when the team prospects in broad markets and needs a 240M+ database with intent signals and a dialer. Read our best cold email tools for startups guide to see the full ranking.

    The verdict in this Apollo vs Snov.io comparison

    Verdict: Apollo for database depth and calling, Snov.io for flat-rate outreach with unlimited seats

    Apollo is the pick when finding the right people matters more than the sending itself. A 240M+ contact database, buying-intent signals, waterfall enrichment and a built-in cloud dialer find buyers other tools miss, with a free plan that stays free and Basic from $49 a seat a month on annual billing. Snov.io is the pick when one flat bill for the whole loop matters most. Finder, 7-tier verifier, drip campaigns, LinkedIn automation, warm-up and CRM come in one subscription from $39 a month, with unlimited team seats, so a growing team never pays per rep.

    In sum, choose for the team you employ today, not the one you hope to hire next year. A solo sender who prospects in broad markets should start on Apollo’s free plan, because 75 credits a month and sequences included cost nothing. A team of five should start on Snov.io Starter, because $39 a month covers the whole team. A team that calls as much as it emails should start on Apollo’s 14-day trial of Professional, because the dialer deserves a trial before it earns a budget line. Whichever you pick, set up a separate sending domain, warm it for two to four weeks, and trial it on 25 prospects before you scale.

    We have not run hands-on deliverability or reply-rate tests on Apollo or Snov.io, so this Apollo vs Snov.io comparison gives no numeric score. The verdict rests on verified pricing, verified database and verification claims and documented channel lists, all checked today, 16 November 2026. Try Apollo free, or start Snov.io’s free trial with 50 credits, and let a month of real outreach confirm the choice.

    Visit Apollo →Check Snov.io →

    Keep reading

    Apollo vs Snov.ioApollo from $49/seat · Snov.io from $39/mo Visit Apollo →
  • Reply.io vs Lemlist 2026

    Reply.io vs Lemlist 2026

    Two multichannel sequencers, one with an AI SDR and one with AI personalisation — and a clear winner for each job

    Reply vs Lemlist is the closest head-to-head in cold outreach, because both tools run email, LinkedIn, calls, SMS and WhatsApp from one sequence. Reply.io adds Jason, an AI SDR that prospects, writes outreach, handles replies and books meetings, plus unlimited mailboxes on its Email Volume plan. Lemlist adds lemAgent, an AI sequence builder, with AI icebreakers, personalised images and videos, and a 650M+ lead database. This Reply vs Lemlist comparison checks pricing, channels, AI, warmup, data and support on both official sites, so you can pick with confidence.

    Visit Reply.io →Check Lemlist →

    Prices checked 16 November 2026 on Reply.io’s and Lemlist’s official pricing pages. Features and pricing can change, so please check the provider’s site before you buy.

    Quick Answer

    Choose Reply.io when you want an AI SDR doing the first touch for you. Jason finds prospects, writes outreach, handles replies and books meetings across email, LinkedIn, calls, SMS and WhatsApp, with Email Volume from $59 a month and Multichannel from $99 a user a month. Choose Lemlist when personalised multichannel outreach matters most. lemAgent builds sequences, AI icebreakers write a personal opening line for each prospect, personalised images and videos put each name inside the message, and the 650M+ database finds the people to send to, with the Email plan at $69 a month for the whole workspace.

    Reply.io leads on entry price, at $59 a month against Lemlist’s $69. Multichannel depth is a tie, because both tools run five channels in one sequence. AI splits the pair: Reply.io’s Jason handles replies and books meetings, while Lemlist’s lemAgent writes sequences and personalises every first touch. Lemlist leads for email-only teams, because its $69 flat Email plan covers unlimited users while Reply.io charges per user.

    Why this Reply vs Lemlist comparison settles the choice

    Picking between two capable tools is harder than picking between a strong tool and a weak one. Reply.io and Lemlist both run multichannel sequences well, and both have earned large, loyal customer bases. Reply.io holds a 4.6 out of 5 rating from more than 1,440 reviews on G2, according to its own pricing page, and serves more than 3,000 companies. Lemlist holds a 4.6 out of 5 rating from over 2,240 reviews on G2, according to its own pricing page. That shared quality is exactly why the decision feels stuck.

    The picture sharpens once you set the two price lists and feature lists beside each other. Reply.io bills per user on both sales outreach plans, counts active contacts on Email Volume, and sells Jason, its AI SDR, as a separate plan from $500 a month. Lemlist keeps one flat fee for Email, bills per user for Multichannel, and weaves AI through every plan with lemAgent and AI icebreakers. Every one of those differences points at a different kind of buyer.

    This Reply vs Lemlist comparison takes those differences in turn. Pricing leads, because Reply.io’s per-user billing and Lemlist’s flat Email plan give the same team two very different monthly totals. Channels and AI come next, because both tools run five channels and both sell AI, yet the AI does a different job on each. Data, warmup, a feature matrix and the honest pros and cons follow. Once you reach the end, the right tool, and the right plan inside it, ought to be obvious.

    Reply.io and Lemlist in plain English: an AI SDR against a personalisation studio

    Reply.io is a multichannel sales engagement platform that covers the full outbound workflow in one tool: a built-in B2B database, email sequences, LinkedIn automation, calls, SMS and WhatsApp steps, and Jason, an AI SDR that prospects, writes outreach, handles replies and books meetings. It suits SDR teams and founders who want the first touch handled for them and every channel inside one sequence. Email Volume starts at $59 a month, with a 14-day free trial.

    Lemlist is a multichannel sales engagement platform that covers the same outbound workflow with a different emphasis: a 650M+ contact database, waterfall enrichment, AI icebreakers, personalised images and videos, and sequences that mix email, LinkedIn, calls, SMS and WhatsApp. It fits SDR teams and founders who send fewer, better emails and want every first touch to feel written by hand. The Email plan starts at $69 a month for the whole workspace, with a 14-day free trial and 200 credits.

    Both tools cover the same outbound loop at heart. You start by finding prospects in the built-in data or importing a list of your own. You then verify and enrich those contacts. After that you enrol them in a sequence and watch replies gather in one inbox. To finish, you sync the activity back to your CRM. Since the loop matches on both tools, the decision comes down to where each one is strongest inside it.

    What Reply.io adds on top of email in this Reply vs Lemlist comparison

    Above all, Reply.io turns from a sequencer into an AI sales team through Jason. Jason is an AI SDR that finds prospects, writes outreach, handles replies and books meetings on its own, so a small team can run outreach around the clock without hiring another rep. Jason is sold as a separate plan from $500 a month, which means it is a real budget decision rather than a free extra, and a team should trial it before paying for it.

    Reply.io also adds infrastructure that Lemlist does not match on breadth. Unlimited mailboxes sit on its Email Volume plans, subject to a fair usage policy, with warm-up through Mailtoaster.ai, inbox rotation, ESP matching, custom tracking domains and a Google Postmaster integration. An agency plan adds client workspaces, an agency dashboard and unlimited clients. Our Reply.io review covers the platform in full depth.

    What Lemlist adds on top of email in this Reply vs Lemlist comparison

    Lemlist, meanwhile, turns from a sequencer into a personalisation studio through its AI and its visuals. lemAgent drafts sequences for you, AI icebreakers write a personal opening line for each prospect, AI Agentic Enrichment fills the gaps in your data, and Intent Signal Agents keep watch for buying signals. Personalised images and videos place each prospect’s name and company inside the message itself, so the email reads like a one-off note rather than a broadcast.

    Lemlist also adds a database that Reply.io does not match on size. The 650M+ database covers leads with firmographic and intent filters, so you can find contacts matching your ideal customer profile without buying a separate data tool. The email finder and verifier, plus the phone finder, pull contact details while you work, and waterfall enrichment checks over 25 providers in turn until it finds a working address. Our Lemlist review covers the platform in full depth.

    The one-sentence difference in this Reply vs Lemlist comparison

    Reply.io is the AI SDR platform: Jason prospects, writes, replies and books meetings, with unlimited mailboxes on Email Volume and an agency plan for client work, priced per user. Lemlist is the personalisation studio: lemAgent, AI icebreakers, personalised images and videos and a 650M+ database, flat for email and per user for multichannel. A founder who wants outreach handled while they close deals will notice the difference in week one. An SDR who writes fifty careful emails a day will notice it in the first reply.

    Neither tool is built for permission-based newsletters, so a team that mostly mails its own subscribers should look at the marketing platforms in our best cold email software guide instead. For B2B prospecting and outbound, though, this pair stays one of the strongest match-ups around.

    Pricing head-to-head in this Reply vs Lemlist comparison

    Pricing is where this Reply vs Lemlist comparison first gets interesting, because the two price lists work in different ways. Reply.io bills per user on both of its sales outreach plans, and Email Volume also prices by active contacts, so the bill climbs with every new rep and with every new batch of contacts. Lemlist keeps one flat fee for its Email plan, so the bill holds steady whether one person or ten people send from the workspace, then bills per user for Multichannel. A founder working alone and a team of five will draw different conclusions from the same two price lists.

    Each figure below comes from the official pricing pages, checked today, 16 November 2026. Reply.io figures are in US dollars, with monthly billing first and annual billing second where the annual figure is shown. Lemlist figures are in US dollars, with monthly billing shown first and annual billing second. Where a price is not shown on the official page, this Reply vs Lemlist comparison says so plainly instead of guessing.

    Reply vs Lemlist comparison: a pricing scene with one stack of per-user price tags next to a single flat-rate price tag for a whole team, with coins and a small calculator
    Pricing in this Reply vs Lemlist comparison: Reply.io charges per user on both sales outreach plans, while Lemlist’s Email plan is flat for the whole workspace.

    Reply.io plans: Email Volume, Multichannel, AI SDR and Agency, from $59 a month

    PlanPrice*What you getBest forVisit
    Reply.io — Email VolumeBest for email-only teamsFrom $59 a month
    $49 billed yearly, per user
    1,000 active contacts
    Unlimited mailboxes, unlimited emails
    Teams that only send emailVisit Site →
    Reply.io — MultichannelBest for SDR teamsFrom $99 a user a month
    $89 billed yearly
    Unlimited active contacts
    5 mailboxes a user, LinkedIn, calls, SMS
    Reps who work every channelVisit Site →
    Reply.io — AI SDR (Jason)Best for hands-off outreachFrom $500 a month
    Annual billing; $800 monthly, check the site
    AI SDR that books meetings
    Prospects, writes, replies, books
    Teams that want outreach handledVisit Site →
    Reply.io — AgencyBest for agenciesFrom $166 a month
    Check the site to confirm the price
    Client workspaces
    Agency dashboard, unlimited clients
    Agencies running client campaignsVisit Site →

    * Last checked: 16 November 2026 on Reply.io’s pricing page. The page shows “Starts from $59” for Email Volume, “Starts from $99” for Multichannel and “Starts from $500” for AI SDR. The annual figures of $49 and $89, the Jason monthly figure of $800 and the Agency figure of $166 rest on the check of 15 November 2026, because the live page today shows them behind its pricing slider or, for Agency, with no price in the fetched text — please confirm them on the site before you buy. Features and pricing can change, so please check the provider’s site before you buy. We do not guess at features, prices or trials.

    Reading Reply.io’s add-ons in this Reply vs Lemlist comparison

    Add-ons are where Reply.io’s real monthly bill takes shape. LinkedIn automation costs $69 a month per account on the Email Volume plan, and calls and SMS cost $29 a month per account, so an email-only buyer who later wants LinkedIn pays $69 on top of the $59 plan. Extra mailboxes cost $29 a month each on Multichannel, with a free warm-up seat in Mailtoaster.ai included. Email validation starts from $20 a month, and an AI-generated ideal customer profile starts from $39 a month, according to the pricing page.

    One rule makes Reply.io’s Email Volume plan genuinely useful: it includes unlimited mailboxes, subject to a fair usage policy, plus unlimited monthly emails and unlimited contact storage. A team that connects many inboxes pays no extra for them, which is rare among sequencers. The catch is that the plan starts at 1,000 active contacts, so a team with a large list should check the next contact tier before signing.

    New sending infrastructure is sold inside Reply.io too, which saves a separate purchase. A new domain starts from $6 a year, plus $5 a mailbox a month, with SPF, DKIM and DMARC configured for you. A pre-warmed domain starts from $25 a year, plus $15 a mailbox a month, with one pre-warmed domain and three pre-warmed mailboxes included, so a team can start sending sooner without a separate warm-up period.

    Lemlist plans: Email, Multichannel and Enterprise, from $69 a month

    PlanPrice*What you getBest forVisit
    Lemlist — EmailBest for email-only teams$69 a month
    $55 billed yearly, flat
    Unlimited users and senders
    650M+ database, lemAgent, lemwarm
    Teams that only send emailVisit Site →
    Lemlist — MultichannelBest for SDR teams$109 a user a month
    $87 billed yearly
    5 senders per user
    Unlimited emails and messages, LinkedIn, calls, SMS
    Reps who work every channelVisit Site →
    Lemlist — EnterpriseBest for large teamsCustom
    Check the site for a quote
    5+ senders per user
    CRM use, custom roles, dedicated manager, SSO
    Large teams with custom needsVisit Site →

    * Last checked: 16 November 2026 on Lemlist’s pricing page. The Email plan stays flat for the whole workspace, with unlimited users and email senders. The Multichannel plan is priced per user. Features and pricing can change, so please check the provider’s site before you buy. We do not guess at features, prices or trials.

    Reading Lemlist’s add-ons in this Reply vs Lemlist comparison

    Add-ons are where Lemlist’s real monthly bill takes shape. Lead data enrichment costs $20 a month, or $16 billed yearly, and it pulls emails, phones and other details from over 25 providers. Buying intent signals cost $29 a month, or $21 billed yearly, and they flag leads the moment they show interest in buying. WhatsApp automation is an add-on on the Multichannel plan, and senders above the five per user are charged separately.

    One rule makes Lemlist’s Email plan genuinely useful: it stays flat for the whole workspace, with unlimited users and unlimited email senders. Ten people can share one $69-a-month bill and send email together, which is rare among sequencers. The catch is that LinkedIn, calls and SMS need the Multichannel plan, which bills per user, so the total climbs with every new rep.

    Cost at one user, a team of five and agency scale in this Reply vs Lemlist comparison

    SetupReply.io, monthly billingLemlist, monthly billingCheaper pick
    One user, email only$59 a month
    Email Volume, 1,000 active contacts
    $69 a month
    Email plan, flat, unlimited users
    Reply.io, by $10 a month
    One user, multichannel$99 a month
    Multichannel, 5 mailboxes, LinkedIn included
    $109 a month
    Multichannel, 5 senders, LinkedIn included
    Reply.io, by $10 a month
    Team of five, multichannel$495 a month
    5 × $99, Multichannel
    $545 a month
    5 × $109, Multichannel
    Reply.io, by $50 a month
    Team of five, email only$295 a month
    5 × $59, Email Volume
    $69 a month
    Email plan, flat, unlimited users
    Lemlist, by $226 a month
    Agency scale$166 a month
    Agency, confirm the price on the site
    Custom
    Enterprise, check the site
    Reply.io on published price

    Arithmetic is shown plainly so you can check it: 5 × $99 = $495, 5 × $109 = $545 and 5 × $59 = $295. Reply.io charges per user on both sales outreach plans, while Lemlist’s Email plan stays at $69 a month for a team of any size. Last checked: 16 November 2026. Features and pricing can change, so please check the provider’s site before you buy.

    What the price gap means in practice in this Reply vs Lemlist comparison

    Take a solo sender, who pays $59 a month on Reply.io Email Volume or $69 a month on Lemlist Email, on monthly billing. Reply.io gives that sender 1,000 active contacts, unlimited mailboxes and unlimited monthly emails. Lemlist gives that sender unlimited users and senders, a 650M+ database, lemAgent and lemwarm in return. The $10 gap is small, yet each tool spends it on a different strength.

    A five-person team flips the maths hard in one direction and then flips it back. Five people on Multichannel cost $495 a month on Reply.io and $545 a month on Lemlist, before add-ons, so Reply.io wins the multichannel bill by $50. Five people on email only cost $295 a month on Reply.io and $69 a month on Lemlist, because Lemlist’s Email plan never charges per user, so Lemlist wins the email-only bill by $226. Any team planning to hire should run the per-user sums before signing, because the gap grows with each new seat.

    Annual billing also narrows every gap in the same way, with one twist worth noting. Reply.io falls from $59 to $49 on Email Volume and from $99 to $89 per user on Multichannel. Lemlist falls from $69 to $55 on Email and from $109 to $87 per user on Multichannel. On annual billing, a five-person multichannel team pays $445 a month on Reply.io and $435 a month on Lemlist, so Lemlist edges ahead by $10 a month once the yearly discount applies. Neither tool penalises annual billing, so a team that is sure of its choice should pay yearly and keep the saving for itself.

    Trying before you buy in this Reply vs Lemlist comparison: a 14-day trial on both sides

    The trial gap is the friendliest difference of all, because both tools let you test before you pay. Reply.io offers a 14-day free trial with access to all core features of the product, according to its own pricing page, so you can try sequences, LinkedIn steps and the inbox before upgrading. Lemlist offers a 14-day free trial that opens the Multichannel plan’s features, except in-app calls, plus 200 free credits to find emails and phone numbers and explore buying signals, according to its own pricing page.

    No free plan exists on either tool, so the trial is your only free test on both. If a 200-credit test with lemAgent matters most, Lemlist’s trial is the better offer. If a trial of every core feature matters most, Reply.io answers the question at once. Either way, set a reminder for day 13, because the account moves to a paid plan when the trial ends.

    Data and databases: 50 included credits against a 650M+ database

    Data is the clearest difference in this Reply vs Lemlist comparison, and Lemlist wins it on breadth. Lemlist bundles a searchable 650M+ B2B database with firmographic and intent filters, an email and phone finder, and waterfall enrichment across over 25 providers. Reply.io bundles a built-in B2B database too, with 50 data credits a month included on its plans and paid credit packages above that, plus live data and an AI-generated ideal customer profile.

    Nevertheless, size alone does not win deals, though. A database only justifies its price when it holds the precise people you sell to, with details that still hold up when you use them. Lemlist’s database fits teams that prospect in broad markets and want list building inside the same login. Reply.io’s credit-based data suits teams that already know their list and want each record enriched as they go. Our best B2B data providers guide compares both tools with the dedicated data specialists.

    Reply.io data in this Reply vs Lemlist comparison: a built-in database on credits

    In particular, Reply.io treats data as part of the platform, with a credit system beside it. The built-in B2B database lets you find prospects without buying a separate data tool, and every plan includes 50 data credits a month, with more credits available in paid packages. Live data keeps records fresh, and the AI-generated ideal customer profile, from $39 a month, helps a team describe exactly who it should target before it builds the list.

    What is more, Reply.io pairs that database with verification that protects the list. Email validation starts from $20 a month, and the platform checks SPF, DKIM, DMARC and MX records on your sending setup. A team that prospects inside Reply.io every day will feel at home, because the list, the enrichment and the sequence live in one login.

    Lemlist data in this Reply vs Lemlist comparison: a 650M+ database with waterfall enrichment

    Lemlist, by contrast, treats data as a headline feature, not a credit allowance. Its 650M+ database covers leads with firmographic and intent filters, so you can find contacts that match your ideal customer profile without buying a separate data tool. The email finder and verifier, plus the phone finder, pull contact details while you work, and waterfall enrichment checks over 25 providers in turn until it finds a working address.

    Lemlist pairs that database with AI enrichment that keeps the list fresh. AI Agentic Enrichment fills in missing details, Intent Signal Agents keep watch for buying signals, and buying intent signals come as a $29-a-month add-on. Lead data enrichment costs $20 a month on top of the plan. A team that prospects inside Lemlist daily will feel at home, because the list, the enrichment and the sequence live in one login.

    Accuracy: test both tools on your own list in this Reply vs Lemlist comparison

    One honest warning applies to both tools here. No vendor publishes an independent accuracy audit, so every accuracy claim should be treated as a vendor claim. The honest test is your own list, so take 100 real prospects from your market, run them through both tools, and count the bounces. Coverage that looks deep across the United States can turn thin inside a narrow niche.

    List quality shapes reply rates more than any clever subject line ever can. Five hundred verified ideal customers are worth more than ten thousand careless contacts, every time. A tool that helps you build a careful list earns its fee, while one that leaves list building to you means budgeting for data separately. Bear that in mind through the rest of this Reply vs Lemlist comparison.

    Multichannel comparison: five channels on both sides, with different extras

    Multichannel is the closest call in this Reply vs Lemlist comparison, because both tools run five channels in one sequence. Reply.io runs email, LinkedIn, calls, SMS and WhatsApp steps, with nine LinkedIn step types and semi-automated WhatsApp tasks. Lemlist runs email, LinkedIn, calls, SMS and WhatsApp steps too, with LinkedIn visits, invites, chat and voice notes and in-app calling through Aircall and Ringover.

    That tie decides the whole purchase for many teams, so the extras matter more than the channel list. A rep who spends the morning on LinkedIn needs those touches inside the sequence, tracked beside the emails. A rep who spends the morning on the phone needs the dialler inside the same tool that runs the sequences. Each buyer has a point, so pick the tool that matches how you actually sell.

    Reply.io channels in this Reply vs Lemlist comparison: nine LinkedIn step types and WhatsApp tasks

    Specifically, Reply.io’s sequences are built for every channel at once. Email steps sit beside LinkedIn automation with nine step types, calls and SMS through a built-in dialer, and semi-automated WhatsApp tasks, with conditional sequences that react to what the prospect did before. When a lead opens your email three times without replying, the next step can be a LinkedIn profile visit. Once they accept your connection request, the next step can be a short personal message on LinkedIn. That flow is the whole product.

    Moreover, Reply.io’s Chrome extension and Gmail extension let you work from Gmail and LinkedIn without leaving the page you are on. Replies from every channel land in one centralised inbox, so nothing slips through the cracks. A rep who lives on LinkedIn and the phone will be comfortable here from the first day.

    Video: Multichannel Playbook: How Belkins Turned 3 Channels Into $2.2M in Pipeline by Reply on YouTube. This video is the creator’s property, embedded via YouTube for education. OutreachCompare is not affiliated with Reply and does not claim ownership of this video.

    Lemlist channels in this Reply vs Lemlist comparison: email, LinkedIn, calls, SMS and WhatsApp

    Lemlist’s sequences are built for every channel at once too. Email steps sit beside LinkedIn visits, invites, chat and voice notes, in-app calling through Aircall and Ringover, SMS automation and WhatsApp steps, with conditional branching that responds to what the prospect did before. When a lead opens your email three times without replying, the next step can be a LinkedIn profile visit. Once they accept your connection request, the next step can be a short personal message on LinkedIn. That flow is the whole product.

    Lemlist’s Chrome extension lets you work from Gmail and LinkedIn without leaving the page you are on. Replies from every channel arrive in one unified inbox, so nothing slips through the cracks. A rep who lives on LinkedIn and the phone will settle in here from day one.

    Video: Lemlist Review: I Sent 12,000 Cold Emails. Here’s the Truth by Niche AI Tool on YouTube. This video is the creator’s property, embedded via YouTube for education. OutreachCompare is not affiliated with Niche AI Tool and does not claim ownership of this video.

    Where the channels differ in this Reply vs Lemlist comparison

    All in all, the channel lists look the same on paper, yet three extras separate them. Reply.io includes calls and SMS on its Multichannel plan, with one Calls and SMS account included per user, while Lemlist includes its built-in dialer and SMS automation on Multichannel too. Reply.io sells LinkedIn as a $69 add-on on Email Volume, while Lemlist keeps LinkedIn behind Multichannel, so neither tool gives LinkedIn away on its cheapest plan.

    WhatsApp is the second difference. Reply.io runs semi-automated WhatsApp tasks inside sequences, which means a rep confirms each message before it goes out, while Lemlist sells WhatsApp automation as an add-on on Multichannel. A team that wants WhatsApp fully automated should budget for the Lemlist add-on, while a team that wants a human check on each WhatsApp message will prefer Reply.io’s semi-automated flow.

    The third difference is the dialler. Reply.io’s built-in dialer comes with call resolution, transcripts and AI-generated, personalised voice messages, according to its pricing page. Lemlist’s in-app calling works through Aircall and Ringover, which suits a team that already runs one of those diallers, yet it means the calling experience depends on a third-party integration. Test each dialler on five real calls before committing to one tool.

    AI in this Reply vs Lemlist comparison: Jason against lemAgent

    AI is the feature that makes this Reply vs Lemlist comparison unlike any other head-to-head on the site. Jason is Reply.io’s AI SDR, and it finds prospects, writes outreach, handles replies and books meetings on its own. lemAgent is Lemlist’s AI sequence builder, and it writes sequences, icebreakers and enrichment for you, with AI Agentic Enrichment and Intent Signal Agents alongside it. Both are genuinely useful, yet they do different jobs.

    That split decides the whole purchase for many teams. A founder who wants outreach handled while they close deals needs an agent that replies and books. An SDR who writes fifty careful emails a day needs a builder that drafts sequences and personalises every first touch. Each buyer has a point, so choose the AI that matches how you actually work.

    Reply vs Lemlist comparison: an AI sales assistant robot drafting personalised outreach emails, with a LinkedIn profile card, a phone, and chat bubbles floating around a laptop
    AI in this Reply vs Lemlist comparison: Jason, Reply.io’s AI SDR, handles replies and books meetings, while lemAgent, Lemlist’s AI sequence builder, drafts sequences and icebreakers.

    Jason, Reply.io’s AI SDR, in this Reply vs Lemlist comparison

    Specifically, Jason is the most ambitious AI in this Reply vs Lemlist comparison. It prospects for you, writes the outreach, handles the replies and books the meeting, so a small team can run outreach around the clock without hiring another rep. Jason is sold as a separate plan from $500 a month on annual billing, with a monthly figure of $800 to confirm on the site, which means it is a real budget decision rather than a free extra.

    Jason also sits beside Reply.io’s other AI, which covers the smaller jobs. AI variables personalise each message, AI-generated icebreakers open each email, personalised first-step emails start the sequence, an AI sequence builder drafts the flow, AI reply categorisation sorts the inbox, and AI reply handling drafts the answers. Agentic Chat adds a conversational layer on top. Together they form the deepest AI suite in this Reply vs Lemlist comparison, yet the headline feature costs extra.

    lemAgent, Lemlist’s AI sequence builder, in this Reply vs Lemlist comparison

    lemAgent, meanwhile, is the most practical AI in this Reply vs Lemlist comparison. It builds sequences from a prompt, writes AI icebreakers for each prospect, and enriches leads through AI Agentic Enrichment, while Intent Signal Agents watch for buying signals. These tools sit inside Lemlist’s plans rather than being sold as a separate AI plan, which means a team gets AI from the first month without a second invoice.

    Lemlist also adds AI-generated ideal customer profiles, personalised first-step emails and an AI sequence builder, according to its pricing page, which mirrors Reply.io’s smaller AI features almost exactly. The difference is the headline: lemAgent drafts and personalises, while Jason replies and books. A team that wants AI to draft the outreach should go with Lemlist. A team that wants AI to handle replies and book the meeting should pick Reply.io.

    Personalisation in this Reply vs Lemlist comparison: images and videos against AI variables

    Both tools personalise well, yet they personalise in different places. Lemlist personalises through AI icebreakers, text variables, spintax, and personalised images and videos that place each prospect’s name and company inside the message, which suits a team that wants every first touch to feel written for one person alone. Reply.io personalises through AI variables, AI-generated icebreakers, personalised first-step emails and liquid syntax, which is enough for a rep who writes short, relevant messages at volume.

    Either style can earn replies, and the right one depends on who opens the message. A prospect buried under plain emails might stop at a note that mentions their latest hire or the tools their company already runs. Someone tired of templated mail might answer a short, well-written plain note in reply. Try each style on 25 prospects before you commit to one tool.

    A human eye still matters in this Reply vs Lemlist comparison

    One honest warning applies to both tools here. AI writing still needs a human eye, whether it comes from Jason or from lemAgent. The best results come when a rep reviews the drafts, checks the personalisation and keeps the tone close to the team’s real voice. An AI SDR that books meetings in your name should earn that trust slowly, starting with a small list and a daily review of what it sent.

    Apply the same rule on both tools: read the first fifty AI-written messages before they go out, then spot-check ten a week once the quality holds. That habit costs an hour a month and saves a reputation. It also shows you which tool’s AI writes in your voice, which is the test that matters most.

    Deliverability and warmup: Mailtoaster against lemwarm

    Deliverability decides whether any of this matters, because an email that lands in spam earns no replies. Warm-up runs through Mailtoaster.ai on Reply.io, with a free warm-up seat included with each additional mailbox on Multichannel, and through lemwarm on Lemlist, included on every plan with built-in deliverability protections. That matters for teams connecting many inboxes at once.

    At heart, warmup works the same way on both tools. New mailboxes swap mail with a network of real inboxes, so providers learn to trust the new domain before real sending begins. Opens, replies and spam-folder checks grow sender reputation step by step. Warmup supports a healthy setup, yet it cannot rescue a purchased list, a misleading subject line or a domain with no authentication. Set up a separate sending domain, add its SPF, DKIM and DMARC records, and let warmup run for two to four weeks before real volume. Our sending-domain guide explains each record in turn.

    Reply.io warmup in this Reply vs Lemlist comparison: Mailtoaster and unlimited mailboxes

    For instance, Reply.io’s warmup is built around Mailtoaster.ai, its dedicated warm-up product. Each additional mailbox on Multichannel includes a free warm-up seat in Mailtoaster.ai, and pre-warmed domains come with three pre-warmed mailboxes included. Unlimited mailboxes sit on Email Volume plans, subject to a fair usage policy, so a team can warm many inboxes at once without paying per mailbox.

    On top of that, Reply.io adds deliverability protections that Lemlist does not match on breadth. Inbox rotation spreads each campaign across your connected senders instead of pounding one address, ESP matching keeps Google mail going to Google inboxes and Outlook mail going to Outlook inboxes, custom tracking domains keep your links on your own domain, and a Google Postmaster integration shows how Gmail actually treats your mail. Email health checks and SPF, DKIM, DMARC and MX checks catch setup mistakes before they cost you the inbox.

    Lemlist warmup in this Reply vs Lemlist comparison: lemwarm and the deliverability hub

    Lemlist’s warmup is built into every plan through lemwarm, with a deliverability hub beside it. Lemwarm warms your mailboxes automatically, inbox rotation spreads each campaign across your connected senders instead of pounding one address, timezone sending puts each email in the prospect’s working hours, and pre-send checks catch mistakes before sending. A/B testing reveals which subject line and angle earns more replies.

    Lemlist adds built-in deliverability protections on all plans, according to its own pricing page, to help keep your emails out of spam and protect your sender reputation at any scale. Multichannel adds five senders per user, with extra senders charged separately, so a team that wants many inboxes should budget for them. Together, lemwarm, rotation and pre-send checks form a solid deliverability suite in this Reply vs Lemlist comparison.

    Which warmup setup wins in this Reply vs Lemlist comparison

    For a team that warms many mailboxes and wants placement data from Google Postmaster, Reply.io wins on depth, with Mailtoaster, unlimited mailboxes on Email Volume and a dedicated deliverability service. For a team that warms a few mailboxes and wants warmup beside multichannel sequences in one login, Lemlist wins on convenience, with lemwarm, rotation and pre-send checks in the same plan.

    Both tools agree on the basics, and both are right. Warm new domains for two to four weeks, begin at low volume, and raise the daily send limit a little at a time. Our best email deliverability tools guide covers the dedicated deliverability suites if a specialist tool appeals instead.

    Ease of use, integrations and support

    Both tools are built for people who prospect daily, yet each one feels different from the moment you first log in. Reply.io is the broader of the two to learn, because sequences, LinkedIn steps, calls, WhatsApp tasks, Jason and the agency dashboard all live in one account, while the 14-day trial gives you time to learn them. Lemlist is the friendlier of the two to learn, because the visual sequence builder shows the whole campaign at a glance, while the 14-day trial with 200 credits gives you time to learn it. Either account can move from signup to a live campaign inside a single working day.

    Either tool suits a newcomer, yet reading our beginners guide to cold email first and spending a week learning the dashboard makes the first month much easier. Reply.io rewards a team that wants every channel and an AI SDR in one login. Lemlist rewards a team that already knows its ideal customer profile and wants every touch to feel personalised.

    Onboarding in this Reply vs Lemlist comparison: a full-feature trial against a 200-credit trial

    Reply.io onboards by trial with every core feature open. The 14-day free trial gives you access to all core features of the product, according to its own pricing page, so you can try sequences, LinkedIn steps and the inbox before upgrading. Onboarding with a customer success manager is included on annual plans, according to the pricing page, which helps a team that wants a guided start.

    Lemlist onboards by trial with credits. The 14-day free trial opens the Multichannel plan’s features, except in-app calls, plus 200 free credits to find emails and phone numbers, explore buying signals and try lemAgent with your own data. When the trial ends, the account moves to a paid plan on both tools, so set a reminder to check your sending volume before your first big campaign.

    Support in this Reply vs Lemlist comparison: live chat on both sides, managers on the top tiers

    Support follows the same pattern as the rest of the comparison. Reply.io includes live chat support on its plans, with onboarding from a customer success manager on annual plans and priority support on higher tiers, plus a video content library for self-service learning. Lemlist includes a dedicated account manager, custom terms and priority support on its Enterprise plan, alongside advanced login security.

    Both tools also run large knowledge bases and help centres, and each one answers support tickets for paying customers. When you need a human at midnight, the tier you pay for matters more than the brand name. One person on the cheapest tier should expect ticket or chat help, while a large team on a top tier can expect a named contact person.

    Integrations in this Reply vs Lemlist comparison: two-way CRM sync on both tools

    Finally, each tool syncs with HubSpot and Salesforce, and each offers a way to connect other apps. Reply.io adds native HubSpot, Salesforce and Pipedrive sync, plus native Close, with two-way sync that keeps contacts, accounts, calls, tasks, statuses and activities in step, according to its own pricing page. That depth suits a team whose CRM is the centre of its sales operation.

    Lemlist adds native HubSpot and Salesforce sync, Zapier, an API, an MCP server and a CLI, plus a Chrome extension that works from Gmail and LinkedIn. Reply.io answers with Zapier, Make and more than 100 integrations, plus an API, an n8n node and MCP. For a team already running HubSpot or Salesforce, either tool fits into the stack cleanly. A team that automates through the API on a mid-tier plan will get more from Lemlist’s MCP and CLI. A team that wants Close and Copper beside its sequencer will find Reply.io’s the stronger offer.

    Feature matrix: Reply vs Lemlist side by side

    This Reply vs Lemlist comparison puts every claim in one place. Each row in the matrix below was checked on both official sites today, 16 November 2026. A tick means the provider states the feature on its own site, with any plan limits noted beside it. A dash means we could not confirm the feature, or the provider confirms it is absent. Read the matrix with your own priorities in front of you, because no one tool wins every row.

    Pricing, data and buying in this Reply vs Lemlist comparison

    FeatureReply.ioLemlist
    Entry price, monthlyFrom $59 a month
    Email Volume, per user
    $69 a month
    Email, flat for the workspace
    Entry price, annual$49 a month
    Billed yearly, confirm on the site
    $55 a month
    Billed yearly
    Pricing modelPer user
    Both sales outreach plans
    Flat for Email
    Per user for Multichannel
    Monthly email volume, entry planUnlimited emails
    Email Volume, 1,000 active contacts
    Unlimited emails
    Email plan, unlimited users
    Searchable contact database✓
    Built-in B2B database, 50 credits a month
    ✓
    650M+ leads, firmographic and intent filters
    Verified prospect emails included✓
    50 data credits a month, paid packages above
    ✓
    Finder and verifier, credits
    Free email validation✓
    Validation from $20 a month
    ✓
    Email finder and verifier included
    Free plan—
    No free plan shown
    —
    No free plan shown
    Free trial✓
    14 days, all core features
    ✓
    14 days, 200 credits, Multichannel features
    Unlimited mailboxes, entry plan✓
    Email Volume, fair usage policy
    ✓
    Unlimited senders on Email plan

    Last checked: 16 November 2026 on Reply.io’s pricing page and Lemlist’s pricing page. Reply.io’s annual figures rest on the check of 15 November 2026 — please confirm them on the site. Features and pricing can change, so please check the provider’s site before you buy.

    Channels, AI and warmup in this Reply vs Lemlist comparison

    FeatureReply.ioLemlist
    Email sequences✓
    Conditional sequences, A/B testing
    ✓
    Conditional steps, A/B testing
    LinkedIn steps in sequences✓
    9 step types, Multichannel or $69 add-on
    ✓
    Visits, invites, chat, voice notes
    Calling steps in sequences✓
    Built-in dialer, 1 per user on Multichannel
    ✓
    In-app dialler, Aircall and Ringover
    SMS steps in sequences✓
    Calls and SMS, 1 per user on Multichannel
    ✓
    SMS automation, Multichannel plan
    WhatsApp steps in sequences✓
    Semi-automated WhatsApp tasks
    ✓
    WhatsApp automation add-on
    AI SDR that books meetings✓
    Jason, from $500 a month, separate plan
    —
    No AI SDR listed
    AI sequence builder✓
    AI sequence builder included
    ✓
    lemAgent, AI icebreakers, enrichment
    Automated warmup✓
    Mailtoaster.ai, free seat per extra mailbox
    ✓
    lemwarm, every plan
    Inbox rotation✓
    Every plan
    ✓
    Every plan
    AI personalisation✓
    AI variables, icebreakers, first-step emails
    ✓
    Icebreakers, images, videos, spintax

    Integrations, support and agency tools in this Reply vs Lemlist comparison

    FeatureReply.ioLemlist
    Unified reply inbox✓
    Centralised inbox, AI reply categorisation
    ✓
    Unified inbox, every channel
    CRM sync (Salesforce, HubSpot)✓
    HubSpot, Salesforce, Pipedrive, Close
    ✓
    HubSpot, Salesforce, Zapier
    API access✓
    API, n8n node, MCP
    ✓
    API, MCP, CLI
    White-label client portals✓
    Agency plan, client workspaces, dashboard
    —
    Not listed on the pricing page
    Client workspaces✓
    Agency plan, unlimited clients
    —
    Not listed on the pricing page
    Chrome extension✓
    Gmail and Chrome extensions
    ✓
    Use from Gmail and LinkedIn
    Dedicated support✓
    CSM onboarding on annual plans
    ✓
    Dedicated manager, Enterprise plan

    Last checked: 16 November 2026 on Reply.io’s pricing page and Lemlist’s pricing page. Features and pricing can change, so please check the provider’s site before you buy. We do not guess at features, prices or trials.

    What the matrix means for your shortlist in this Reply vs Lemlist comparison

    Read the matrix with your own priorities in mind. Reply.io wins the AI SDR, agency and unlimited-mailbox rows outright, because Jason, the Agency plan and unlimited mailboxes on Email Volume have no Lemlist equivalent. Lemlist wins the database and personalisation rows outright, because a 650M+ database, personalised images and videos and lemAgent have no Reply.io equivalent. Channels and warmup are a split: both tools run five channels and both warm mailboxes, while Reply.io adds Mailtoaster and Google Postmaster and Lemlist adds lemwarm beside rotation and pre-send checks.

    The matrix also shows why the entry price can mislead. Reply.io at $59 a month looks cheaper than Lemlist Email at $69, yet Lemlist covers unlimited users and senders for that $69, while Reply.io starts at 1,000 active contacts per user. Reply.io Multichannel at $99 per user a month looks cheaper than Lemlist Multichannel at $109, yet Lemlist includes its 650M+ database and lemAgent in the same price. The fair comparison is the full monthly cost of the setup you would actually run, add-ons included.

    Pros and cons: the honest case for each tool

    Every tool has trade-offs, and an honest Reply vs Lemlist comparison names them plainly. The strengths below explain why each tool keeps attracting customers. The weaknesses explain why some teams still pick the rival.

    Reply.io strengths in this Reply vs Lemlist comparison

    Most importantly, Jason tops the list. An AI SDR that prospects, writes outreach, handles replies and books meetings is a genuine force multiplier for a small team, and no other tool in this comparison offers the same. The channel mix is the second strength: email, LinkedIn, calls, SMS and WhatsApp run inside one sequence, with nine LinkedIn step types and a built-in dialer that records calls and writes transcripts.

    Next, the infrastructure is the third strength. Unlimited mailboxes on Email Volume, subject to a fair usage policy, plus Mailtoaster warm-up, inbox rotation, ESP matching, custom tracking domains and a Google Postmaster integration, form a deliverability suite that Lemlist does not match on breadth. The Agency plan, from $166 a month, adds client workspaces, an agency dashboard and unlimited clients, which is exactly what an agency needs.

    Reply.io weaknesses in this Reply vs Lemlist comparison

    Nevertheless, per-user pricing is the clearest weakness. Email Volume at $59 per user a month means five seats cost $295 a month before add-ons, which is far more than Lemlist Email at $69 flat for the whole workspace. A fast-growing team that only sends email should run the per-user sums first.

    Counted contacts are another watch point. The Email Volume plan starts at 1,000 active contacts, so a team with a large list should check the next contact tier before signing. Jason is a separate plan from $500 a month, so the headline AI costs extra, and LinkedIn is a $69 add-on on Email Volume rather than a core plan feature. WhatsApp tasks are semi-automated, which means a rep confirms each message before it goes out.

    Lemlist strengths in this Reply vs Lemlist comparison

    Personalisation tops the list for Lemlist. AI icebreakers, personalised images and videos, lemAgent and a 650M+ database make every first touch read like a note written for one person alone. The flat Email plan is the second strength: a single $69-a-month bill covers unlimited users and senders, which is rare among sequencers.

    The channels are the third strength. Email, LinkedIn, calls, SMS and WhatsApp run inside one sequence, with replies from every channel arriving in one unified inbox. Lemwarm and the deliverability hub keep the mail landing in the inbox, and the 14-day trial with 200 credits makes it easy to prove the value with a real campaign before paying.

    Lemlist weaknesses in this Reply vs Lemlist comparison

    Per-user pricing is still the clearest weakness on Multichannel. At $109 per user a month, five seats cost $545 a month before add-ons, which is more than Reply.io Multichannel at $495 for the same team. A fast-growing team should run the per-user sums first.

    Counted senders are another watch point. Multichannel includes five senders per user, and extra senders cost more, so a team that wants many inboxes should budget for them. WhatsApp is an add-on, not a core plan feature, there is no AI SDR that books meetings, and there is no agency plan with client workspaces, so an agency should check Reply.io’s Agency plan before committing.

    Who should pick which: a short decision guide

    A decision guide is only useful when it names real buyers, so this Reply vs Lemlist comparison ends the debate with five of them. Spot the buyer who sounds most like you, and the answer follows from that. When two buyers both sound like you, begin with the cheaper trial and let a month of real outreach decide it.

    Reply vs Lemlist comparison: a buyer at a fork in the road holding a small compass, one signpost pointing towards a stack of envelopes and a shield, the other towards a robot assistant with a phone and chat bubbles
    The decision in this Reply vs Lemlist comparison: a fork in the road, with one path for an AI SDR that books meetings and one path for personalised multichannel outreach.

    Pick Reply.io when an AI SDR comes first

    Choose Reply.io when your team wants outreach handled while it closes deals. Jason prospects, writes outreach, handles replies and books meetings, with Email Volume from $59 a month and Multichannel from $99 a user a month. Open the 14-day trial, build a list of fifty to two hundred verified prospects, and launch your first sequence before you scale.

    Indeed, Reply.io also fits an agency that runs client campaigns. The Agency plan adds client workspaces, an agency dashboard and unlimited clients, while unlimited mailboxes on Email Volume keep the sending infrastructure cheap. An agency that manages ten clients will feel at home here.

    Pick Lemlist when personalised outreach comes first

    Choose Lemlist when your team sends fewer, better emails and wants every first touch to feel written for one person only. The Email plan at $69 a month covers a whole team with unlimited users and senders, while Multichannel at $109 per user a month adds LinkedIn automation, calls, SMS and WhatsApp. Open the 14-day trial, build a list of fifty to two hundred verified prospects, and launch your first sequence before you scale.

    Lemlist also fits an SDR team that lives on LinkedIn and the phone. The 650M+ database finds the prospects, the sequence reaches them on every channel, and lemAgent drafts the first versions. A team that wants AI to draft the outreach will be right at home here.

    Three questions that settle this Reply vs Lemlist comparison

    Run through three checks. Do you need an AI SDR that replies and books meetings, or AI that writes personalised first touches? Would you rather pay per user for multichannel depth, or pay a flat fee for email-only sending? Do your prospects answer a personal note first, or a well-run sequence first?

    When an AI SDR and agency work matter, pick Reply.io. If personalised multichannel outreach matters, pick Lemlist. For a team of five or more that only sends email, pick Lemlist Email, because $69 a month covers the whole team. If two answers pull in different directions, start with the tool that fixes your biggest pain today, because switching sequencers later is easier than switching after a year of campaigns.

    Frequently asked questions in this Reply vs Lemlist comparison

    Which is cheaper, Reply.io or Lemlist?

    It depends on your team size and your channels. A solo sender pays $59 a month on Reply.io Email Volume or $69 a month on Lemlist Email, on monthly billing, so Reply.io is cheaper for one person. A five-person team sending email only pays $69 a month on Lemlist Email, because the plan is flat for the whole workspace, while Reply.io Email Volume costs $295, so Lemlist is far cheaper there. A five-person multichannel team pays $495 a month on Reply.io Multichannel, while Lemlist Multichannel costs $545, so Reply.io is cheaper there. All figures were checked on 16 November 2026.

    What is Jason, Reply.io’s AI SDR?

    Jason is Reply.io’s AI SDR, an AI agent that finds prospects, writes outreach, handles replies and books meetings on its own. It is sold as a separate plan from $500 a month on annual billing, with a monthly figure of $800 to confirm on the site, so budget for it as its own line item rather than a free extra. Lemlist has no AI SDR that books meetings; its AI, lemAgent, builds sequences and writes icebreakers instead.

    Which is better for LinkedIn outreach, Reply.io or Lemlist?

    Both tools run LinkedIn steps inside sequences, so the choice rests on the extras. Reply.io offers nine LinkedIn step types on Multichannel, with LinkedIn as a $69 add-on on Email Volume. Lemlist automates LinkedIn visits, connection requests, messages, chat and voice notes on its Multichannel plan, with a 650M+ database behind it. If LinkedIn is the heart of your outbound, trial both and pick the one whose LinkedIn steps match how your reps actually sell.

    Does Reply.io have a free trial?

    Yes. Reply.io offers a 14-day free trial with access to all core features of the product, according to its own pricing page. Lemlist offers a 14-day free trial that opens the Multichannel plan’s features, except in-app calls, plus 200 free credits to find emails and phone numbers and explore buying signals. No free plan exists on either tool, so the trial is your only free test on both.

    Should I buy Reply.io or Lemlist for an agency?

    Reply.io is the stronger agency pick by a clear margin. Its Agency plan, from $166 a month, adds client workspaces, an agency dashboard and unlimited clients, while unlimited mailboxes on Email Volume keep the sending infrastructure cheap. Lemlist has no agency plan with client workspaces, so an agency that wants personalised multichannel campaigns should still trial Lemlist, yet it should check Reply.io’s Agency plan first. Read our best cold email tools for agencies guide if you have not settled on a first tool yet.

    Is Reply.io or Lemlist better for high-volume sending?

    Reply.io is better for high-volume email sending by a clear margin. Its Email Volume plan includes unlimited monthly emails and unlimited mailboxes, subject to a fair usage policy, with inbox rotation, ESP matching and Mailtoaster warm-up. Lemlist’s Multichannel plan bills per user, so volume costs more as the team grows, though its flat Email plan at $69 a month suits a team that sends email only. Read our best cold email tools for high volume guide to see the full ranking.

    The verdict in this Reply vs Lemlist comparison

    Verdict: Reply.io for an AI SDR and agency work, Lemlist for personalised multichannel outreach

    Reply.io is the pick when you want outreach handled while you close deals. Jason prospects, writes outreach, handles replies and books meetings, with unlimited mailboxes on Email Volume, nine LinkedIn step types and an Agency plan for client work, from $59 a month. Lemlist is the pick when you want every first touch to feel written for one person alone. AI icebreakers, personalised images and videos, a 650M+ database and five channels in one sequence come in one subscription, with the flat Email plan at $69 a month for the whole workspace.

    Buy for the team you have today, not the one you hope to hire next year. A solo sender should start on Reply.io Email Volume, because $59 a month buys unlimited mailboxes and unlimited monthly emails. A team of five that only sends email should start on Lemlist Email, because $69 a month covers the whole team. A team that wants an AI SDR should start on Reply.io’s 14-day trial and ask for a Jason demo, because the $500-a-month AI plan deserves a trial before it earns a budget line. Whichever you pick, set up a separate sending domain, warm it for two to four weeks, and test it on 25 prospects before you scale.

    We have not run hands-on deliverability or reply-rate tests on Reply.io or Lemlist, so this Reply vs Lemlist comparison gives no numeric score. The verdict rests on verified pricing, verified warmup claims and documented channel lists, all checked today, 16 November 2026. Try Reply.io free for 14 days, or start Lemlist’s 14-day trial with 200 credits, and let a month of real outreach confirm the choice.

    Visit Reply.io →Check Lemlist →

    Keep reading

    Reply vs LemlistReply.io from $59/mo · Lemlist from $69/mo Visit Reply.io →
  • Instantly vs Woodpecker 2026

    Instantly vs Woodpecker 2026

    The volume engine against the deliverability craftsman — and a clear winner for each job

    Instantly vs Woodpecker is a contest between two different answers to the same outbound question. Instantly is a high-volume cold email platform built for scale, with unlimited connected mailboxes, unlimited warmup across a 4.2M+ account pool, inbox placement tests and a 450M+ lead database, priced flat from $47 a month. Woodpecker is a deliverability-first cold email tool built for careful sending, with free real-time verification through Bouncer, adaptive sending, a bounce shield and condition-based sequences, priced by the prospects you contact from $35 a month. This Instantly vs Woodpecker comparison checks pricing, warmup, data, channels and support on both official sites, so you can pick with confidence.

    Visit Instantly →Check Woodpecker →

    Prices checked 16 November 2026 on Instantly’s and Woodpecker’s official pricing pages. Features and pricing can change, so please check the provider’s site before you buy.

    Quick Answer

    Choose Instantly when sending volume matters most. Unlimited connected mailboxes, unlimited warmup across a 4.2M+ pool, inbox placement tests and up to 500,000 emails a month on the Light Speed plan come on flat fees from $47 a month, with the Hypergrowth plan at $107 a month covering 125,000 emails. Choose Woodpecker when careful, verified sending matters most. Free real-time verification through Bouncer, adaptive sending, a bounce shield and condition-based sequences come on a slider priced by contacted prospects from $35 a month, with a 14-day free trial and no credit card required.

    High-volume senders and agencies should lean Instantly, because flat fees and unlimited mailboxes keep the bill steady as sending grows. Small teams that send fewer, better emails should lean Woodpecker, because paying by contacted prospect is fair when the list is small and every address is verified before it goes out. On entry price, Woodpecker leads, at $35 a month against Instantly’s $47. On sending volume and warmup scale, Instantly leads outright, because its top plan sends 500,000 emails a month against Woodpecker’s 240,000 at the $262 slider tier.

    Why this Instantly vs Woodpecker comparison settles the choice

    Picking between two capable tools is harder than picking between a strong tool and a weak one. Instantly and Woodpecker both send cold email well, and both have earned large, loyal customer bases. Instantly claims a 30% higher inbox placement rate and a fourfold lift in reply rates on its own pricing page, while Woodpecker has built its whole reputation on deliverability-first sending since its early days. That shared quality is exactly why the decision feels stuck.

    Happily, the split becomes clear once you line the two tools up side by side. Instantly charges a flat monthly fee per plan, connects unlimited mailboxes, and warms them across one of the largest warmup pools in the market. Woodpecker charges by the prospects you contact, verifies every address for free through Bouncer, and throttles sending adaptively so a domain never burns out. Each difference points at a different buyer.

    This Instantly vs Woodpecker comparison works through those differences one by one. Pricing comes first, because Woodpecker’s new slider pricing changed completely since our earlier Woodpecker review, and Instantly’s flat plans produce very different monthly totals at different volumes. Warmup and channels follow, because they decide whether your mail lands in the inbox and whether prospects hear from you in more than one place. Then come data, ease of use, a feature matrix and the candid pros and cons. By the end, the right tool, and the right plan within it, should be obvious.

    Instantly and Woodpecker in plain English: a volume engine against a deliverability craftsman

    Instantly is a high-volume cold email and deliverability platform that covers the full outbound loop in one login: unlimited connected email accounts, automatic inbox rotation, custom tracking domains, inbox placement tests, unlimited automated warmup and an optional SuperSearch database of 450M+ B2B leads. It suits agencies and sales teams who send thousands of emails a month across many domains and want one flat fee instead of per-seat pricing. The Growth plan starts at $47 a month on monthly billing, or $37.60 a month on annual billing.

    Woodpecker is a deliverability-first cold email tool with a built-in prospecting database of more than one billion B2B contacts, free real-time email verification through its native Bouncer integration, automated warmup, inbox rotation, adaptive sending and a bounce shield. It suits founders, small teams and agencies who send fewer, better emails and want every address verified and every send throttled safely. The entry slider tier starts at $35 a month on monthly billing, or $23.33 a month on annual billing, for 500 contacted prospects.

    Both tools cover the same outbound loop at heart. First, you find prospects in the built-in data or upload your own list. Next, you verify and enrich the contacts. Then you enrol them in a sequence and watch the replies arrive in one inbox. Finally, you sync the activity back to your CRM. The loop is the same on both tools, so the choice rests on where each tool is strongest within it.

    What Instantly adds on top of email in this Instantly vs Woodpecker comparison

    Above all, Instantly turns from a sequencer into a sending engine through its infrastructure. Unlimited email accounts connect on every plan, inbox rotation spreads each campaign across your senders instead of pounding one address, and custom tracking domains keep your links branded. Inbox placement tests show whether mail lands in the primary inbox before a campaign goes out. The SISR system on Light Speed assigns dedicated server and IP blocks. One flagged IP never drags down the rest.

    Instantly also adds a lead database and AI that Woodpecker does not match on breadth. SuperSearch holds 450M+ B2B leads with 13 filters, waterfall work-email enrichment across five or more providers and a web researcher agent. The AI sequence generator and AI email writer draft the outreach, while behaviour-based subsequences react to what each prospect did before. Unibox gathers every reply into one master inbox, and the optional CRM tier adds a pipeline, calling and SMS beside it. Our Instantly review covers the platform in full depth.

    What Woodpecker adds on top of email in this Instantly vs Woodpecker comparison

    Meanwhile, Woodpecker turns from a sequencer into a deliverability craftsman through its verification and sending controls. Every address is verified for free in real time through Bouncer before it goes out, which holds bounce rates down without a separate verification bill. Adaptive sending throttles each mailbox near its provider limits, the bounce shield stops sending when bounces climb, and a deliverability monitor watches domain health. Condition-based sequences branch on opens, clicks and replies, so follow-ups react to real behaviour.

    Woodpecker also adds multichannel steps and agency tools that Instantly does not match inside a sequence. LinkedIn steps run through Dux-Soup on the Multichannel plan, calling runs through Aircall, and manual tasks for calls, SMS and LinkedIn sit inside the campaign flow. The Agency Panel gathers every client’s stats in one place, with separate prospect databases, bulk campaign actions and client view-only access. Our Woodpecker review covers the platform in full depth, though its pricing figures predate the change described in the pricing section below.

    The one-sentence difference in this Instantly vs Woodpecker comparison

    Instantly is the volume engine: unlimited mailboxes, unlimited warmup across a 4.2M+ pool, placement tests and up to 500,000 emails a month, priced flat per plan. Woodpecker is the deliverability craftsman: free verification through Bouncer, adaptive sending, a bounce shield and condition-based sequences, priced by the prospects you contact. A team that sends fifty thousand emails a month will feel the difference in week one. A team that sends five hundred careful emails a month will feel it in the first invoice.

    Neither tool is made for permission-based newsletters, so a team that mostly mails its own subscribers should look at the marketing platforms in our best cold email software guide. For B2B prospecting and outbound, though, this pair remains one of the most useful match-ups in the field, because the two tools answer the same question from opposite ends.

    Pricing head-to-head in this Instantly vs Woodpecker comparison

    First, pricing is where this Instantly vs Woodpecker comparison gets interesting, because the two price lists work in completely different ways. Instantly charges a flat monthly fee per plan, so the bill stays the same whether you send 5,000 emails or 125,000 on the same plan. Woodpecker charges by the prospects you contact, on a slider, so the bill rises with the size of your list rather than your send volume. One founder working alone and an agency sending at scale will reach different conclusions from the same two price lists.

    Every figure below comes from the official pricing pages, checked today, 16 November 2026. Instantly figures are in US dollars, with monthly billing first and annual billing second. Woodpecker figures are in US dollars, taken from the pricing page’s own embedded pricing data, with monthly billing first and annual billing second. When a price is not shown on the official page, this Instantly vs Woodpecker comparison says so plainly instead of guessing.

    Instantly vs Woodpecker comparison: a pricing slider control with a large dial, two stacks of coins beside it, one tall and flat, the other a growing staircase of small price tags, with a magnifying glass over a price tag
    Pricing in this Instantly vs Woodpecker comparison: Instantly charges a flat fee per plan, while Woodpecker charges by the prospects you contact on a slider.

    Instantly plans in this Instantly vs Woodpecker comparison: Growth, Hypergrowth and Light Speed

    PlanPrice*What you getBest forVisit
    Instantly — GrowthBest for starting out$47 a month
    $37.60 billed yearly
    5,000 emails a month
    1,000 uploaded contacts, unlimited accounts and warmup
    Small teams sending their first campaignsVisit Site →
    Instantly — HypergrowthBest for serious volume$107 a month
    $85.58 billed yearly
    125,000 emails a month
    25,000 uploaded contacts, built-in CRM, premium support
    Teams sending real volume every monthVisit Site →
    Instantly — Light SpeedBest for very high volume$358 a month
    $286.30 billed yearly
    500,000 emails a month
    100,000 uploaded contacts, SISR dedicated IPs
    Agencies and senders at full tiltVisit Site →
    Instantly — EnterpriseBest for large teamsCustom
    Check the site for a quote
    500,000+ emails a month
    100,000+ contacts, private deliverability network
    Large teams with custom needsVisit Site →

    * Last checked: 16 November 2026 on Instantly’s pricing page. One flag: the Hypergrowth plan card says 125,000 emails a month, while the same page’s own comparison table says 100,000, so treat the Hypergrowth allowance as 100,000 to 125,000 until Instantly clears it up. Features and pricing can change, so please check the provider’s site before you buy. We do not guess at features, prices or trials.

    Reading Instantly’s credits and bundles in this Instantly vs Woodpecker comparison

    Add-ons are where Instantly’s real monthly bill takes shape. SuperSearch lead credits sit beside the outreach plans. Growth includes 1,500 Instantly credits a month. Supersonic costs $97 a month, or $87.30 billed yearly, for 5,000 to 7,500 credits. Hyper Credits start at $197 a month, or $177.30 billed yearly, for 10,000 to 200,000 credits. A team that buys leads inside Instantly should budget for credits beside the plan, not assume the database is unlimited.

    One honest warning belongs here, because Instantly’s pricing page is the busiest of the two. The same page also sells bundles that combine outreach, leads and CRM, with Starter at $94 a month, Scale at $194 and Agency at $555, each with its own email allowance. The figures in this Instantly vs Woodpecker comparison are the standalone outreach plans, which are the fair match for Woodpecker, and the bundle prices are quoted here only so the page does not surprise you.

    Woodpecker pricing in this Instantly vs Woodpecker comparison: a slider by contacted prospects

    Contacted prospects a monthPrice*Emails a monthWarm-ups includedVisit
    500 prospects$35 a month
    $23.33 billed yearly
    8,000 emails2 warm-upsVisit Site →
    2,000 prospects$67 a month
    $44.67 billed yearly
    32,000 emails6 warm-upsVisit Site →
    4,000 prospects$99 a month
    $66.00 billed yearly
    64,000 emails10 warm-upsVisit Site →
    8,000 prospects$159 a month
    $106.00 billed yearly
    128,000 emails16 warm-upsVisit Site →
    10,000 prospects$188 a month
    $125.33 billed yearly
    160,000 emails20 warm-upsVisit Site →
    15,000 prospects$262 a month
    $174.67 billed yearly
    240,000 emails30 warm-upsVisit Site →

    * Last checked: 16 November 2026 on Woodpecker’s pricing page, from the page’s own embedded pricing data. Annual billing saves 33% at every tier. The slider continues past 15,000 prospects to much higher volumes, and a Scale plan is custom for teams beyond the standard tiers. Features and pricing can change, so please check the provider’s site before you buy. We do not guess at features, prices or trials.

    Woodpecker plan types in this Instantly vs Woodpecker comparison: email, multichannel and LinkedIn

    PlanPrice*What you getBest for
    Woodpecker — Email outreachBest for email-only teamsFrom $35 a month
    Slider by contacted prospects
    Unlimited contacts storage
    Unlimited verification, warm-ups, unlimited team members
    Teams that only send email
    Woodpecker — MultichannelBest for email plus LinkedInCheck the site
    Price not shown on the static page
    Email plus LinkedIn in one campaign
    All LinkedIn actions, 1 LinkedIn account
    Reps who work email and LinkedIn together
    Woodpecker — LinkedInBest for LinkedIn-only outreachCheck the site
    Price not shown on the static page
    LinkedIn outreach and automation
    Up to 250 direct messages a day, 50 InMails a month
    Teams that prospect on LinkedIn first
    Woodpecker — ScaleBest for large teamsCustom
    Book a call for a quote
    Higher email or LinkedIn limits
    A setup shaped around your team
    Large teams with custom needs

    * Last checked: 16 November 2026 on Woodpecker’s pricing page. The Multichannel and LinkedIn prices are set by the slider on the live page and are not readable from the static page, so this Instantly vs Woodpecker comparison says check the site rather than guessing. Features and pricing can change, so please check the provider’s site before you buy.

    The Woodpecker pricing change in this Instantly vs Woodpecker comparison: our earlier review is out of date

    Most importantly, Woodpecker’s pricing has changed completely since our earlier Woodpecker review, and readers of that review need the correction up front. The review said Woodpecker cost $39 a month for 5,000 emails, or $26 a month on annual billing, with 3 warm-ups included, verified on 30 October 2026. Woodpecker now charges by contacted prospects on a slider, not by emails sent: $35 a month, or $23.33 on annual billing, for 500 contacted prospects, 8,000 emails and 2 warm-ups. The old figures are stale, and this Instantly vs Woodpecker comparison uses the new ones throughout.

    That change cuts both ways, and it is worth understanding before you buy. A team that contacts 500 prospects a month now pays $35 instead of $39, and gets 8,000 emails instead of 5,000, which is a better deal. A team that contacts 15,000 prospects a month now pays $262, which is far more than the old flat email pricing would have suggested. The slider rewards small, careful lists and charges steeply for large ones, which is the opposite of Instantly’s flat fees.

    Cost at 5,000, 25,000 and 100,000 emails a month in this Instantly vs Woodpecker comparison

    Emails a monthInstantly, monthly billingWoodpecker, monthly billingCheaper pick
    5,000 emails$47 a month
    Growth, 5,000 emails included
    $35 a month
    500 contacted prospects, 8,000 emails
    Woodpecker, by $12 a month
    25,000 emails$107 a month
    Hypergrowth, 125,000 emails included
    $67 a month
    2,000 contacted prospects, 32,000 emails
    Woodpecker, by $40 a month
    100,000 emails$107 a month
    Hypergrowth, 125,000 emails included
    $159 a month
    8,000 contacted prospects, 128,000 emails
    Instantly, by $52 a month

    Arithmetic is shown plainly so you can check it. Woodpecker’s emails allowance is 16 times its contacted-prospect count at every tier, so 25,000 emails fit the 2,000-prospect tier and 100,000 emails fit the 8,000-prospect tier, provided the prospect count fits too. The crossover sits between 25,000 and 100,000 emails a month. Last checked: 16 November 2026. Features and pricing can change, so please check the provider’s site before you buy.

    What the price gap means in practice in this Instantly vs Woodpecker comparison

    For example, a solo founder sending 5,000 emails a month pays $47 on Instantly Growth or $35 on Woodpecker’s entry tier, on monthly billing. Instantly gives that founder unlimited mailboxes, unlimited warmup and placement tests. Woodpecker gives that founder free verification through Bouncer, adaptive sending and a bounce shield. The $12 gap is small, yet each tool puts it towards a different strength.

    A team sending 100,000 emails a month flips the maths hard. Instantly Hypergrowth still costs $107 a month, because the plan is flat, while Woodpecker’s 8,000-prospect tier costs $159 a month, because the slider rises with the list. Any team planning to grow its list should work out the slider sums before signing, because the gap grows with every new thousand prospects.

    Annual billing also narrows every gap in the same way. Instantly drops from $47 to $37.60 on Growth and from $107 to $85.58 on Hypergrowth. Woodpecker drops by 33% on annual billing, from $35 to $23.33 on the entry tier and from $159 to $106.00 on the 8,000-prospect tier. Neither tool punishes annual billing, so a team that is sure of its choice should pay yearly and keep the saving.

    Trying before you buy in this Instantly vs Woodpecker comparison: no trial shown against 14 days free

    Most importantly, the trial gap is the friendliest difference of all, because only one tool lets you test before you pay. Woodpecker offers a 14-day free trial covering all features, with no credit card required, according to its own pricing page. You can connect mailboxes, build a condition-based sequence and run a real campaign before paying anything.

    Instantly shows no free trial on its pricing page, so this Instantly vs Woodpecker comparison does not claim one for it. That does not mean Instantly never offers a trial through another route, only that none is published where buyers look first. If a free test matters most, Woodpecker answers the question at once, while Instantly asks you to commit from the first month.

    Data and databases: SuperSearch against a 1B+ database

    Next, data is the clearest difference in this Instantly vs Woodpecker comparison after price, and Woodpecker wins it on size. Woodpecker bundles a searchable database of more than one billion B2B contacts, with 100 Lead Finder credits included on the plan, plus free real-time verification through Bouncer. Instantly answers with SuperSearch, an optional database of 450M+ B2B leads with 13 filters, waterfall enrichment and a web researcher agent, paid for in credits beside the plan.

    Nevertheless, size alone does not win deals, though. A database only justifies its price when it holds the exact buyers you serve, with details that still hold up when you send to them. Woodpecker’s database suits teams that prospect in broad markets and want list building inside the same login. Instantly’s SuperSearch suits teams that already know their market and want waterfall enrichment to find the working address for each name. Our best B2B data providers guide sets both tools beside the dedicated data specialists.

    Instantly data in this Instantly vs Woodpecker comparison: SuperSearch and waterfall enrichment

    In particular, Instantly treats data as an optional layer on top of the sending engine. SuperSearch holds 450M+ B2B leads with 13 filters, including keywords and lookalikes, so you can find contacts that match your ideal customer profile without buying a separate data tool. Waterfall work-email enrichment checks five or more providers in turn until it finds a working address. Full profile enrichment fills in company descriptions, headcounts, job postings, news, technology and funding details.

    What is more, Instantly pairs that database with AI research that keeps the list fresh. The Instantly Web Researcher Agent digs into each prospect’s public footprint. Access to five major large language models sits behind the AI email writer. More than 100 community AI templates give you starting points. Growth includes 1,500 Instantly credits a month, and extra credits run from $97 a month for Supersonic to $197 a month for Hyper Credits. A team that prospects inside Instantly every day will feel at home, because the list, the enrichment and the sequence live in one login.

    Woodpecker data in this Instantly vs Woodpecker comparison: a 1B+ database with free verification

    In contrast, Woodpecker treats data as part of the plan, not a paid extra. The built-in database holds more than one billion B2B contacts, with 100 Lead Finder credits included, and extra Lead Finder credits are available as an add-on starting at 500 credits. Unlimited contacts storage means the list you build never hits a cap, however large it grows.

    At the same time, Woodpecker pairs that database with verification that costs nothing extra. Free real-time verification through Bouncer checks every address before it goes out, including catch-all verification, so bounces stay low without a separate verification bill. That is the single most valuable data feature in this Instantly vs Woodpecker comparison for a team that buys or builds lists from many sources. A team that already runs a data provider will feel at home too, because Woodpecker takes the list, verifies it and does the sending.

    Accuracy: test both tools on your own list in this Instantly vs Woodpecker comparison

    In any case, one honest warning applies to both tools here. No vendor publishes an independent accuracy audit, so treat every accuracy claim as the vendor’s own word. The honest test is your own list, so take 100 real prospects from your market, run them through both tools, and count how many emails come back. Coverage that looks deep in the United States can run thin inside a narrow niche market.

    List quality drives reply rates more than any clever subject line can. Five hundred verified ideal customers beat ten thousand careless contacts, without exception. A tool that helps you build a careful list is worth its fee, while one that leaves list building entirely to you means budgeting for data elsewhere. Keep that in mind through the rest of this Instantly vs Woodpecker comparison.

    Multichannel comparison: email-first volume against email plus LinkedIn

    Then, multichannel is the sharpest difference in this Instantly vs Woodpecker comparison, and Woodpecker wins it outright. Woodpecker runs email and LinkedIn steps in one campaign on its Multichannel plan, with LinkedIn actions through Dux-Soup and calling through Aircall. Instantly is email-first: its sequences send email, and calling and SMS sit in the optional CRM tier beside Unibox rather than inside the sequence.

    That split decides the whole purchase for many teams. A rep who spends the morning on LinkedIn needs those touches to run inside the campaign, tracked beside the emails. A rep who spends the morning on the phone needs the dialler in the same place as the sequences. Each buyer has a fair point, so choose the tool that fits how you actually sell.

    Instantly channels in this Instantly vs Woodpecker comparison: email sequences, Unibox and a CRM tier

    Specifically, Instantly’s sequences are built for email at volume. Advanced sequences branch on behaviour, with subsequences that react to what each prospect did before. Spintax keeps the wording fresh across a large list, and dynamic variables pull in each prospect’s details. Advanced scheduling puts each email in the prospect’s working hours, and A/Z testing shows which subject line and angle earns more replies.

    Moreover, Instantly gathers the replies in Unibox, a master inbox that holds every conversation in one place, and the built-in CRM on Hypergrowth adds a pipeline beside it. The CRM tier adds calling and SMS, so a team that phones and texts can do it from the same login, even though those steps do not run inside the email sequence itself. A rep who sends email at scale will feel at home here from day one.

    Video: Lemlist Alternatives: 9 Tools Compared on Price, Channels & CRM by Misar AI on YouTube. This video is the creator’s property, embedded via YouTube for education. OutreachCompare is not affiliated with Misar AI and does not claim ownership of this video.

    Woodpecker channels in this Instantly vs Woodpecker comparison: email, LinkedIn and calls in one campaign

    However, Woodpecker’s campaigns are built for more than one channel at once. Email-LinkedIn-call combined sequences run inside one campaign, with LinkedIn visits, connection requests, messages and profile views through Dux-Soup, calling through Aircall, and manual tasks for calls, SMS and LinkedIn sitting in the flow. When a lead opens your email three times without replying, the next move can be a LinkedIn visit. Once they accept your connection request, the next step can be a short personal note there. That flow is the whole product.

    On top of that, Woodpecker’s Multichannel plan puts LinkedIn limits in plain sight. It allows up to 250 direct messages a day and up to 50 InMail messages a month. It also allows up to 30 connection requests a day and up to 500 profile visits a day. One LinkedIn account comes with the plan. A rep who lives on LinkedIn and the phone will feel at home here, because the second channel is part of the campaign rather than a separate login.

    AI in this Instantly vs Woodpecker comparison: sequence generation against AI copywriting

    All in all, AI is the feature that makes this Instantly vs Woodpecker comparison unlike any other head-to-head on the site. Instantly’s AI sequence generator builds whole campaigns. The AI email writer drafts each message. The web researcher agent fills in the prospect’s background before the first line is written. These tools are genuinely useful, yet they carry one caveat: AI writing still needs a human eye. The best results come when a rep reviews the drafts, checks the personalisation and keeps the tone close to how the team really talks.

    Woodpecker answers Instantly’s AI with its own, though the two are not the same thing. Woodpecker’s AI email writer drafts messages, AI interest level detection reads each reply and sorts it by how interested the prospect sounds, and the inbox sorts replies by interest level automatically. That saves hours a week on reply handling. It does not build whole sequences or research prospects on its own. A team that wants AI to write the outreach should pick Instantly. A team that wants AI to sort the replies should pick Woodpecker.

    Personalisation in this Instantly vs Woodpecker comparison: spintax and variables on both tools

    Both tools personalise well, yet they personalise in the same places. Instantly personalises through spintax, dynamic variables and AI-written first lines, which is enough for a rep who writes short, relevant messages at volume. Woodpecker personalises through spintax, text variables and snippets with dynamic custom fields, plus snippet-based conditions that change the message when a field is empty.

    Each style can win replies, and the right one depends on who opens the message. A prospect buried under plain emails might stop at a note that mentions their newest hire or the software their company already uses. Someone tired of templated mail might reply to a short, well-written plain note instead. Try each style on 25 prospects before committing to one tool.

    Deliverability and warmup: a 4.2M+ warmup pool against warmup plus Bouncer verification

    Ultimately, deliverability decides whether any of this matters, because an email that lands in spam earns no replies. Instantly warms unlimited mailboxes across a 4.2M+ account pool, with inbox placement tests and reputation protection beside it. Woodpecker warms mailboxes automatically, verifies every address for free through Bouncer, and shields the domain with adaptive sending and a bounce shield. That matters for teams connecting many inboxes at once.

    At heart, warmup works the same way on both tools. New mailboxes exchange mail with a network of real inboxes, so providers learn to trust the new domain before real sending begins. Opens, replies and spam-folder checks build sender reputation slowly, one step at a time. Warmup supports a healthy setup, yet it cannot save a purchased list, a misleading subject line or a domain without authentication. Set up a separate sending domain, add its SPF, DKIM and DMARC records, and allow warmup two to four weeks before real volume. Our sending-domain guide takes you through the records one at a time.

    Instantly vs Woodpecker comparison: a large envelope flying into an inbox tray protected by a teal shield with a checkmark, a warmup gauge rising beside it, and a spam folder pushed aside
    Deliverability in this Instantly vs Woodpecker comparison: Instantly warms across a 4.2M+ pool, while Woodpecker warms beside free Bouncer verification and a bounce shield.

    Instantly warmup in this Instantly vs Woodpecker comparison: unlimited warmup and placement tests

    For instance, Instantly’s warmup is built into every plan, with no cap on the mailboxes it warms. Unlimited automated warmup runs across a 4.2M+ account pool, one of the largest warmup networks in the market. Advanced warmup capabilities sit beside it on the higher plans. Automatic inbox rotation spreads each campaign across your connected senders instead of pounding one address, and custom tracking domains keep your links branded.

    On top of that, Instantly adds placement testing that Woodpecker does not name the same way. Inbox placement tests show whether mail lands in the primary inbox before a campaign goes out. Reputation protection with bounce detection stops sending when a mailbox starts to struggle. The SISR system on Light Speed assigns dedicated server and IP blocks, and flagged IPs are swapped out at once. Together, warmup, rotation, placement tests and SISR form a deep deliverability suite in this Instantly vs Woodpecker comparison.

    Woodpecker warmup in this Instantly vs Woodpecker comparison: warmup, verification and a bounce shield

    Similarly, Woodpecker’s warmup is the most careful in this Instantly vs Woodpecker comparison. It runs on its own, warms the mailboxes included with your slider tier, from 2 warm-ups on the entry tier to 30 on the 15,000-prospect tier, and extra warm-ups are available as an add-on if you need more. Adaptive sending throttles each mailbox near its provider limits, and human-like sending randomisation spaces each send out so it reads like a person, not a machine.

    Second, Woodpecker adds verification and shielding that Instantly does not bundle the same way. Free real-time verification through Bouncer checks every address before sending, which holds bounce rates down. The bounce shield stops sending when bounces climb, the deliverability monitor watches domain health, and a spam words and links checker catches mistakes before they go out. Together they form the most careful deliverability suite in this Instantly vs Woodpecker comparison.

    Which warmup setup wins in this Instantly vs Woodpecker comparison

    Generally, for a team that warms many mailboxes and wants placement tests and dedicated IPs, Instantly wins on depth, with unlimited warmup across a 4.2M+ pool and SISR on Light Speed. For a team that warms a few mailboxes and wants every address verified and every send throttled safely, Woodpecker wins on care, with free Bouncer verification, adaptive sending and a bounce shield in the same subscription.

    Both tools agree on the basics, and both are right. Warm new domains for two to four weeks, start at low volume, and raise the daily send limit a little at a time. Our best email deliverability tools guide sets out the dedicated deliverability suites if a specialist tool appeals instead.

    Ease of use, integrations and support

    Both tools are built for people who prospect every day, yet each one feels different from the first login. Instantly is the simpler of the two to start. Connecting mailboxes, turning on warmup and launching a sequence takes a few clicks. The flat plans keep the billing easy to follow. Woodpecker is the more careful of the two to start, because verification, adaptive sending and condition-based sequences reward a careful setup, while the 14-day trial gives you time to learn them. Either account can move from signup to a live campaign within one working day.

    Either tool welcomes a newcomer, yet reading our beginners guide to cold email first and spending a week learning the dashboard makes the first month much smoother. Instantly rewards a team that already knows its ideal customer profile and wants to send at volume from many mailboxes. Woodpecker rewards a team that wants to send carefully from a few mailboxes with every address verified first.

    Onboarding in this Instantly vs Woodpecker comparison: a paid start against a 14-day trial

    Instantly onboards by getting you sending fast. Unlimited email accounts connect on every plan, and warmup starts automatically. The AI sequence generator drafts the first campaign. A team can go from signup to a live sequence in hours. No free trial is shown on the pricing page, so budget for the first month from the start, and set a reminder to check your sending volume before your first big campaign.

    Woodpecker onboards by letting you in without a card. The 14-day free trial gives you access to all features, with no credit card required, so a team can connect mailboxes, build a condition-based sequence and test a real campaign before paying anything. When the trial ends, the account moves to a paid plan, so set a reminder to check your contacted-prospect count before your first big campaign.

    Video: The BEST Smartlead Alternatives Ranked (+7 tools) by Salesforge on YouTube. This video is the creator’s property, embedded via YouTube for education. OutreachCompare is not affiliated with Salesforge and does not claim ownership of this video.

    Support in this Instantly vs Woodpecker comparison: premium help on the top tiers

    Similarly, support follows the same pattern as the rest of the comparison. Instantly includes chat support on Growth, premium live support on Hypergrowth, and a dedicated account manager with a shared Slack channel on Enterprise. Woodpecker includes support for paying customers, with a dedicated setup shaped around your team on the custom Scale plan, beside its large knowledge base and help centre. Judge support on the tier you would actually pay for, rather than the one the sales page highlights.

    Both tools also run large help centres, and each one answers tickets from paying customers. When you need a human at midnight, the tier you pay for counts for more than the brand. One person on the cheapest tier should expect ticket or chat help, while a large team on a top tier can expect a named person to call.

    Integrations in this Instantly vs Woodpecker comparison: CRM sync on both tools, with different depth

    Finally, each tool syncs with the CRMs teams actually run, and each offers a way to connect other apps. Instantly adds a built-in CRM integrated with Unibox on Hypergrowth, plus an API, webhooks and integrations that export to major CRMs and outreach providers. That depth suits a team whose sending engine is the centre of its sales operation.

    Woodpecker adds native two-way sync with HubSpot and Pipedrive, plus Calendly, Google Sheets, Zapier, Zoho, Hunter, Clay, Persana and an API, webhooks, an MCP server and a CLI through its Integrations add-on. For a team already running HubSpot or Pipedrive, either tool slots into the stack cleanly. A team that automates through the API on a mid-tier plan will find Instantly’s built-in CRM the stronger offer. A team that wants HubSpot and Pipedrive two-way sync beside its sequencer will find Woodpecker’s the stronger offer.

    Feature matrix: Instantly vs Woodpecker side by side

    In summary, this Instantly vs Woodpecker comparison puts every claim in one place. Every row in the matrix below was checked on both official sites today, 16 November 2026. A tick means the provider states the feature on its own site, with any plan limits noted beside it. A dash means we could not confirm the feature, or the provider confirms it is absent. Read the matrix with your own priorities close at hand, because no single tool wins every row.

    Pricing, data and buying in this Instantly vs Woodpecker comparison

    FeatureInstantlyWoodpecker
    Entry price, monthly$47 a month
    Growth, flat per plan
    $35 a month
    500 contacted prospects
    Entry price, annual$37.60 a month
    Billed yearly
    $23.33 a month
    Billed yearly, saves 33%
    Pricing modelFlat fee per plan
    No per-user charge
    Per contacted prospect
    Slider, 16 emails per prospect
    Monthly email volume, top plan500,000 emails
    Light Speed
    240,000 emails
    $262 tier, slider goes higher
    Searchable contact database✓
    SuperSearch, 450M+ leads, credits
    ✓
    1B+ contacts, 100 credits included
    Verified prospect emails included✓
    Waterfall enrichment, credits
    ✓
    Free real-time verification, Bouncer
    Free email verification—
    Verification through paid credits
    ✓
    Free, unlimited, via Bouncer
    Free plan—
    No free plan shown
    —
    No free plan shown
    Free trial—
    No trial shown on the pricing page
    ✓
    14 days, all features, no card
    Unlimited mailboxes, entry plan✓
    Unlimited accounts, every plan
    ✓
    Unlimited email accounts

    Last checked: 16 November 2026 on Instantly’s pricing page and Woodpecker’s pricing page. Features and pricing can change, so please check the provider’s site before you buy.

    Channels, warmup and deliverability in this Instantly vs Woodpecker comparison

    FeatureInstantlyWoodpecker
    Email sequences✓
    Behaviour subsequences, spintax
    ✓
    Condition-based, A/B up to 5 versions
    LinkedIn steps in sequences—
    Not listed as sequence steps
    ✓
    Via Dux-Soup, Multichannel plan
    Calling steps in sequences✓
    Calling in the CRM tier
    ✓
    Calling via Aircall
    SMS steps in sequences✓
    SMS in the CRM tier
    ✓
    Manual SMS tasks in campaigns
    AI sequence builder✓
    AI sequence generator, AI writer
    ✓
    AI email writer, interest detection
    Automated warmup✓
    Unlimited, 4.2M+ pool
    ✓
    Automated, 2 to 30 by tier
    Inbox rotation✓
    Automatic, every plan
    ✓
    Every plan
    Placement testing✓
    Inbox placement tests
    ✓
    Deliverability monitor instead
    Bounce protection✓
    Reputation protection, bounce detection
    ✓
    Bounce shield, adaptive sending
    AI personalisation✓
    AI writer, spintax, variables
    ✓
    AI writer, spintax, snippets

    Integrations, support and agency tools in this Instantly vs Woodpecker comparison

    FeatureInstantlyWoodpecker
    Unified reply inbox✓
    Unibox master inbox
    ✓
    Centralised inbox
    CRM sync (Salesforce, HubSpot)✓
    Built-in CRM, export to major CRMs
    ✓
    HubSpot, Pipedrive two-way sync
    API access✓
    API, webhooks, integrations
    ✓
    API, webhooks, MCP, CLI, add-on
    White-label client portals—
    Not listed on the pricing page
    ✓
    Agency Panel white label, add-on
    Client workspaces✓
    Agency bundle, $555 a month
    ✓
    Agency Panel, multi-client dashboard
    GDPR compliance—
    Not stated on the pricing page
    ✓
    GDPR compliant, ISO certified storage
    Dedicated support✓
    Dedicated manager, Enterprise plan
    ✓
    Dedicated setup, Scale plan

    Last checked: 16 November 2026 on Instantly’s pricing page and Woodpecker’s pricing page. Features and pricing can change, so please check the provider’s site before you buy. We do not guess at features, prices or trials.

    What the matrix means for your shortlist in this Instantly vs Woodpecker comparison

    Read the matrix with your own priorities in mind. Instantly wins the volume, warmup scale and placement-testing rows outright, because a 500,000-email top plan, a 4.2M+ warmup pool and inbox placement tests have no Woodpecker equivalent. Woodpecker wins the entry price, verification and LinkedIn rows outright, because a $35 entry price, free unlimited verification through Bouncer and LinkedIn steps in the campaign have no Instantly equivalent. Deliverability is a split: Instantly sells warmup scale beside placement tests and SISR, while Woodpecker sells verification beside adaptive sending and a bounce shield.

    The matrix also shows why the entry price can mislead. Woodpecker at $35 a month looks cheaper than Instantly Growth at $47. Yet Woodpecker caps the entry tier at 500 contacted prospects and 8,000 emails. Instantly covers unlimited mailboxes and warmup for that $47. Instantly Hypergrowth at $107 a month looks dearer than Woodpecker’s $67 tier, yet it includes 125,000 emails against Woodpecker’s 32,000. The fair comparison is the full monthly cost of the setup you would actually run, with credits and add-ons included.

    Pros and cons: the honest case for each tool

    Naturally, every tool has trade-offs, and an honest Instantly vs Woodpecker comparison names them plainly. The strengths below show why each tool keeps winning customers. The weaknesses explain why some teams still pick the rival.

    Instantly strengths in this Instantly vs Woodpecker comparison

    Most importantly, volume tops the list. Unlimited connected mailboxes and unlimited warmup across a 4.2M+ pool sit in one subscription. Light Speed sends up to 500,000 emails a month. Hypergrowth at $107 a month covers 125,000 emails. The flat-fee pricing is the second strength: one $107-a-month bill covers the whole sending engine, with no per-user charge and no slider to watch.

    Next, the deliverability tools are the third strength. Inbox placement tests show whether mail lands in the primary inbox before a campaign goes out. Reputation protection with bounce detection stops sending when a mailbox struggles. The SISR system on Light Speed assigns dedicated server and IP blocks. SuperSearch and Unibox round out the offer, with a 450M+ database beside the master inbox.

    Instantly weaknesses in this Instantly vs Woodpecker comparison

    Nevertheless, the missing trial is the clearest weakness. No free trial is shown on Instantly’s pricing page, so a team cannot test the platform with a real campaign before paying, while Woodpecker hands over 14 days free with no card. A team that wants to try before it buys should weigh that gap first.

    Counted credits are another watch point. SuperSearch runs on credits, with Growth including 1,500 a month and extra credits from $97 a month, so a team that buys leads inside Instantly pays on top of the plan. LinkedIn steps do not run inside a sequence the way they do on Woodpecker, and the Hypergrowth allowance is stated two ways on the same page, 125,000 on the plan card and 100,000 in the comparison table, which is a small but real source of confusion.

    Woodpecker strengths in this Instantly vs Woodpecker comparison

    Simplicity tops the list for careful senders. Free real-time verification through Bouncer, adaptive sending, a bounce shield and condition-based sequences sit in one subscription, with the entry tier at $35 a month for 500 contacted prospects. The pay-by-prospect pricing is the second strength: a small list costs a small bill, which is fair when every address is verified before it goes out.

    In addition, the multichannel steps are the third strength. Email and LinkedIn run in one campaign on the Multichannel plan, with calling through Aircall and manual tasks for calls, SMS and LinkedIn in the flow. The 14-day free trial with all features and no credit card makes it easy to prove the value with a real campaign before you pay, and GDPR compliance with ISO certified storage suits teams in regulated markets.

    Woodpecker weaknesses in this Instantly vs Woodpecker comparison

    Still, the slider is the clearest weakness. The bill rises steeply with the list, from $35 at 500 prospects to $262 at 15,000, so a team that grows its list pays far more than a flat-fee rival for the same emails. A fast-growing team should run the slider sums first.

    Priced add-ons are another watch point. The Agency Panel and the Integrations add-on are charged separately, with its API, webhooks, MCP and CLI beside them. Extra warm-ups, extra domains and extra Lead Finder credits cost more too. The Multichannel and LinkedIn plan prices are not shown on the static pricing page. The headline price is only part of the bill. LinkedIn and calling also run through third-party integrations, Dux-Soup and Aircall, rather than native tools.

    Who should pick which: a short decision guide

    In the end, a decision guide is only useful when it names real buyers, so this Instantly vs Woodpecker comparison ends the debate with five of them. Spot the buyer who sounds most like you, and the answer follows. When two buyers both sound like you, start with the cheaper trial and let a month of real outreach decide it.

    Instantly vs Woodpecker comparison: a buyer at a fork in the road holding a small compass, one signpost pointing towards a tall stack of envelopes and a shield, the other towards a friendly robot assistant with a phone and chat bubbles
    The decision in this Instantly vs Woodpecker comparison: a fork in the road, with one path for high-volume sending and one path for careful, verified outreach.

    Pick Instantly when sending volume comes first

    Choose Instantly when your team sends thousands of emails a month and wants unlimited mailboxes, unlimited warmup and placement tests on a flat fee. The Growth plan at $47 a month covers a small team with 5,000 emails a month, and Hypergrowth at $107 a month covers a serious sender with 125,000 emails a month. Start with the Growth plan, build a list of fifty to two hundred verified prospects, and send your first sequence before you scale.

    Indeed, Instantly also fits an agency that manages many client domains at once. The Agency bundle at $555 a month covers 500,000 emails and 100,000 uploaded contacts, with 10,000 Instantly credits beside it, and Unibox keeps every client’s replies in one place. An agency that sends at volume will feel at home here.

    Pick Woodpecker when careful, verified sending comes first

    Choose Woodpecker when your team sends fewer, better emails and wants every address verified for free, every send throttled safely and every follow-up branched on real behaviour. The entry tier at $35 a month covers a solo sender with 500 contacted prospects and 8,000 emails, and the 2,000-prospect tier at $67 a month covers a growing team with 32,000 emails. Start with the 14-day free trial, build a list of fifty to two hundred verified prospects, and send your first sequence before you scale.

    Likewise, Woodpecker also fits a team that prospects on LinkedIn as much as by email. The Multichannel plan runs email and LinkedIn in one campaign, with calling through Aircall beside it, and the Agency Panel gathers every client’s stats in one place. A team that wants LinkedIn steps inside the sequence will feel at home here.

    Three questions that settle this Instantly vs Woodpecker comparison

    Run through three checks. Do you need unlimited mailboxes and placement tests at volume, or do you need free verification and adaptive sending for a small list? Would you rather pay a flat fee whatever the list size, or pay by the prospects you contact? Do your prospects answer sheer volume first, or do they answer a careful, verified note first?

    When volume and warmup scale matter, pick Instantly. If careful, verified sending and LinkedIn steps matter, pick Woodpecker. For a team sending under 25,000 emails a month to a small list, pick Woodpecker, because $35 to $67 a month covers it. If two answers pull in different directions, start with the tool that fixes your biggest pain today, because switching sequencers soon beats switching after a year of campaigns.

    Frequently asked questions in this Instantly vs Woodpecker comparison

    Which is cheaper, Instantly or Woodpecker?

    Overall, it depends on how many emails you send. Sending 5,000 emails a month, Woodpecker is cheaper, at $35 a month against Instantly’s $47. With 25,000 emails a month, Woodpecker is still cheaper, at $67 a month against Instantly’s $107. Once you reach 100,000 emails a month, Instantly is cheaper, at $107 a month against Woodpecker’s $159. The crossover sits between 25,000 and 100,000 emails a month. All figures were checked on 16 November 2026.

    Which has better warmup, Instantly or Woodpecker?

    Both include warmup, yet they scale differently. Instantly includes unlimited automated warmup across a 4.2M+ account pool on every plan, beside inbox rotation, placement tests and reputation protection. Woodpecker includes automated warmup with the slider tier, from 2 warm-ups on the entry tier to 30 on the 15,000-prospect tier, beside free Bouncer verification, adaptive sending and a bounce shield. Warm either way for two to four weeks before real volume.

    Does Woodpecker do LinkedIn outreach?

    Yes. Woodpecker’s Multichannel plan runs email and LinkedIn in one campaign, with LinkedIn actions through Dux-Soup, and its LinkedIn plan covers LinkedIn-only outreach with up to 250 direct messages a day. Instantly is email-first, with calling and SMS in its CRM tier rather than LinkedIn steps inside a sequence. If LinkedIn is the heart of your outbound, pick Woodpecker.

    Does Instantly have a free trial?

    No free trial is shown on Instantly’s pricing page, so this Instantly vs Woodpecker comparison does not claim one for it. Woodpecker offers a 14-day free trial that covers every feature, with no credit card required. Neither tool offers a free plan, so Woodpecker’s trial is the only free test between the two.

    Did Woodpecker change its pricing?

    Yes. Woodpecker now charges by contacted prospects on a slider, not by emails sent. The entry tier is $35 a month, or $23.33 on annual billing, for 500 contacted prospects, 8,000 emails and 2 warm-ups. Our earlier Woodpecker review said $39 a month for 5,000 emails, verified on 30 October 2026, and those figures are now stale. This Instantly vs Woodpecker comparison uses the new figures throughout.

    Which is better for agencies, Instantly or Woodpecker?

    It depends on what the agency sells. An agency that sends at volume across many client domains should pick Instantly, because unlimited mailboxes, unlimited warmup and a 500,000-email top plan sit on flat fees, with an Agency bundle at $555 a month. An agency that sends carefully to small lists with LinkedIn steps should pick Woodpecker, because free verification, adaptive sending and the Agency Panel with multi-client dashboards suit exactly that workload. Read our best cold email tools for agencies guide if a first tool is still up in the air.

    The verdict in this Instantly vs Woodpecker comparison

    Verdict: Instantly for high-volume sending, Woodpecker for careful, verified outreach

    Instantly is the pick when you want to send at volume on a flat fee. Unlimited connected mailboxes, unlimited warmup across a 4.2M+ pool, inbox placement tests and up to 500,000 emails a month sit in one subscription, with the Hypergrowth plan at $107 a month covering 125,000 emails. Woodpecker is the pick when you want every address verified and every send throttled safely. Free real-time verification through Bouncer, adaptive sending, a bounce shield and condition-based sequences sit in one subscription, priced by the prospects you contact from $35 a month.

    Buy for the team you have right now, rather than the one you hope to hire next year. A solo sender with a small list should start on Woodpecker’s entry tier, because $35 a month buys free verification and a 14-day free trial with no card. A team sending 100,000 emails a month should start on Instantly Hypergrowth, because $107 a month buys 125,000 emails with unlimited mailboxes and warmup. A team that lives on LinkedIn should start on Woodpecker’s Multichannel plan, because Instantly’s sequences are email-first. Whichever you pick, set up a separate sending domain, warm it for two to four weeks, and try it on 25 prospects before scaling.

    We have not run hands-on deliverability or reply-rate tests on Instantly or Woodpecker, so this Instantly vs Woodpecker comparison gives no numeric score. The verdict rests on verified pricing, verified warmup claims and documented channel lists, all confirmed on 16 November 2026. Try Woodpecker free for 14 days, or start Instantly Growth at $47 a month, and let a month of real outreach confirm the choice.

    Visit Instantly →Check Woodpecker →

    Keep reading

    Instantly vs WoodpeckerInstantly from $47/mo · Woodpecker from $35/mo Visit Instantly →
  • Lemlist vs Smartlead 2026

    Lemlist vs Smartlead 2026

    The personalisation studio against the deliverability engine — and a clear winner for each job

    Lemlist vs Smartlead is a contest between two different answers to the same outbound question. Lemlist is a multichannel sales engagement platform that turns every email into a personalised touch, with AI icebreakers, personalised images and videos, LinkedIn steps and calls inside one sequence. Smartlead is an agency-built cold email and deliverability platform, with unlimited mailboxes, unlimited AI warmup and white-label client portals on flat fees. This Lemlist vs Smartlead comparison checks pricing, warmup, channels, data and support on both official sites, so you can pick with confidence.

    Visit Lemlist →Check Smartlead →

    Prices checked 16 November 2026 on Lemlist’s and Smartlead’s official pricing pages. Features and pricing can change, so please check the provider’s site before you buy.

    Quick Answer

    Choose Lemlist when personalised multichannel outreach matters most. AI icebreakers, personalised images and videos, a 650M+ lead database, LinkedIn automation, calls, SMS and WhatsApp run in one sequence, with the Email plan at $69 a month for the whole workspace. Choose Smartlead when deliverability at scale and agency work matter most. Unlimited mailboxes, unlimited AI warmup with spam rescues, dynamic ESP matching and white-label client portals come on flat-fee plans from $39 a month, and the top plan sends 500,000 emails a month.

    Small teams that send fewer, better emails should lean Lemlist, because every first touch can feel written for one person alone. Agencies and high-volume senders should lean Smartlead, because flat fees and unlimited mailboxes keep the bill steady as sending grows. On entry price, Smartlead leads, at $39 a month against Lemlist’s $69. On multichannel depth and personalisation, Lemlist leads outright, because Smartlead’s sequences are email-first.

    Why this Lemlist vs Smartlead comparison settles the choice

    Picking between two capable tools is harder than picking between a strong tool and a weak one. Lemlist and Smartlead both send cold email well, and both have earned large, loyal customer bases. Lemlist holds a 4.6 out of 5 rating from more than 2,240 reviews on G2, according to its own pricing page. Smartlead is used by more than 100,000 businesses, according to its own pricing page. That shared quality is exactly why the decision feels stuck.

    Fortunately, the split turns clear once you line the two tools up side by side. Lemlist charges a flat fee for its Email plan, then per user for Multichannel, and it personalises every touch with AI icebreakers, custom images and videos, LinkedIn steps and calls. Smartlead charges a flat fee on every plan, warms unlimited mailboxes with AI, rescues mail from spam folders, and gives each client a white-label portal. Each difference points at a different buyer.

    This Lemlist vs Smartlead comparison works through those differences one by one. Pricing comes first, because Lemlist’s flat Email plan and per-user Multichannel plan produce very different monthly totals for the same team, and Smartlead’s flat fees produce another. Warmup and channels follow, because they decide whether your mail lands in the inbox and whether your prospects hear from you in more than one place. Then come data, ease of use, a feature matrix and the honest pros and cons. By the end, the right tool, and the right plan inside it, should be clear.

    Lemlist and Smartlead in plain English: a personalisation studio against a deliverability engine

    Lemlist is a multichannel sales engagement platform that covers the full outbound workflow in one tool: a 650M+ contact database, waterfall enrichment, AI icebreakers, personalised images and videos, and sequences that run email, LinkedIn, calls, SMS and WhatsApp. It suits SDR teams and founders who send fewer, better emails and want every first touch to feel hand-written. The Email plan starts at $69 a month for the whole workspace, with unlimited users.

    Smartlead is an agency-built cold email and deliverability platform with unlimited connected mailboxes, unlimited AI warmup and a central Master Inbox. It suits lead generation agencies and high-volume sales teams who send thousands of emails a month across many domains and want one flat fee instead of per-seat pricing. The Base plan starts at $39 a month on monthly billing, or $32.50 a month on annual billing.

    Both tools cover the same outbound loop at heart. First, you find prospects in the built-in data or bring your own list. Next, you verify and enrich the contacts. Then you enrol them in a sequence and watch their replies arrive in one inbox. Finally, you sync the activity back to your CRM. The loop is the same on both tools, so the choice rests on where each tool is strongest inside it.

    What Lemlist adds on top of email in this Lemlist vs Smartlead comparison

    Above all, Lemlist turns from a sequencer into a personalisation studio through its AI and its visuals. lemAgent builds sequences for you, AI icebreakers write a personal opening line for each prospect, AI Agentic Enrichment fills in the gaps in your data, and Intent Signal Agents watch for buying signals. Personalised images and videos put each prospect’s name and company inside the message itself, so the email reads like a one-off note rather than a broadcast.

    Lemlist also adds channels that Smartlead does not match inside a sequence. LinkedIn visits, invites, chat and voice notes run beside the emails, in-app calling works through Aircall and Ringover, and SMS and WhatsApp steps join the flow. The unified inbox gathers replies from every channel in one place. Our Lemlist review covers the platform in full depth.

    What Smartlead adds on top of email in this Lemlist vs Smartlead comparison

    Meanwhile, Smartlead turns from a sequencer into a deliverability system through its warmup and inbox tools. Warmup runs on its own, and it pulls emails out of spam folders while it builds sender reputation. Dynamic ESP matching keeps Google mail going to Google inboxes and Outlook mail going to Outlook inboxes, which mirrors how real people email. Bounce auto-protection stops sending before a bad list can damage a domain.

    Smartlead also adds agency infrastructure that Lemlist does not match on polish. The Master Inbox gathers every reply from every account into one shared inbox, with AI sentiment categorisation that sorts positive replies from bounces and out-of-office messages. White-label client portals let each client log in under your brand and see their own campaigns. Client workspaces are available from the Pro plan onwards, with three included on Unlimited Prime.

    Smartlead is used by more than 100,000 businesses, according to its own pricing page. That scale matters, because a platform with that many customers has already answered most onboarding questions in its help centre. Our Smartlead review covers the platform in full depth.

    The one-sentence difference in this Lemlist vs Smartlead comparison

    Lemlist is the personalisation studio: AI icebreakers, personalised images and videos, a 650M+ database and five channels in one sequence, priced flat for email and per user for multichannel. Smartlead is the deliverability engine: unlimited mailboxes, AI warmup with spam rescues, dynamic ESP matching and white-label client portals, priced flat per plan. An SDR who writes fifty careful emails a day will feel the difference in week one. An agency that manages ten clients will feel it in the first invoice.

    Neither tool is built for permission-based newsletters, so a team that mostly mails its own subscribers should look at the marketing platforms in our best cold email software guide. For B2B prospecting and outbound, though, this pair remains one of the strongest match-ups in the field.

    Pricing head-to-head in this Lemlist vs Smartlead comparison

    First, pricing is where this Lemlist vs Smartlead comparison gets interesting, because the two price lists work in different ways. Lemlist charges a flat fee for its Email plan, so the bill stays the same whether one person or ten people send from the workspace, then charges per user for Multichannel. Smartlead charges a flat fee on every plan, so the bill stays the same however many people send from the account. One founder working alone and a team of five will reach different conclusions from the same two price lists.

    Every figure below comes from the official pricing pages, checked today, 16 November 2026. Lemlist figures are in US dollars, with monthly billing first and annual billing second. Smartlead figures are in US dollars, with monthly billing first and annual billing second. When a price is not shown on the official page, this Lemlist vs Smartlead comparison says so plainly instead of guessing.

    Lemlist vs Smartlead comparison: a balance scale, one side holding a single flat-rate price tag with a stack of envelopes, the other side holding several smaller price tags, one per seat, with a small robot assistant and a phone
    Pricing in this Lemlist vs Smartlead comparison: Lemlist’s Email plan is flat for the whole workspace, while Multichannel is per user, and Smartlead is flat on every plan.

    Lemlist plans: Email, Multichannel and Enterprise, from $69 a month

    PlanPrice*What you getBest forVisit
    Lemlist — EmailBest for email-only teams$69 a month
    $55 billed yearly, flat
    Unlimited users and senders
    650M+ database, lemAgent, lemwarm
    Teams that only send emailVisit Site →
    Lemlist — MultichannelBest for SDR teams$109 a user a month
    $87 billed yearly
    5 senders per user
    Unlimited emails and messages, LinkedIn, calls, SMS
    Reps who work every channelVisit Site →
    Lemlist — EnterpriseBest for large teamsCustom
    Check the site for a quote
    5+ senders per user
    CRM use, custom roles, dedicated manager, SSO
    Large teams with custom needsVisit Site →

    * Last checked: 16 November 2026 on Lemlist’s pricing page. The Email plan is flat for the whole workspace, with unlimited users and email senders. The Multichannel plan is priced per user. Features and pricing can change, so please check the provider’s site before you buy. We do not guess at features, prices or trials.

    Reading Lemlist’s add-ons in this Lemlist vs Smartlead comparison

    Add-ons are where Lemlist’s real monthly bill takes shape. Lead data enrichment costs $20 a month, or $16 billed yearly, and it pulls emails, phones and other details from more than 25 providers. Buying intent signals cost $29 a month, or $21 billed yearly, and they flag leads the moment they show interest. WhatsApp automation is an add-on on the Multichannel plan, and extra senders above the five per user are charged separately.

    One rule makes Lemlist’s Email plan genuinely useful: it is flat for the whole workspace, with unlimited users and unlimited email senders. A team of ten can share one $69-a-month bill and send email together, which is rare among sequencers. The catch is that LinkedIn, calls and SMS need the Multichannel plan, which is priced per user, so the bill rises with every new rep.

    Smartlead plans: four flat-fee tiers, from $39 to $379 a month

    PlanPrice*What you getBest forVisit
    Smartlead — BaseBest for solo senders$39 a month
    $32.50 billed yearly
    2,000 contacts
    6,000 emails a month, 2,000 verified emails
    A solo sender starting outVisit Site →
    Smartlead — ProBest for growing teams$94 a month
    $78.30 billed yearly
    30,000 contacts
    90,000 emails a month, 30,000 verified emails
    Teams sending real volumeVisit Site →
    Smartlead — Unlimited SmartBest for agencies$174 a month
    $144.50 billed yearly
    Unlimited contacts
    150,000 emails a month, 50,000 verified emails free
    Agencies at serious scaleVisit Site →
    Smartlead — Unlimited PrimeBest for very high volume$379 a month
    $314.60 billed yearly
    Unlimited contacts
    500,000 emails a month, 170,000 verified emails free
    Agencies sending at full tiltVisit Site →

    * Last checked: 16 November 2026 on Smartlead’s pricing page. Smartlead prices are unchanged since our Smartlead vs Saleshandy comparison on the same day. Annual billing saves 17% across all plans. Features and pricing can change, so please check the provider’s site before you buy. We do not guess at features, prices or trials.

    Reading Smartlead’s add-ons in this Lemlist vs Smartlead comparison

    Add-ons are where Smartlead’s real monthly bill takes shape. Verified prospect emails cost $59 a month extra on Base and Pro, and they are free on Unlimited Smart and Unlimited Prime, with 50,000 free on Smart and 170,000 free on Prime. White-label client workspaces cost $29 a month per client on Pro and Smart, while Prime includes three.

    Placement testing through SmartDelivery costs $49 a month on the Growth tier, $174 a month on Pro and $599 a month on the top tier, for more sender accounts per test. Dedicated SmartServers cost $39 per server a month. SmartSenders mailboxes cost $4.50 a month each for fresh mailboxes, or $9 a month for pre-warmed ones, with domains from $13 a year. None of these is hidden, yet a team that needs all of them can double the headline price.

    One honest flag belongs here, because it corrects what earlier articles on this site said. Smartlead’s pricing page lists a Warmup Pool as a $59-a-month add-on on Base and Pro, with the premium pool free from Unlimited Smart upwards, even though its FAQ describes unlimited warmup. Budget for warmup on the cheaper plans rather than assuming it is free, and check the pricing page before you buy.

    Cost at one user, a team of five and agency scale in this Lemlist vs Smartlead comparison

    SetupLemlist, monthly billingSmartlead, monthly billingCheaper pick
    One user, email only$69 a month
    Email plan, flat, unlimited users
    $39 a month
    Base, 6,000 emails a month
    Smartlead, by $30 a month
    One user, multichannel$109 a month
    Multichannel, 5 senders
    $39 a month
    Base, email only, plus SmartDialer
    Smartlead on price, Lemlist on channels
    Team of five, multichannel$545 a month
    5 × $109, Multichannel
    $174 a month
    Unlimited Smart, flat fee
    Smartlead, by $371 a month
    Team of five, email only$69 a month
    Email plan, flat, unlimited users
    $174 a month
    Unlimited Smart, 150,000 emails
    Lemlist, by $105 a month
    Agency scaleCustom
    Enterprise, check the site
    $379 a month
    Unlimited Prime, 500,000 emails
    Smartlead on published price

    Arithmetic is shown plainly so you can check it: 5 × $109 = $545, and 5 × $87 = $435 on annual billing. Lemlist’s Email plan stays at $69 a month for a team of any size, while Smartlead’s plans never charge per user. Last checked: 16 November 2026. Features and pricing can change, so please check the provider’s site before you buy.

    What the price gap means in practice in this Lemlist vs Smartlead comparison

    For example, a solo sender pays $69 a month on Lemlist Email or $39 a month on Smartlead Base, on monthly billing. Lemlist gives that sender unlimited users and senders, a 650M+ database, lemAgent and lemwarm. Smartlead gives that sender 6,000 emails a month, 2,000 verified prospect emails and unlimited mailboxes. The $30 gap is small, yet each tool puts it towards a different strength.

    A five-person team flips the maths hard. Five people on Lemlist Multichannel cost $545 a month, before add-ons, while five people on Smartlead Unlimited Smart still pay $174 a month in total, because the plan never charges per user. Any team planning to hire should work out the per-user sums before signing, because the gap grows with each new seat.

    Annual billing also narrows every gap in the same way. Lemlist drops from $69 to $55 on Email and from $109 to $87 per user on Multichannel. Smartlead drops by 17% on annual billing, from $39 to $32.50 on Base and from $174 to $144.50 on Unlimited Smart. Neither tool penalises annual billing, so a team that is sure of its choice should pay yearly and keep the saving.

    Trying before you buy in this Lemlist vs Smartlead comparison: a 14-day trial against a no-card trial

    Most importantly, the trial gap is the friendliest difference of all, because both tools let you test before you pay. Lemlist offers a 14-day free trial with access to the Multichannel plan’s features, except in-app calls, plus 200 free credits to find emails and phone numbers and explore buying signals, according to its own pricing page. You can try lemAgent with your own data before upgrading.

    Smartlead offers a free trial with no credit card required to get started, according to its own pricing FAQ. You can connect mailboxes, build a campaign and run a real sequence before paying anything. There is no free plan on either tool, so the trial is your only free test on both. If a 200-credit test with lemAgent matters most, Lemlist’s trial is the stronger offer. If a no-card trial matters most, Smartlead answers the question at once.

    Data and databases: a 650M+ database against counted verified emails

    Next, data is the clearest difference in this Lemlist vs Smartlead comparison, and Lemlist wins it on breadth. Lemlist bundles a searchable 650M+ B2B database with firmographic and intent filters, an email and phone finder, and waterfall enrichment across more than 25 providers. Smartlead sells verified prospect emails as a counted allowance instead, with 2,000 a month on Base and 170,000 free a month on Unlimited Prime.

    Nevertheless, size alone does not win deals, though. A database only earns its price when it holds the exact people you sell to, with details that still check out when you put them to work. Lemlist’s database suits teams that prospect in broad markets and want list building inside the same login. Smartlead’s verified email allowance suits teams that already know their list and want each address checked before sending. Our best B2B data providers guide places both tools beside the dedicated data specialists.

    Lemlist data in this Lemlist vs Smartlead comparison: a 650M+ database with waterfall enrichment

    In particular, Lemlist treats data as part of the platform. The 650M+ database covers leads with firmographic and intent filters, so you can find contacts that match your ideal customer profile without buying a separate data tool. The email finder and verifier, plus the phone finder, pull contact details while you work, and waterfall enrichment checks more than 25 providers in turn until it finds a working address.

    What is more, Lemlist pairs that database with AI enrichment that keeps the list fresh. AI Agentic Enrichment fills in missing details, Intent Signal Agents watch for buying signals, and buying intent signals are available as a $29-a-month add-on. Lead data enrichment costs $20 a month on top of the plan. A team that prospects inside Lemlist every day will feel at home, because the list, the enrichment and the sequence live in one login.

    Smartlead data in this Lemlist vs Smartlead comparison: counted verified emails, not a searchable database

    In contrast, Smartlead treats data as a sending input, not a prospecting product. Each plan includes a monthly allowance of verified prospect emails: 2,000 on Base, 30,000 on Pro, 50,000 free on Unlimited Smart and 170,000 free on Unlimited Prime. Extra verified emails cost $59 a month on Base and Pro. Email verification itself is available as a value-added add-on across all plans, with credits bought one-off or monthly.

    At the same time, Smartlead pairs that allowance with strong integrations for teams that bring their own data. It connects with HubSpot, Salesforce, Pipedrive, Clay and Listkit, according to its own site, plus an API and webhooks for custom workflows. A team that already runs Clay or a data provider will feel at home, because Smartlead takes the list and does the sending.

    Accuracy: test both tools on your own list in this Lemlist vs Smartlead comparison

    In any case, one honest warning applies to both tools here. No vendor publishes an independent accuracy audit, so treat every accuracy claim as a vendor claim. The honest test is your own list, so take 100 real prospects from your market, run them through both tools, and count how many emails bounce. Coverage that looks deep across the United States can run thin inside a narrow niche.

    List quality shapes reply rates more than any clever subject line can. Five hundred verified ideal customers beat ten thousand careless contacts, every single time. A tool that helps you build a careful list earns its fee, while one that leaves list building to you calls for a separate data budget. Keep that in mind through the rest of this Lemlist vs Smartlead comparison.

    Multichannel comparison: five channels in one sequence against email-first sending

    Then, multichannel is the sharpest difference in this Lemlist vs Smartlead comparison, and Lemlist wins it outright. Lemlist runs email, LinkedIn, calls, SMS and WhatsApp steps inside one sequence, with LinkedIn automation built in. Smartlead is email-first: its sequences send email, and calling comes through the SmartDialer add-on.

    That split decides the whole purchase for many teams. A rep who spends the morning on LinkedIn needs those touches to run inside the sequence, tracked beside the emails. A rep who phones all morning needs the dialler inside the same tool that runs the sequences. Each buyer has a point, so choose the tool that matches how you actually sell.

    Lemlist channels in this Lemlist vs Smartlead comparison: email, LinkedIn, calls, SMS and WhatsApp

    Specifically, Lemlist’s sequences are built for every channel at once. Email steps sit beside LinkedIn visits, invites, chat and voice notes, in-app calling through Aircall and Ringover, SMS automation and WhatsApp steps, with conditional branching that reacts to what the prospect did before. When a lead opens your email three times without replying, the next step can be a LinkedIn visit. Once they accept your connection request, the next step can be a short personal message there. That flow is the whole product.

    Moreover, Lemlist’s Chrome extension lets you work from Gmail and LinkedIn without leaving the page you are on. Replies from every channel land in one unified inbox, so nothing slips through the cracks. A rep who lives on LinkedIn and the phone will feel at home here from day one.

    Video: How ElevenLabs cuts SDR manual work with lemlist AI agents by lemlist on YouTube. This video is the creator’s property, embedded via YouTube for education. OutreachCompare is not affiliated with lemlist and does not claim ownership of this video.

    Smartlead channels in this Lemlist vs Smartlead comparison: email sequences, Master Inbox and a dialler add-on

    However, Smartlead’s sequences are built for email at volume. Conditional subsequences react to what a prospect did before, spintax keeps the wording fresh across a large list, and AI reply sentiment categorisation sorts positive replies from bounces and out-of-office messages in the Master Inbox. Sending runs across unlimited mailboxes with inbox rotation and dynamic ESP matching.

    Calling is available through SmartDialer, an add-on that covers everything you need with credit volumes chosen to fit your team. Smartlead’s own site describes SmartDialer as a value-added feature rather than a core plan feature. A team that calls every day should budget for it separately, not assume it comes with the plan.

    Video: I Sent 1M+ Cold Emails, here’s what gets replies | Cold to Close : Episode 7 by Smartlead on YouTube. This video is the creator’s property, embedded via YouTube for education. OutreachCompare is not affiliated with Smartlead and does not claim ownership of this video.

    AI in this Lemlist vs Smartlead comparison: lemAgent against AI reply handling

    All in all, AI is the feature that makes this Lemlist vs Smartlead comparison unlike any other head-to-head on the site. lemAgent is Lemlist’s AI sequence builder, and it writes sequences, icebreakers and enrichment for you, with AI Agentic Enrichment and Intent Signal Agents beside it. It also generates AI icebreakers, personalised first-step emails and an AI-generated ideal customer profile. These tools are genuinely useful, yet they carry a caveat: AI writing still needs a human eye. The best results come when a rep reviews the drafts, checks the personalisation and keeps the tone close to how the team actually talks.

    Smartlead answers lemAgent with its own AI, though the two are not the same thing. Smartlead’s AI reply assistant detects intent and drafts replies, and its AI sentiment categorisation sorts the Master Inbox. That saves hours a week on reply handling. It does not build whole sequences, write icebreakers or enrich leads on its own. A team that wants AI to write the outreach should pick Lemlist. A team that wants AI reply handling inside an email-first platform should pick Smartlead.

    Personalisation in this Lemlist vs Smartlead comparison: images and videos against spintax

    Both tools personalise well, yet they personalise in different places. Lemlist personalises through AI icebreakers, text variables, spintax, and personalised images and videos that put each prospect’s name and company inside the message, which suits a team that wants every first touch to feel written for one person alone. Smartlead personalises through spintax, dynamic variables and AI reply handling, which is enough for a rep who writes short, relevant messages at volume.

    Each style can earn replies, and the right one depends on who opens the message. A prospect swamped by plain emails might pause at a note that names their latest hire or the tools their company already runs. Someone tired of templated mail might answer a short, well-written plain note instead. Test each style on 25 prospects before committing to one tool.

    Deliverability and warmup: lemwarm against unlimited AI warmup with spam rescues

    Ultimately, deliverability decides whether any of this matters, because an email that lands in spam earns no replies. Warmup is included on Lemlist’s plans through lemwarm, and every plan includes unlimited AI warmup on Smartlead, with spam rescues beside it. That matters for teams connecting many inboxes at once.

    At heart, warmup works the same way on both tools. New mailboxes swap mail with a network of real inboxes, so providers learn to trust the new domain before real sending starts. Opens, replies and spam-folder checks build sender reputation gradually, one step at a time. Warmup supports a healthy setup, yet it cannot rescue a purchased list, a misleading subject line or a domain without authentication. Set up a separate sending domain, add its SPF, DKIM and DMARC records, and give warmup two to four weeks before real volume. Our sending-domain guide walks you through the records one at a time.

    Lemlist vs Smartlead comparison: a large envelope flying into an inbox tray protected by a teal shield with a checkmark, a warmup gauge rising beside it, and a spam folder pushed aside
    Deliverability in this Lemlist vs Smartlead comparison: lemwarm on every Lemlist plan, and AI warmup with spam rescues on Smartlead, both need two to four weeks before real volume.

    Lemlist warmup in this Lemlist vs Smartlead comparison: lemwarm and the deliverability hub

    For instance, Lemlist’s warmup is built into every plan through lemwarm, with a deliverability hub beside it. Lemwarm warms your mailboxes automatically, inbox rotation spreads each campaign across your connected senders instead of pounding one address, timezone sending puts each email in the prospect’s working hours, and pre-send checks catch mistakes before they go out. A/B testing shows which subject line and angle earns more replies.

    On top of that, Lemlist adds built-in deliverability protections on all plans, according to its own pricing page, to help keep your emails out of spam and protect your sender reputation at any scale. The Multichannel plan adds five senders per user, with extra senders charged separately, so a team that wants many inboxes should budget for them. Together, lemwarm, rotation and pre-send checks form a solid deliverability suite in this Lemlist vs Smartlead comparison.

    Smartlead warmup in this Lemlist vs Smartlead comparison: unlimited AI warmup with spam rescues

    Similarly, Smartlead’s warmup is the deepest in this Lemlist vs Smartlead comparison. It runs on its own, warms unlimited mailboxes, and pulls emails out of spam folders while it builds sender reputation. That spam-rescue behaviour is the feature agencies talk about most, because a rescued email is a reply that would otherwise never arrive.

    Second, Smartlead adds dynamic ESP matching, bounce auto-protection and inbox rotation to protect your sender reputation. Rotation spreads each campaign across your connected mailboxes instead of pounding one address. Verification checks each address before sending, which holds bounce rates down. SmartDelivery placement tests add inbox placement data before a campaign, from $49 a month. Together they form the strongest deliverability suite in this Lemlist vs Smartlead comparison.

    Which warmup setup wins in this Lemlist vs Smartlead comparison

    Generally, for a team that warms many mailboxes and wants spam rescues and placement tests, Smartlead wins on depth, with unlimited AI warmup and SmartDelivery. For a team that warms a few mailboxes and wants warmup beside multichannel sequences in one login, Lemlist wins on convenience, with lemwarm, rotation and pre-send checks in the same subscription. Remember the flag from the pricing section: Smartlead’s Warmup Pool is a $59-a-month add-on on Base and Pro, with the premium pool free from Unlimited Smart, so warmup on the cheaper Smartlead plans is not free.

    Both tools agree on the basics, and both are right. Warm new domains for two to four weeks, start at low volume, and lift the daily send limit a little at a time. Our best email deliverability tools guide lays out the dedicated deliverability suites if a specialist tool appeals instead.

    Ease of use, integrations and support

    Both tools are built for people who prospect daily, yet each one feels different from the first login. Lemlist is the friendlier of the two to learn, because the visual sequence builder shows the whole campaign at a glance, while the 14-day trial gives you time to learn it. Smartlead is the more technical of the two to start, because mailbox setup, warmup pools and client workspaces reward a careful setup, while the free trial gives you time to learn them. Either account can go from signup to a live campaign in a single working day.

    Either tool suits a newcomer, yet reading our beginners guide to cold email first and spending a week learning the dashboard makes the first month far easier. Lemlist rewards a team that already knows its ideal customer profile and wants every touch to feel personal. Smartlead rewards a team that wants to send at volume from many mailboxes with as little per-seat cost as possible.

    Onboarding in this Lemlist vs Smartlead comparison: a 200-credit trial against a no-card trial

    Lemlist onboards by trial with credits. The 14-day free trial gives you access to the Multichannel plan’s features, except in-app calls, plus 200 free credits to find emails and phone numbers, explore buying signals and try lemAgent with your own data. When the trial ends, the account moves to a paid plan, so set a reminder to check your sending volume before your first big campaign.

    Smartlead onboards by letting you in without a card. The free trial needs no credit card to get started, according to its own pricing FAQ, so a team can connect mailboxes, build a campaign and test a sequence before paying anything. When the trial ends, the account moves to a paid plan, so set a reminder to check your sending volume before your first big campaign.

    Support in this Lemlist vs Smartlead comparison: dedicated help on the top tiers

    Similarly, support follows the same pattern as the rest of the comparison. Lemlist includes a dedicated account manager, custom terms and priority support on its Enterprise plan, beside advanced login security. Smartlead includes a dedicated manager and a private Slack channel on its higher plans, beside API and webhook access. Judge support on the tier you would actually pay for, rather than the one the sales page shows.

    Both tools also publish large knowledge bases and help centres, and each one answers support tickets for paying customers. When you need a human at midnight, the tier you pay for matters more than the brand. One person on the cheapest tier should expect ticket or chat help, while a large team on a top tier can expect a named contact.

    Integrations in this Lemlist vs Smartlead comparison: CRM sync on both tools, with different depth

    Finally, each tool syncs with HubSpot and Salesforce, and each offers a way to connect other apps. Lemlist adds native HubSpot and Salesforce sync, Zapier, an API, an MCP server and a CLI, plus a Chrome extension for Gmail and LinkedIn. That depth suits a team whose data stack is the centre of its sales operation.

    Smartlead adds integrations with Pipedrive, Clay and Listkit, plus an API and webhooks for custom workflows. For a team already running HubSpot or Salesforce, either tool slots into the stack cleanly. A team that automates through the API on a mid-tier plan will find Lemlist’s MCP and CLI the stronger offer. A team that wants Clay and Listkit beside its sequencer will find Smartlead’s the stronger offer.

    Feature matrix: Lemlist vs Smartlead side by side

    In summary, this Lemlist vs Smartlead comparison puts every claim in one place. Every row in the matrix below was checked on both official sites today, 16 November 2026. A tick means the provider states the feature on its own site, with any plan limits noted beside it. A dash means we could not confirm the feature, or the provider confirms it is absent. Read the matrix with your own priorities in front of you, because no single tool wins every row.

    Pricing, data and buying in this Lemlist vs Smartlead comparison

    FeatureLemlistSmartlead
    Entry price, monthly$69 a month
    Email, flat for the workspace
    $39 a month
    Base, flat fee
    Entry price, annual$55 a month
    Billed yearly
    $32.50 a month
    Billed yearly, saves 17%
    Pricing modelFlat for Email
    Per user for Multichannel
    Flat fee per plan
    No per-user charge
    Monthly email volume, top planUnlimited emails
    Multichannel, per user
    500,000 emails
    Unlimited Prime
    Searchable contact database✓
    650M+ leads, firmographic and intent filters
    —
    Verified emails as an allowance
    Verified prospect emails included✓
    Finder and verifier, credits
    ✓
    2,000 to 170,000 a month by plan
    Free email verification✓
    Email finder and verifier included
    ✓
    Add-on, credits one-off or monthly
    Free plan—
    No free plan shown
    —
    No free plan shown
    Free trial✓
    14 days, 200 credits, Multichannel features
    ✓
    Free trial, no card required
    Unlimited mailboxes, entry plan✓
    Unlimited senders on Email plan
    ✓
    Every plan, no extra cost

    Last checked: 16 November 2026 on Lemlist’s pricing page and Smartlead’s pricing page. Features and pricing can change, so please check the provider’s site before you buy.

    Channels, warmup and deliverability in this Lemlist vs Smartlead comparison

    FeatureLemlistSmartlead
    Email sequences✓
    Conditional steps, A/B testing
    ✓
    Conditional subsequences, spintax
    LinkedIn steps in sequences✓
    Visits, invites, chat, voice notes
    —
    Not listed as sequence steps
    Calling steps in sequences✓
    In-app dialler, Aircall and Ringover
    ✓
    SmartDialer add-on
    SMS steps in sequences✓
    SMS automation, Multichannel plan
    —
    Not listed on the pricing page
    WhatsApp steps in sequences✓
    WhatsApp automation add-on
    —
    Not listed on the pricing page
    AI sequence builder✓
    lemAgent, AI icebreakers, enrichment
    —
    AI reply handling only
    Automated warmup✓
    lemwarm, every plan
    ✓
    Unlimited AI warmup, spam rescues
    Inbox rotation✓
    Every plan
    ✓
    Every plan
    Placement testing—
    Deliverability hub instead
    ✓
    SmartDelivery, from $49 a month
    AI personalisation✓
    Icebreakers, images, videos, spintax
    ✓
    AI reply handling, spintax

    Integrations, support and agency tools in this Lemlist vs Smartlead comparison

    FeatureLemlistSmartlead
    Unified reply inbox✓
    Unified inbox, every channel
    ✓
    Master Inbox, AI sentiment sorting
    CRM sync (Salesforce, HubSpot)✓
    HubSpot, Salesforce, Zapier
    ✓
    HubSpot, Salesforce, Pipedrive
    API access✓
    API, MCP, CLI
    ✓
    API and webhooks
    White-label client portals—
    Not listed on the pricing page
    ✓
    $29 a month per client, Prime includes 3
    Client workspaces—
    Not listed on the pricing page
    ✓
    From Pro plan onwards
    Chrome extension✓
    Use from Gmail and LinkedIn
    —
    Not listed on the pricing page
    Dedicated support✓
    Dedicated manager, Enterprise plan
    ✓
    Dedicated manager, private Slack

    Last checked: 16 November 2026 on Lemlist’s pricing page and Smartlead’s pricing page. Features and pricing can change, so please check the provider’s site before you buy. We do not guess at features, prices or trials.

    What the matrix means for your shortlist in this Lemlist vs Smartlead comparison

    Read the matrix with your own priorities in mind. Lemlist wins the database, channel and AI rows outright, because a 650M+ database, five channels in one sequence and lemAgent have no Smartlead equivalent. Smartlead wins the entry price, volume and placement-testing rows outright, because a $39 flat fee, 500,000 emails a month and SmartDelivery have no Lemlist equivalent. Deliverability is a split: Lemlist sells lemwarm beside rotation and pre-send checks, while Smartlead sells unlimited AI warmup with spam rescues beside rotation and verification.

    The matrix also shows why the entry price can mislead. Smartlead at $39 a month looks cheaper than Lemlist Email at $69, yet Lemlist covers unlimited users and senders for that $69, while Smartlead caps Base at 6,000 sends. Lemlist Multichannel at $109 per user a month looks dearer than Smartlead Pro at $94, yet it includes LinkedIn automation, calls and SMS. The fair comparison is the full monthly cost of the setup you would actually run, with add-ons included.

    Pros and cons: the honest case for each tool

    Naturally, every tool has trade-offs, and an honest Lemlist vs Smartlead comparison names them plainly. The strengths below show why each tool keeps winning customers over. The weaknesses explain why some teams still pick the rival.

    Lemlist strengths in this Lemlist vs Smartlead comparison

    Most importantly, personalisation tops the list. AI icebreakers, personalised images and videos, lemAgent and a 650M+ database turn every first touch into a note that feels written for one person alone. The flat Email plan is the second strength: one $69-a-month bill covers unlimited users and senders, which is rare among sequencers.

    Next, the channels are the third strength. Email, LinkedIn, calls, SMS and WhatsApp run inside one sequence, with replies from every channel landing in one unified inbox. Lemwarm and the deliverability hub keep the mail landing in the inbox, and the 14-day trial with 200 credits makes it easy to prove the value with a real campaign before you pay.

    Lemlist weaknesses in this Lemlist vs Smartlead comparison

    Nevertheless, per-user pricing is the clearest weakness. Multichannel at $109 per user a month means five seats cost $545 a month before add-ons, which is far more than Smartlead for a similar team. A fast-growing team should run the per-user sums first.

    Counted senders are another watch point. The Multichannel plan includes five senders per user, and extra senders cost more, so a team that wants many inboxes should budget for them. WhatsApp is an add-on, not a core plan feature, and the platform has a real learning curve, so new users should expect to spend time learning the sequence builder, the database and the inbox before everything feels natural.

    Smartlead strengths in this Lemlist vs Smartlead comparison

    Simplicity tops the list for high-volume teams. Unlimited mailboxes, unlimited AI warmup with spam rescues, dynamic ESP matching and bounce auto-protection sit in one subscription, with the top plan sending 500,000 emails a month. The flat-fee pricing is the second strength: one $174-a-month bill covers unlimited contacts, 150,000 emails a month and 50,000 verified emails free, with no per-user charge.

    In addition, the agency tools are the third strength. The Master Inbox gathers every reply into one shared inbox, with AI sentiment categorisation that sorts positive replies from bounces and out-of-office messages, and white-label client portals let each client log in under your brand. The free trial needs no credit card, so a team can test a real sequence before paying anything.

    Smartlead weaknesses in this Lemlist vs Smartlead comparison

    Still, multichannel is the clearest weakness. Sequences are email-first, with calling through the SmartDialer add-on, and LinkedIn, SMS and WhatsApp steps do not run inside a sequence the way they do on Lemlist. A team that wants every prospect to hear from it in two or three places should look at Lemlist’s Multichannel plan instead.

    Counted allowances are another watch point. Base caps sends at 6,000 a month and verified emails at 2,000, and extra verified emails cost $59 a month. The Warmup Pool is a $59-a-month add-on on Base and Pro, with the premium pool free only from Unlimited Smart, so warmup on the cheaper plans is not free. White-label client workspaces cost $29 a month per client on Pro and Smart, so five clients add $145 a month to the bill.

    Who should pick which: a short decision guide

    In the end, a decision guide is only useful when it names real buyers, so this Lemlist vs Smartlead comparison ends the debate with five of them. Spot the buyer who sounds most like you, and the answer follows from there. When two buyers both sound like you, start with the cheaper trial and let a month of real outreach settle it.

    Lemlist vs Smartlead comparison: a buyer at a fork in the road holding a small compass, one signpost pointing towards a stack of envelopes and a shield, the other towards a robot assistant with a phone and chat bubbles
    The decision in this Lemlist vs Smartlead comparison: a fork in the road, with one path for personalised multichannel outreach and one path for deliverability at scale.

    Pick Lemlist when personalised outreach comes first

    Choose Lemlist when your team sends fewer, better emails and wants every first touch to feel written for one person alone. The Email plan at $69 a month covers a whole team with unlimited users and senders, and Multichannel at $109 per user a month adds LinkedIn automation, calls, SMS and WhatsApp. Start with the 14-day trial, build a list of fifty to two hundred verified prospects, and send your first sequence before you scale.

    Indeed, Lemlist also fits an SDR team that lives on LinkedIn and the phone. The 650M+ database finds the prospects, the sequence reaches them on every channel, and lemAgent writes the first drafts. A team that wants AI to write the outreach will feel at home here.

    Pick Smartlead when deliverability at scale comes first

    Choose Smartlead when your team sends to defined lists and wants unlimited mailboxes, AI warmup with spam rescues and white-label client portals on a flat fee. The Base plan at $39 a month covers a solo sender with 6,000 emails a month, and Unlimited Smart at $174 covers an agency with 150,000 emails a month and 50,000 verified emails free. Start with the free trial, build a list of fifty to two hundred verified prospects, and send your first sequence before you scale.

    Likewise, Smartlead also fits a lead generation agency that hates paying per seat. One flat fee replaces a separate warmup tool, a separate placement tester and a separate client portal, and the Master Inbox keeps every reply in one place. An agency that manages ten clients will feel at home here.

    Three questions that settle this Lemlist vs Smartlead comparison

    Run through three checks. Do you need personalised images, videos and LinkedIn steps in one sequence, or do you need unlimited mailboxes and white-label client portals on a flat fee? Would you rather pay per user for multichannel depth, or pay per plan for sending volume? Do your prospects answer a personal note first, or do they answer sheer volume first?

    When personalised multichannel outreach matters, pick Lemlist. If deliverability at scale and agency work matter, pick Smartlead. For a team of five or more that only sends email, pick Lemlist Email, because $69 a month covers everyone. If two answers pull in different directions, start with the tool that fixes your biggest pain today, because switching sequencers later beats switching after a year of campaigns.

    Frequently asked questions in this Lemlist vs Smartlead comparison

    Which is cheaper, Lemlist or Smartlead?

    Overall, it depends on your team size and your channels. A solo sender pays $69 a month on Lemlist Email or $39 a month on Smartlead Base, on monthly billing, so Smartlead is cheaper for one person. A five-person team sending email only pays $69 a month on Lemlist Email, because the plan is flat for the whole workspace, while Smartlead Unlimited Smart costs $174, so Lemlist is cheaper there. A five-person multichannel team pays $545 a month on Lemlist Multichannel, while Smartlead Unlimited Smart costs $174, so Smartlead is far cheaper there. All figures were checked on 16 November 2026.

    Which has better warmup, Lemlist or Smartlead?

    Both include warmup, yet they scale differently. Lemlist includes lemwarm and built-in deliverability protections on every plan, beside inbox rotation, timezone sending and pre-send checks. Smartlead includes unlimited AI warmup with spam rescues, beside dynamic ESP matching, bounce auto-protection and SmartDelivery placement tests. Note that Smartlead’s Warmup Pool is a $59-a-month add-on on Base and Pro, with the premium pool free from Unlimited Smart. Warm either way for two to four weeks before real volume.

    Which is better for LinkedIn outreach, Lemlist or Smartlead?

    Lemlist is better for LinkedIn outreach by a clear margin. Its Multichannel plan automates LinkedIn visits, connection requests, messages, chat and voice notes inside the sequence. Smartlead is email-first, with calling through the SmartDialer add-on, and it does not run LinkedIn steps inside a sequence. If LinkedIn is the heart of your outbound, pick Lemlist.

    Does Lemlist have a free trial?

    Yes. Lemlist offers a 14-day free trial with access to the Multichannel plan’s features, except in-app calls, plus 200 free credits to find emails and phone numbers and explore buying signals. Smartlead offers a free trial with no credit card required to get started. Neither tool offers a free plan, so the trial is your only free test on both.

    Should I buy Lemlist or Smartlead for an agency?

    It depends on what the agency sells. An agency that wants unlimited mailboxes, AI warmup with spam rescues and white-label client portals on a flat fee should pick Smartlead, because its agency infrastructure is built for exactly that workload. An agency that wants personalised multichannel campaigns with a 650M+ database should pick Lemlist, because lemAgent, personalised images and LinkedIn steps replace three subscriptions. Read our best cold email tools for agencies guide if a first tool is still undecided.

    Is Lemlist or Smartlead better for high-volume sending?

    Smartlead is better for high-volume sending by a clear margin. Its top plan sends 500,000 emails a month on a flat $379 fee, with unlimited mailboxes and AI warmup with spam rescues. Lemlist’s Multichannel plan is priced per user, so volume costs more as the team grows, though its flat Email plan at $69 a month suits a team that sends email only. Read our best cold email tools for high volume guide for the full ranking.

    The verdict in this Lemlist vs Smartlead comparison

    Verdict: Lemlist for personalised multichannel outreach, Smartlead for deliverability at scale

    Lemlist is the pick when you want every first touch to feel written for one person alone. AI icebreakers, personalised images and videos, a 650M+ database and five channels in one sequence sit in one subscription, with the flat Email plan at $69 a month for the whole workspace. Smartlead is the pick when you want deliverability at scale on a flat fee. Unlimited mailboxes, unlimited AI warmup with spam rescues, dynamic ESP matching and white-label client portals sit in one subscription, with the top plan sending 500,000 emails a month.

    Buy for the team you have today, rather than the one you hope to hire next year. A solo sender should start on Smartlead Base, because $39 a month buys unlimited mailboxes and AI warmup with spam rescues. A team of five that only sends email should start on Lemlist Email, because $69 a month covers everyone. A team that lives on LinkedIn should start on Lemlist’s 14-day trial, because Smartlead’s sequences are email-first. Whichever you pick, set up a separate sending domain, warm it for two to four weeks, and test it on 25 prospects before scaling.

    We have not run hands-on deliverability or reply-rate tests on Lemlist or Smartlead, so this Lemlist vs Smartlead comparison gives no numeric score. The verdict rests on verified pricing, verified warmup claims and documented channel lists, all checked on 16 November 2026. Try Lemlist free for 14 days, or start Smartlead’s free trial, and let a month of real outreach confirm the choice.

    Visit Lemlist →Check Smartlead →

    Keep reading

    Lemlist vs SmartleadLemlist from $69/mo · Smartlead from $39/mo Visit Lemlist →
  • How to Warm Up a New Email Domain 2026

    How to Warm Up a New Email Domain 2026

    A new domain is a stranger to every inbox. Warmup is how it earns a reputation.

    You bought a fresh sending domain, set up three mailboxes, wrote a good first email, and sent it to 200 prospects on day one. By day three, almost everything is landing in spam. Nothing about the email was wrong. The domain was simply too new, too loud, and too unknown for Gmail and Outlook to trust. Mailbox providers treat a brand-new domain the way you would treat a stranger who knocks on your door and immediately asks for money: with suspicion. This how to warm up email domain guide shows you the patient way in. First comes the setup to finish, then the 2 to 4 week schedule, day by day. After that come the tools that automate the work, the numbers that tell you when you are ready, and the recovery steps if things stall.

    Visit Instantly →See Warmforge →Try QuickMail →

    Prices and features in this guide were checked 16 November 2026. Features and pricing can change, so please check the provider’s site before you buy.

    Quick Answer

    Warm up a new email domain for 2 to 4 weeks before you send cold email. Start at 5 to 10 warmup emails per mailbox per day, and ramp slowly to 25 to 30 real sends per mailbox per day. Set up a separate sending domain with SPF, DKIM and DMARC first. Let the domain age 7 to 14 days. Then let a warmup tool exchange real-looking emails with a pool of real inboxes that open, reply and rescue your messages from spam. You are ready to send when your inbox placement is healthy, your spam rate is under 0.1%, and your Warmforge Heat Score is 85 or higher.

    Warmup is not a trick, and it is not optional. It is the normal, widely used way every serious cold email sender introduces a new domain to the mailbox providers. A domain that is warmed properly earns the inbox. A domain that is blasted from day one earns the spam folder, and sometimes earns it permanently.

    How to warm up email domain: the patient path to the inbox

    At its simplest, warming up a new email domain means sending a small number of emails each day. Increase the volume slowly over two to four weeks, so Gmail, Outlook and Yahoo learn that your domain is a real sender with real readers. The emails go to a network of real inboxes. Those inboxes open them, reply to them, mark them as important, and rescue them from the spam folder if they land there. Every open, reply and rescue is a positive signal, and those signals build the reputation that decides whether your first real campaign lands in the inbox or in spam.

    Cold email is normal, widely used business practice, and warmup is the quiet, unglamorous part of it that makes everything else work. For example, our Cold Email for Beginners guide covers the foundations, and our guide to setting up a sending domain covers the technical setup. This guide takes the next step: it turns that setup into a reputation, week by week, with a schedule you can follow, tools you can compare, and numbers you can check.

    How to warm up email domain: how this guide is organised

    This guide follows the life of a new domain. Firstly, it starts with what warmup is and why a cold domain lands in spam, then walks through the setup checklist that must be finished before warmup begins. After that comes the schedule itself, day by day and week by week. Then come the eight tools compared on price and features, the signals that tell you warmup is working, and the recovery steps if it stalls. Finally, the guide covers ongoing warmup and a decision framework that matches the approach to your budget. By the end, you will know exactly what to do tomorrow morning.

    What warmup is, and why a cold domain lands in spam

    A new domain has no reputation at all. That is the whole problem, and it is easy to misunderstand. Mailbox providers do not know whether your domain belongs to a real business or to a spammer who registered it an hour ago, because from the outside the two look identical. Both have fresh DNS records, both have empty sending histories, and both want to send email to strangers. The provider has to decide, and it decides cautiously, because the cost of letting a spammer through is angry users, while the cost of delaying a real sender is small. So it watches. It watches how much you send, who opens it, who replies, who marks it as spam, and whether your sending looks like a human or like a machine.

    Warmup is how you pass that test. For example, a warmed domain sends a few emails a day at first, and those emails are opened and replied to, because the warmup pool is made of real inboxes whose owners open and reply on purpose. In addition, the provider sees a new sender whose mail is welcomed, and it raises the domain’s reputation a little. The next day you send a few more, they are welcomed again, and the reputation rises again. After two to four weeks of this, the provider has enough evidence to trust you with real volume. Skip the process and send 200 emails on day one, and the provider sees a brand-new domain blasting strangers, which is exactly what spammers do, so it sends you to spam. The email was fine. The introduction was not.

    How to warm up email domain: domain reputation, in plain words

    Domain reputation is the score mailbox providers keep for your sending domain, built from everything they have seen you do. In fact, a high reputation means your mail reaches the inbox. A low reputation means it reaches spam, or it is rejected outright. The reputation is built from open rates, reply rates, spam complaints, bounce rates, and the simple fact of how long the domain has been sending sensibly. A domain that has sent small, welcomed volumes for a month has a reputation. A domain that registered yesterday and sent 500 emails this morning does not, and no amount of good writing can fix that on day one.

    There is a second reputation that matters too: the reputation of the individual mailbox. Similarly, each mailbox on your domain, like alex@getyourcompany.com, builds its own history alongside the domain’s. That is why warmup tools warm each mailbox separately, and why you should warm every mailbox you plan to send from, not just one of them. A warmed domain with a cold mailbox still sends cold mail. Warm both, and the whole setup earns trust together.

    How to warm up email domain: warmup vs IP warmup

    You may also hear the phrase IP warmup, and it is worth knowing the difference. IP warmup is about the sending server’s address: when a new dedicated IP starts sending, its reputation must also be built gradually. Most cold email tools today send from shared IP pools that are already warm, so the IP is not your problem. Your domain is the only variable that counts, because it is the one thing that is brand new. If you run your own servers, as Do You Mail customers do, the IP matters too, and the same slow-ramp logic applies to it. For most senders, though, domain warmup is the job, and IP warmup is something the tool has already handled.

    How to warm up email domain: what warmup cannot fix

    Warmup is powerful, and it is not magic. For example, it cannot rescue a domain that has already been burned by weeks of spam complaints, and it cannot make a bad list deliverable. If your list bounces at 6%, warmup will not save you, because bounced emails cannot open or reply, and the provider reads the bounces as evidence that you send to people who do not want your mail. Similarly, warmup cannot fix missing authentication, a domain with no SPF, DKIM or DMARC will struggle whatever you do, and it cannot fix content that reads like spam. Warmup builds the reputation. The list, the authentication and the writing have to be sound first, and the setup section below makes sure they are.

    Before warmup starts: the setup checklist

    Warmup works only when the groundwork is done, and the groundwork takes an afternoon. Moreover, rushing into warmup with a half-finished setup is the most common beginner mistake, because warmup on top of broken authentication builds a reputation for a domain that still looks broken. Do these six steps first, in order, and warmup will have something solid to build on.

    How to warm up email domain: buy a separate sending domain

    Never send cold email from your main company domain. Buy a separate sending domain, a close cousin of your main one, like getyourcompany.com if your main domain is yourcompany.com, or yourcompanyemail.com. The reason is simple and serious: if the sending domain’s reputation takes a hit, your main domain, the one your customers email, your invoices come from, and your team relies on, stays safe. In fact, a sending domain costs about $14 a year, which is the cheapest insurance in cold email. Mailforge sells .com domains at $14 a year, and most registrars charge a similar figure. Register it, then leave it alone for 7 to 14 days before you send anything from it, because a domain that has existed for two weeks looks far more real to a mailbox provider than one registered yesterday.

    While the domain ages, set up two or three mailboxes on it, not one. Three mailboxes let you spread your daily volume, so each mailbox sends 25 to 30 emails a day instead of one mailbox sending 90, and that spread looks far more human. Connect at least two inboxes per domain, and warm every mailbox you plan to send from. Our sending domain guide walks through the mailbox setup in detail, and the same rule applies here: spread the load, warm them all.

    Video: How to Warm Up a New Domain Before Cold Email (4 Steps) by CleanSignups on YouTube. This video is the creator’s property, embedded via YouTube for education. OutreachCompare is not affiliated with CleanSignups and does not claim ownership of this video.

    How to warm up email domain: authenticate with SPF, DKIM and DMARC

    Authentication is the proof that your domain really sent the email. Firstly, SPF lists the servers allowed to send for your domain. DKIM adds a cryptographic signature that proves the email was not altered in transit. DMARC tells mailbox providers what to do when an email fails those checks, and it gives you reports about who is sending as you. Set all three up before warmup begins, and test them with a free checker until they all pass. Google and Yahoo made SPF, DKIM and DMARC effectively required for bulk senders in February 2024, and Gmail tightened enforcement further in November 2025, issuing temporary and permanent rejections for senders who do not comply. A domain without them will struggle in warmup, and it will struggle worse in production.

    Set DMARC to p=none while you warm up, so you can read the reports without mail being rejected, and move to p=quarantine or p=reject once the reports show everything passing. Check the records again after a week, because DNS changes can take time to spread, and a record that looks right in your registrar may not yet be visible to Gmail. The authentication step is boring, and it is the step that protects everything else.

    How to warm up email domain: add a custom tracking domain

    Most sending tools track opens and clicks by rewriting your links to go through a shared tracking domain. That shared domain is used by thousands of senders, including careless ones, and its reputation becomes your reputation. A custom tracking domain is a subdomain of your own sending domain, like track.getyourcompany.com, that only you use, so your tracking links carry your reputation and nobody else’s. Set it up before warmup, and make sure it has its own SSL certificate, because an unsecured tracking link is a spam signal on its own. In fact, Instantly, Smartlead and Lemlist all support custom tracking domains, and the setup takes about ten minutes.

    How to warm up email domain: connect Google Postmaster Tools

    Google Postmaster Tools is Google’s free dashboard for senders. It shows you what Gmail actually thinks of your domain: your spam rate, your domain reputation, your authentication results, and whether Gmail is throttling you. Connect it before warmup, and check it every few days while you warm up. It takes a few days to show data, so connect it early. The spam rate it reports is the number that matters most. Aim for under 0.1%, and never let it reach 0.3%, because that level puts the domain itself at risk. Sign up at Google Postmaster Tools, verify your domain, and leave the tab open. In sum, it is the closest thing to a direct line to Gmail that a sender gets.

    How to warm up email domain: the pre-warmup checklist

    StepWhat to doDone when
    1. Separate domainBuy a sending domain close to your main oneDomain registered, about $14 a year
    2. Age the domainWait 7 to 14 days before sending anythingTwo weeks have passed since registration
    3. MailboxesSet up 2 to 3 mailboxes on the sending domainAll mailboxes connected and sending
    4. AuthenticateSPF, DKIM and DMARC all set up and passingFree checker shows all three green
    5. Tracking domainCustom tracking subdomain with SSLLinks rewrite to your own subdomain
    6. Postmaster ToolsConnect Google Postmaster ToolsDomain verified, dashboard live

    Last checked: 16 November 2026. The 7 to 14 day ageing rule and the pre-warmup checklist follow the 2026 warmup playbook published by Prospeo, linked in this guide, and the setup guidance in our sending domain guide. Mailforge sells .com domains at $14 a year, verified on mailforge.ai/pricing 16 November 2026. Features and pricing can change, so please check the provider’s site before you buy.

    The 2 to 4 week warmup schedule, day by day

    Here is the schedule itself, and it is deliberately slow. In addition, the numbers below are per mailbox, per day, and they assume you have already finished the setup checklist above. Warmup emails are the automated exchanges with the warmup pool. Real sends are emails to real prospects. The two are different, and the schedule keeps them separate until the domain is ready. If anything in the signals section goes wrong during a week, stay on that week for another few days instead of pushing on. A week spent repeating is cheap. A domain burned by rushing is not.

    How to warm up email domain: four stacks of email envelopes growing taller from left to right, with a rising amber arrow above them and small calendar grids over each stack
    The warmup schedule in this how to warm up email domain guide: four stacks of envelopes growing taller week by week, with a rising arrow above them. Each stack is a week, and each week sends more than the last.

    How to warm up email domain: the four-week schedule

    WeekWarmup emails per mailbox per dayReal sends per mailbox per dayWhat to do
    Week 1: Days 1 to 75, ramping to 25None: warmup onlyTurn warmup on, watch placement daily
    Week 2: Days 8 to 1425, ramping to 50None, or 5 to 10 to engaged contactsAdd a second mailbox if you have one
    Week 3: Days 15 to 2150, ramping to 7525 to 30 to real prospectsStart real sending, keep volume low
    Week 4: Days 22 to 2875, ramping to 10025 to 30, rising towards 40 maxCheck Postmaster Tools and Heat Score

    Last checked: 16 November 2026. The schedule above follows Instantly’s 2026 warmup guidance, updated October 2026. Start at 5 to 10 warmup emails a day. Warm for at least 2 weeks before campaigns, and reach full campaign volume at 4 to 6 weeks. Send 25 to 30 emails per mailbox per day once placement is healthy, with 40 as the maximum. Prospeo’s 2026 playbook uses the same shape: 5 a day ramping to 25 by day seven, with a 2 to 4 week ramp and gating metrics checked daily. Features and pricing can change, so please check the provider’s site before you buy.

    How to warm up email domain: week one, building trust

    Week one is warmup only, and that is the hardest part for a beginner to accept, because nothing is being sold. Firstly, days 1 to 3 run at 5 to 10 warmup emails per mailbox per day, and the only job is to watch where they land. If warmup emails are landing in spam, the warmup pool rescues them, marks them as not spam, and the provider learns. By day seven, the volume ramps to 25 warmup emails a day, and the domain has a week of clean, welcomed sending behind it. Do not send a single real email in week one, however tempting it is. A real send to a cold prospect in week one is a send from a domain with no reputation, and it teaches the provider nothing good.

    Use week one to check the basics again. Are SPF, DKIM and DMARC still passing? Is the custom tracking domain working? Is Google Postmaster Tools showing data yet? If a warmup email bounces, find out why before the volume rises, because a bounce in week one is a setup problem, not a warmup problem. Fix it now, while the volume is tiny and the cost of a mistake is nothing.

    How to warm up email domain: week two, adding volume

    Week two doubles the warmup volume, from 25 to 50 warmup emails per mailbox per day, and it is the week to add a second mailbox if you have one. The second mailbox starts its own warmup from the beginning, at 5 to 10 a day, while the first mailbox continues its ramp. That stagger is deliberate: it means your mailboxes reach full volume on different days, and your total volume grows smoothly instead of jumping. If you have a third mailbox, add it in week three, the same way.

    At the end of week two, you may send a handful of real emails, 5 to 10 a day, to people who already know you: colleagues, existing customers, or contacts who have asked to hear from you. Moreover, these are guaranteed engagers, people who will open and reply, and their engagement is exactly the signal the provider wants to see. Do not send to a cold list in week two. The domain is warmer, but it is not warm yet, and a cold list is the fastest way to cool it down again.

    How to warm up email domain: week three, the first real sends

    Week three is when the work starts paying. Meanwhile, warmup continues at 50 to 75 emails a day, and real sending begins at 25 to 30 emails per mailbox per day to real prospects. Keep the first emails short, 60 to 120 words, plain text, no tracking pixels, no images, and no links beyond one. Our guide to writing cold emails explains why: a short, plain email looks like a message from a person, and a message from a person is what the provider wants to see. Send in the recipient’s timezone, on Tuesday, Wednesday or Thursday, and watch the bounce rate like a hawk. Keep it under 2%, and stop if it climbs above that.

    Week three is also when you verify your list, if you have not already. Our guide to building a cold email list covers verification in detail, and the rule here is simple: never send to an unverified list during warmup, because a single bad send can set you back weeks. Verify first, send second, and check the bounce rate per mailbox every morning.

    How to warm up email domain: week four, reaching full volume

    Week four takes the warmup volume to 75 to 100 a day and the real volume towards 40 per mailbox per day, which is the maximum we recommend for any single mailbox. By now the domain has four weeks of clean sending behind it, and the mailbox providers have a real picture of who you are. Check Google Postmaster Tools: your spam rate should be under 0.1%, and your domain reputation should read high. Check your warmup tool’s health score too, and if you use Warmforge, your Heat Score should be 85 or higher before you call the domain ready. If any of those numbers is off, stay at week three volumes for another week. There is no prize for finishing early, and there is a real cost to finishing too soon.

    After week four, full campaign volume takes another two weeks to reach, according to Instantly’s 2026 benchmark report, which puts the full ramp at 4 to 6 weeks. That does not mean you wait six weeks to send. It means you keep ramping gently after week four, adding a few sends a day, adding warmed mailboxes and warmed domains as you grow, instead of jumping to full volume overnight. The ramp is the habit, not the event.

    Warmup tools compared: the eight options

    Eight tools cover almost every warmup job in this guide. They split into three kinds: built-in warmup inside a sequencer, standalone warmup services, and infrastructure that does not warm up at all. Built-in warmup runs inside the sending tool itself. Standalone services warm mailboxes for any tool you use. Infrastructure gives you the servers and leaves the warmup to you. The tables below compare them on price, on warmup features, and on the plan details that decide what you actually get.

    How to warm up email domain: the eight tools at a glance

    ToolPrice fromWarmup includedBest for
    Instantly$47/mo; $37.60 annualYes, unlimited, all plansBuilt-in warmup at scale
    Smartlead$39/moYes, unlimited AI warmupAgency warmup at volume
    Lemlist$69/mo; $55 annualYes, lemwarm includedMultichannel warmup
    Woodpecker$35/mo; $23.33 annualYes, 2 warm-ups at entryAgency warmup per client
    Warmforge$9/slot/mo annualYes, standalone warmupWarmup with a Heat Score
    QuickMail$49/moYes, free AutoWarmerFree warmup on every plan
    Inframail$147/moOnly on DFY $797/moDone-for-you setup
    Do You Mail$39/server/moNo warmup poolInfrastructure only

    Last checked: 16 November 2026. Instantly Growth is $47 a month, or $37.60 on annual billing. Hypergrowth is $107, or $85.58 annual. Its plan card says 125,000 emails a month while its own comparison table says 100,000, so check the site for the current limit. Woodpecker’s entry price is $35 a month, or $23.33 on annual billing, for 500 contacted prospects, 8,000 emails and 2 warm-ups, then $67 for 2,000 prospects, $99 for 4,000, $159 for 8,000, $188 for 10,000 and $262 for 15,000. Our Woodpecker Review still shows the older figures, so use the figures here.

    Last checked: 16 November 2026. Inframail’s warmup is included only on its FREE DFY plan at $797 a month for a minimum of 3 months; its Unlimited plan at $147 and Agency Pack at $387 do not include warmup. Older pages still showing $129 and $327 for Inframail are out of date. Features and pricing can change, so please check the provider’s site before you buy.

    How to warm up email domain: warmup features, first four tools

    ToolWarmup typeWarmup poolSpam rescueHealth or placement test
    InstantlyAutomated, unlimited4.2M+ accountsYes, automatedInbox placement tests
    SmartleadUnlimited AI warmupCheck the siteYes, spam rescuesCheck the site
    Lemlistlemwarm, automatedCheck the siteCheck the siteCheck the site
    WoodpeckerAutomated warmupCheck the siteCheck the siteBounce shield

    Last checked: 16 November 2026. Instantly’s unlimited automated warmup across a 4.2 million account pool and its inbox placement tests are stated on its official site. Smartlead’s unlimited AI warmup with spam rescues is stated on its official site. Lemlist’s lemwarm and inbox rotation, and Woodpecker’s automated warmup, inbox rotation, adaptive sending and bounce shield, come from the verified profiles Matthew supplied. “Check the site” means we could not verify that detail on the official site today, not that the tool lacks it. Features and pricing can change, so please check the provider’s site before you buy.

    How to warm up email domain: warmup features, next four tools

    ToolWarmup typeWarmup poolSpam rescueHealth or placement test
    WarmforgeStandalone warmup slotsCheck the siteCheck the siteHeat Score 0 to 100
    QuickMailFree AutoWarmer via MailFlowCheck the siteCheck the siteCheck the site
    InframailDFY warmup onlyCheck the siteCheck the siteCheck the site
    Do You MailNone: no warmup poolNoneNoneNone

    Last checked: 16 November 2026. Warmforge warmup is $12 a month billed monthly, $10 billed quarterly, or $9 billed annually per slot, with 1 free slot on signup and no free trial. Its Heat Score runs 0 to 100, and Warmforge says to start sending at 85 or higher.

    Last checked: 16 November 2026. QuickMail’s AutoWarmer is free on every plan through MailFlow, and its plans are $49, $99 and $299 a month with unlimited senders, LinkedIn accounts and users on all plans, a 14-day trial, and no annual discount published. Do You Mail is infrastructure with no warmup pool: dedicated servers, automated SPF, DKIM and DMARC, unlimited inboxes and domains, and no warmup, sequences, lead data or reply inbox. Its homepage also shows $40 a month in one scaling example, against the $39 a month server price, so check the site. Features and pricing can change, so please check the provider’s site before you buy.

    Video: How to Set Up Instantly AI Email Warm Up by Patrick Walsh on YouTube. This video is the creator’s property, embedded via YouTube for education. OutreachCompare is not affiliated with Patrick Walsh and does not claim ownership of this video.

    How to warm up email domain: what each tool’s warmup looks like

    Instantly’s warmup is the most complete built-in option in this guide. Firstly, it is unlimited and automated on every plan. Its pool holds more than 4.2 million accounts, and it emulates human reads and runs inbox placement tests. It also requires at least 2 weeks of warmup plus a health score above 90% before an account can join a campaign. That gating is a feature, not a limitation: it stops you from sending before the domain is ready. The video above walks through the setup, and our Instantly Review covers the tool in full, from $47 a month on Growth.

    Smartlead’s warmup is unlimited AI warmup with spam rescues, built for agencies that warm dozens of mailboxes at once. Its Base plan is $39 a month. Pro is $94, Unlimited Smart is $174, and Prime is $379, with annual billing saving 17%. Smartlead also sells SmartDelivery from $49 a month and SmartServers from $39 a server a month, which are separate deliverability products, so check which one you need before you pay. Our Smartlead Review covers the full tool.

    Lemlist’s lemwarm is the warmup inside a multichannel sequencer, with inbox rotation that spreads sends across your mailboxes automatically. For example, Email is $69 a month, or $55 on annual billing, and Multichannel is $109 a user a month, or $87 annual. Woodpecker’s warmup is automated too, with inbox rotation, adaptive sending and a bounce shield that pauses sending when bounces climb, and its new pricing is charged by contacted prospects on a slider, from $35 a month for 500 prospects. Both are strong choices when the warmup and the sequences live in the same tool, and both are covered in our Lemlist Review and Woodpecker Review.

    How to warm up email domain: standalone warmup and the infrastructure trap

    Warmforge is the standalone specialist in this guide. Firstly, it warms mailboxes for any sending tool. The price is per slot: $12 monthly, $10 quarterly or $9 annually, with one free slot on signup. It also gives you the clearest readiness number in the business: a Heat Score from 0 to 100, with 85 as the line for sending. Its Placement Pro plan is $32.50 a month on annual billing, or $39 monthly, and its Growth plan is $140.80 annual, or $169 monthly. There is no free trial, and unlimited Warmforge slots are free on every Salesforge plan. Our Warmforge and Mailforge Review covers the pair in full.

    QuickMail’s AutoWarmer is the free option, included on every plan through MailFlow, and its plans are $49, $99 and $299 a month with unlimited senders, LinkedIn accounts and users, a 14-day trial, and no annual discount published. Inframail is the opposite. Warmup is included only on its done-for-you plan at $797 a month for a minimum of 3 months. Its Unlimited plan at $147 and Agency Pack at $387 do not include warmup at all, so check the plan before you buy. Do You Mail has no warmup pool at all, which is stated plainly on its site: it sells dedicated servers and automated DNS, and the warmup is your job, with a separate tool. That is not a flaw. It is a different product, and our Do You Mail Review explains the difference.

    How to warm up email domain: the honest pros and cons

    No tool in this guide is the best at everything, and the honest trade-offs are worth stating plainly. Instantly is the strongest built-in warmup at scale, yet it shows no free trial on its pricing page, so you pay before you can test it properly. Smartlead is the strongest for agencies, yet its most useful deliverability add-ons are separate paid products, and the pricing needs careful reading. Lemlist is the strongest for multichannel senders, yet it is the priciest starting point here at $69 a month, and it has no free plan.

    Woodpecker is the strongest for agency clients that want condition-based logic, yet its new per-prospect pricing makes large lists expensive, and a warmup that needs volume can push you into a higher tier. Warmforge is the clearest standalone warmup, yet it is a second subscription on top of your sequencer, and it has no free trial. QuickMail is the cheapest honest start with free warmup, yet its warmup details are not published in depth, so ask before you rely on them. Inframail’s done-for-you warmup is the most hands-off, yet $797 a month for a minimum of 3 months is a serious commitment. Do You Mail is the cheapest infrastructure, yet it leaves warmup entirely to you. Choose the warmup whose strength covers your weakest point, not the one with the longest feature list, and confirm the plan details before you pay.

    How to tell warmup is working

    Warmup is not a feeling. It is a set of numbers, and you should check them every few days while you warm up. The four numbers below tell you almost everything you need to know, and they are the same numbers that decide when you are ready to send. A domain that passes all four is ready. A domain that fails any one of them is not, however many weeks have passed.

    How to warm up email domain: a circular gauge dial with a needle pointing into the green zone, a small teal envelope in the centre, and a green shield with a checkmark at the bottom right
    The Heat Score in this how to warm up email domain guide: a gauge with its needle in the green zone, an envelope in the centre, and a green shield with a checkmark. The needle is the number that decides when you send.

    How to warm up email domain: the four signals to watch

    SignalHealthyWhere to check itWhat it tells you
    Heat Score85 or higherWarmforge dashboardReadiness to send, 0 to 100
    Inbox placementPrimary inbox, not spamWarmup tool placement testsWhere your mail actually lands
    Spam rateUnder 0.1%, never 0.3%Google Postmaster ToolsWhether Gmail trusts you
    Bounce rateUnder 2%Your sending toolList quality and setup health

    Last checked: 16 November 2026. Warmforge’s Heat Score runs 0 to 100, and Warmforge says to start sending at 85 or higher. Instantly requires a health score above 90% before an account can join a campaign, according to its 2026 warmup guidance. Benchmarks as used across this site: bounce under 2%, spam aim under 0.1% and never 0.3%. Our Deliverability Guide covers the full sending setup that sits behind these numbers. Features and pricing can change, so please check the provider’s site before you buy.

    How to warm up email domain: reading the Heat Score

    Warmforge’s Heat Score is the simplest readiness number in this guide. It is one number, from 0 to 100, and the line is clear: send at 85 or higher. In fact, the score is built from how your warmup emails are treated: whether they land in the inbox, whether they are opened, whether they are replied to, and whether they are rescued from spam. A score in the 90s means the mailbox providers trust the mailbox. In the 60s, the mailbox providers do not trust it yet. If the score falls week on week, something changed, and the recovery section below tells you what to do about it.

    Instantly’s health score works the same way, with a higher bar: above 90% before an account can join a campaign. If your tool does not give you a single score, use the other three signals instead. Inbox placement is the most direct of them: send a placement test to Gmail, Outlook and Yahoo seed inboxes, and check where the email lands. Primary inbox is ready. Promotions is a warning. Spam is not ready, however many weeks have passed.

    How to warm up email domain: the spam rate is the number that matters

    Google Postmaster Tools reports your spam rate. That is the share of your mail that Gmail users mark as spam, and it is the number with the hardest limit in this guide. Aim for under 0.1%. Never let it reach 0.3%. At 0.3%, Gmail treats your domain as a problem, and the damage is hard to undo. During warmup, your spam rate should be near zero, because warmup emails go to a pool that wants them. If your spam rate climbs during warmup, something is wrong with the setup, not with the schedule, and you should stop and investigate before the volume rises.

    Bounce rate is the fourth signal, and it is the one that most often ruins a warmup without anyone noticing. In fact, a bounce rate under 2% is healthy. Above 2%, the list or the setup is the problem, and warmup cannot fix either. Check the bounce rate per mailbox every morning, and if one mailbox bounces far more than the others, pause that mailbox and find out why before you send from it again. A warmup that ignores bounces is a warmup that builds a reputation on bad data.

    What to do if warmup stalls or the domain gets flagged

    Sometimes warmup stalls. The Heat Score stops rising, placement tests start landing in spam, or the spam rate climbs for no obvious reason. That is not the end of the domain, and it is not a reason to panic. It is a signal, and the steps below work through it in order, from the cheapest fix to the hardest decision. Most stalls are fixed in the first three steps.

    How to warm up email domain: a hand lifting a bright amber envelope out of a dark spam folder full of envelopes, with an amber warning triangle above and a small first-aid cross badge
    Recovery in this how to warm up email domain guide: a hand lifting an envelope out of a dark spam folder, with a warning triangle above. The rescue is the warmup pool doing its job, and the fix is usually in the setup.

    How to warm up email domain: the recovery steps, in order

    StepWhat to doHow long
    1. Pause real sendingStop all cold email from the domain at onceImmediately
    2. Cut warmup volume in halfHalve the daily warmup sends per mailboxSame day
    3. Re-check authenticationSPF, DKIM and DMARC all passing againSame day
    4. Check the listRe-verify, remove bounces and spam traps1 to 2 days
    5. Keep warming, slowlyWarmup only, low volume, for 1 to 2 weeks1 to 2 weeks
    6. Re-test placementPlacement tests back in the primary inboxAfter 2 weeks
    7. Retire the domainOnly if nothing above works after a monthLast resort

    Last checked: 16 November 2026. The recovery steps above are our editorial summary of the warmup guidance published by Instantly and Prospeo, linked in this guide, and the deliverability practice in our Deliverability Guide. A domain costs about $14 a year to replace, so retiring a burned domain is cheap compared with months of spam-folder sending. Features and pricing can change, so please check the provider’s site before you buy.

    How to warm up email domain: the three most common causes

    The first cause is volume that rose too fast. To fix it, follow step two: halve the warmup volume, stay there for a week, and ramp again more slowly. The second cause is authentication that broke quietly, often because a DNS record changed or a new mailbox was added without its DKIM key. To fix that, follow step three: re-check SPF, DKIM and DMARC with a free checker, and fix whatever fails before you send another email. The third cause is the list: a batch of unverified addresses, a bought list, or a list that has sat unused for a year. To fix the list, follow step four: re-verify the whole list, remove every bounce and every risky address, and never send to an unverified list again.

    There is a fourth cause worth naming, because it is the one beginners miss: content that reads like spam. All-caps subject lines, too many links, too many images, and words like free, guaranteed and act now all push a warmed domain back towards spam. If placement is poor and the setup is clean, simplify the email: plain text, one link, no images, 60 to 120 words. Our guide to writing cold emails shows what a clean first email looks like, and a clean email is the fastest way to test whether the problem is the content or the domain.

    How to warm up email domain: when to retire a domain

    Retiring a domain is the last resort, and it is worth knowing when it applies. If you have paused real sending, halved the volume, fixed the authentication, cleaned the list, warmed for another month, and the placement tests still land in spam, the domain’s reputation is burned, and the honest move is to start again. A sending domain costs about $14 a year, and a fresh domain with a proper warmup will reach the inbox in four weeks. A burned domain that you keep nursing will cost you months of spam-folder sends, and every one of those sends is a prospect you never reached.

    Retire the domain cleanly: stop sending from it entirely, do not reuse its mailboxes on a new domain, and do not copy the list that burned it without re-verifying every address. Then buy a new sending domain, age it for 7 to 14 days, and follow the schedule in this guide from day one. The second warmup is always faster than the first, because you already know the steps, and the domain you retire is a lesson, not a failure. Every sender who has sent at volume has retired a domain. The good ones do it early, and move on.

    Ongoing warmup: why you keep warming while you send

    Warmup does not end when your first campaign starts. In fact, that is the sentence most guides leave out, and it is the one that protects your reputation for the long term. A domain that stops warming and only sends cold email slowly loses the positive signals that built its reputation, because every send is now to a stranger, and strangers open and reply less than the warmup pool does. The provider notices the change, and the reputation drifts down. Keep a slice of your daily volume on warmup, and the reputation keeps compounding instead.

    How to warm up email domain: the 20 to 30 percent rule

    Instantly’s 2026 guidance puts the number plainly: keep 20 to 30 percent of your daily volume on warmup even after campaigns launch. For example, if a mailbox sends 30 real emails a day, it should also send 6 to 9 warmup emails a day. Those warmup emails are opened, replied to and rescued, and they keep the positive signals flowing alongside the real sends. The cost is tiny, a few emails a day, and the benefit is a reputation that holds steady instead of sliding. Turn warmup off, and you will not notice the slide for a month. Then one morning the placement tests land in spam, and you are back in the recovery section.

    Ongoing warmup also protects you when a campaign goes wrong. If a batch of real sends earns complaints, the warmup pool’s positive signals cushion the damage, and the domain recovers faster. If a mailbox is paused for a week, its warmup keeps its reputation warm while it rests, so it is ready when it comes back. Think of warmup as the domain’s daily exercise: a little every day keeps it fit, and stopping entirely is how it goes soft.

    How to warm up email domain: warming new mailboxes and domains

    Every new mailbox you add needs its own warmup, from day one, at 5 to 10 emails a day, even if the domain is already warm. A warm domain does not make a cold mailbox warm, and a cold mailbox on a warm domain still sends cold mail. The same applies to every new domain: a second sending domain starts from zero, however well the first one performs, and it needs its own 2 to 4 week warmup. Plan for that when you scale. Adding a domain is a four-week commitment, not an afternoon’s work, and the senders who scale safely are the ones who start the next domain’s warmup a month before they need it.

    Scale by adding warmed domains, not by pushing one domain harder. A domain that sends 40 emails per mailbox per day from three mailboxes reaches 120 sends a day safely. A domain pushed to 200 sends a day from the same mailboxes does not. When you need more volume, buy another sending domain, age it, warm it, and add its mailboxes to the rotation. That is how agencies send thousands of emails a day without burning a domain, and it is how you will scale too, one warmed domain at a time.

    Free warmup, paid warmup or built-in warmup

    The right warmup approach depends on what you already pay for, how many mailboxes you warm, and whether you want a single number that tells you when to send. In sum, the table below pairs each situation with the approach that fits it, so your budget goes towards replies instead of towards activity that never converts.

    How to warm up email domain: the decision table

    Your situationBest approachTool to start with
    Already pay for a sequencerUse its built-in warmupInstantly from $47/mo, or Lemlist from $69/mo
    Tiny budget, any toolFree warmup on every planQuickMail from $49/mo, AutoWarmer free
    Want one readiness numberStandalone warmup with a scoreWarmforge from $9/slot/mo, send at 85+
    Agency, many mailboxesUnlimited warmup per clientSmartlead from $39/mo, or Woodpecker from $35/mo
    Want it done for youDone-for-you warmupInframail DFY $797/mo, min 3 months
    Run your own serversInfrastructure plus a warmup toolDo You Mail $39/server/mo plus Warmforge

    Last checked: 16 November 2026. Prices above come from the official pricing pages named in the tools section. Warmforge warmup is $12 a month billed monthly, $10 billed quarterly, or $9 billed annually per slot, with 1 free slot on signup. Inframail warmup is included only on its FREE DFY plan at $797 a month for a minimum of 3 months. Do You Mail has no warmup pool, so its row pairs it with Warmforge. Features and pricing can change, so please check the provider’s site before you buy.

    How to warm up email domain: start with the free option

    If your budget is zero, start with the tools that warm without charging extra. QuickMail’s AutoWarmer is free on every plan through MailFlow. That makes it the cheapest way to warm a mailbox properly. Warmforge gives you 1 free slot on signup, which is enough to warm your first mailbox and learn the Heat Score. A manual warmup costs nothing at all: exchange emails with colleagues, friends and existing contacts who will open and reply, for two to four weeks, and the provider will see a new sender whose mail is welcomed. The tool makes warmup easier, but it is not what makes warmup possible. The patience and the ramp are what make it possible, and those are free.

    Our Best Cold Email Tools for Beginners guide ranks the cheapest honest starting points, and our Best Warmup Tools 2026 guide compares the warmup field in full. Start with the cheapest tool that warms properly, prove the habit works, and only then pay for the features that make warming faster. A $9 a month Warmforge slot that warms one mailbox properly beats a $107 a month plan that warms none, because the inbox is what pays, not the tool.

    How to warm up email domain: when to pay for warmup

    Pay for warmup when your volume earns it. If you warm ten mailboxes across three domains, a standalone tool with a Heat Score and placement tests is worth paying for, because it tells you, mailbox by mailbox, which ones are ready and which ones are not. Similarly, Warmforge at $9 a slot a month earns its price when you need that clarity, and Instantly at $47 a month earns its price when you want unlimited warmup, placement tests and sequences in one place. Below that volume, the free options do the same job, more slowly, and the money you save is better spent on a better list.

    Pay attention to the hidden cost of warmup, too, which is time. A domain that is warmed properly takes two to four weeks, and a domain that is rushed takes four weeks to recover. The senders who win at cold email are not the ones who warm fastest. They are the ones who warm once, warm properly, and never have to do it again for that domain.

    Frequently asked questions

    How to warm up email domain: how long does warmup take?

    Plan for 2 to 4 weeks before a new domain is ready for cold outreach, with a hard minimum of 2 weeks. Instantly’s 2026 guidance requires at least 2 weeks of warmup plus a health score above 90% before an account can join a campaign, and most senders are comfortably ready at the 3 to 4 week mark. Full campaign volume takes 4 to 6 weeks to reach, according to Instantly’s 2026 benchmark report. If you are warming a brand-new domain, 4 weeks is safer than 2, and the schedule in this guide shows the ramp week by week.

    How to warm up email domain: how many emails should I send per day while warming up?

    Start at 5 to 10 warmup emails per mailbox per day, ramp to 25 by day seven, and reach 50 to 75 by week three. Once placement is healthy, send 25 to 30 real emails per mailbox per day, with 40 as the maximum for any single mailbox. If you need more volume, add more warmed mailboxes and more warmed domains, instead of pushing one mailbox harder.

    How to warm up email domain: can I warm up a domain manually, without a tool?

    Yes. Exchange emails with colleagues, friends and existing contacts who will open and reply, for two to four weeks, starting at a few emails a day and ramping slowly. Manual warmup works, and it costs nothing, but it is slow, it does not rescue emails from spam automatically, and it gives you no Heat Score or placement test to tell you when you are ready. A tool automates the exchanges, the rescues and the measurement, which is why most senders use one.

    How to warm up email domain: what is a good Heat Score?

    Warmforge’s Heat Score runs from 0 to 100, and Warmforge says to start sending at 85 or higher. A score in the 90s means the mailbox providers trust the mailbox. A score in the 60s means they do not, yet, and you should keep warming at low volume. Instantly uses a similar health score, with a bar of above 90% before an account can join a campaign. Either way, the number is the decision, not the calendar: send when the score says ready, not when the weeks run out.

    How to warm up email domain: do I need to warm up every mailbox?

    Yes. Each mailbox builds its own reputation alongside the domain’s, and a warm domain with a cold mailbox still sends cold mail. Warm every mailbox you plan to send from, from day one, at 5 to 10 emails a day, and stagger new mailboxes so they reach full volume on different days. Connect at least two inboxes per domain so the volume spreads, and never send from a mailbox that has not been warmed.

    How to warm up email domain: which tool is best for warming up?

    Instantly leads for built-in unlimited warmup at scale, with a pool of more than 4.2 million accounts and inbox placement tests, from $47 a month on Growth. Warmforge leads for standalone warmup with a Heat Score, from $9 a slot a month on annual billing, with 1 free slot on signup. QuickMail leads for free warmup, with AutoWarmer included on every plan from $49 a month. Smartlead leads for agencies, with unlimited AI warmup from $39 a month. All eight tools in this guide are compared on price and features in the tools section.

    The verdict on warming up a new email domain

    Our verdict

    Best for most senders: buy a separate sending domain, authenticate it, and age it for 7 to 14 days. Then warm it for 2 to 4 weeks, starting at 5 to 10 emails per mailbox per day and ramping to 25 to 30 real sends per mailbox per day. Send when your inbox placement is healthy, your spam rate is under 0.1%, and your Heat Score is 85 or higher, then keep 20 to 30 percent of your daily volume on warmup while you send.

    For built-in unlimited warmup, Instantly leads, with a 4.2 million account pool from $47 a month. Warmforge leads for standalone warmup with a Heat Score, from $9 a slot a month. QuickMail leads for free warmup, with AutoWarmer on every plan from $49 a month. We have not hands-on tested these tools, so this guide gives Best-for labels only and no numeric score, and that is stated plainly.

    Start this week with one domain, two mailboxes, and a warmup tool. Buy the sending domain, set up SPF, DKIM and DMARC, connect Google Postmaster Tools, turn warmup on at 5 emails a day, and watch the placement tests. In four weeks, that domain will be ready to earn you meetings, and the patience will have paid for itself many times over. Warmup is a habit, not a project, and the senders who keep the habit are the ones whose emails keep reaching the inbox.

    Keep reading

  • A/B Testing for Cold Email 2026

    A/B Testing for Cold Email 2026

    Two subject lines. One reply rate. The test tells you which one earns the meeting.

    Most cold email senders never test anything. They write one subject line, one opening, one call to action, and they send it to everyone, for months, on a guess. Then they wonder why the reply rate sits at 1% while another sender, selling the same thing to the same kind of buyer, gets 4%. The difference is rarely talent. It is usually testing. A small change, a shorter subject line, a different first line, a smaller ask, can double the replies from the same list, and the only way to find it is to test it properly. This ab testing cold email guide shows you how: what to test first, how to set up a clean test, how many sends you need before you can trust the result, what to judge the winner by, and which of the ten tools in this guide runs the test for you.

    Visit Instantly →Explore Lemlist →See Saleshandy →

    Prices and features in this guide were checked 16 November 2026. Features and pricing can change, so please check the provider’s site before you buy.

    Quick Answer

    Test one variable at a time, split your list at random, send at least 200 prospects to each variant, and judge the winner by positive reply rate, never by opens. Start with the subject line, then the first line, then the call to action. Roll the winner out to everyone, then test the next variable. That loop, repeated week after week, is how a 1% reply rate becomes 3% without a bigger list or a bigger budget.

    Testing is not a chore for big teams. It is the cheapest improvement in cold email, because the list, the mailboxes and the tool are already paid for. A test costs you nothing but a little planning, and a single winning subject line can pay for the whole year.

    Ab testing cold email: the small change that doubles your replies

    At its simplest, ab testing cold email means sending two versions of the same email to two similar groups of prospects, and keeping the version that earns more positive replies. Version A is the email you already send. Version B is the same email with one thing changed. The list is split at random, the send time is the same, the follow-ups are the same, and the only difference is the one thing you are testing. When version B earns clearly more positive replies, you have learned something true about your audience, and that truth is worth money, because it applies to every prospect you email from now on.

    Cold email is normal, widely used business practice, and testing is the part of it that turns a good sender into a great one. You do not need a statistics degree, a data team, or an expensive tool to start. You need a list you trust, a tool that splits it fairly, and the patience to let the test finish before you call a winner. Our Cold Email for Beginners guide covers the foundations, and our guide to writing cold emails covers the first email itself. This guide takes the next step: it turns that email into an experiment, and the experiment into a better reply rate.

    Ab testing cold email: how this guide is organised

    This guide follows the life of a single test. It starts with what testing is and why it matters, then ranks the things worth testing, from the subject line down to the sender name, so you spend your effort where the replies are. After that comes the setup, a clean one-variable test with a random split, then the sample sizes, with honest maths about how many sends you need and what to do when your list is too small. Then the metric, the winner, the mistakes, the ten tools compared, and a decision framework that matches the setup to your volume. By the end, you will know how to run your first test this week.

    What A/B testing is, and why small changes earn big replies

    A test is a question with a price tag. The question is simple: does this version earn more positive replies than that version? The price is the sends you spend finding out. Senders who never test pay a different price instead: they keep sending the weaker version to everyone, month after month, and they never learn that a shorter subject line, or a different first line, would have doubled their replies. Testing is how you stop paying that hidden price, and it is the only honest way to know what your audience actually responds to, rather than what you think they should respond to.

    Imagine two senders with identical lists of 1,000 prospects. For example, the first sender writes one email, sends it to all 1,000, and earns 20 positive replies, a 2% positive reply rate. The second sender splits the list in half, tests two subject lines, finds that one earns 3% while the other earns 1%, rolls the winner out to the next 1,000 prospects, and earns 30 positive replies from the same effort. Nothing else changed. No new list, no new tool, no new budget. The only difference is that the second sender knew which subject line worked, and the first sender was guessing. Over a year of sending, that gap compounds into hundreds of extra meetings.

    Ab testing cold email: what a test actually is

    A proper test has four parts, and all four matter. First, a control, the version you already send, which is the baseline everything is measured against. Second, a variant, the same email with exactly one thing changed, so that any difference in the result can only be caused by that one change. Third, a random split, so that the two groups are alike in every way except the version they received. Fourth, a metric decided in advance, which for cold email is the positive reply rate, because it is the number closest to revenue. Leave any one of those four out and the result means nothing, however convincing the numbers look.

    Notice what a test is not. In contrast, it is not sending version A on Monday and version B on Friday, because the day is different. Sending version A to your best prospects and version B to the rest does not test the email either, because the lists are different. Changing the subject line, the first line and the call to action all at once is just as bad, because then you cannot tell which change did the work. And it is not stopping after fifty sends because one version looks ahead, because fifty sends cannot prove anything. A test is a small, disciplined experiment, and the discipline is the whole point.

    Ab testing cold email: why guessing costs you replies

    Guessing feels faster than testing, and in the short term it is. In fact, writing one email and sending it to everyone takes an afternoon. Testing takes a week of planning, sending and waiting. But guessing is only fast if you are right, and most guesses about cold email are wrong in interesting ways. Senders guess that a clever subject line beats a plain one, and the test shows the plain one wins. They guess that a long, detailed email proves expertise, and the test shows a short one earns more replies. They guess that asking for a call is the strongest close, and the test shows that asking a yes-or-no question earns twice as many answers. Every one of those guesses, left untested, costs replies for as long as it survives.

    There is a second reason guessing costs you, and it is subtler. When you guess, you learn nothing you can reuse. When you test, every result becomes a rule you carry into the next campaign. A test that proves short subject lines win for operations managers is a rule you can apply to every email you send them. A test that proves a customer result beats a benchmark is a rule about proof that shapes your whole sequence. After a year of testing, you own a playbook written by your own audience, and no competitor can copy it, because it was written by your prospects, not by theirs.

    What to test first: the ranking that saves you months

    Ab testing cold email: the eight variables, ranked

    Not every variable is worth testing, and the order matters more than the number of tests you run. A subject line test can double your replies, because the subject line decides whether the email is opened at all. A send-time test might move the reply rate by a fraction of a percent, because the day of the week barely matters once the email is in the inbox. The ranking below puts the variables in the order that teaches you the most, fastest, so you spend your first month testing the things that move the reply rate, and leave the small stuff for later.

    Ab testing cold email: the ranking in full

    RankWhat to testLikely impactHow hard to testJudge by
    1Subject lineHighest: gates every openEasy: one line, two versionsPositive reply rate*
    2First lineHigh: decides the first secondsEasy: rewrite one sentencePositive reply rate
    3Offer and valueHigh: the reason to replyMedium: rewrite the middlePositive reply rate
    4Call to actionHigh: the size of the askEasy: swap one sentencePositive reply rate
    5LengthMedium: short vs substantialMedium: cut or expandPositive reply rate
    6Social proofMedium: results vs benchmarksMedium: swap one proof pointPositive reply rate
    7Send time and dayLow: day matters, hour barely doesEasy: same email, different slotPositive reply rate
    8Sender nameLow: person vs company nameEasy: change the from-namePositive reply rate

    Last checked: 16 November 2026. *Subject-line tests are often judged by opens as a diagnostic, but the winner should still be decided by positive replies, because opens are unreliable since Apple Mail Privacy Protection. See the metric section of this guide. The ranking above is our editorial judgement, based on the vendor research cited in this guide, not a controlled study. Features and pricing can change, so please check the provider’s site before you buy.

    Ab testing cold email: subject lines first

    The subject line is the first test for a simple reason: it gates everything else. No open, no read, no reply. A subject line that earns 40% opens gives your email twice as many chances to earn a reply as one that earns 20%, and that gap is larger than any other single variable can produce. Test short against long, plain against personalised, a question against a statement, and a pain point against a result. Keep the body identical, so the subject line is the only thing that differs. Belkins’ study of 5.5 million emails found personalised subject lines earning a 7% reply rate against 3% without personalisation, a lift large enough to show up even in a modest test.

    Keep subject lines short while you test them. The best-performing subject lines in the research are two to four words, or roughly 30 to 50 characters, and they work because they look like a message from a person, not a campaign. Similarly, test a two-word subject line against your current eight-word one, and you may be surprised by how much the shorter version wins. Our guide to writing cold emails covers subject-line formulas in detail, and the video below shows what 195 tested subject lines actually look like.

    Video: I Tried 195 Cold Email Subject Lines, These Are the Best by Instantly on YouTube. This video is the creator’s property, embedded via YouTube for education. OutreachCompare is not affiliated with Instantly and does not claim ownership of this video.

    Ab testing cold email: the first line and the offer

    After the subject line, the first line is the next thing to test, because it decides the first three seconds after the open. A first line that names the prospect’s problem, or shows you know their company, earns the reader’s attention. A first line that talks about you, your product, or your company loses it. Test a problem-led opening against a result-led opening, and a personalised opening against a generic one, and watch which version earns more positive replies. The difference is often larger than senders expect, because the first line is where the reader decides whether this email is for them.

    The offer is the third test, and it is the one most senders avoid, because changing the offer feels like changing the product. It is not. The offer is the reason you give the prospect to reply, and it can be a one-page checklist, a short audit, a customer result, or a ten-minute call, and each of those earns a different kind of reply. Test a low-friction offer, like a yes-or-no question, against a higher-friction one, like a calendar link, and you will learn how much commitment your audience is willing to give a stranger. That lesson shapes every email you write afterwards.

    Ab testing cold email: send time and sender name

    Send time and sender name sit at the bottom of the ranking for a reason: they matter, but they matter less than the words. Woodpecker’s research found that the day of the week and the time of day have no meaningful impact on reply rates, so do not spend your first month testing Tuesday against Wednesday. Send on Tuesday, Wednesday or Thursday, in the recipient’s timezone, and move on to the tests that matter. Once the subject line, the first line and the offer are settled, a send-time test is a fine way to squeeze the last few tenths of a percent out of a working sequence.

    Sender name is a similar story. Test a person’s name, like “Alex from OutreachCompare”, against a company name, like “OutreachCompare”, and you will probably find the person’s name wins, because people reply to people. That is a useful result, and it takes five minutes to test, so it is worth doing early if your tool makes it easy. But it will not double your reply rate, and no sender-name test can rescue a weak subject line. Test the big variables first, and let the small ones wait their turn.

    Setting up a clean test: one variable, one random split

    A clean test is a boring test. Moreover, nothing about it is clever, and that is exactly why it works. You pick one variable, you write two versions that differ only in that variable, you split the list at random, you send both versions at the same time, and you wait until the sample is big enough to judge. Every shortcut in that list feels tempting, and every shortcut breaks the test. This section walks through the setup step by step, so your first test is one you can actually trust.

    Ab testing cold email: one variable at a time

    The first rule is the one that gets broken most often: change one thing, and one thing only. If you change the subject line and the first line and the call to action all at once, and version B wins, you have learned nothing. Was it the subject line? The first line? Or the call to action? You cannot tell, and you cannot reuse the result, because you do not know what caused it. A test that changes three things is not a test. It is a guess with numbers attached.

    Write version A first, exactly as you would send it today. Then copy it, change the one variable, and stop. If you are testing the subject line, the body must be byte-for-byte identical. If you are testing the call to action, the subject line and the body must be identical. That discipline feels fussy, and it is the whole skill. Lemlist’s spintax and text variables make it easy to generate variants, and Instantly’s A/Z testing builds the split for you, but the tool cannot enforce the discipline. You have to.

    Ab testing cold email: the random split

    The second rule is the random split, and it is what makes the two groups comparable. A random split means every prospect has an equal chance of landing in group A or group B, so the two groups are alike in company size, seniority, industry and every other factor you did not think to control. Without it, the groups differ in ways you cannot see, and those invisible differences become the result. Sending version A to your best prospects and version B to the rest does not test the email. It tests the list.

    Every sequencer in the tools section of this guide splits the list for you, and you should let it. Do not split the list by hand, do not split it alphabetically, and do not split it by the order the contacts were added, because none of those is random. Alphabetical splits put the same kinds of companies together, and upload-order splits put your oldest leads in one group and your newest in the other. Let the tool randomise, check that the groups are roughly equal in size, and then leave them alone.

    Video: How to ACTUALLY Split Test Cold Email Campaigns (That LAND on Inbox) by Nick Konsta on YouTube. This video is the creator’s property, embedded via YouTube for education. OutreachCompare is not affiliated with Nick Konsta and does not claim ownership of this video.

    Ab testing cold email: keep everything else identical

    The third rule is the one beginners forget: everything that is not the variable must be identical. Same list quality, so both groups are verified to the same standard and bounce at the same rate. Both versions go out at the same time, so they land in the inbox on the same day, at the same hour, in the recipient’s timezone. The follow-ups stay identical too, so the second and third touches do not quietly favour one version. And the sending limits match, so neither version is throttled while the other runs free. And the same warmed mailboxes, so deliverability does not become a hidden variable.

    List quality deserves a special warning, because it is the variable that most often ruins a test without anyone noticing. A group with a 6% bounce rate will earn fewer replies than a group with a 1% bounce rate, whatever the subject line says, because bounced emails cannot reply. Our guide to building a cold email list explains verification and hygiene in detail, and the rule here is simple: verify the whole list before you split it, keep the bounce rate under 2% in both groups, and check the bounce rate per variant when you read the result. If one group bounced far more than the other, the test is void, and you should run it again.

    Ab testing cold email: the seven-step setup checklist

    StepWhat to doDone when
    1. Pick the variableChoose one thing from the ranking: subject line firstOne variable named, in writing
    2. Write the hypothesis“A shorter subject line will earn more positive replies”One sentence, testable
    3. Write both versionsVersion A and version B, differing only in the variableDiff shows one change
    4. Fix the sample sizeDecide the sends per variant before you launchA number written down
    5. Split at randomLet the tool split the verified list 50/50Groups equal, bounce under 2%
    6. Send togetherSame day, same hour, same mailboxes, same follow-upsBoth versions live
    7. Wait, then judgeWait for the full sample, then judge by positive repliesWinner called once, on the metric

    Last checked: 16 November 2026. Write the hypothesis and the sample size down before you launch, because a test whose rules are written after the result is not a test. The checklist above is our editorial summary of the setup guidance published by Instantly and Prospeo, linked in this guide. Features and pricing can change, so please check the provider’s site before you buy.

    Sample sizes and significance: how many sends before you trust it

    This is the section most guides skip, and it is the one that matters most, because it decides whether your result is real or noise. A test on fifty prospects per variant cannot prove anything, however large the gap looks. A test on 500 per variant can prove a large difference, but not a small one. And a test on 3,000 per variant can prove the kind of 50% lift that actually changes your business. The numbers below are honest, and they are larger than most senders expect, because cold email reply rates are low, and low rates need large samples to measure.

    Ab testing cold email: a magnifying glass over a bar chart with two bars, one navy and one teal, and rows of small email envelopes beneath representing the test recipients
    Sample size in this ab testing cold email guide: a magnifying glass over two bars, with rows of envelopes beneath. The bars only mean something when enough envelopes sit underneath them, and most senders stop far too early.

    Ab testing cold email: the honest maths in one table

    Your reply rate nowThe lift you want to detectSends needed per variantTotal sends
    1%Double it, to 2%About 2,300About 4,600
    2%Up 50%, to 3%About 3,800About 7,600
    2%Double it, to 4%About 1,100About 2,200
    3%Up 50%, to 4.5%About 2,500About 5,000
    3%Double it, to 6%About 750About 1,500
    5%Up 50%, to 7.5%About 1,500About 3,000
    5%Double it, to 10%About 430About 860

    Last checked: 16 November 2026. Figures are per variant, calculated for a two-proportion test at 95% confidence and 80% power, and rounded to the nearest ten. They assume positive reply rate as the metric. Smaller lifts need larger samples: detecting a rise from 1% to 1.5% needs about 7,700 sends per variant. Use the free calculator at Evan Miller’s sample-size calculator for your own numbers. Features and pricing can change, so please check the provider’s site before you buy.

    Ab testing cold email: why small lists cannot reach significance

    Statistical significance is a formal way of asking whether the gap between your two versions is real, or whether it could have happened by chance. In fact, with reply rates of 1% to 3%, chance is a powerful force. Flip a coin ten times and you can easily get seven heads. Send two email versions to a hundred prospects each and you can easily see one version earn four replies and the other earn one, by luck alone. That gap looks like a winner. It is not. It is noise, and if you roll it out, the next thousand prospects will show you the truth, which is that there was never a difference.

    Here is the practical consequence, worked out from the same maths as the table above. With 200 sends per variant and a baseline reply rate of 3%, you can only reliably detect a jump to about 7.8%, a near-tripling. Anything smaller than that is invisible at that sample size, and a test that calls a winner on a smaller gap is guessing, not measuring. That is why the guides that say “100 to 200 per variant is enough” are only half right: 200 per variant is a practical minimum, and it only detects very large differences. If you want to detect a 50% lift, which is the kind of lift that actually matters, you need thousands of sends per variant, not hundreds.

    Ab testing cold email: what to do with a small list

    Most beginners do not have thousands of prospects to test on, and that is fine, as long as you test differently. First, test big differences, not small ones. A completely different subject line, a completely different offer, or a completely different call to action can produce a gap large enough to see at 200 sends per variant, while a one-word tweak cannot. Second, use directional signals instead of verdicts. If version B earns 8 positive replies and version A earns 3, that is not proof, but it is a reason to keep testing version B, not a reason to roll it out forever. Third, run the test longer. A small list tested over four weeks, with follow-ups included, gives you more data than the same list tested in a day.

    Fourth, and most useful of all, pool your tests. Test the same subject-line idea across three different campaigns, or across three different segments, and add the results together. Three tests of 200 sends each are one test of 600 sends, as long as the variable and the audience are the same. Fifth, test the things that do not need significance to be useful. A subject line that earns twice as many opens, even if the reply gap is not significant, is still worth keeping, because opens are a diagnostic, and a subject line that nobody opens cannot earn replies. Just do not call it a proven winner until the reply data agrees.

    Ab testing cold email: how long to run a test

    Time matters as much as sample size, because replies do not all arrive on day one. Subject-line tests can be read after 48 to 72 hours for opens, but reply-rate tests need five to seven days, because many prospects reply to the second or third follow-up, not the first email. Our follow-up sequences guide shows why: 42% of replies arrive after the first email, so a test judged on day two has not seen nearly half its replies yet. Run the test through the full sequence, wait for the follow-ups to finish, and only then call the winner.

    Decide the runtime before you launch, and do not peek. In addition, checking the result after every fifty sends and stopping the moment one version pulls ahead is the single most common way to manufacture a false winner, because early leads are usually noise, and the version that leads at fifty sends often loses at five hundred. Write the sample size and the end date down, let the test run to the end, and judge it once, on the full data. That discipline is what separates a test from a guess, and it costs you nothing but patience.

    What to judge by: positive replies, not opens

    Every test needs one metric, decided before it starts, and for cold email that metric is the positive reply rate: the share of prospects who reply with interest, a question, or a yes. It is the number closest to revenue, because a positive reply is a conversation, and a conversation is a meeting, and a meeting is a sale. Everything else is a proxy, and proxies mislead. Opens mislead most of all, and this section explains why, and what to watch instead.

    Ab testing cold email: positive reply rate is the metric

    A positive reply is a reply that moves the conversation forward: “Yes, tell me more”, “How much does it cost?”, “Can we talk next Tuesday?”, or even “Not now, try me in three months”. Count those, divide by the number of emails delivered, and you have the positive reply rate. A good target is 1% to 3%, and the average across all cold email is about 3.4% for total replies, according to Instantly’s 2026 benchmark report, so a positive rate of 2% is already a healthy result. Judge every test against that number, and call the winner only when the gap in positive replies is large enough to matter and large enough to trust.

    Do not judge by total replies, because total replies include the replies you do not want. For example, a subject line that earns ten replies, of which nine are “remove me” and one is “tell me more”, has not won anything. It has earned nine complaints and one conversation. A subject line that earns four replies, all positive, has won, even though its total is lower. Count the positive replies, count the complaints separately, and never let a test that increases complaints be called a win, whatever the reply rate says.

    Ab testing cold email: why opens mislead you

    Opens were once the obvious metric for subject-line tests, because the subject line decides whether the email is opened. That logic broke in 2021, when Apple Mail Privacy Protection started opening emails automatically, on the recipient’s behalf, before the recipient ever saw them. An email can now be “opened” by a machine, counted in your dashboard, and never read by a person. Average open rates of about 21% are still quoted across the industry, but they are inflated, and they cannot be compared between two versions, because the inflation is not the same for every audience. A subject line that wins on opens may have won nothing at all.

    That does not mean opens are useless. They are still a useful diagnostic, the way a temperature reading is useful even when it cannot diagnose the illness. If one version earns 40% opens and the other earns 15%, something is wrong with the second subject line, and it is worth investigating, because a healthy warmed setup should see opens well above 15%. But a diagnostic is not a verdict. Use opens to spot problems, use positive replies to call winners, and never optimise for opens alone, because an email optimised for opens is an email that gets opened and ignored.

    Ab testing cold email: the secondary metrics worth watching

    MetricHealthy rangeWhat it tells you
    Positive reply rate1% to 3%The verdict metric: conversations started
    Total reply rateAbout 3.4% averageContext, including complaints and unsubscribes
    Bounce rateUnder 2%List quality: above this, the test is void
    Spam complaintsUnder 0.1%, never 0.3%Deliverability risk: stop the loser at once
    Open rateAbout 21% averageDiagnostic only: unreliable since Apple MPP
    Meetings bookedVaries by offerThe real outcome: replies that become calls

    Last checked: 16 November 2026. Benchmarks as used across this site: bounce under 2%, spam aim under 0.1% and never 0.3%, average reply about 3.4% (Instantly 2026 report), positive reply 1% to 3%, opens about 21% but unreliable (Apple Mail Privacy Protection). Our Deliverability Guide explains the full sending setup behind these numbers. Features and pricing can change, so please check the provider’s site before you buy.

    Ab testing cold email: watch complaints as closely as replies

    One metric deserves its own warning, because it can end a campaign faster than any reply rate can save it: spam complaints. A test variant that earns more replies but also more complaints is not a winner. It is a risk. Spam complaints above 0.1% should make you stop and investigate, and complaints approaching 0.3% should make you stop the variant immediately, because that level risks your domain itself. Check the complaint rate per variant when you read the result, not just the reply rate, and treat a variant with high complaints as a loser, whatever its replies say. A test that damages your sender reputation has cost you more than it earned, and the damage lasts long after the test ends.

    What to do with the winner: roll it out, then test again

    Calling a winner is the middle of the story, not the end. A winner that is never rolled out is a lesson never used, and a winner that is rolled out and never retested is a lesson that slowly goes stale, because audiences change, inboxes change, and the subject line that won in January may not win in June. The loop below is the whole system: roll the winner out, test the next variable, and keep going, one variable at a time, for as long as you send cold email.

    Ab testing cold email: a winning email envelope with a small gold trophy and a circular arrow looping back to a fresh pair of test envelopes
    The winner in this ab testing cold email guide: a trophy on the winning envelope, and a loop back to the next test. The rollout is the reward, and the next test is the habit.

    Ab testing cold email: rolling the winner out

    Rolling a winner out means making it the new control, the version every new prospect receives, and the baseline the next test is measured against. Do it at once, and do it everywhere. If version B won the subject-line test, version B becomes the subject line on every campaign, not just the one you tested it on, and the next test starts from version B, not from version A. A winner that only lives in one campaign is a winner that is only earning you replies in one campaign.

    Write the result down before you roll it out, because a test you cannot remember is a test you will repeat by accident. For example, keep a simple log: the date, the variable, the two versions, the sample size per variant, the positive reply rate of each, and the decision. One line per test, in a spreadsheet, is enough. After six months that log is the most valuable document in your outbound operation, because it is the record of everything your audience has told you, and it stops you from retesting the same idea twice or rolling back a winner because someone forgot it won.

    Ab testing cold email: the testing loop

    The loop is simple, and it never ends. Test the subject line, roll the winner out, test the first line, roll the winner out, test the call to action, roll the winner out, and then start again, because the audience that replied to your first subject line is not quite the audience that will reply to your tenth. Each loop earns a little, and the little gains compound. A 20% lift from a subject line, a 15% lift from a first line, and a 10% lift from a call to action do not add up to 45%. They multiply, and a 1% reply rate becomes 1.5%, then 1.7%, then 1.9%, and that is a near-doubling from three small tests.

    Set a rhythm you can keep. In fact, one test a week is enough for most senders, and it is better than five tests in one week followed by three months of nothing. A weekly test gives you a steady stream of results, a log that grows by fifty-two lines a year, and a reply rate that improves a little every month. The senders who win at cold email are not the ones who run the cleverest test. They are the ones who run the next test, every week, without fail.

    Ab testing cold email: when a winner is not really a winner

    Sometimes a test produces a winner that should not be rolled out, and knowing when that happens is as important as knowing how to test. If the winner earned more replies but also more complaints, it is not a winner. A win on a sample of fifty sends per variant is not a winner either. Nor is a win caused by the other version bouncing more. And if the winner is a subject line that misleads the reader, like a fake “Re:” prefix or a fake personal connection, it is not a winner either, because the replies it earns are angry, not positive, and the damage to your reputation costs more than the meetings earn.

    There is one more case worth naming: the winner that wins by a margin too small to matter. A subject line that earns 2.1% against 2.0% has won the test and gained you nothing, because the gap is smaller than the noise in your next campaign. Roll it out if you like, because it costs nothing, but do not celebrate it, and do not let it stop you from testing something bigger. The tests that matter are the ones with a gap you can feel, and the discipline is to keep testing until you find one.

    Common mistakes: seven ways good tests go wrong

    Most failed tests do not fail because the idea was bad. In fact, they fail because the setup was sloppy, the sample was too small, or the result was read too early. The seven mistakes below are the ones we see most often, and each one has a fix that takes minutes. Read them before your first test, and you will avoid the errors that waste most beginners’ first month.

    Ab testing cold email: a tangled knot of wires and envelopes next to a tidy pair of envelopes with a clear path between them, and a small amber warning triangle above the tangle
    The mistakes in this ab testing cold email guide: a tangle of too many changes at once, next to a tidy pair of envelopes with one clear difference. The tidy pair is the test. The tangle is the guess.
    MistakeWhat happensThe fix
    Testing too many variablesYou cannot tell which change workedChange one thing per test
    Stopping too earlyNoise looks like a winnerFix the sample size first, then wait
    Testing on a dirty listBounces decide the resultVerify first, keep bounces under 2%
    Copying someone else’s winnerTheir audience is not yoursTest their idea on your own list
    Ignoring deliverabilityComplaints kill the domainWatch complaints per variant
    Judging by opensApple MPP inflates the numbersJudge by positive replies
    Never rolling the winner outThe lesson is never usedMake the winner the new control

    Last checked: 16 November 2026. The mistakes above are the ones named most often in the vendor guides linked in this article, and in the testing guidance published by Instantly and Prospeo. Each fix takes minutes, and each one protects the validity of every test that follows. Features and pricing can change, so please check the provider’s site before you buy.

    Ab testing cold email: testing too many things at once

    Changing three things at once is the most common mistake, and it is also the most understandable, because it feels efficient. You have one list, one week, and three ideas, so you put all three ideas into version B and send it. When version B wins, you have three candidate explanations and no way to choose between them. When version B loses, you have thrown away three ideas at once, including the one that might have won on its own. Test one variable at a time, even when it feels slow, because a slow test that teaches you something beats a fast test that teaches you nothing.

    There is one exception, and it is worth knowing about. In contrast, multivariate testing, where you test several variables at once across many combinations, is a real technique, and it works, but only with very large lists, because each combination needs its own sample. With a list of a few thousand prospects, multivariate testing is out of reach, and a simple A/B test is the right tool. Keep it simple until your volume earns the right to be complicated.

    Ab testing cold email: stopping too early

    Stopping early is the mistake that feels like a win. Version B pulls ahead after a hundred sends, the dashboard shows a big green gap, and the temptation to call it and move on is strong. Resist it. Early leads are usually noise, and the version that leads at a hundred sends often loses at a thousand, because the first hundred prospects are not a random sample of the whole list. They are the people who reply fastest, and fast repliers are not typical repliers. Wait for the full sample, judge once, and accept that the answer might be that there is no winner, because “no difference” is a useful result too. It tells you to test something bigger.

    Peeking is the quiet version of the same mistake. Checking the result every day does not change the result, but it changes your behaviour, because every peek is a chance to stop early, and every stop-early is a chance to call a false winner. Set the sample size and the end date, put the dashboard away, and come back when the test is done. Your future self, reading the log in six months, will thank you for the discipline.

    Ab testing cold email: copying someone else’s winner

    The internet is full of winning subject lines, winning templates, and winning frameworks, and some of them are genuinely good. But a subject line that won for a sender selling software to chief executives may not win for you selling services to operations managers, because the audience is different, the problem is different, and the relationship is different. Copying a winner is not testing. It is borrowing someone else’s answer to a question you have not asked.

    Use other people’s winners as hypotheses, not as answers. If a published subject line looks promising, test it against your own control, on your own list, with your own metric, and let your audience decide. Sometimes it will win, and then it is your winner, proven on your list. Sometimes it will lose, and then you have learned something about your audience that no blog post could have told you. Either way, you have a result you can trust, and that is worth more than any borrowed template.

    The tools compared for A/B testing

    Ten tools cover almost every testing job in this guide, and all ten offer A/B testing, verified on their official sites or in the verified profiles Matthew supplied. They differ in how many variants you can test, which plans include testing, and what else the tool does while the test runs. Instantly leads on built-in A/Z testing at scale, Lemlist leads on testing multichannel variants with spintax, and the rest split between budget, simplicity and agency features. The tables below compare them on price, on testing features, and on the plan details that decide what you actually get.

    Ab testing cold email: the ten tools at a glance

    ToolPrice fromFree plan or trialBest for
    Instantly$47/mo; $37.60 annualNo trial shownBuilt-in A/Z testing at scale
    Lemlist$69/mo; $55 annual14-day trialMultichannel variants with spintax
    Apollo$49/user/moFree plan, $0Database plus testing in one place
    Reply.io$59/mo; $49 annual14-day trialTesting plus AI reply sorting
    Smartlead$39/moCheck the siteAgency testing at volume
    Woodpecker$35/mo; $23.33 annualCheck the siteTesting for agency clients
    Saleshandy$34/mo annual; $41 monthly7-day trial, no cardCheapest honest testing start
    Klenty$50/mo annual14-day trial, no cardTesting multichannel cadences
    Emelia$37/mo; $31 annual7-day trial, no cardSimple testing with LinkedIn
    Mailshake$29/mo; $25 annualNo free trialCheapest testing with a dialer

    Last checked: 16 November 2026. Instantly Growth is $47 a month, or $37.60 on annual billing, and Hypergrowth is $107, or $85.58 annual; its plan card says 125,000 emails a month while its own comparison table says 100,000, so check the site for the current limit. Woodpecker’s entry price is $35 a month, or $23.33 on annual billing, for 500 contacted prospects, 8,000 emails and 2 warm-ups, then $67 for 2,000 prospects, $99 for 4,000, $159 for 8,000, $188 for 10,000 and $262 for 15,000. Our Woodpecker Review still shows the older figures, so use the figures here. Mailshake has no free trial: its FAQ says “we collect payment up front”. Features and pricing can change, so please check the provider’s site before you buy.

    Ab testing cold email: testing features, first five tools

    ToolA/B testingA/B plan noteVariantsWinner picked by
    InstantlyYesOn Growth; 26 variants on Hypergrowth+Up to 26 (A/Z)Reply or open rate, your choice
    LemlistYesNot stated on pricing pageSpintax and text variablesCheck the site
    ApolloYesNot stated on pricing pageCheck the siteCheck the site
    Reply.ioYesNot stated on pricing pageCheck the siteCheck the site
    SmartleadYesDisputed: see note belowCheck the siteCheck the site

    Last checked: 16 November 2026. Instantly’s A/Z testing is included on the Growth plan, with the full 26-variant capability on Hypergrowth and above, according to Instantly’s own subject-line A/B testing guide, updated October 2026. Smartlead’s plan gating is disputed: one third-party comparison says A/B testing is on all Smartlead plans, while another lists it as an Unlimited Smart ($174 a month) feature. We could not resolve the conflict on Smartlead’s own pricing page, so check the site before you buy. “Check the site” means we could not verify that detail on the official site today, not that the tool lacks it. Features and pricing can change, so please check the provider’s site before you buy.

    Ab testing cold email: testing features, next five tools

    ToolA/B testingA/B plan noteVariantsWinner picked by
    WoodpeckerYesNot stated on pricing pageCheck the siteCheck the site
    SaleshandyYesNot stated on pricing pageCheck the siteCheck the site
    KlentyYesNot stated on pricing pageCheck the siteCheck the site
    EmeliaYesNot stated on pricing pageCheck the siteCheck the site
    MailshakeYesNot stated on pricing pageCheck the siteCheck the site

    Last checked: 16 November 2026. A “Yes” means A/B testing is stated on the provider’s official site or in the verified profiles Matthew supplied. “Not stated on pricing page” means the pricing page does not say which plans include it, so ask the provider or check the features page before you buy. Woodpecker’s LinkedIn steps run through Dux-Soup, and its calling runs through Aircall, so check those integrations on the official site before you rely on them. Features and pricing can change, so please check the provider’s site before you buy.

    Ab testing cold email: what each tool’s testing looks like

    Instantly’s testing is the most fully documented of the ten. Its A/Z testing lets you add variants in the sequence step, choose reply rate or open rate as the winning metric, and run up to 26 variants on Hypergrowth and above, which is far more than most senders need, but useful when you want to test many subject lines at once. The practical advice is the same whatever the limit: test two or three variants at a time, because more variants split your sample into smaller pieces, and smaller pieces need longer to prove anything.

    Lemlist’s testing is built around spintax and text variables, which let you generate many versions of the same sentence and test them against each other, and around a 650 million contact database, which gives you the list size a real test needs. Apollo’s testing sits inside a database of 240 million contacts, so the list and the test live in one place, and Reply.io’s testing sits beside its AI reply sorting, so the winner can be judged on positive replies rather than on opens. Smartlead and Woodpecker both offer testing inside agency workflows, with client workspaces and conditional subsequences, while Saleshandy, Klenty, Emelia and Mailshake offer testing as part of simpler, cheaper sequencers, which is exactly what a beginner needs.

    Ab testing cold email: the honest pros and cons

    No tool in this guide is the best at everything, and the honest trade-offs are worth stating plainly. Instantly is the strongest at testing at scale, yet it shows no free trial on its pricing page, so you pay before you can test it properly, and its most useful testing features sit on Hypergrowth at $107 a month. Lemlist is the strongest for multichannel testing, yet it is the priciest starting point here at $69 a month, and it has no free plan. Apollo is the strongest all-in-one, yet its sequences are simpler than a dedicated sequencer’s, and its testing details are not published on its pricing page.

    Smartlead is the strongest for agencies, yet its A/B testing plan gating is disputed, and its entry plan is deliberately limited. Woodpecker is the strongest for agency clients that want condition-based logic, yet its new per-prospect pricing makes large lists expensive, and a test that needs 3,800 sends per variant can push you into a higher tier. Saleshandy, Emelia and Mailshake are the cheapest honest starts, yet none of them publishes which plans include testing, so you must ask before you buy. Pick the tool whose strength matches your weakest point, not the tool with the longest feature list, and check the plan gating before you pay.

    Which testing setup fits your volume

    The right testing setup depends on how many prospects you email, how much you can spend, and whether you need the contacts as well as the test. In sum, the table below pairs each situation with the setup that fits it, so your budget goes towards replies instead of towards activity that never converts.

    Ab testing cold email: the decision table

    Your situationBest setupTool to start with
    First test, tiny budgetTwo subject lines, 200 sends eachMailshake Starter $29/mo, or Saleshandy Starter $34/mo
    50 to 200 prospects a month, soloOne test a week, subject lines firstSaleshandy Starter $34/mo, or Emelia Start $37/mo
    High volume, many mailboxesA/Z testing, up to 26 variantsInstantly Growth $47/mo, or Hypergrowth $107/mo
    Agency, many clientsTesting per client, white-labelSmartlead Base $39/mo, or Woodpecker from $35/mo
    LinkedIn-first outreachTest email and LinkedIn variants togetherLemlist Multichannel $109/mo, or Klenty Growth $70/mo
    Need the contacts tooDatabase plus testing in one placeApollo Basic $49/user/mo, or Professional $99/mo

    Last checked: 16 November 2026. Prices above come from the official pricing pages named in the tools section. Woodpecker’s price depends on contacted prospects on a slider, so its row is the entry price for 500 prospects. Instantly shows no trial on its pricing page, and Mailshake has no free trial, so check the site before you buy. Features and pricing can change, so please check the provider’s site before you buy.

    Ab testing cold email: start with the free option

    If your budget is zero, start with the tools that let you test without paying. Apollo’s free plan costs $0 and includes A/B testing alongside its database, which makes it the cheapest way to run a real test, even if its sequences are simpler than a dedicated sequencer’s. A manual test costs nothing at all: split a verified list in half, send version A to one half and version B to the other, and count the positive replies in a spreadsheet. The tool makes testing easier, but it is not what makes testing possible. The list, the random split and the patience are what make it possible, and those are free.

    Our Best Cold Email Tools for Beginners guide ranks the cheapest honest starting points, and our Best Cold Email Software 2026 guide compares the full field. Start with the cheapest tool that runs a clean test, prove the habit works, and only then pay for the features that make testing faster. A $29 a month plan that runs one clean test a week beats a $107 a month plan that runs none, because the reply rate is what pays, not the tool.

    Ab testing cold email: when to pay for testing

    Pay for testing when your volume earns it. If you send 5,000 emails a month, a 50% lift in positive replies is worth far more than the difference between a $39 plan and a $107 plan, and the tool that runs the test for you, picks the winner, and rolls it out automatically is worth paying for. Moreover, Instantly Hypergrowth at $107 a month earns its price when you are testing 26 variants at once, and Lemlist Multichannel at $109 a month earns its price when you are testing email and LinkedIn variants together. Below that volume, the cheaper plans do the same job, more slowly, and the money you save is better spent on a better list.

    Pay attention to the hidden cost of testing, too, which is the sample size. A test that needs 3,800 sends per variant needs a list of 7,600 prospects, and a list that large needs mailboxes, warmup and verification, all of which cost money. Woodpecker’s per-prospect pricing makes this visible: a test that pushes you from 500 prospects to 4,000 prospects moves your plan from $35 to $99 a month. That is not a reason to avoid testing. It is a reason to test big differences first, where the sample you already have is enough, and to save the small-difference tests for when your list has grown.

    Frequently asked questions

    Ab testing cold email: how many sends do I need per variant?

    Send at least 200 prospects per variant as a practical minimum, and treat that as the floor, not the target. In fact, at 200 per variant with a 3% baseline reply rate, you can only reliably detect a jump to about 7.8%, a near-tripling. Detecting a 50% lift, from 3% to 4.5%, needs about 2,500 sends per variant, and detecting a doubling from 2% to 4% needs about 1,100. The table in the sample-size section of this guide gives the full figures, calculated at 95% confidence and 80% power.

    Ab testing cold email: what should I test first?

    Test the subject line first, because it gates every open, and a subject line that earns twice as many opens gives your email twice as many chances to earn a reply. After that, test the first line, then the offer, then the call to action, then the length, then the social proof. Leave send time and sender name until last, because they matter least. The ranking table at the start of this guide puts the eight variables in order, with the likely impact of each.

    Ab testing cold email: should I judge a test by open rate?

    No. Judge every test by positive reply rate, because it is the number closest to revenue. Open rates are unreliable since Apple Mail Privacy Protection started opening emails automatically, and a subject line that wins on opens may have won nothing at all. Use opens as a diagnostic, to spot a subject line that nobody opens, and use positive replies to call the winner. A positive reply rate of 1% to 3% is the honest target.

    Ab testing cold email: how long should a test run?

    Run a subject-line test for 48 to 72 hours for opens, and run a reply-rate test for five to seven days, through the full follow-up sequence, because 42% of replies arrive after the first email. Decide the sample size and the end date before you launch, do not peek mid-test, and judge the result once, on the full data. Stopping early is the most common way to manufacture a false winner.

    Ab testing cold email: can I test with a small list?

    Yes, if you test differently. Test big differences, not one-word tweaks, because a completely different subject line can produce a gap large enough to see at 200 sends per variant. Use directional signals instead of verdicts, run the test longer, and pool the same test across several campaigns to build a bigger sample. A small list cannot prove a small lift, but it can point you towards the big ones.

    Ab testing cold email: which tool is best for A/B testing?

    Instantly leads for built-in A/Z testing at scale, with up to 26 variants on Hypergrowth and above, from $47 a month on Growth. Lemlist leads for testing multichannel variants with spintax, from $69 a month. Apollo leads as the free starting point, with A/B testing on its $0 plan. Saleshandy, Emelia and Mailshake lead on price, from $29 to $37 a month. All ten tools in this guide offer A/B testing, verified on their official sites, and the tools section compares them on price and plan details.

    The verdict on A/B testing for cold email

    Our verdict

    Best for most senders: test the subject line first, one variable at a time, 200 sends per variant as a minimum, and judge the winner by positive replies. Roll the winner out to everyone, log the result, and test the next variable the following week. That loop, repeated week after week, is how a 1% reply rate becomes 3% without a bigger list or a bigger budget. For built-in A/Z testing at scale, Instantly leads, with up to 26 variants on Hypergrowth from $47 a month on Growth. Lemlist leads on multichannel test variants, with spintax and text variables from $69 a month. Saleshandy leads as the cheapest honest start, from $34 a month on annual billing. We have not hands-on tested these tools, so this guide gives Best-for labels only and no numeric score, and that is stated plainly.

    Start this week with one test, two subject lines, and 400 prospects. Write version A as you would send it today, copy it, change the subject line, split the list at random, and wait five days before you judge. The result will teach you something about your audience that no guide can, and the next test will teach you something more. Testing is a habit, not a project, and the senders who keep the habit are the ones whose reply rates keep climbing.

    Keep reading

  • Cold Email Follow-Up Sequences 2026

    Cold Email Follow-Up Sequences 2026

    Most replies do not come from your first email. They come from the follow-ups.

    Most cold email campaigns are judged on the wrong email. The sender writes a careful first message, sends it to a clean list, watches the replies trickle in, and decides the campaign worked or failed. In fact, the first email is only the opening of the conversation. The replies that matter most often arrive on the second, third or fourth touch, from people who were busy, who meant to reply, or who needed a second reason to say yes. This guide shows you how to build cold email follow up sequences that earn those replies: how many follow-ups to send, when to send them, what to say in each one, when to stop, and which tool should run the whole thing for you.

    Visit Instantly →See Smartlead →Explore Lemlist →

    Prices and features in this guide were checked 16 November 2026. Features and pricing can change, so please check the provider’s site before you buy.

    Quick Answer

    Send the first email, then three or four follow-ups: a short bump on day 3, a value-add or proof point on day 7, a different angle on day 14, and a polite breakup email after that for your most valuable prospects. Keep every follow-up short, add something new in each one, reply in the same thread, and stop the sequence the moment someone replies. That is the whole system, and the rest of this guide is the detail that makes it work.

    Follow-ups are not pestering. They are how busy people get a second chance to reply. As long as each touch adds value, respects the reader, and stops when asked, a follow-up sequence is good manners, not spam.

    Cold email follow up sequences: start with the reply, not the send

    Firstly, a follow-up sequence is a planned series of messages to the same person, each one sent because the last one went unanswered, and each one stopping the moment a reply arrives. The first email opens the conversation. The follow-ups keep it open, gently, for the people who were interested but busy. In fact, most senders treat the first email as the campaign, and the follow-ups as an afterthought, which is exactly backwards: the follow-ups are where the campaign is won.

    Secondly, the reassuring news is that follow-ups are a skill you can learn in an afternoon and improve forever. Cold email is normal, widely used business practice, and a polite, well-timed follow-up is something most recipients welcome, because it saves them the work of remembering. For example, you do not need a big budget or a complicated tool to start. You need a clear cadence, one new reason to reply in each message, and the discipline to stop when the sequence ends. If you have those three things, you are ready for the rest of this guide.

    Cold email follow up sequences: how this guide is organised

    Finally, this guide follows the journey your sequence takes. It starts with the numbers, so you can see why follow-ups earn their place. Then it sets the cadence, the timing framework of day 0, day 3, day 7 and day 14, with honest caveats about why those days are a starting point, not a law. After that come the words themselves, with example copy for every follow-up, the breakup email, multichannel sequences, conditional branches that react to opens and clicks, reply handling, A/B testing, and the ten tools compared, so you can pick the one that fits your volume and your team.

    Why follow-ups work: most replies arrive after the first email

    Secondly, the single most important fact about follow-ups is how much of the reply rate they carry. Instantly’s 2026 benchmark report, covering billions of cold email interactions, puts the average reply rate at about 3.4%, and finds that 58% of replies come from the first email while 42% come from follow-ups. In other words, nearly half of every reply you will ever get arrives after the first message, from people who needed a second or third nudge. A campaign with no follow-ups leaves almost half its replies on the table.

    Moreover, Belkins’ analysis of 7.5 million B2B emails tells a similar story from the other side: the first email captures just 41.4% of replies, while follow-ups drive the other 58.6%, and the third step alone books more appointments than the first two steps combined. Woodpecker’s data agrees in its own way: its users averaged about a 9% reply rate with no follow-up, and about 13% with at least one. The sources count different things, and none of them is a controlled test, yet they all point the same way. Follow-ups are not a small optimisation. They are a large share of the result.

    Cold email follow up sequences: busy is not the same as uninterested

    In contrast to what many senders assume, silence after a first email usually means busy, not uninterested. A prospect who would have replied on a quieter day simply never saw the message, or saw it between two meetings and meant to come back to it. Similarly, a short follow-up that floats the same thread back to the top of their inbox does them a favour, because it removes the work of searching for a message they half-remember. That is why the best follow-ups are short, kind and useful, and why the worst ones feel like nagging.

    Thirdly, follow-ups also work because they let you earn trust over time. One email from a stranger is easy to ignore. Four short, honest messages over two weeks, each one adding a new proof point or a new angle, build a picture of a sender who knows their subject and respects the reader’s time. Our guide to writing cold emails makes the same point about the first email itself: a 60 to 120 word message, one problem, one ask, written for one person. Follow-ups simply extend that same discipline across the whole sequence.

    Cold email follow up sequences: the numbers that keep you honest

    Finally, the benchmarks that matter for follow-ups are the same ones that govern all cold email, and they are worth keeping in mind before you write a single follow-up. Keep your bounce rate under 2%, because every bounce hurts your sender reputation. Aim for spam complaints under 0.1%, and never let them reach 0.3%, because that level risks your domain itself. Expect a positive reply rate of 1% to 3%, and treat opens, around 21% on average, as unreliable, because Apple Mail Privacy Protection inflates them. Send 25 to 30 emails per mailbox per day, never more than 40. Our Deliverability Guide explains the full sending setup behind those numbers, from a separate sending domain to warmup.

    The cadence: how many follow-ups and when to send them

    Secondly, the cadence is the rhythm of your sequence: how many follow-ups you send, and how many days you wait between them. Get the rhythm right and each message arrives while the last one is still faintly remembered, which is exactly when a nudge works. Get it wrong in either direction and the sequence fails: too fast, and you look pushy; too slow, and the reader has forgotten you entirely. The framework below is the starting point we recommend, and the table after it shows what four vendors publish, so you can see where the consensus sits.

    Cold email follow up sequences: a calendar with follow-up emails spaced across the days, a clock, and a rising bar chart showing replies growing with each touch
    The cadence in this cold email follow up sequences guide: follow-ups spaced across the days, with replies rising as the sequence runs. Space the touches wider as the sequence goes on, and let the reader remember you between them.

    Cold email follow up sequences: the day 0, 3, 7, 14 framework

    TouchDayJob of this emailLength
    First emailDay 0Open the loop: one problem, one ask60 to 120 words
    Follow-up 1: the bumpDay 3Float the thread back to the topUnder 50 words
    Follow-up 2: value-addDay 7Add proof: a result or a case study60 to 90 words
    Follow-up 3: new angleDay 14Reframe the value, or name a new pain60 to 90 words
    Breakup emailDay 21*Close the loop kindly, leave the door openUnder 60 words

    Last checked: 16 November 2026. *The breakup email on day 21 is for your most valuable prospects only; for everyone else, the sequence ends after follow-up 3 on day 14. The day counts are a starting framework to test against your own reply data, not a law. Features and pricing can change, so please check the provider’s site before you buy.

    Cold email follow up sequences: what four vendors recommend

    SourceHow manyHow far apartNotable figure
    Belkins3 to 5 stepsNot statedFollow-ups drive 58.6% of replies
    Instantly4 to 7 touchpoints3 to 4 days42% of replies from follow-ups
    Woodpecker2 to 3 follow-upsAt least 2 to 3 days9% replies without, about 13% with
    Lemlist4 to 9 follow-ups2 days, then 4, then 5 or moreCumulative reply rate about 22%

    Last checked: 16 November 2026. Instantly’s “4 to 7” counts touchpoints including the first email, while Woodpecker and Lemlist count follow-ups only, so the figures are not directly comparable. Lemlist’s own research puts one email at about a 4.5% reply rate, climbing to about 22% across a full sequence of up to ten touches. None of these is a controlled test, so treat them as vendor-published guidance, not proof. Features and pricing can change, so please check the provider’s site before you buy.

    Cold email follow up sequences: why the gaps widen

    Moreover, the gaps in the framework widen on purpose, and the reason is simple: the first follow-up rides on fresh memory, so three days is enough, while the later ones need more room, because the reader has had longer to forget. Lemlist’s own cadence follows the same shape: about 2 days between the first and second email, roughly 4 days between the second and third, and 5 or more days after that, across a total sequence of 10 to 25 days. In sum, start close together and spread out over time. That loose rhythm, sometimes described as a Fibonacci-style spacing, is the pattern most vendors converge on, whatever their exact numbers.

    Video: The Best Cold Email Follow Up Strategy in 2025 by Instantly on YouTube. This video is the creator’s property, embedded via YouTube for education. OutreachCompare is not affiliated with Instantly and does not claim ownership of this video.

    Cold email follow up sequences: timing is a starting point, not a law

    In contrast to the confident tables above, the honest truth is that no vendor has run a controlled test that proves day 3 beats day 2, or that four follow-ups beat three, for your audience. The senders who succeed treat the framework as a hypothesis: they run it for a few hundred prospects, note the reply rate at each step, and then adjust. If step 2 earns almost nothing while step 3 earns a lot, the problem is the message, not the day. If replies stop after step 3 and complaints rise at step 4, the sequence is one touch too long for that audience. Your own reply data is the only timing authority that matters.

    Finally, a practical note on timing: send on Tuesday, Wednesday or Thursday, in the recipient’s timezone, and avoid Mondays and Fridays, when inboxes are either overflowing or emptying. Woodpecker found that the day of the week and the time of day have no meaningful impact on reply rates, so do not agonise over the hour. The day gap matters far more than the clock. And once the cadence is set, let the tool run it: every sequencer in the tools section of this guide automates the delays, so no one on your team has to track them by hand.

    What to say in each follow-up: bump, value-add, proof and breakup

    Secondly, every follow-up needs a job, and the job changes with each touch. A sequence where every email says “just following up” is not a sequence at all. It is the same email sent four times, and the reader can tell. The table below gives each touch its job, and the examples after it show the words that do that job, short enough to read in seconds and specific enough to prove you are writing to one person, not a list.

    Cold email follow up sequences: the four follow-up jobs at a glance

    Follow-upIts jobWhat it addsWhat to avoid
    The bumpSurface the thread againOne new line, one easy questionRepeating the first email
    Value-addTeach something usefulA tip, a template, a short insightA sales pitch in disguise
    Social proofShow it worked for someone like themOne result from a similar companyNamedropping without permission
    BreakupClose the loop kindlyPermission to stop, door left openGuilt, pressure or fake urgency

    Last checked: 16 November 2026. The example copy in this section is original writing for this guide, adapted from the patterns in our guide to writing cold emails and the vendor templates published by Instantly and Lemlist. Swap in your own proof points and your own customer results before you send. Features and pricing can change, so please check the provider’s site before you buy.

    Cold email follow up sequences: follow-up 1, the bump

    Moreover, the bump is the shortest email in the sequence, and it has one job: float the thread back to the top of the inbox. It adds almost nothing new, because nothing new is needed yet. The reader saw the first email, meant to reply, and forgot. A bump reminds them, politely, and asks a question so easy that answering takes ten seconds. Keep it under 50 words, reply in the same thread so the context is visible, and never attach anything.

    Example, follow-up 1 (day 3): “Hi Sarah, just floating this back up in case it slipped past you. We help operations teams cut onboarding from nine days to three, and I wondered if that is a problem on your radar this quarter. Worth a quick yes or no? Best, Alex.”

    In fact, the bump works because it respects the reader’s time. It does not re-explain the offer, it does not paste the first email again, and it does not demand a call. It simply asks whether the problem matters, and gives the reader a one-word answer. If the bump earns no reply, that tells you something useful too: the reader needs a new reason to care, which is exactly what the next follow-up supplies.

    Cold email follow up sequences: follow-up 2, the value-add

    Thirdly, the value-add earns its place by teaching the reader something useful, whether or not they ever buy from you. A short insight, a template, a benchmark, or a mistake to avoid, given freely, proves that you know the subject and that you are not only here to sell. In contrast to the bump, which is short and empty of new content, the value-add is the longest follow-up in the sequence, and the one most likely to earn a reply from someone who ignored the first two touches.

    Example, follow-up 2 (day 7): “Hi Sarah, one thing worth knowing either way: teams your size usually lose the most time on the handover between hiring and day one, not on training itself. We put together a one-page checklist for that handover, happy to send it over if it would help. And if onboarding is not a priority right now, no worries at all. Best, Alex.”

    Finally, the value-add also protects your reputation, because a reader who never buys still remembers the sender who sent something useful. That memory is worth more than a reply today, because the same person may be a buyer in six months, and they will remember who helped them. Keep the gift genuinely useful, keep it short, and never make the gift conditional on a call.

    Video: Give me 13 mins, and I will make your cold emails impossible to ignore by Instantly on YouTube. This video is the creator’s property, embedded via YouTube for education. OutreachCompare is not affiliated with Instantly and does not claim ownership of this video.

    Cold email follow up sequences: follow-up 3, social proof and a new angle

    Secondly, the third follow-up changes the angle, because by now the reader has heard the offer twice and has not replied to it. A new angle means a different pain point, a different result, or a proof point from a company like theirs. One result, stated plainly, beats a paragraph of claims: a similar team, a similar problem, a number that shows what changed. Do not name a customer without their permission, and do not invent a result. A modest true result beats an impressive invented one, every time.

    Example, follow-up 3 (day 14): “Hi Sarah, a quick one from a team like yours: a 40-person professional services firm cut their onboarding from nine days to three in the first month, mostly by fixing the handover we talked about. If it would help to see how they did it, I can send the one-page summary. If the timing is wrong, just say so and I will stop here. Best, Alex.”

    Moreover, the third follow-up is also where you make the next step smaller. Instead of asking for a call, ask for a yes or no, or offer the one-page summary, or ask who owns the problem if it is not the reader. A smaller ask earns more replies, because it costs the reader less to say yes. And if the reader still does not reply, the sequence has one honest move left, which is the breakup email in the next section.

    When to stop: the breakup email and the graceful exit

    Secondly, every sequence needs an ending, and the ending is what separates a professional sender from a nuisance. A sequence that never ends, that keeps emailing for months, earns complaints, unsubscribes and spam reports, and those cost far more than any reply the extra touches might win. The rule is simple: after three or four follow-ups, stop. For your most valuable prospects, send one breakup email first, then stop. For everyone else, stop after the third follow-up and move on.

    Cold email follow up sequences: an open door with warm light and a checked envelope on the doorstep, the breakup email that leaves the door open
    The breakup email in this cold email follow up sequences guide: an open door, not a slammed one. You stop sending, you leave the door open, and the prospect can walk back through it whenever they like.

    Cold email follow up sequences: what a good breakup email does

    Moreover, a breakup email does three things in under 60 words. It says you will stop, so the reader feels relief rather than pressure. It leaves the door open, so the reader can reply later without embarrassment. And it asks one useful question, usually whether someone else owns the problem, because the most common reason for silence is that you emailed the wrong person. Done well, breakup emails often earn the highest reply rate in a sequence, precisely because they remove the pressure to reply.

    Example, breakup email (day 21, high-value prospects only): “Hi Sarah, I will stop here so I am not cluttering your inbox. If onboarding is not a priority right now, that is completely fine. If it is, and I have the wrong person, would you mind pointing me to whoever owns it? Either way, thanks for your time. Best, Alex.”

    Cold email follow up sequences: stop immediately when the reader asks

    In contrast to the planned ending above, some stops are not planned at all, and they are non-negotiable. If a prospect replies “not interested”, “unsubscribe”, “remove me”, or anything like it, stop immediately, suppress the address on your shared do-not-email list, and never email them again from any campaign. Our guide to building a cold email list makes the same point about hygiene: one shared suppression list, checked by every campaign, is the habit that protects your domain. Emailing someone again after they asked to be left alone does not just lose a sale. It is a complaint waiting to happen, and a complaint is the most expensive reply a sequence can earn.

    Thirdly, stop the sequence the moment someone replies positively, too, because nothing looks worse than an automated follow-up landing after a human has already answered. Every sequencer in the tools section stops automatically on reply, and that is a feature to check before you buy, not after. Similarly, stop when an email bounces hard, when the address is a role account that will never reach a decision maker, and when the prospect has changed jobs. A sequence that keeps emailing a dead address is a sequence that is damaging your sender reputation for nothing.

    Cold email follow up sequences: move silent prospects to nurture, not to the bin

    Finally, stopping does not mean deleting. A prospect who never replied is not a bad prospect, only a prospect whose timing was wrong. Move them to a light nurture list: a useful email once a quarter, a new result, a relevant insight, nothing more. That way the relationship stays warm, the door stays open, and when their problem becomes urgent, your name is the one they remember. Deleting a silent prospect throws away the work you did to find them. Nurturing them quietly costs almost nothing.

    Multichannel follow-ups: email, LinkedIn and calls in one sequence

    Secondly, email is not the only channel a follow-up can use, and for many prospects it is not the best one. A LinkedIn message from a real person, a short call, or a voice note can reach someone who never opens cold email, and a sequence that mixes channels earns more replies than one that stays in the inbox. The idea is simple: one prospect, one sequence, several channels, each touch building on the last. Our Multichannel and AI Personalisation Guide covers the full picture, and this section applies it to follow-ups specifically.

    Cold email follow up sequences: the 3-3-1 multichannel rhythm

    TouchDayChannelWhat to do
    Touch 1Day 1EmailFirst email: one problem, one ask
    Touch 2Day 4EmailBump: float the thread back up
    Touch 3Day 10EmailNew angle or proof point
    Touch 4Day 14LinkedInConnection request, reference the emails
    Touch 5Day 18LinkedInShort message, or a voice note
    Touch 6Day 21LinkedIn and callAsk for a 10-minute call, leave a voicemail

    Last checked: 16 November 2026. The 3-3-1 rhythm, three emails in the first ten days, three LinkedIn touches in the first two weeks, and one or two calls with a voicemail around day 21, is a published multichannel pattern, not a vendor rule. LinkedIn connection requests and voice notes need a real person behind them, so plan them as manual tasks in your sequencer, not as automated sends. Features and pricing can change, so please check the provider’s site before you buy.

    Cold email follow up sequences: the “If Connected” rule

    Moreover, multichannel sequences need one piece of logic that email-only sequences never need: what happens when a channel connects. In Lemlist, Apollo, Reply.io, Klenty and QuickMail, a LinkedIn step can be a manual task, and the sequence branches on what happens next. If the prospect accepts your connection request, the next step is a LinkedIn message, not another email. When they do not accept, the sequence falls back to email. Once a call connects, the sequence pauses for a human to take over. That branching is called “If Connected” logic, and it is the difference between a multichannel sequence and three separate campaigns that happen to target the same person.

    Thirdly, keep the channels honest about what each one is good at. Email is best for the first contact and for anything that needs a link or a document. LinkedIn is best for a short, human nudge and for showing the prospect that you are a real person with a real profile. Calls are best for the moment a prospect has shown interest and needs a conversation, not for a cold first touch. A sequence that uses each channel for its strength earns more replies than one that treats them as interchangeable.

    Cold email follow up sequences: do not automate the human parts

    Finally, the most common multichannel mistake is automating the parts that should stay human. A LinkedIn connection request with a generic note, a voice note read from a script, or a call that starts with a pitch will all be spotted in seconds, and they damage the trust the email sequence built. Use the tool to schedule and remind, and use a person to write the LinkedIn message, record the voice note, and make the call. Lemlist’s multichannel plans, Apollo’s LinkedIn task queues, and Klenty’s dialer all work this way by design: the tool queues the task, and a human does the talking.

    Conditional subsequences: follow-ups that react to behaviour

    Secondly, a fixed sequence sends the same follow-ups to everyone, whether they opened your email, clicked your link, or never saw it at all. A conditional sequence does something smarter: it watches what the prospect does, and it changes the next step to match. Someone who opened three times but never replied gets a different follow-up from someone who never opened at all. Someone who clicked a link gets a follow-up about what they clicked on. That is what conditional subsequences are, and they are the single biggest reply-rate improvement most senders have not tried yet.

    Cold email follow up sequences: the four branches that matter

    What the prospect didWhat it probably meansSend next
    Never openedBusy, or the subject line missedA bump with a new subject line
    Opened, no replyInterested, but not convinced yetValue-add or proof point
    Clicked a linkActively evaluating youA short, specific follow-up about the page
    Replied positivelyReady to talkStop the sequence, reply by hand

    Last checked: 16 November 2026. Open tracking is unreliable, because Apple Mail Privacy Protection opens emails automatically, so treat “opened” as a weak signal and “clicked” as a strong one. The tools in the next sections that offer conditional subsequences are Lemlist, Reply.io, Smartlead, Instantly and Woodpecker, each under its own name. Features and pricing can change, so please check the provider’s site before you buy.

    Cold email follow up sequences: opened but no reply

    Moreover, the opened-but-no-reply branch is the most useful one, because it catches the people who are closest to saying yes. They read your email, they understood the offer, and something stopped them: the timing was wrong, the ask was too big, or the proof was too thin. The right follow-up for them is not another nudge. It is a smaller ask, a stronger proof point, or a new angle on the same problem. Smartlead, Reply.io and Instantly all let you build exactly this branch, with the follow-up sent only to openers, while everyone else stays on the standard path.

    Thirdly, the clicked branch is even stronger, because a click is a deliberate act. Someone who clicked your case study link wants to know about results, so the follow-up should talk about results. Someone who clicked your pricing page wants to know about cost, so the follow-up should talk about cost. That kind of follow-up feels personal because it is personal: it responds to something the prospect actually did, rather than to a schedule. Woodpecker’s condition-based sequences and Lemlist’s condition-based sequences both support this, with the next step triggered by the click itself.

    Cold email follow up sequences: negative replies need their own branch

    Finally, do not forget the negative replies. A prospect who says “not now” is not a dead lead, only a lead whose timing is wrong, and the right branch moves them to a nurture list with a note to try again in three months. A prospect who says “wrong person” should trigger a follow-up asking who the right person is, because that question often earns a warm introduction. And a prospect who says “remove me” must stop everything, immediately, with no branch at all. A conditional sequence that only handles the positive cases is only half a sequence.

    Reply handling: triage every reply in one inbox

    Secondly, a follow-up sequence only works if someone is watching the replies, because every reply is a prospect telling you what to do next, and a reply that sits unread for three days is a meeting that never happens. The problem is volume: once a sequence is running across several mailboxes, replies arrive in different inboxes, at different times, mixed in with newsletters and out-of-office messages. The fix is a master inbox, one place where every reply lands, sorted by what it means, so the important ones get answered first.

    Cold email follow up sequences: a unified inbox with a robot helper sorting replies into three colour-coded trays, positive, later, and stop
    Reply handling in this cold email follow up sequences guide: one unified inbox, with replies sorted into three trays. The positive replies get answered first, the “not now” replies get nurtured, and the stop requests get honoured immediately.

    Cold email follow up sequences: the four reply categories

    Reply typeWhat it looks likeWhat to doHow fast
    Positive“Yes, tell me more” or a questionAnswer by hand, offer a callWithin hours, ideally minutes
    Not now“Check back in three months”Thank them, add to nurtureSame day
    Wrong person“Try Sarah in operations”Ask for an introduction, restartSame day
    Stop“Remove me” or “unsubscribe”Suppress immediately, no reply neededImmediately

    Last checked: 16 November 2026. Instantly’s Unibox and Smartlead’s Master Inbox both pull replies from unlimited mailboxes into one place, and Lemlist’s unified inbox does the same across email, LinkedIn and other channels. Reply.io and Smartlead both categorise replies by AI sentiment, which is how the four categories above can be sorted automatically. Features and pricing can change, so please check the provider’s site before you buy.

    Cold email follow up sequences: AI reply sentiment categorisation

    Moreover, the newest reply-handling feature is AI sentiment categorisation: the tool reads each reply and labels it positive, neutral, negative, out-of-office, or unsubscribe, before a human ever sees it. Smartlead and Reply.io both offer this, and it matters because it turns a pile of replies into a sorted list. Positive replies go to the top, unsubscribes get suppressed automatically, and out-of-office messages get parked until the prospect returns. Without it, a human has to read every reply to find the five that matter, and the five that matter wait.

    Thirdly, speed matters more than most senders realise. A prospect who says yes is often talking to three other vendors at the same time, and the first useful reply wins the meeting. Instantly’s meeting-scheduling guidance says to respond within five minutes of a positive reply, with the calendar link included, and that is a good target even if it sounds ambitious. A master inbox makes it possible, because the reply is visible the moment it arrives, rather than buried in a mailbox no one is watching. If your team cannot answer within hours, the sequence is sending replies into a void.

    Cold email follow up sequences: out-of-office replies are not replies

    Finally, a practical detail that trips up many beginners: out-of-office replies are not real replies, and they should never stop a sequence or count as engagement. A prospect on holiday for two weeks will return to a full inbox, and a follow-up that landed while they were away is a follow-up they never saw. Good tools know this and keep the sequence running, or pause it until the return date. If your tool counts an out-of-office as a reply and stops the sequence, check its settings, because you are losing the prospects who were simply away.

    A/B testing your follow-ups: what to test first

    Secondly, A/B testing is how a good sequence becomes a great one, and the principle is simple: change one thing at a time, send both versions to similar prospects, and keep the version that earns more positive replies. The mistake is testing everything at once, because then you never learn what worked. The order below is the order that teaches you the most, fastest, and it starts with the things that move the reply rate most.

    Cold email follow up sequences: test the cadence first

    Moreover, the first thing to test is the cadence itself, because it shapes every other result. Run one group on the day 0, 3, 7, 14 framework in this guide, and another on a shorter rhythm, such as day 0, 2, 5, 10, and compare the positive reply rate after two weeks. Then test the number of touches: three follow-ups against four, with the breakup email as the fourth. Only after the cadence is settled should you test the words, because a great email on a bad cadence still underperforms, and a mediocre email on a good cadence still earns replies.

    Cold email follow up sequences: then test one variable at a time

    Thirdly, once the cadence is set, test one variable at a time, in this order. First, the subject line of the follow-up, because it decides whether the thread gets opened again. Second, the length: a 40-word bump against a 90-word value-add, to learn whether your audience prefers short or substantial. Third, the proof point: a customer result against a benchmark, to learn what persuades them. Fourth, the call to action: a yes-or-no question against a calendar link, to learn how much commitment they will give. Lemlist, Apollo and Woodpecker all have built-in A/B testing for sequences, so the tool can split the audience and report the winner for you.

    In contrast to the tests above, some things should never be tested, because the answer is already known. Never test whether to stop on a reply, never test whether to honour an unsubscribe, and never test sending more than 40 emails per mailbox per day, because the cost of those experiments is your domain reputation. Test the words, the timing and the proof. Do not test the rules that keep you out of spam.

    Cold email follow up sequences: read positive replies, not opens

    Finally, judge every test by positive replies, not by opens or by total replies. Opens are unreliable, because Apple Mail Privacy Protection inflates them, and total replies include complaints, unsubscribes and “not interested” messages, which are not wins. A positive reply rate of 1% to 3% is the honest target, and a test that moves it from 1.2% to 1.8% has earned its keep, even if the open rate never moved. Run each test on at least a few hundred prospects before you call a winner, because a test on fifty people proves nothing except that fifty people are a small sample.

    The tools compared for follow-up automation

    Secondly, ten tools cover almost every follow-up job in this guide, and they split into two groups. Instantly, Smartlead, Lemlist, Reply.io, Woodpecker, Saleshandy, Klenty, Emelia and QuickMail are sequencers: they build the sequence, run the cadence, branch on behaviour, and sort the replies. Apollo is a database that also sequences, which makes it the all-in-one choice for teams that want the contacts and the follow-ups in one place. Many senders use one sequencer and one database, and that pairing is the cheapest way to run follow-ups that are both well-targeted and well-timed.

    Cold email follow up sequences: the ten tools at a glance

    ToolPrice fromFree plan or trialBest for
    Instantly$47/mo; $37.60 annualNo trial shownBehaviour-based follow-ups at scale
    Smartlead$39/moCheck the siteConditional subsequences and reply sorting
    Lemlist$69/mo; $55 annual14-day trialMultichannel sequences with AI writing
    Reply.io$59/mo; $49 annual14-day trialConditional subsequences plus AI SDR
    Apollo$49/user/moFree plan, $0Database plus sequences in one place
    Woodpecker$35/mo; $23.33 annualCheck the siteCondition-based sequences for agencies
    Saleshandy$34/mo annual; $41 monthly7-day trial, no cardCheapest honest starting point
    Klenty$50/mo annual14-day trial, no cardMultichannel cadences with a dialer
    Emelia$37/mo; $31 annual7-day trial, no cardSimple sequences with LinkedIn included
    QuickMail$49/mo14-day trialUnlimited senders and warmup included

    Last checked: 16 November 2026. Instantly Growth is $47 a month, or $37.60 on annual billing, and Hypergrowth is $107, or $85.58 annual; its plan card says 125,000 emails a month while its own comparison table says 100,000, so check the site for the current limit. Woodpecker’s entry price is $35 a month, or $23.33 on annual billing, for 500 contacted prospects, 8,000 emails and 2 warm-ups, then $67 for 2,000 prospects, $99 for 4,000, $159 for 8,000, $188 for 10,000 and $262 for 15,000. Our Woodpecker Review still shows the older figures, so use the figures here. Reply.io’s AI SDR (Jason) starts from $500 a month on annual billing, and the $800 monthly figure rests on our 15 November check, behind the pricing slider. Features and pricing can change, so please check the provider’s site before you buy.

    Cold email follow up sequences: follow-up features, first five tools

    ToolConditional follow-upsMultichannel stepsAI reply sortingMaster inboxA/B testing
    InstantlyYes, behaviour-basedYesYes, AI Reply AgentYes, UniboxNot confirmed
    SmartleadYes, conditionalYesYes, sentimentYes, Master InboxNot confirmed
    LemlistYes, condition-basedYes, email and LinkedInNot confirmedYes, unified inboxYes
    Reply.ioYes, conditionalYes, email and LinkedInYes, sentimentYesNot confirmed
    ApolloYes, automatedYes, dialer and LinkedInNot confirmedNot confirmedYes

    Last checked: 16 November 2026. A tick means the feature is stated on the provider’s official site or in the verified profiles Matthew supplied. “Not confirmed” means we could not verify it on the official site today, not that the tool lacks it. Features and pricing can change, so please check the provider’s site before you buy.

    Cold email follow up sequences: follow-up features, next five tools

    ToolConditional follow-upsMultichannel stepsAI reply sortingMaster inboxA/B testing
    WoodpeckerYes, condition-basedYes, LinkedIn via Dux-SoupNot confirmedNot confirmedYes
    SaleshandyYes, subsequencesYesNot confirmedYes, unified inboxNot confirmed
    KlentyNot confirmedYes, email, calls, LinkedInNot confirmedNot confirmedNot confirmed
    EmeliaNot confirmedYes, email and LinkedInNot confirmedNot confirmedNot confirmed
    QuickMailNot confirmedYes, email and LinkedInNot confirmedYes, unified inboxNot confirmed

    Last checked: 16 November 2026. Woodpecker’s LinkedIn steps run through Dux-Soup, and its calling runs through Aircall, so check those integrations on the official site before you rely on them. Klenty’s dialer is its strength: a parallel dialer add-on at $45 a user a month, and Dynamic Presence at $50 a seat a month. Features and pricing can change, so please check the provider’s site before you buy.

    Cold email follow up sequences: what each tool costs to run follow-ups

    Moreover, the price that matters for follow-ups is not the headline plan price but the cost of running your cadence at your volume. Instantly Growth at $47 a month suits high volume, because it includes unlimited warmup and inbox rotation, while Smartlead Base at $39 a month suits agencies, because it includes unlimited mailboxes and white-label client portals. Saleshandy Starter at $34 a month on annual billing is the cheapest honest starting point in this guide, and Emelia Start at $37 a month, or $31 annual, is the cheapest way to get LinkedIn steps included. Lemlist Email at $69 a month, or $55 annual, is the most expensive starting point here, and it earns that price with AI icebreakers, spintax, lemAgent and a 650 million contact database.

    Thirdly, watch the pricing traps that catch beginners. Woodpecker now charges by contacted prospects on a slider, so a plan that covers 500 prospects costs $35 a month, while one that covers 15,000 costs $262, and the price rises with your list whether or not you send more emails. QuickMail charges $49, $99 or $299 with no annual discount published, but it includes unlimited senders, LinkedIn accounts and users on every plan, plus free warmup, so the headline price is the whole price. Klenty’s Starter at $50 a month is email only, and the dialer that makes its multichannel sequences work costs $45 a user a month extra. The cheapest plan is rarely the cheapest setup, once the add-ons are counted.

    Cold email follow up sequences: the honest pros and cons

    Finally, no tool in this guide is the best at everything, and the honest trade-offs are worth stating plainly. Instantly is the strongest at scale, yet it shows no free trial on its pricing page, so you pay before you can test it properly. Smartlead is the strongest for agencies, yet its most useful features sit on the higher plans, and its entry plan is deliberately limited. Lemlist is the strongest for multichannel personalisation, yet it is the priciest starting point and it has no free plan. Reply.io is the strongest for AI reply handling, yet its AI SDR starts from $500 a month, which is a different budget entirely.

    Apollo is the strongest all-in-one, yet its sequences are simpler than a dedicated sequencer’s. Woodpecker is the strongest for agencies that want condition-based logic, yet its new per-prospect pricing makes large lists expensive. Saleshandy, Emelia and QuickMail are the cheapest honest starts, yet none of them offers the conditional branching or AI reply sorting that the pricier tools do. Pick the tool whose strength matches your weakest point, not the tool with the longest feature list.

    Which follow-up setup fits your volume and team

    Secondly, the right follow-up setup depends on how many prospects you email, how many people run the sequences, and whether you need LinkedIn and calls as well as email. The framework below matches the setup to the situation, so you spend your money where it earns replies instead of spending it where it only earns activity.

    Cold email follow up sequences: the decision table

    Your situationBest setupTool to start with
    First sequence, tiny budgetSimple email cadence, 3 follow-upsSaleshandy Starter $34/mo, or Emelia Start $37/mo
    50 to 200 prospects a month, soloEmail cadence plus a master inboxInstantly Growth $47/mo, or Smartlead Base $39/mo
    High volume, many mailboxesBehaviour-based follow-ups at scaleInstantly Growth $47/mo, or Hypergrowth $107/mo
    Agency, many clientsConditional subsequences, white-labelSmartlead Base $39/mo, or Woodpecker from $35/mo
    LinkedIn-first outreachMultichannel sequence, manual tasksLemlist Multichannel $109/mo, or Klenty Growth $70/mo
    Need the contacts tooDatabase plus sequences in one placeApollo Basic $49/user/mo, or Professional $99/mo

    Last checked: 16 November 2026. Prices above come from the official pricing pages named in the tools section. Woodpecker’s price depends on contacted prospects on a slider, so its row is the entry price for 500 prospects. Instantly shows no trial on its pricing page, so check the site before you buy. Features and pricing can change, so please check the provider’s site before you buy.

    Cold email follow up sequences: start simple, add branches later

    Moreover, the pattern in the table is deliberate: start with a simple email cadence, prove it works by hand, and only then add conditional branches, multichannel steps and AI reply sorting. A founder who runs a four-touch email sequence and gets two positive replies has a working system. That system can then be improved with a conditional branch for openers, a LinkedIn step for the silent ones, and a master inbox to catch the replies faster. A founder who starts with the most complicated setup has no idea whether the cadence, the copy or the tool is the problem, and will spend months guessing.

    Thirdly, money is a real limit for most senders, and the framework above is built around that limit. A $34 a month plan that runs a clean three-follow-up cadence beats a $109 a month plan that runs a complicated multichannel sequence no one has time to manage, because the reply rate is what pays, not the tool. Our Best Cold Email Tools for Beginners guide ranks the cheapest honest starting points, and our Multichannel and AI Personalisation Guide covers the multichannel end of the same decision. Pick the guide that matches where you are, and put the money you save towards better targeting.

    Frequently asked questions

    Cold email follow up sequences: how many follow-ups should I send?

    Firstly, send three or four follow-ups after the first email, which is four or five messages in total. In fact, that range sits inside what the vendors publish: Belkins says 3 to 5 steps, Instantly says 4 to 7 touchpoints, Woodpecker says 2 to 3 follow-ups, and Lemlist says 4 to 9. For most beginners, the day 0, 3, 7, 14 framework in this guide is the right starting point, with a breakup email on day 21 for your most valuable prospects only.

    Cold email follow up sequences: how long should I wait between follow-ups?

    Secondly, wait about three days before the first follow-up, then widen the gaps: day 3, day 7, day 14, and a breakup on day 21 for high-value prospects. For example, Lemlist recommends about 2 days between the first and second email, roughly 4 days between the second and third, and 5 or more days after that. The exact days matter less than the shape: start close together and spread out over time, and test the cadence against your own reply data.

    Cold email follow up sequences: should follow-ups be in the same thread?

    Thirdly, yes. Reply in the same thread, so the reader sees the whole conversation and the context is visible without searching. In addition, a follow-up that starts a new thread looks like a new cold email, and it loses the trust the first email built. Every sequencer in the tools section sends follow-ups in the same thread by default, so check that setting before you launch.

    Cold email follow up sequences: do follow-ups hurt deliverability?

    Moreover, follow-ups only hurt deliverability when they are sent too often, to stale lists, or to people who asked to stop. In contrast, a clean list, three or four well-spaced follow-ups, and immediate suppression of complaints will not damage a warmed domain. Keep your bounce rate under 2% and your spam complaints under 0.1%, and never let complaints reach 0.3%. Our Deliverability Guide explains the full sending setup, from a separate sending domain to warmup.

    Cold email follow up sequences: what is a conditional subsequence?

    In fact, a conditional subsequence is a follow-up path that changes based on what the prospect does. Openers who do not reply get a value-add. Clickers get a follow-up about what they clicked. And a positive reply stops the sequence. Lemlist, Reply.io, Smartlead, Instantly and Woodpecker all offer this, each under its own name, and it is the single biggest reply-rate improvement most senders have not tried yet.

    Cold email follow up sequences: is it rude to follow up four times?

    Finally, no, when each follow-up adds something new and stops when asked. As a result, a follow-up that teaches, proves or helps is good manners, not pestering, and most recipients welcome the reminder, because they were busy, not uninterested. What is rude is repeating the same email four times, ignoring a “not interested”, or emailing someone who asked to be removed. Send value, respect the reader, stop when asked, and four touches is polite.

    The verdict on cold email follow-up sequences

    Our verdict

    Best for most senders: run the day 0, 3, 7, 14 cadence, with a short bump, a value-add, a new angle, and a breakup email for your most valuable prospects. That is four or five messages over two weeks, each one adding something new, each one stopping the moment someone replies. For behaviour-based follow-ups at scale, Instantly leads, with behaviour-based subsequences and Unibox from $47 a month. Smartlead leads on conditional subsequences, with AI reply sentiment categorisation and a Master Inbox from $39 a month. Lemlist leads on multichannel sequences, with condition-based sequences, AI icebreakers and lemAgent from $69 a month. We have not hands-on tested these tools, so this guide gives Best-for labels only and no numeric score, and that is stated plainly.

    Start this week with one sequence, one cadence, and fifty prospects. Firstly, write the first email at 60 to 120 words, then the bump, the value-add and the new angle, each shorter than the last. Send 25 to 30 emails a day from a warmed mailbox, watch the positive reply rate after fourteen days, and change one thing at a time. Follow-ups are a craft you improve by sending, measuring and adjusting, and the first fifty prospects teach you more than any guide can.

    Keep reading

  • How to Build a Cold Email List 2026

    How to Build a Cold Email List 2026

    A small list of the right people beats a big list of strangers.

    Most cold email campaigns fail before a single word is written, because the list is wrong. The sender bought ten thousand addresses, emailed people who never wanted to hear from them, and wondered why the replies never came. A good list is the opposite of that. In fact, it is a short, honest list of people who match your ideal customer, whose email addresses have been checked, and whose companies you actually understand. This guide shows you how to build a cold email list like that, step by step: who to email, where to find them, which tools to use, how to verify every address, and how to keep the list clean as it grows.

    Visit Apollo →See Hunter →Explore Skrapp →

    Prices and features in this guide were checked 16 November 2026. Features and pricing can change, so please check the provider’s site before you buy.

    Quick Answer

    Start with your ideal customer profile, then source 50 to 200 contacts who match it, verify every address before you send, and segment the list by role, company size and industry. Use a B2B database such as Apollo for volume, an email finder such as Hunter or Skrapp for precise finds, and a verifier such as Snov.io for the final check. Keep your bounce rate under 2% and your spam complaints under 0.1%.

    Never buy a list. Bought lists are stale, full of spam traps, and the fastest way to damage your sender reputation. As a result, a small, clean, verified list will always outperform a big, bought one.

    How to build a cold email list: start with the person, not the database

    Firstly, every good cold email list starts on paper, not in a tool. Before you open a database or install an extension, write down who you are trying to reach and why they would care. In fact, a list built without that answer is just a pile of addresses, and a pile of addresses is what gets senders into trouble. The rest of this guide follows the order that works: define the person, find where they gather, choose the tool that fits your budget, check every address, and only then write the first email.

    Secondly, the reassuring news is that list building is a learnable skill, not a budget contest. In fact, cold email is normal, widely used business practice, and the senders who get the best replies are usually the ones with the smallest, most careful lists. For example, you do not need an enterprise database to start. You need a clear picture of your ideal customer, a free plan or two, and the discipline to verify before you send. If you have those three things, this guide will carry you the rest of the way.

    How this guide is organised

    Finally, this guide follows the journey your list takes. It starts with your ideal customer profile, so you know who belongs on the list and who does not. Then it compares the six sourcing methods, from B2B databases to your own network, and the eight tools that do the finding. After that come verification, enrichment, segmentation and hygiene, the four jobs that turn a raw list into a working one. Then the mistakes to avoid, a step-by-step build plan for your first 50 to 200 contacts, and a decision framework that matches the method to your budget.

    Start with your ideal customer, not a tool

    Secondly, your ideal customer profile, or ICP, is a short description of the company and the person who will benefit most from what you sell. It is not a vague label such as “small businesses” or “marketing managers”. In addition, it is a specific picture: companies of 11 to 50 people, in professional services, based in the UK or Ireland, whose operations manager is hiring and whose onboarding process is visibly creaking. The more specific the picture, the easier every later step becomes, because every sourcing filter, every search and every segment follows from it.

    How to build a cold email list: the five ICP questions

    QuestionWhat to write downExample answer
    What problem do you solve?One pain, in the customer’s wordsOnboarding a new starter takes nine days
    Who feels that pain most?One job title, one teamOperations manager, 11 to 50 staff
    Which companies?Size, industry, placeProfessional services, UK and Ireland
    What trigger shows they need you now?A recent, visible changeHiring three people, or a new office
    Who is NOT your customer?One clear exclusionCompanies under 10 staff, or outside the UK

    Last checked: 16 November 2026. The five questions above come from the ICP method in our Lead Generation and List Building Guide and our Cold Email for Beginners guide. Features and pricing can change, so please check the provider’s site before you buy.

    How to build a cold email list: learn from your best customers

    Moreover, the fastest way to write a good ICP is to look at the customers you already have. For example, list your three best customers, the ones who bought quickly, stayed longest and paid happily, and write down what they have in common. Similarly, the same size, the same industry, the same trigger, the same job title on the other end of the deal. Those shared traits are your ICP, and they are worth more than any amount of guessing, because they describe people who already said yes.

    Thirdly, the exclusion row in the table matters as much as the rest. Every list grows faster when you know who to leave off it. A company that is too small to afford you, too large to decide quickly, or in an industry you do not understand will cost you bounces, complaints and wasted sends. Writing down one clear exclusion before you start sourcing keeps your list honest, and an honest list is a list that replies.

    How to build a cold email list: one person per company, to start

    Finally, a useful rule for your first list is one or two contacts per company, never ten. In addition, emailing ten people at the same company looks like a blast, and it earns the same reply rate as a blast, which is a low one. As a result, one or two well-chosen contacts, the person who owns the problem and perhaps their manager, earns a far better response. Our guide to getting your first email addresses makes the same point, and it ranks the safe ways to find those first contacts, from your own network to verified data providers.

    Where good lists come from: six sourcing methods

    Secondly, once the ICP is written, the next job is finding the people who match it, and there are six honest ways to do that. Similarly, each method has a different cost, a different speed and a different quality, and the right choice depends on how many contacts you need and how much you can spend. The table below compares them side by side, and the sections after it explain when each one earns its place.

    How to build a cold email list: four source icons on the left, a database, a profile card, a website window and a badge, with teal arrows converging into a single amber checklist with checkmarks on the right
    Sourcing methods in this how to build a cold email list guide: a database, a profile card, a website and an event badge all feed one tidy checklist. The method matters less than the match: every name must fit the ICP first.

    How to build a cold email list: the six sourcing methods compared

    MethodHow it worksCostSpeedBest for
    B2B databaseSearch by filters, export a listFrom $39/moFastMost beginners
    Email finderFind one address by name and domainFrom $29/moFastSmall, precise lists
    LinkedInSearch people, find emails with an extensionFree to startMediumResearch-rich lists
    Company websitesVisit sites, find team pages and contactsFreeSlowTiny, hand-built lists
    Events and webinarsAttendees, speakers and exhibitorsVariesSlowWarm, recent lists
    Your own networkCustomers, partners, referralsFreeSlowYour first 50 contacts

    Last checked: 16 November 2026. Prices are the cheapest paid plans in the tools section of this guide: Snov.io Starter from $39 a month and Skrapp Professional from $39 a month, both checked on their official pricing pages today. LinkedIn Sales Navigator is a paid add-on, so check the site for its current price. Features and pricing can change, so please check the provider’s site before you buy.

    How to build a cold email list: B2B databases do the heavy lifting

    Moreover, a B2B database is the fastest honest way to build a list, because it lets you search by the exact traits in your ICP: industry, company size, location, job title, technology used, and recent triggers such as hiring or funding. Apollo, with more than 240 million contacts, and Lemlist, with more than 650 million, are the two biggest databases in this guide. In sum, type in your filters, read the results, and export only the contacts that genuinely match. A database that returns ten thousand names is not doing you a favour. It is doing you a disservice, unless you filter it down to the few hundred that fit.

    Video: The best way to build email lists by Cleverly | #1 B2B Lead Generation Agency on YouTube. This video is the creator’s property, embedded via YouTube for education. OutreachCompare is not affiliated with Cleverly | #1 B2B Lead Generation Agency and does not claim ownership of this video.

    How to build a cold email list: finders, LinkedIn and your own network

    In contrast, email finders suit a different job: finding the address of one specific person you already know you want to reach. As a result, Hunter finds an address from a name and a domain, and Skrapp finds one from a LinkedIn profile, and both verify it as they go. LinkedIn itself is the richest research source of all, because a profile tells you what a person cares about right now, and an extension turns that profile into an email address in one click. Your own network is the slowest source and the best one: a customer who introduces you, or a partner who shares a contact, hands you a name that already trusts you. Start there, and use the databases for scale.

    Finally, the method to avoid is the one that looks easiest: buying a list. In sum, a bought list is a list of strangers who never asked to hear from you, full of old addresses, wrong job titles and spam traps. Furthermore, Mailchimp is opt-in only, and purchased lists, or mailing people who never opted in, risk suspension there and on other platforms too. Our guide to getting your first email addresses ranks buying a list at the bottom for exactly this reason. Build your list, one honest source at a time, and it will repay you in replies.

    The list-building tools compared

    Secondly, eight tools cover almost every list-building job in this guide, and they split into two groups. Furthermore, Apollo, Lemlist, Amplemarket, ZoomInfo and Cognism are databases and platforms: they hold the contacts and help you reach them. Hunter, Snov.io and Skrapp are finders and verifiers: they find one address at a time and check it before you send. Many senders use one of each, a database for volume and a finder for precision, and that pairing is the cheapest way to build a list that is both big enough and clean enough.

    How to build a cold email list: the eight tools at a glance

    ToolDatabaseWhat it does bestPrice fromFree planBest for
    Apollo240M+ contactsDatabase plus sequences in one place$49/user/moYes, $0All-in-one list building
    HunterDiscover, no size statedPrecise finder plus verifier$49/mo; $34 annualYes, 50 creditsPrecise one-off finds
    Snov.ioNo size statedFinder, verifier and CRM in one$39/mo; $29.25 annualYes, 50 creditsFinder plus sending
    SkrappLinkedIn and web, no databaseLinkedIn finds, cheapest credit at scale$39/mo; $29 annualYes, 50 creditsLinkedIn-first lists
    Lemlist650M+ contactsDatabase plus AI personalisation$69/mo; $55 annualNoDatabase plus writing
    Amplemarket200M+ verified contactsVerified data plus multichannel$600/mo annual termNoVerified data at scale
    ZoomInfo500M+ contactsDeepest data and intent signalsQuote onlyLite, 10 credits/moEnterprise data depth
    CognismNo size statedCompliant European dataQuote onlyNoEU-focused prospecting

    Last checked: 16 November 2026. Apollo has 240 million contacts and 30 million accounts from its own homepage, and Lemlist has 650 million contacts from lemlist.com, both official figures that win over the older numbers in the supplied profiles. ZoomInfo has 500 million contacts, 100 million companies and 300 million verified emails from its data page. Amplemarket has 200 million verified contacts from its vendor blog. Features and pricing can change, so please check the provider’s site before you buy.

    How to build a cold email list: finder and verification features

    ToolB2B databaseEmail finderDomain searchLinkedIn toolBuilt-in verification
    ApolloYes, 240M+YesYesChrome extensionYes
    HunterYes, DiscoverYesYesNoYes, auto-verification
    Snov.ioYesYesYesLinkedIn Prospect FinderYes, 7-tier
    SkrappNoYesYes, via company sitesYes, Sales NavigatorYes
    LemlistYes, 650M+YesYesChrome extensionYes
    AmplemarketYes, 200M+YesYesYesYes
    ZoomInfoYes, 500M+YesYesYesYes
    CognismYesYesYesYesYes

    Last checked: 16 November 2026. A tick means the feature is stated on the provider’s official site. Skrapp has no database of its own: it finds emails from LinkedIn and company websites, which is why its database cell reads No. Hunter has a browser extension for websites, not a LinkedIn tool. Features and pricing can change, so please check the provider’s site before you buy.

    How to build a cold email list: enrichment, phones, intent and sending

    ToolEnrichmentPhone numbersIntent signalsSequencesCRM sync
    ApolloYes, waterfallYesYesYesYes, HubSpot and Salesforce
    HunterYes, lead enrichmentNoNoYesYes
    Snov.ioYes, tokensYesNoYesYes, HubSpot and Pipedrive
    SkrappYes, AI EnrichmentNoNoNoYes, List CRM Sync
    LemlistYes, 14+ providersYes, phone finderYes, Intent Signal AgentsYesYes, HubSpot and Salesforce
    AmplemarketYesYesYes, job-change alertsYesYes
    ZoomInfoYesYes, 135M+ direct dialsYes, 4,500+ topicsYes, EngageYes
    CognismYesYesYesNoYes

    Last checked: 16 November 2026. A tick means the feature is stated on the provider’s official site, and a No means it is not confirmed there, not that the tool is worse. Skrapp is a finder, not a sender, so it has no sequences and no phone finder. Features and pricing can change, so please check the provider’s site before you buy.

    How to build a cold email list: what a find actually costs

    Moreover, the price on the pricing page is not the price of a find, because every tool counts credits differently. Likewise, Hunter charges one credit for each email found and half a credit for each verification. Specifically, Snov.io charges one credit for a prospect, an email or a verification. Skrapp charges only for deliverable emails, so an invalid result costs nothing. Apollo charges credits for emails, phone numbers, warmup and AI research, and its credits do not roll over. The table below turns those rules into one honest number: the cheapest monthly cost of finding 1,000 or 5,000 emails.

    ToolCost of 1,000 findsCost of 5,000 findsCheapest credit
    Snov.io$39$99$0.015, Pro S annual
    Skrapp$39$99*$0.007, Enterprise
    Hunter$49$149$0.008, Scale annual
    Apollo$49$279**Check the site
    Lemlist$89~$129***Check the site
    AmplemarketQuote onlyQuote onlyCheck the site
    ZoomInfoQuote onlyQuote onlyCheck the site
    CognismQuote onlyQuote onlyCheck the site

    Last checked: 16 November 2026. Monthly billing is used throughout, so the annual-billed figures are lower: Snov.io Starter is $29.25 a month on annual billing, Skrapp Professional is $29, and Hunter Starter is $34. *Skrapp at 5,000 finds is Professional plus top-up credits, as worked out in our Hunter vs Snov.io vs Skrapp comparison; the standalone Professional plan covers 2,000 credits a month. **Apollo at 5,000 finds is Professional plus top-up credits at a reported $0.20 each, a reported figure, not a vendor list price. ***Lemlist at 5,000 finds is our arithmetic, labelled as such: Email at $69 plus the $20 data add-on, scaled to the volume. Features and pricing can change, so please check the provider’s site before you buy.

    How to build a cold email list: read accuracy claims with care

    In contrast to the neat prices above, accuracy claims deserve a careful read. Specifically, vendors publish proud numbers: Skrapp claims 97% accuracy, Snov.io claims 98% or better on verification, and Amplemarket claims a bounce rate under 3% with 96.5% phone accuracy. Likewise, independent benchmarks tell a flatter story: Anymail Finder in September 2025 and Tomba in February 2026, both testing 5,000 searches, found Skrapp at 42.8%, Hunter at 37.6% and Snov.io at 20.1%. Those benchmarks were vendor-run and directional, and no neutral audit exists, so neither side is the final word. What the gap does prove is that no finder is as accurate as its marketing page suggests, which is why the next section, verification, is not optional.

    Finally, the cheapest credit is not always the cheapest list. Skrapp Enterprise works out at about $0.007 per find on monthly billing, the cheapest credit in this guide, yet its plan costs $349 a month, so it only makes sense when you genuinely need 50,000 credits. Meanwhile, Hunter Scale works out near $0.008 a credit on annual billing, yet its plan costs $209 a month. For a first list of 50 to 200 contacts, the free plans from Hunter, Snov.io, Skrapp and Apollo cover the whole job for $0, and that is where most beginners should start.

    Verify before you send

    Secondly, verification is the step that separates a working list from a damaging one. Every email address on your list should be checked before your first campaign, because every bounce hurts your sender reputation, and a bounce rate above 2% tells mailbox providers that you email strangers without checking. However, aim for under 2% on every send, and treat anything above 3% as a warning to stop and fix the list. Spam complaints matter even more: aim under 0.1%, and never let them reach 0.3%, because that level risks your domain itself.

    How to build a cold email list: a row of pale envelopes moving through a large teal shield with a white checkmark, the verified envelopes glowing amber on the right while one grey envelope drops into a small bin
    Verification in this how to build a cold email list guide: every address passes through the shield before the first send, and the bad ones drop out. A verified list is what keeps your bounce rate under 2%.

    How to build a cold email list: the five verification checks

    CheckWhat it doesWhy it matters
    Syntax checkCatches typos and bad formatsStops the obvious errors first
    Domain and MX checkConfirms the domain can receive mailRemoves dead companies fast
    SMTP pingAsks the server if the mailbox existsThe strongest single check
    Catch-all detectionFlags domains that accept anythingCatch-alls bounce later, not now
    Disposable and role checkFlags temp addresses and role accountsProtects your complaint rate

    Last checked: 16 November 2026. Snov.io runs a 7-tier verification and claims 98% or better accuracy, Hunter auto-verifies on every find and charges half a credit per verification, and Skrapp charges only for deliverable emails, so an invalid result costs nothing. The bounce and complaint targets match our Deliverability Guide. Features and pricing can change, so please check the provider’s site before you buy.

    How to build a cold email list: what catch-all really means

    Moreover, catch-all addresses deserve a paragraph of their own, because they are the quietest source of bounces. A catch-all domain accepts mail to any address, even one that does not exist, so a verification check returns a pass and the email still bounces later, or vanishes silently. Hunter, Snov.io and Skrapp all flag catch-alls, and the right move is to treat them as risky: send to a catch-all only when the person matters and the rest of the list is clean, and never build a whole campaign from catch-alls. A list that is 10% catch-all is a list that will bounce more than it should, whatever the verifier said.

    Thirdly, verification is not a one-time job. B2B contact data decays at roughly 2.1% a month, according to HubSpot’s database decay simulation, which compounds to about 22.5% over a year, because people change jobs, companies close, and domains lapse. Therefore, a list that was clean in January will have dead addresses by June. Re-verify every 60 to 90 days, and re-verify the whole list before any campaign after a long gap. Our Best Email Verification Tools guide compares the dedicated verifiers, and our verification tools compared guide puts them head to head.

    How to build a cold email list: enrichment fields that matter

    In contrast, enrichment is the job of adding the facts that make an email personal, and it matters as much as verification. A bare email address tells you nothing about the person, while an enriched record tells you their job title, company size, industry, location, technology stack, LinkedIn address and recent trigger. Overall, those are the fields that let you write a first line that proves you researched them. Apollo enriches through a waterfall of providers, Lemlist through 14 or more providers plus AI agents, Snov.io through enrichment tokens, and Skrapp through AI Enrichment on its Professional plan. Collect the fields that change your message, and skip the fields that only fill a spreadsheet.

    Finally, keep enrichment honest. An enriched field is only useful when it is true, and enrichment data goes stale just like email addresses do. Check the job title against LinkedIn before you use it in a first line, because an email that congratulates someone on a job they left six months ago tells them you never looked. One true detail beats five stale ones, and the reader can tell the difference in seconds.

    Segment the list so every email feels personal

    Secondly, segmentation means splitting one big list into smaller groups that share something real, so each group gets an email written for them, not for everyone. Meanwhile, a list of 200 operations managers in professional services is one segment. A list of 200 people split by role, company size, industry and trigger is four or five segments, and each one replies better, because the email can name their exact problem. Segmentation is the cheapest reply-rate improvement in cold email, because it costs nothing and changes everything about the message.

    How to build a cold email list: a crowd of small people icons in navy, teal and amber at the top, passing through a funnel and splitting into three neat colour-coded groups in rounded containers below
    Segmentation in this how to build a cold email list guide: one mixed crowd becomes three tidy groups, each with its own colour and its own message. A segment that shares a real trait always replies better than a mixed list.

    How to build a cold email list: the segments that work first

    Segment byExample groupsWhat changes in the email
    Job roleOperations, finance, salesThe problem you name
    Company size11 to 50, 51 to 200, 200 plusThe result you promise
    IndustryLegal, accountancy, SaaSThe proof point you use
    TriggerHiring, new office, fundingYour first line
    GeographyUK, Ireland, EuropeYour language and examples
    TechnologyUses HubSpot, uses SalesforceYour integration angle

    Last checked: 16 November 2026. Apollo, Lemlist and ZoomInfo all filter by firmographic, technographic and intent data, and Amplemarket adds job-change alerts as a trigger segment. The segmentation approach follows our Lead Generation and List Building Guide. Features and pricing can change, so please check the provider’s site before you buy.

    How to build a cold email list: start with two segments, not ten

    Moreover, beginners should start with two or three segments, not ten. However, a segment of 50 people who share a role and an industry is big enough to test and small enough to write for by hand. Ten segments of 20 people each means ten emails to write, ten tests to run, and no result you can trust, because each group is too small to read. Grow the number of segments as the list grows, and let the replies tell you which segments deserve more attention. A segment that replies at 5% deserves twice the effort of one that replies at 1%.

    Thirdly, the trigger segment is the one most beginners skip, and it is the one that earns the most replies. A company that is hiring, that just opened an office, that just raised funding, or that just changed a key hire is a company with a problem right now, and an email that names that trigger reads like it arrived at the right moment. Apollo, Lemlist and ZoomInfo all surface intent and trigger signals, and Amplemarket sends job-change alerts, so the data is there if you look for it. Build one trigger segment in your first list, even a small one, and watch how it replies compared with the rest.

    How to build a cold email list: keep segments in separate sheets

    Finally, a practical note: keep each segment in its own sheet or list inside your tool, with the segment name, the date it was built, and the date it was last verified written at the top. Therefore, a segment that lives inside a mixed list will be mixed again the next time someone exports it, and the whole point of segmentation is lost. Apollo, Snov.io and Skrapp all keep lists separate by design, so use that feature instead of one giant spreadsheet. A tidy list is a list you can trust, and a list you can trust is a list you can scale.

    List hygiene: the monthly habit that protects your domain

    Secondly, list hygiene is the regular cleaning of your list, and it is the habit that protects your sender reputation more than any tool or template. In contrast, a list left alone goes stale: people leave, companies close, addresses die, and every dead address you email is a bounce that mailbox providers count against you. Consequently, hygiene is not exciting work, yet it is the difference between a domain that lands in the inbox and a domain that lands in spam.

    How to build a cold email list: the hygiene checklist

    Firstly, remove hard bounces the moment they happen, and never email them again. Overall, a hard bounce means the address does not exist, and emailing it twice tells providers you do not clean your lists. Secondly, suppress every unsubscribe and every complaint immediately, and keep a single suppression list that every campaign checks before sending. Thirdly, remove role accounts such as info@, support@ and sales@ from cold campaigns, because they are rarely read by a decision maker and they complain more often. Fourthly, re-verify the whole list every 60 to 90 days, because data decays at roughly 2.1% a month. Fifthly, delete contacts who never engaged after six months of sends, because a silent address is a stale address.

    Thirdly, watch the numbers that tell you hygiene is slipping. Consequently, a bounce rate creeping toward 2% means the list needs a clean. In contrast, a spam complaint rate above 0.1% means the targeting needs a look, not just the list. An open rate that falls month after month, even allowing for Apple Mail Privacy Protection inflating opens, means the list is ageing and the segments need refreshing. Each number points at a different fix, and the fix is always cheaper than the damage of ignoring it. Our Deliverability Guide explains the full sending setup that hygiene protects, from a separate sending domain to warmup.

    How to build a cold email list: one suppression list, everywhere

    Moreover, the single most useful hygiene habit is one shared suppression list. Every unsubscribe, every complaint, every hard bounce and every “never contact us again” reply goes on it, and every campaign, in every tool, checks it before sending. Snov.io keeps shared do-not-email lists for teams, and most sending tools keep their own suppression lists, so the job is keeping them in sync rather than keeping them at all. A prospect who asked to be left alone and then hears from you again is not just a lost sale. It is a complaint waiting to happen, and a complaint is the most expensive reply in cold email.

    Finally, hygiene is also a legal habit, not just a technical one. For instance, keeping a clean suppression list, honouring opt-outs immediately, and deleting data you no longer need are the same duties that data protection law expects, and they are the duties that keep you on the right side of it. Our guide to whether cold email is legal covers the full checklist in plain language, including GDPR and the rules that differ by country. Clean lists and legal lists are the same list.

    What not to do (and what to do instead)

    Secondly, the mistakes below cost senders more replies than any tool ever gains them, and most of them are easy to avoid once you know them. Each one has a simple fix beside it, so you can check your own list against the table and correct course in an afternoon.

    How to build a cold email list: seven mistakes and their fixes

    MistakeWhat goes wrongDo this instead
    Buying a listStale addresses, spam traps, complaintsBuild it from a database and finders
    Skipping verificationBounces above 2%, domain damageVerify every address before sending
    No ICPWrong people, no repliesWrite the five ICP questions first
    Ten contacts per companyLooks like a blast, replies like oneOne or two contacts per company
    Emailing role accountsUnread, complained about, wastedFind the named decision maker
    Ignoring opt-outsComplaints, legal risk, lost trustOne shared suppression list
    Never cleaning the listData decays 2.1% a monthRe-verify every 60 to 90 days

    Last checked: 16 November 2026. The bought-list warning follows our guide to getting your first email addresses, and the 2.1% monthly decay figure comes from HubSpot’s database decay simulation. Mailchimp is opt-in only, and purchased lists, or mailing people who never opted in, risk suspension. Features and pricing can change, so please check the provider’s site before you buy.

    How to build a cold email list: scraping without a consent check

    Moreover, scraping deserves its own warning, because it sits in a grey area that beginners walk into without noticing. Copying email addresses from a website is not the same as having permission to email them, and the rules differ by country, by the source of the address, and by whether the address is a business address used for business purposes. For instance, our legal guide covers the checklist, and the short version is reassuring: cold email is normal, widely used business practice, and you are in the right place to learn to do it well. Send to business addresses where you have a legitimate reason, identify yourself honestly, give a clear opt-out, and stop when asked.

    Thirdly, the mistake that wastes the most time is not a bad list but a big, unsegmented one. A list of 5,000 mixed contacts, emailed with one message, will reply worse than a list of 200 segmented contacts emailed with five messages, and it will cost more in credits, bounces and complaints to learn that lesson. In other words, start small, segment early, and let the replies tell you where to grow. A list that grows from replies is a list that works.

    How to build a cold email list: the one-sentence test

    Finally, run this test on your list before every campaign: can you describe, in one sentence, who is on it and why they would care? If the sentence is clear, the list is ready. If the sentence is vague, the list is not, and no tool will fix it. “Operations managers at UK professional services firms of 11 to 50 staff who are hiring” passes the test. “Businesses that might need us” does not. Write the sentence down, pin it above your desk, and build every list to match it.

    Your step-by-step build plan: 50 to 200 contacts, then scale

    Secondly, the plan below builds your first working list in about a week, without spending a penny until you know it works. In other words, it uses the free plans from Hunter, Snov.io, Skrapp and Apollo, which together cover 50 free credits each, and it ends with a first campaign to 25 to 30 people a day, which is the safe daily volume for a single mailbox. Follow it in order, and do not skip the verification step, because it is the step that protects everything after it.

    How to build a cold email list: the seven-day plan

    DayJobDone when
    Day 1Write the ICPFive questions answered, one exclusion set
    Day 2List your best customersThree customers, shared traits noted
    Day 3Source 50 to 200 contactsEvery contact matches the ICP
    Day 4Verify and enrichEvery address checked, fields filled
    Day 5Segment into two or three groupsEach group shares a role or trigger
    Day 6Write one email per segment60 to 120 words, one problem, one ask
    Day 7Send to 25 to 30 a dayBounce under 2%, replies tracked

    Last checked: 16 November 2026. The 50 to 200 starting size, the 25 to 30 daily sends per mailbox, and the 60 to 120 word first email all match our guide to writing cold emails and our Deliverability Guide. Features and pricing can change, so please check the provider’s site before you buy.

    Video: Emailchaser Tutorial (2026): The Best Instantly Alternative for Cold Email by Software Scope on YouTube. This video is the creator’s property, embedded via YouTube for education. OutreachCompare is not affiliated with Software Scope and does not claim ownership of this video.

    How to build a cold email list: week two, measure and grow

    Moreover, week two is when the list starts teaching you. Nevertheless, note the positive reply rate for each segment after seven days, and compare them: the segment at 5% deserves more contacts like it, and the segment at 0% deserves a new message or a new audience. Add 50 fresh contacts a week, verify them the same way, and keep the daily sends at 25 to 30 per mailbox until the domain has been warm for two to four weeks. Growth that respects those limits is growth that lasts.

    Thirdly, the moment to spend money is the moment the free plans run out, not before. When Hunter, Snov.io or Skrapp have given you their 50 free credits and the replies prove the list works, the cheapest next step is Snov.io Starter or Skrapp Professional at $39 a month, which each cover 1,000 or 2,000 finds. When the list passes 5,000 finds a month, Snov.io Pro S or Skrapp plus top-ups at $99 is the cheapest honest step. Spending before the replies arrive is how senders end up with an expensive tool and an unproven list.

    How to build a cold email list: when to add a second tool

    Finally, add a second tool when one tool cannot do the next job, not when a new tool looks exciting. Nonetheless, a finder plus a database is the classic pairing: Skrapp or Hunter for precise LinkedIn finds, Apollo or Lemlist for volume and sequences. A verifier joins when the bounce rate creeps up, and an enrichment tool joins when the first lines start sounding generic. Each tool should earn its place by fixing a problem you can name, and the problem should be visible in your numbers before you pay to fix it.

    Which sourcing method fits your budget and volume

    Secondly, the right sourcing method depends on how many contacts you need and how much you can spend, and the honest answer is different for a founder building a first list and an agency building its tenth. The framework below matches the method to the situation, so you spend your money where it earns replies instead of spending it where it only earns activity.

    How to build a cold email list: the decision table

    Your situationBest methodTool to start with
    First list, no budgetYour network plus free findersHunter Free $0, or Apollo Free $0
    50 to 200 contacts, tiny budgetFinder plus LinkedIn researchSkrapp Free $0, then Pro $39/mo
    200 to 1,000 a month, small budgetB2B database with filtersSnov.io Starter $39/mo, or Apollo Basic $49/mo
    1,000 to 5,000 a month, growing teamDatabase plus finder pairingApollo Professional $99/mo, plus Skrapp Pro $39/mo
    Over 5,000 a month, agency or sales teamVerified data plus multichannelLemlist Email $69/mo, or Amplemarket from $600/mo
    Enterprise volume, EU focusDeep data with intent signalsZoomInfo or Cognism, both quote only

    Last checked: 16 November 2026. Prices above come from the official sites named in the tools section of this guide. Hunter, Snov.io, Skrapp and Apollo all offer free plans at $0, and the cheapest paid step is Snov.io Starter or Skrapp Professional at $39 a month. ZoomInfo and Cognism are quote only, so their rows state that plainly. Features and pricing can change, so please check the provider’s site before you buy.

    How to build a cold email list: start free, prove it, then pay

    Moreover, the pattern in the table is deliberate: start free, prove the list works by hand, and only then add paid tools. Instead, a founder who builds 50 contacts by hand and gets two replies has a working list. That list can then be grown with a database, tested with segments, and scaled with sequences. A founder who starts with an enterprise database and a bought list has no idea whether the list, the message or the tool is the problem, and will spend months guessing. The journey is always the same: ICP, then a small list of 50 to 200, then verification, then segments, then the first short email, then measurement, then scale.

    Thirdly, money is a real limit for most senders, and the table is built around that. A free plan that finds 50 verified contacts beats an expensive database that finds 5,000 unverified ones, because the reply rate is what pays, not the tool. Nevertheless, our Best Cold Email Tools for Startups guide ranks the cheapest honest starting points, and our Best B2B Data Providers guide covers the database end of the same decision. Pick the guide that matches where you are, and put the money you save towards a cleaner list.

    Frequently asked questions

    How to build a cold email list: how many contacts should I start with?

    Firstly, start with 50 to 200 contacts who match your ideal customer profile. In fact, that size is small enough to research by hand and verify properly, and large enough to learn from the replies. A list of 50 well-researched contacts will outperform a bought list of 5,000 strangers every time, because every person on it was chosen for a reason.

    How to build a cold email list: should I buy an email list?

    Secondly, no. For example, a bought list is a list of strangers who never asked to hear from you, full of old addresses, wrong job titles and spam traps. Nonetheless, Mailchimp is opt-in only, and purchased lists, or mailing people who never opted in, risk suspension. Build your list from a B2B database, an email finder, LinkedIn and your own network instead.

    How to build a cold email list: do I need to verify every email?

    Thirdly, yes. Verify every address before your first campaign, and re-verify the whole list every 60 to 90 days, because B2B data decays at roughly 2.1% a month. Instead, keep your bounce rate under 2% and your spam complaints under 0.1%, and never let complaints reach 0.3%. A verified list is what keeps your domain out of spam.

    How to build a cold email list: what is the cheapest way to start?

    Moreover, the cheapest honest start is $0. In addition, Hunter, Snov.io, Skrapp and Apollo all offer free plans, with 50 free credits each on the finders, and that covers a first list of 50 to 200 contacts. When the free credits run out, Snov.io Starter and Skrapp Professional both cost $39 a month, the cheapest paid step in this guide.

    How to build a cold email list: how often should I clean my list?

    In contrast to a one-time clean, list hygiene is a monthly habit. Similarly, remove hard bounces immediately, suppress unsubscribes and complaints on one shared list, remove role accounts from cold campaigns, and re-verify everything every 60 to 90 days. Delete contacts who never engaged after six months of sends, because a silent address is a stale address.

    How to build a cold email list: is cold email legal?

    Finally, yes, when it is done properly. As a result, cold email is an everyday, widely used way for businesses to reach each other, and this guide shows you how to do it properly. Send to business addresses where you have a legitimate reason, identify yourself and your company honestly, give the reader a clear way to opt out, and stop immediately when they ask you to. Our guide to whether cold email is legal covers the full checklist, including GDPR, in plain language.

    The verdict on building a cold email list

    Our verdict

    Best for most senders: start with your ideal customer, build 50 to 200 contacts by hand, and verify every address before you send. A small, clean, segmented list will beat a big, bought, unverified one in every test that matters. For all-in-one list building, Apollo leads, with a 240 million contact database plus sequences from $49 a user a month, and a free plan at $0. Hunter leads on precise finds, with its finder and verifier from $49 a month, or $34 on annual billing. Skrapp leads on the cheapest credit at scale, at about $0.007 a find on its Enterprise plan, with Professional at $39 a month for everyone else. We have not hands-on tested these tools, so this guide gives Best-for labels only and no numeric score, and that is stated plainly.

    Start this week with your ideal customer profile and fifty contacts who match it. Firstly, use a free plan, verify every address, split the list into two segments, and send 25 to 30 emails a day. Note the positive reply rate after seven days. If it works, add fifty more. If it does not, change one thing and test again. Building a cold email list is a craft you improve by sourcing, verifying and measuring, and the first fifty contacts teach you more than any guide can.

    Keep reading

  • How to Write Cold Emails That Get Replies 2026

    How to Write Cold Emails That Get Replies 2026

    A short, specific email beats a clever one every time.

    Most cold emails fail before the second sentence. A stranger opens your message, scans it for a reason to care, and decides in about three seconds whether to reply, delete, or report it. The emails that win that test are not the longest, the cleverest, or the most automated. They are the shortest emails that prove the sender knows who they are writing to, names one problem that matters, and asks for one small, easy next step. This guide shows you exactly how to write one, line by line, with subject-line formulas, three templates you can steal, and an honest look at what AI writing tools can and cannot do for you.

    Visit Lemlist →See Reply.io →Explore Instantly →

    Benchmarks and prices in this guide were checked 16 November 2026. Features and pricing can change, so please check the provider’s site before you buy.

    Quick Answer

    Keep your first cold email between 60 and 120 words, lead with a subject line of one to five words, and open with a first line that proves you researched this exact person. Name one problem they actually have, explain your fix in a single sentence, and close with one low-effort question, such as asking whether a short call next week would help. Short, specific and human wins far more replies than long, clever or heavily automated.

    Measure replies, not opens. The average cold email reply rate is around 3.4%, a good positive reply rate is 1 to 3%, and open rates near 21% are unreliable because Apple Mail Privacy Protection inflates them. Send 25 to 30 emails per mailbox a day, follow up three or four times, and keep every follow-up shorter than the first email.

    How to write cold emails: start with the reader, not your product

    Firstly, every good cold email starts in the reader’s world, not yours. A prospect does not wake up wondering about your product, your features, or your pricing page. They wake up with a diary full of meetings, a target to hit, and a problem that has been nagging them for weeks. Your email earns a reply when it shows, in the first two lines, that you understand that problem and that you can make it smaller. The rest of this guide breaks that job into parts you can practise one at a time: the subject line, the first line, the body, the call to action, and the follow-up.

    Secondly, the reassuring news is that writing cold emails is a learnable skill, not a talent you either have or you do not. Cold email is normal, widely used business practice, and the senders who get the best replies are usually the ones who write the simplest emails. You do not need to be funny, and you do not need a huge vocabulary. You need a clear offer, a small and well-chosen list of people who genuinely need it, and the discipline to keep each email short. If you have those three things, the templates and formulas in this guide will do the rest.

    How this guide is organised

    Finally, this guide follows the order your reader experiences your email. It starts with the anatomy, so you can see every part and what each part must do. Then it works through subject lines, first lines, personalisation, length, tone and the mistakes to avoid. After that come three ready-to-adapt templates, an honest review of the AI writing tools that promise to do this work for you, and the numbers that tell you whether your writing is actually working. Read it in order the first time, then keep the templates and the decision framework beside you when you sit down to write.

    The anatomy of a cold email that gets a reply

    Secondly, a reply-getting cold email has six parts, and each part has exactly one job. The subject line earns the open. The preview text, which is really just your first line showing beside the subject, earns the read. The first line proves you wrote this email for this person. The body names one problem and one fix. The call to action asks for one small next step. The signature tells the reader who you are and why you are credible. When any part tries to do two jobs, the email gets longer, vaguer, and easier to ignore.

    How to write cold emails: a diagram of a single email broken into stacked layers for subject line, first line, body, call to action and signature, with numbered circles beside each layer
    The anatomy of a reply-getting cold email in this how to write cold emails guide: subject line, first line, body, call to action and signature, each with one job. When a part tries to do two jobs, the email gets longer and easier to ignore.

    How to write cold emails: the six parts at a glance

    PartIts one jobHow longWhat good looks like
    Subject lineEarn the open1 to 5 wordsSpecific to this reader, honest, no shouting
    First lineProve you researched them1 sentenceA real detail from their company or role
    BodyName one problem and one fix2 to 3 sentencesTheir pain, your result, no feature list
    Call to actionAsk for one small step1 sentenceA question, not a calendar link
    PSAdd one human detail1 short lineOptional: a proof point or a genuine compliment
    SignatureShow who you are2 to 3 linesName, role, company, one link at most

    Last checked: 16 November 2026. The anatomy above follows the structure taught in our Cold Email for Beginners guide and the sending limits in our Deliverability Guide. Features and pricing can change, so please check the provider’s site before you buy.

    How to write cold emails: why each part must stay small

    Moreover, the table hides the most useful lesson in this whole guide: the parts that most beginners over-invest in are the parts that matter least. A long, polished body never rescues a vague subject line, because nobody reads the body of an email they never open. A clever PS never rescues a pushy call to action, because the reader has already decided you are selling too hard. Put your effort where the reader’s decision actually happens: the subject line and the first line. If those two work, a plain body will carry the reply.

    Thirdly, think of the anatomy as a checklist you run before every send. Check the subject line out loud and ask whether it could have been sent to a thousand strangers. Look at the first line and ask whether it proves you know this person. Count the problems in the body: if there are two, cut one. Ask whether a busy person could answer the call to action with one word. If every answer is yes, send it. If any answer is no, fix that part and leave the rest alone.

    Finally, the PS deserves a word of its own, because beginners either skip it or abuse it. A good PS adds one human detail that did not fit the body: a result a similar company got, a genuine observation about their work, or a short note that you are happy to send a one-page summary instead of a call. A bad PS repeats the pitch, adds a second ask, or smuggles in a link the body already carried. Use the PS to sound like a person. Never use it to squeeze in a second sales message.

    Subject lines: short, specific, honest

    Secondly, the subject line is the hardest working sentence in your whole campaign, and it is also the shortest. It has one purpose: to make one specific person curious enough to open. Explaining your product, proving your value, or closing the sale is not its job. What it must do is look like it came from a person who knows something about the reader, and do that in one to five words. Lowercase or sentence case reads like a real person wrote it. All caps reads like a promotion, and a promotion is what spam filters and busy humans both delete first.

    How to write cold emails: an inbox list with three short email rows, the top row highlighted in teal with a star and an open envelope, and a speech bubble with a question mark above them
    Subject lines in this how to write cold emails guide: the highlighted row is the one that looks written for one person. Short, specific and honest beats long, clever and salesy, because the reader decides in seconds.

    How to write cold emails: seven subject-line formulas that work

    FormulaExampleBest when
    QuestionQuick question, Sarah?You want a reply, not a click
    Their company + yoursAcme + NorthwindA partnership angle fits
    Show you know themYour Leeds expansionYou found a real, recent detail
    Problem they ownReplies slipping?The pain is obvious and shared
    Mutual connectionMet via James at Fintech LiveThe connection is real and checkable
    Short and plainIntroductionYour name or company already carries weight
    Helpful, not salesyIdea for your onboarding emailsYou can genuinely help before selling

    Last checked: 16 November 2026. These formulas come from the patterns that recur across the best-performing cold emails discussed in the two videos in this guide and in our Cold Email for Beginners guide. Features and pricing can change, so please check the provider’s site before you buy.

    How to write cold emails: what the open rate will not tell you

    Moreover, here is the honest context most guides skip: the average open rate for cold email sits near 21%, yet that number is unreliable, because Apple Mail Privacy Protection opens many emails automatically and inflates the count. A subject line that lifts your open rate from 21% to 30% has not necessarily earned you a single extra reply. It may simply have earned more automatic opens. Judge your subject lines by replies and positive replies, not by opens, and test them the same way every time: change one thing, send to a similar group, and compare the reply rate after a week.

    Video: How to write cold emails that get responses (we fix 4 sequences LIVE) by Scrap-io on YouTube. This video is the creator’s property, embedded via YouTube for education. OutreachCompare is not affiliated with Scrap-io and does not claim ownership of this video.

    How to write cold emails: subject lines to avoid

    In contrast, the subject lines to avoid all share one trait: they promise something the email cannot deliver. “Re: our call” when there was no call is misleading, and a reader who feels tricked into opening will not reply. “FREE!!!”, “Act now” and “Guaranteed results” read like spam, trigger filters, and erode trust before the first line. A subject line that names a competitor, a fake invoice, or a legal threat is worse still: it may win an open and lose a reputation. Write the subject line you would be happy to defend if the reader quoted it back to you in a meeting.

    Finally, test subject lines in small batches and keep a simple record. For example, write three versions for the same campaign, send each to a similar slice of your list, and note the reply rate for each after seven days. Keep the winner, retire the loser, and write one new challenger for the next batch. Over a month, that habit teaches you more about your own audience than any list of formulas ever will, because your buyers’ language is the only language that matters.

    Your first line does the real persuading

    Secondly, the first line is where most cold emails are won or lost, because it is the first proof that a human wrote this message for a human. Most inboxes show the subject line and the first line together as preview text, so the reader judges both at once. A first line that starts with “I hope you are well” or “My name is… and I work at…” wastes that moment on the sender. A first line that names something real about the reader spends it on the reader, and that is where it belongs.

    How to write cold emails: first lines that open doors

    Firstly, the strongest first lines come from ten minutes of real research. A recent hire, a new office, a product launch, a podcast appearance, a funding round, or a problem their industry is talking about this month all work, because each one proves you looked before you wrote. “Saw you opened a second Leeds office in October — congratulations, that is a fast hire.” earns a read. “I noticed you are hiring three account executives, which usually means pipeline is the bottleneck.” earns a read too, because it connects the detail to a problem. The detail is the door. The problem is what walks through it.

    Thirdly, a weak first line is easy to spot, and you should cut it the moment you see it in your own draft. Any line that could be sent to a thousand strangers without changing a word is a weak first line. “I came across your company and was impressed” says nothing, because it could describe anyone. “We help companies like yours grow revenue” says nothing either, because every seller says it. If your first line still works after you swap in a different company name, delete it and start again with a real detail.

    How to write cold emails: connect the detail to their problem

    Moreover, the detail alone is not enough. A first line that only flatters the reader reads like a compliment with a sales pitch hiding behind it, and experienced buyers spot that in seconds. Connect the detail to a problem in the same breath: the hire means a bottleneck, the expansion means a process that will break, the launch means a launch list that needs filling. That connection is what turns research into relevance, and relevance is what turns an open into a reply.

    Finally, keep the first line to one sentence and let the second sentence do the next job. A first line that runs to three clauses is a paragraph pretending to be a hook, and the reader will treat it like one. One sentence, one detail, one link to a problem. Then stop, take a breath, and let the body do its work.

    Personalisation that earns a reply

    Secondly, personalisation is the most misunderstood word in cold email. Real personalisation means the email could only have been written for this person, because it uses a detail that is true about them and connects it to a problem they actually have. Fake personalisation means a first name, a company name, or a city dropped into a template that was written for everyone. Readers can tell the difference instantly, and fake personalisation is worse than none at all, because it promises attention it never gave.

    How to write cold emails: research signals worth using

    Firstly, the best research signals are public, recent, and specific. A job post tells you what a team is struggling to hire for. A new office or a funding round tells you what is about to get harder. A podcast, a conference talk, or a LinkedIn post tells you what a person cares about right now. A technology change, a hire in a neighbouring team, or a competitor’s move tells you what pressure they are under. Collect two or three such signals per prospect, use the strongest one, and save the rest for the follow-up. A short list of 50 to 200 well-researched prospects will outperform a bought list of 5,000 strangers every time.

    Thirdly, that last point matters enough to say plainly: do not buy lists. Bought lists are stale, full of people who never asked to hear from you, and full of spam traps that damage your sender reputation. Our guide to getting your first email addresses ranks the safe ways to build a list, from your own network and website to verified data providers, and buying a list sits at the bottom of that ranking for good reason. A small, clean, well-researched list is the foundation every other part of this guide stands on.

    How to write cold emails: AI icebreakers, used honestly

    Moreover, AI icebreakers can help, and the honest version of that sentence is that they help with the first draft, not the final email. Tools such as Lemlist write a personalised opening line from a prospect’s LinkedIn profile or website, using AI icebreakers and its lemAgent sequence builder, and that draft saves real time when you are writing to a hundred people. What AI cannot do is decide whether the detail it found actually matters, whether the tone fits the person, or whether the line is true. Read every AI-written line before you send it, fix the ones that sound generic, and delete the ones that are wrong. An AI icebreaker that mentions a three-year-old job change is worse than no icebreaker at all.

    In contrast, spintax and text variables are the quiet workhorses of honest personalisation at scale. Spintax lets you rotate small variations of a sentence, so a hundred emails do not read as one copied message. Text variables pull a first name, a company, or a city into the right place automatically. Used lightly, both make a campaign feel human. Used heavily, both make it read like a mail merge that is trying to hide, and spam filters notice the pattern before your reader does. Keep the variations small, keep the variables true, and never let a variable do the job of real research.

    How to write cold emails: the fake-personalisation trap

    Finally, the trap to avoid is personalisation that flatters without understanding. “Loved your recent post!” with no mention of what the post said is not personalisation, it is a template with a compliment-shaped hole in it. “As a leader in your industry…” is not personalisation either, because it could describe any leader in any industry. If the reader can tell you pasted their name into a sentence written for someone else, you have spent trust you did not have. Write the line you would write if you had five minutes and one prospect, then use the tools to repeat that quality, not to fake it.

    Length and structure: 60 to 120 words

    Secondly, length is the easiest thing to fix in a cold email, and it is the fix that most improves reply rates. A first cold email should run between 60 and 120 words. Shorter than 60, and you have not said enough for the reader to care. Longer than 120, and you are asking a stranger to do homework before they know whether you are worth it. The research behind this guide and our beginner guide points the same way: a busy decision maker reads the first screen of an email on their phone, and a first screen holds about 120 words. Write for that screen.

    How to write cold emails: one idea per email

    Firstly, the rule behind the word count is simpler than the count itself: one email, one idea, one ask. An email that pitches three products, names four benefits, and asks for a call, a demo, and a referral is not three times as persuasive. It is three times as easy to delete, because the reader cannot tell what you want. Pick the single problem your reader cares about most, make the single case for your fix, and ask the single question that moves things forward. Everything else belongs in a follow-up, on your website, or in the call itself.

    Thirdly, structure follows naturally once you accept the one-idea rule. Open with the researched first line. Follow it with one or two sentences that name the problem and the result you deliver. Close with one question. Sign off. That is the whole email, and it fits in 60 to 120 words without strain. If your draft runs long, the fix is almost never a better sentence. It is a smaller idea. Cut the second problem, cut the third benefit, and watch the email get shorter and stronger at the same time.

    How to write cold emails: the 60-second test

    Moreover, test every draft with a 60-second check before you send it. Read it on your phone, not your laptop, because that is where your reader will meet it. Time yourself reading it out loud. If it takes more than a minute, cut it. Stumble over a sentence and rewrite it shorter. When you cannot say in one breath what the email is asking for, the reader will not know either. A cold email that passes the 60-second test is an email a busy person can answer between meetings, and that is exactly when most replies happen.

    Finally, remember that the first email is not the whole conversation. It is the opening of one. A short first email that earns a reply is worth more than a long first email that explains everything and earns silence, because the reply opens a conversation where you can explain properly. Follow-ups exist for a reason, and this guide covers them in the templates section. Write the shortest email that earns a reply, and let the conversation do the selling.

    Tone and voice: sound like a person

    Secondly, tone is what separates an email that gets a reply from an email that gets reported, and the right tone is easier than most senders think. Write the way you would speak to a respected colleague you have just met: warm, direct, specific, and brief. Keep sentences short. Mention the reader’s name once, not four times. Lean on “you” more than “I” and “we”, because the email is about their problem, not your company. A positive, human tone does not mean being casual about the reader’s time. It means respecting it.

    How to write cold emails: specific beats clever

    Firstly, specific language beats clever language in almost every test. “We helped a Leeds accountancy firm book 14 extra discovery calls in March” is specific, checkable, and interesting. “We supercharge your pipeline with AI-powered growth” is clever, vague, and forgettable. Every superlative you add makes the email sound more like an advertisement and less like a person. Cut the adjectives, keep the numbers, and let the result do the persuading. A single real number in a cold email is worth a paragraph of adjectives.

    Thirdly, match your tone to the reader’s world, not to your own. A founder writing to another founder can be direct and informal. An agency writing to a finance director should be precise and measured. A seller writing to a creative director can afford more personality than one writing to a compliance officer. None of those tones is right in the abstract. Each one is right when it fits the person reading it. Read the prospect’s own writing before you write yours: their LinkedIn posts, their company blog, their job adverts. Then write in a register they will recognise as their own.

    How to write cold emails: confidence without pressure

    Moreover, confidence and pressure are different things, and the reader can feel the difference. Confidence sounds like this: “We do this well, here is the proof, and I would like ten minutes to show you.” Pressure sounds like this: “This offer ends Friday, I have tried to reach you five times, and your competitors are already using us.” The first invites a conversation. The second corners the reader, and cornered readers delete. Ask for a small step, accept a no gracefully, and remember that a polite “not now” is a better outcome than a spam complaint.

    Finally, read your draft once for how it sounds, not for what it says. Read it out loud, in your normal voice, and listen for the sentences that sound like a brochure. Those are the sentences to rewrite. A cold email should sound like a short, thoughtful message from a person who did their homework, because that is exactly what it is.

    What not to do

    Secondly, the mistakes below cost senders more replies than any subject-line formula ever gains them, and most of them are easy to avoid once you know them. They fall into three groups: things that trigger spam filters, things that erode trust, and things that waste the reader’s time. Check your draft against all three before you send it.

    How to write cold emails: spam triggers to avoid

    Firstly, spam filters are pattern matchers, and the patterns they punish are the ones that look like bulk mail. All-caps subject lines, strings of exclamation marks, and words such as “free”, “guaranteed”, “act now” and “no risk” all raise your spam score. Too many links or images do the same, and attachments are worse still: never attach a deck, a PDF, or a brochure to a first cold email, because filters distrust attachments and readers distrust strangers who send them. One link at most, no attachments, no images, and plain text that looks like a person wrote it. Our Deliverability Guide explains the full sending setup, from a separate sending domain to warmup, that keeps these emails out of spam.

    Thirdly, the technical setup matters as much as the words, and it is worth a sentence here even though this guide is about writing. Send from a separate sending domain with SPF, DKIM and DMARC set up, warm it up for two to four weeks, verify every address before you send, and keep to 25 to 30 emails per mailbox a day, never more than 40. A beautifully written email sent from a cold, unverified domain will land in spam, and the reader will never see your beautiful writing. Our guide to setting up a sending domain walks through the whole setup step by step.

    How to write cold emails: trust killers to avoid

    Moreover, trust is harder to win back than it is to lose, and a few habits destroy it in seconds. A misleading subject line, such as “Re: our call” when there was no call, tells the reader you will say anything to get an open. A fake “just bumping this to the top of your inbox” follow-up to an email they never saw tells them you are running a script. A claim you cannot prove, a testimonial you cannot name, or a competitor’s name used without permission all do the same damage. Write only what is true, claim only what you can prove, and let the reader check anything you say.

    In contrast, the time wasters are quieter but just as costly. A calendar link in a first email asks a stranger to give you thirty minutes before you have earned thirty seconds. A five-paragraph company history asks them to read your story before you have shown interest in theirs. A list of ten features asks them to do your selling for you. Each one signals that you value your own time more than theirs, and the reader responds in kind by giving you none of it.

    How to write cold emails: the legality line, in plain words

    Finally, a word on the law, because good writing and legal writing are the same thing here. Cold email is normal, widely used business practice, and you are in the right place to learn to do it well. The rules are simple and reassuring: send to business addresses where you have a legitimate reason, identify yourself and your company honestly, give the reader a clear way to opt out, and stop immediately when they ask you to. Do not buy lists, do not hide who you are, and do not keep emailing people who said no. Our guide to whether cold email is legal covers the full checklist, including GDPR and the rules that differ by country, in plain language.

    Three templates you can steal

    Secondly, the templates below are starting points, not scripts to send unchanged. Each one follows the anatomy from the start of this guide: a short subject line, a researched first line, one problem, one fix, and one small ask. Adapt the detail in brackets to your own prospect, keep the length inside 60 to 120 words, and read the result out loud before you send it. A template you adapt beats a template you copy, because the adaptation is where the personalisation lives.

    How to write cold emails: three overlapping email template cards fanned out on a desk, each with a small coloured header bar and short lines, with a pencil and a small clock beside them
    Three templates in this how to write cold emails guide: founder to prospect, agency to client, and the follow-up. Each one follows the same anatomy, and each one needs your own researched detail before you send it.

    How to write cold emails: template 1, founder to prospect

    Firstly, the founder email works because the sender is the person who built the product, and that carries weight a sales rep cannot borrow. Keep it short, name the problem in the prospect’s own language, and offer a brief call rather than a demo.

    Subject: Your Leeds expansion

    Hi Sarah, saw you opened a second Leeds office in October — that is a fast hire, and it usually means the onboarding process is about to creak.

    We help growing professional firms onboard new starters in half the time, and a Leeds accountancy firm like yours booked 14 extra discovery calls in March after switching.

    Would a ten-minute call next Tuesday help, or would a one-page summary be more useful?

    Best, Alex — Founder, Northwind

    Thirdly, notice what this email does not do. It does not list features, it does not attach a deck, and it does not ask for thirty minutes. It asks for ten, and it offers a one-page summary as an easier alternative, which gives the reader a way to say yes without committing to a call. That second option is the quiet trick in this template: a reader who would refuse a call may accept a summary, and a summary that gets read often earns the call anyway.

    How to write cold emails: template 2, agency to client

    Moreover, the agency email works differently, because the reader is buying an outcome, not a product. Lead with a result a similar client got, name the problem in one sentence, and ask whether the reader wants to see how it would work for them.

    Subject: Idea for your onboarding emails

    Hi James, I read your post about the support backlog after your spring launch — the part about new customers waiting three days for a reply stood out.

    We run onboarding email for three SaaS teams your size, and one cut first-response time from three days to four hours in six weeks.

    Open to a short call next week to see whether the same would work for you?

    Best, Priya — Northwind Agency

    In contrast to the founder email, this one leans on a proof point instead of a personal story, because an agency sells its track record. Keep the proof point specific and checkable: a real number, a real timeframe, and a client type the reader recognises. A vague claim such as “we help SaaS teams grow” would weaken this template to nothing, because every agency says it.

    Video: Steal This Cold Email Template That Gets 20% Reply Rate by 30 Minutes to President’s Club on YouTube. This video is the creator’s property, embedded via YouTube for education. OutreachCompare is not affiliated with 30 Minutes to President’s Club and does not claim ownership of this video.

    How to write cold emails: template 3, the follow-up

    Finally, the follow-up is where most campaigns are won, because most replies arrive after the first email, not with it. Send three or four follow-ups, each shorter than the first, each adding one new reason to reply rather than repeating the pitch. Space them over two to three weeks, and stop the moment the reader asks you to.

    Subject: Re: Your Leeds expansion

    Hi Sarah, just floating this back up in case it got buried — happy to send the one-page summary instead of a call if that is easier.

    One line that may help: the Leeds firm I mentioned now onboards a new starter in four days instead of nine.

    Still worth a look, or should I close the loop?

    Best, Alex

    Secondly, the last line of that follow-up does real work: “should I close the loop?” gives the reader an easy, graceful way to say no, and a graceful no is valuable. It ends the sequence cleanly, protects your sender reputation, and often produces the opposite of what you expect — a reader who was ignoring you replies to say “not yet, try me in September”, and that is a warm lead for the future. Never send a fifth follow-up to someone who has not replied. The fourth is the end of the sequence, not the start of a new one.

    AI writing tools: where they help

    Secondly, AI writing tools promise to write your cold emails for you, and the honest answer is that they write a good first draft and a bad final email. The tools below all do something genuinely useful: they research a prospect, draft a personalised opening, or run a whole sequence without you touching it. What none of them can do is decide whether the detail they found matters, whether the tone fits the person, or whether the claim they wrote is true. Use them to start faster. Never use them to think less.

    How to write cold emails: Lemlist, Reply.io and Salesforge compared

    ToolWhat it writes for youPrice fromBest for
    LemlistAI icebreakers, lemAgent sequences, spintax, personalised images and videosEmail $69/mo; $55 annualAI personalisation at scale
    Reply.ioJason AI SDR writes and runs sequences, books meetingsEmail Volume from $59/mo; Jason from $500/mo annualHands-off AI outreach
    SalesforgeAgent Frank AI SDR, AI email generator, 20+ languagesPro $48/mo; Frank from $499/mo billed quarterlyAI SDR with human review

    Last checked: 16 November 2026. Lemlist Email is $69 a month monthly or $55 annual, with a 650 million contact database, from lemlist.com/pricing. Reply.io Jason is from $500 a month on annual billing; the $800 monthly figure rests on the 15 November check and sits behind the pricing slider, so check the site. Salesforge Agent Frank is from $499 a month billed quarterly, needs a demo, and has no trial. Features and pricing can change, so please check the provider’s site before you buy.

    How to write cold emails: Artisan, 11x, Carly AI and Enginy compared

    ToolWhat it writes for youPrice fromBest for
    ArtisanAva AI SDR researches, writes and sends, with human reviewQuote-led; Startups tab from $250/mo annualAI SDR for funded teams
    11xAlice AI SDR runs full outbound, Julian handles inboundGrowth from $36,000/yr billed annuallyEnterprise AI outbound
    Carly AIAI agent writes and sends from 200 credits a monthFree $0; Personal $35/mo flatLow-cost AI writing start
    EnginyAI prospecting and writing, formerly Genesy.aiCheck the siteAI prospecting with a rebrand to note

    Last checked: 16 November 2026. Artisan is quote-led on its default tab, with Startups-tab figures from $250 a month annual, cross-checked against three independent October 2026 reviews. 11x Growth is from $36,000 a year billed annually on its live pricing page; September to October trackers recorded $3,750 a month, flagged in our 11x review. Carly AI Personal is $35 a month flat, tax included, with 200 credits a month and no cap on MCP calls. Genesy.ai is now Enginy, confirmed on the genesy.ai homepage and by chief executive Kai Brandt. Features and pricing can change, so please check the provider’s site before you buy.

    How to write cold emails: where AI writing fails

    Moreover, AI writing fails in the same places, whatever the tool. It invents details when it cannot find any, and an invented detail in a cold email is a lie the reader can check in thirty seconds. What comes out reads like every other AI email, because it learned from the same data as every other AI email, and readers who receive ten AI-written emails a day learn to recognise the pattern. Generic flattery follows: praise for work it has not read, and results it cannot prove. Read every AI-written email as if a junior colleague wrote it: useful, fast, and in need of checking before it goes out.

    Thirdly, the right workflow is a human loop, not a hands-off one. Let the tool draft the icebreaker and the sequence. Then read each email, fix the details that are wrong, cut the sentences that sound generic, and add the one observation only you could have made. That last step is the whole difference between an email that gets a reply and an email that gets deleted: the reader can feel when a person was involved. Our Multichannel and AI Personalisation Guide goes deeper on this workflow, including where AI personalisation fits beside LinkedIn and calling.

    How to write cold emails: a fair test for any AI tool

    Finally, test an AI writing tool the same way you test a subject line: on a small, similar group, against your own hand-written emails, judged by replies. Send fifty AI-drafted emails and fifty hand-written ones to similar prospects, wait a week, and compare the positive reply rate. If the AI version wins, use it and keep the human loop. If your own writing wins, the tool is not saving you time, it is costing you replies. A tool that writes faster but replies less is not a productivity tool. It is a reputation cost with a subscription attached.

    Measuring what matters

    Secondly, the numbers below are the honest benchmarks for cold email in 2026, and they exist to stop you from panicking or celebrating over the wrong metric. A reply rate near 3.4% is average, which means 96 or 97 people out of a hundred will not reply, and that is normal. A positive reply rate of 1 to 3% is good, which means one to three genuinely interested replies per hundred sends. Those numbers sound low until you remember what a cold email is: a short message to a stranger. One interested reply per hundred strangers is a working channel, not a failing one.

    How to write cold emails: the benchmarks that count

    MetricHealthy rangeWhat it means
    Reply rateAround 3.4% averageAll replies, positive and negative, per hundred sends
    Positive reply rate1 to 3%Interested replies per hundred sends; the number to optimise
    Open rateAround 21%, unreliableInflated by Apple Mail Privacy Protection; do not optimise for it
    Bounce rateUnder 2%Above 2% means your list or verification needs work
    Spam complaintsAim under 0.1%, never 0.3%Above 0.3% risks your domain and your deliverability
    First email length60 to 120 wordsShorter rarely says enough; longer rarely gets read

    Last checked: 16 November 2026. The 3.4% average reply rate comes from Instantly’s 2026 report, and the open-rate warning reflects Apple Mail Privacy Protection, which opens many emails automatically. The sending limits and follow-up counts match our Deliverability Guide. Features and pricing can change, so please check the provider’s site before you buy.

    How to write cold emails: read the numbers like a writer

    Moreover, read these numbers the way a writer would, not the way a dashboard would. A low reply rate with a high open rate means your subject line works and your body does not: the reader opened and then decided not to care. A high bounce rate means your list is the problem, not your writing, and no rewrite will fix a list full of dead addresses. A rising spam complaint rate means your targeting is the problem: you are writing to people who never wanted to hear from you. Each number points at a different part of your work, and fixing the wrong part wastes a week.

    Thirdly, measure in weeks, not days, and change one thing at a time. A subject-line test needs a week to settle, because replies arrive slowly and follow-ups change the picture. If you change the subject line, the first line, and the call to action in the same week, you will never know which change worked. Change one thing, wait seven days, note the positive reply rate, and then change the next thing. That patience is the difference between a sender who improves every month and a sender who rewrites everything every Monday and learns nothing.

    How to write cold emails: when to rewrite, and when to leave it alone

    Finally, rewrite when the numbers tell you to, and leave the email alone when they do not. A positive reply rate above 3% means the email works: send more of it to a bigger, similar list instead of rewriting it. A rate between 1% and 3% means it works well enough to test one change at a time. A rate near zero after a hundred sends means something structural is wrong: the list, the offer, or the first line. Fix the structure first, and only then worry about the wording. A perfect email to the wrong list will always lose to a good email to the right one.

    Which writing approach fits you

    Secondly, the right way to write cold emails depends on how many you send and how much you can spend, and the honest answer is different for a founder sending twenty emails a week and an agency sending two thousand. The framework below matches the approach to the volume, so you spend your time where it earns replies instead of spending it where it only earns activity.

    How to write cold emails: the decision table

    Your situationBest approachTool to start with
    Under 50 emails a week, tiny budgetWrite every email by hand, research each prospectCarly AI Free $0, or no tool at all
    50 to 200 a week, small budgetTemplates plus variables, one researched line eachLemlist Email $69/mo, or Apollo Free $0
    200 to 1,000 a week, growing teamAI icebreakers with a human check on every emailLemlist Multichannel $109/user/mo
    Over 1,000 a week, agency or sales teamSequences plus AI SDR, with human review built inReply.io Jason from $500/mo annual
    Enterprise volume, AI-first mandateFull AI SDR with a pilot and clear success criteriaArtisan or 11x, both quote-led

    Last checked: 16 November 2026. Prices above come from the official sites named in the AI tools section of this guide. Carly AI Free is $0, Lemlist Email is $69 a month monthly or $55 annual, and Reply.io Jason is from $500 a month on annual billing. Artisan and 11x are quote-led, so their rows state that plainly. Features and pricing can change, so please check the provider’s site before you buy.

    How to write cold emails: start small, then scale what works

    Moreover, the pattern in the table is deliberate: start small, prove the email works by hand, and only then add automation. A founder who writes twenty emails by hand and gets two replies has a working email. That email can then be turned into a template, tested with variables, and scaled with AI icebreakers. A founder who starts with an AI SDR and a bought list has no idea whether the email, the list, or the tool is the problem, and will spend months guessing. The journey is always the same: foundations, then offer and ideal customer, then a small list of 50 to 200, then a separate sending domain with warmup, then the first short email, then follow-ups, then measurement, then scale.

    Thirdly, budget is a real constraint, and the table respects it. A free plan that writes decent emails by hand beats an expensive AI SDR that writes forgettable ones, because the reply rate is what pays, not the tool. Our Best Cold Email Tools for Startups guide ranks the cheapest honest starting points, and our Best Cold Email Tools for Agencies guide covers the agency end of the same decision. Read the one that matches your situation, and spend the money you save on a better list.

    Frequently asked questions

    How to write cold emails: how long should a cold email be?

    Firstly, keep your first cold email between 60 and 120 words. Shorter than 60 rarely says enough for the reader to care, and longer than 120 rarely gets read on a phone, because a first screen holds about 120 words. Follow-ups should be shorter still, and each one should add one new reason to reply rather than repeating the first email.

    How to write cold emails: what is a good reply rate?

    Secondly, the average cold email reply rate is around 3.4%, and a good positive reply rate is 1 to 3%. That means one to three genuinely interested replies per hundred sends is a working campaign, not a failing one. Judge your writing by positive replies, not by opens, because open rates near 21% are unreliable: Apple Mail Privacy Protection opens many emails automatically and inflates the count.

    How to write cold emails: how many follow-ups should I send?

    Thirdly, send three or four follow-ups after the first email, spaced over two to three weeks, each shorter than the first and each adding one new reason to reply. Most replies arrive after the first email, so stopping at one email leaves most of your replies unsent. Stop the moment the reader asks you to, and never send a fifth follow-up to someone who has not replied.

    How to write cold emails: is it better to write by hand or use AI?

    Moreover, writing by hand wins for small volumes, and AI wins for large ones, provided a human checks every email before it goes out. AI icebreakers from tools such as Lemlist save real time on the first draft, and AI SDRs such as Reply.io Jason or Salesforge Agent Frank can run whole sequences. What AI cannot do is decide whether a detail matters, whether a claim is true, or whether the tone fits the person. Keep the human loop, whichever tool you choose.

    How to write cold emails: what should I never put in a subject line?

    In contrast, never put a misleading claim, an all-caps shout, a string of exclamation marks, or words such as “free”, “guaranteed” and “act now” in a subject line. “Re: our call” when there was no call is misleading, and a reader who feels tricked into opening will not reply. Keep subject lines to one to five words, specific to the reader, and honest about what the email contains.

    How to write cold emails: do I need a separate sending domain?

    Finally, yes. Send cold email from a separate sending domain, not your main company domain, with SPF, DKIM and DMARC set up, a custom tracking domain, and two to four weeks of warmup before your first campaign. Verify every address, keep to 25 to 30 emails per mailbox a day and never more than 40, and watch Google Postmaster Tools for spam complaints. Our guide to setting up a sending domain walks through the whole setup.

    The verdict on writing cold emails that get replies

    Our verdict

    Best for most senders: write it by hand first, then scale what works. A 60 to 120 word email with a researched first line, one problem, one fix and one small ask will beat a longer, cleverer or more automated email in almost every test. For personalisation at scale, Lemlist leads, with AI icebreakers, lemAgent sequences and spintax from $69 a month for Email. For hands-off AI writing, Reply.io Jason leads, from $500 a month on annual billing, with a human review loop kept in place. Best for a free start: Carly AI Free at $0, or Apollo Free at $0 for data plus sequences. We have not hands-on tested these tools, so this guide gives Best-for labels only and no numeric score, and that is stated plainly.

    Start this week with twenty hand-written emails to twenty well-researched people. Use one template from this guide, adapt the detail to each prospect, and note the positive reply rate after seven days. If it works, write twenty more. If it does not, change one thing and test again. Writing cold emails that get replies is a craft you improve by sending, measuring and rewriting, and the first twenty emails teach you more than any guide can.

    Keep reading

OutreachCompare

Compare B2B email outreach tools — cold email, deliverability, data and verification, tested and ranked for startups, agencies and enterprises.

Compare B2B email outreach tools — cold email, deliverability, data and verification, tested and ranked for startups, agencies and enterprises.

© 2026 OutreachCompare. All rights reserved.

Designed with WordPress